In this article I had explained how to download and install Visual Basic for free. But how to create the first application? Well In this article I intend to explain how to create an application with Visual Basic.

I will not deal with the actual programming now, in fact I will write other articles on how to learn to plan with Visual Basic. Rather, I describe the steps to enter the idea of Visual Studio and then allow programming in Visual Basic.
Create an application with Visual Basic
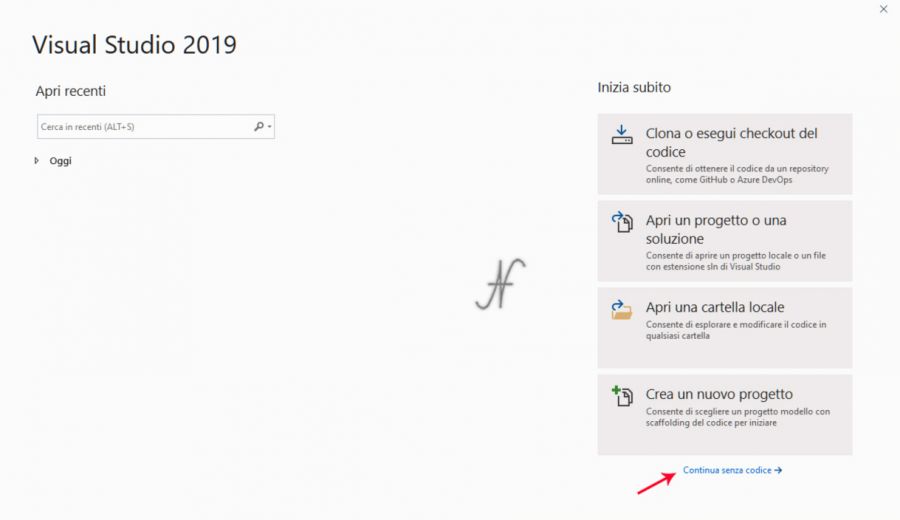
At the start of Microsoft Visual Studio 2019, from the Windows Start menu, this screen opens. To create an application with Visual Basic, press the button Create a new project. Alternatively, you can press Continue without code To enter directly into the IDE (Integrated Development Environment) of Visual Studio.
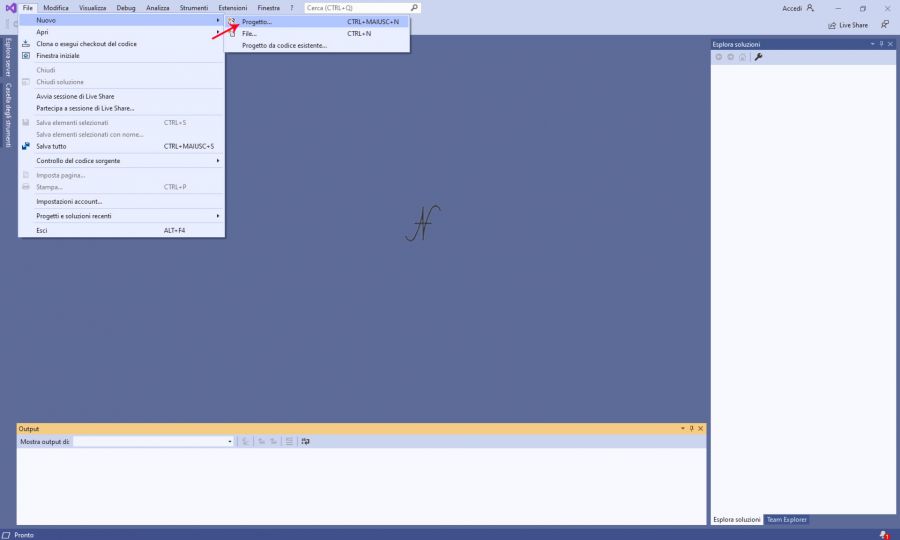
The Visual Studio ID is the window (the environment) where it is possible to create the forms (the windows) of the applications that we will create and type the lines of the program. To create a new program with Visual Basic, starting from the idea, click on the menu File, New, and finally on Project.
Microsoft Visual Studio allows you to program in various programming languages and also to create many types of applications. For this reason there are many choices.

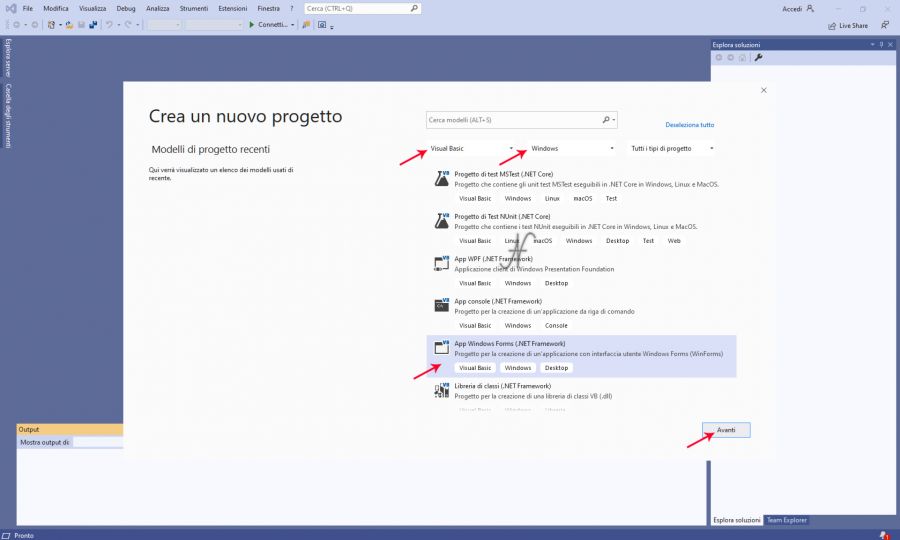
To create a normal desktop application (a normal software for Windows PC, the one with windows and buttons, to be clear), from the window Create a new project, select, from the drop-down menus, Visual Basic and Windows, as specified in the following image.
With the selections you just made, the applications you can make in Visual Basic, for Windows operating system, are listed.
At this point, simply search and select Windows Forms Apps (.NET Framework) and then press Forward.
Application configuration
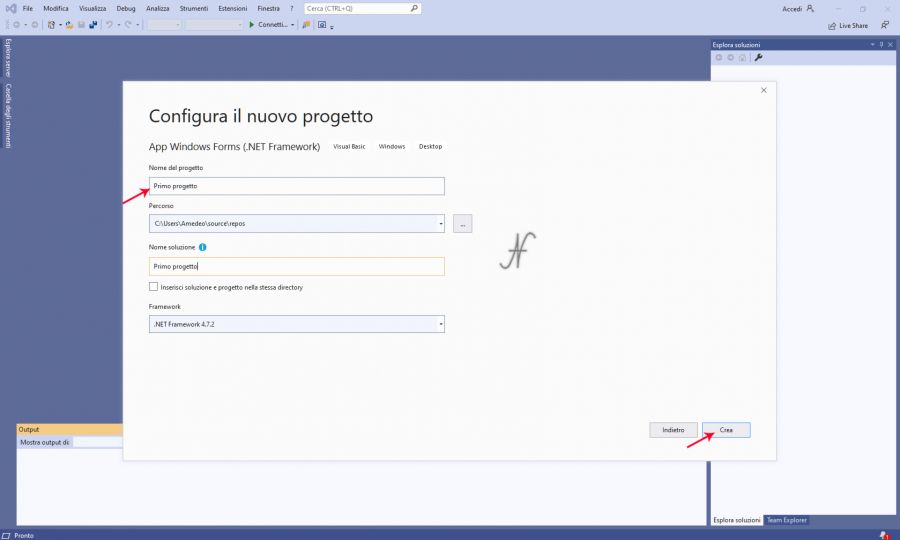
From the window Configure the new project, type the name of the project and solution. The solution is a project container. Initially, to make simple applications, you can give the same name to both the project and the solution.

Finally, you can create the application with Visual Basic, by pressing the button Create.
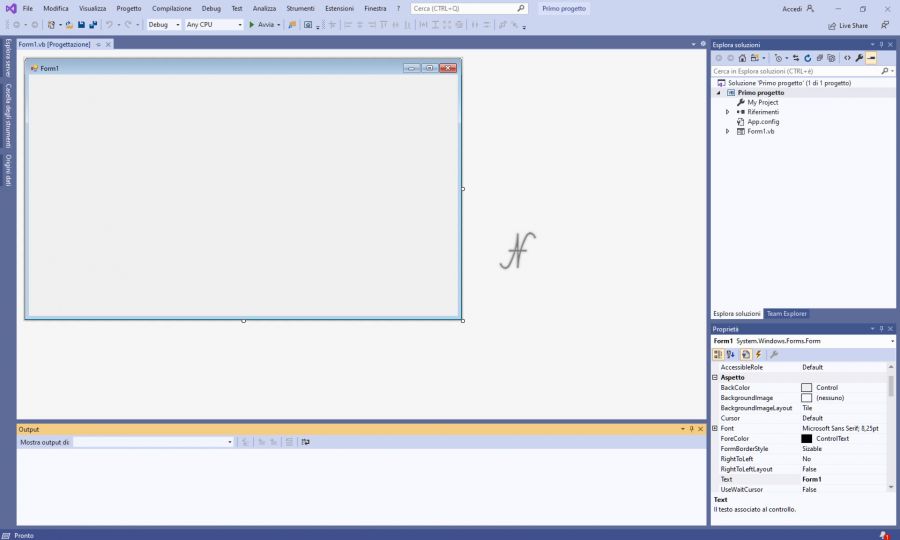
Here we are! Finally the IDE opens again with an empty form: it is a window on which you can add all the elements you want.
Subsequently, to open an App already configured, you can click on Open a project or solution, directly from the first window that opens up to the start of Visual Studio.
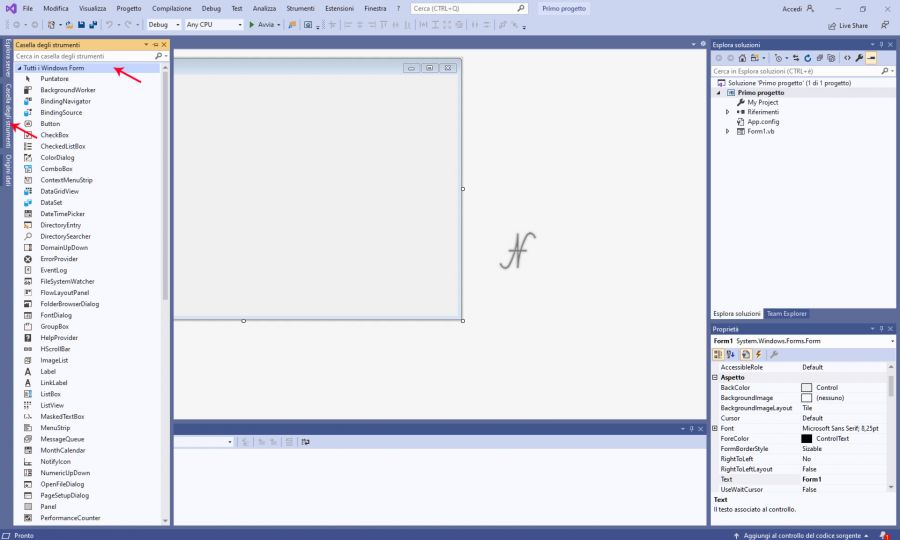
To insert checks within the form, for example texts, buttons, or even images, from the left sidebar you will have to open the Toolbox.
Inside the form, many elements can be inserted. After inserting the elements in the empty window (the form), we will have to go to write the actual program, where we will define the functionality of the app and the behavior of the program that we will create.
Compatibility between Visual Basic 2010 and Visual Studio 2019
For the completeness of your needs, projects created with Visual Basic 2010 Express are perfectly compatible with the Visual Studio 2019 Community. The opposite is not equally true: Visual Basic 2010 refuses to open projects created with the latest versions.
I couldn't resist commenting. Perfectly written!
Thank you!
Whoah this weblog is fantastic, I like studying your posts about Basic.
Stay up the great work! You realize, lots of people are hunting round for this info, you could help them greatly.
Thank you!
Having read this I believed it is very informative.
I appreciate you spending some time and energy to put this information together.
Thank you!