The bike struggles to start? The scooter does not turn on? The starter is spinning, but the engine is not starting? Or, even, the starter does not even turn? Probably the fault lies with the battery, which needs to be replaced. Let's see how to change the battery to the bike and which one to choose.

Battery to be replaced? Here are the symptoms!
It may happen that, after a few days of downtime, the bike struggles to leave. The starter turns less vigorously, or you can see the dashboard turn on and off continuously.
In other cases, the instrument panel does not even turn on and the starter does not turn.
In these situations, most likely the battery needs to be recharged or replaced. Continuing reading, you will find out how to change the battery to the bike and which one to choose.
Attempt to recharge the battery
The first step that I recommend to take, before replacing the battery, is to recharge it at least throughout the night.

Some batteries have unscrewable caps. Paying attention, and wearing chemical resistant protective gloves, you can check that the level of sulfuric acid is higher than the cell plates. In case the acid level of one or more elements is lower than the plates, it must be topped up with distilled water. This operation must be carried out before recharging the battery. To top up the battery, I recommend removing it from the housing compartment and removing it from the bike or scooter.
If the battery is in order, via a battery charger, you can set the charge by connecting the red and black terminals, respectively, to the positive and negative terminals of the battery. The red cable identifies the positive of the charger and must be connected to the + of the battery. The black at -.
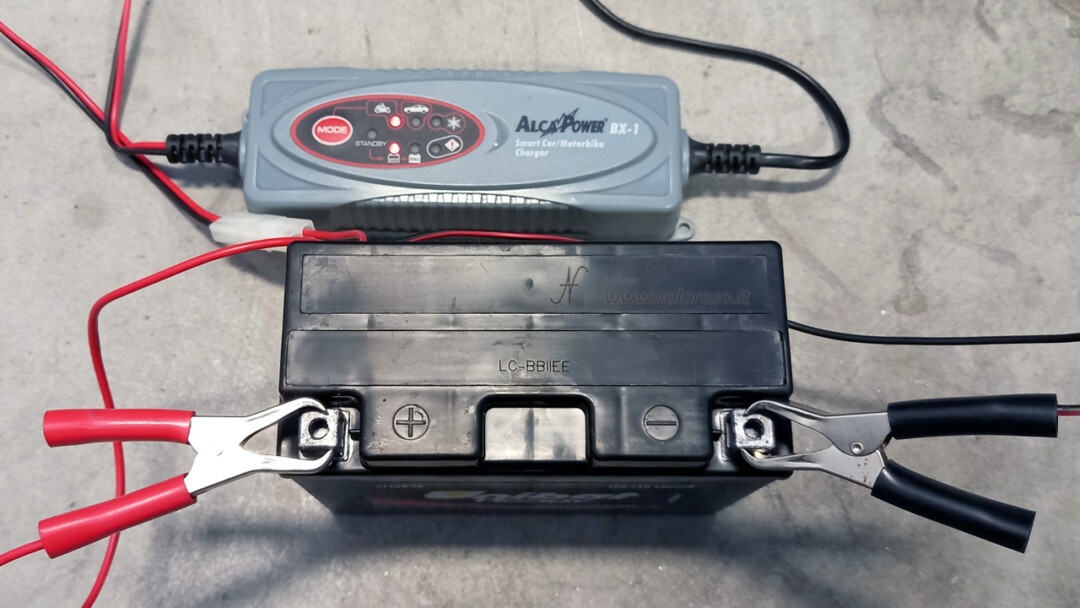
Charging the battery can also be done with the battery in its housing, without disconnecting the red and black cables of the motorcycle. Lead-acid batteries must be recharged in a ventilated environment, as they can emit explosive gases (hydrogen) during recharge. Never use lighters, smoke, solder, emit flames and fire alongside a recharging lead battery!
If we are lucky, after charging, the battery will last a few more months.

It may happen that the charger does not detect the presence of the battery and, therefore, does not start charging. In this case, the tester will confirm that the battery voltage has dropped too much compared to its nominal value. The battery got damaged. Even on a battery (12V) discharged, you should still measure a voltage of at least 10.8 Volts. Below this voltage value, the battery may have damaged itself.
Choosing the battery for the motorcycle / scooter: compatibility and technical characteristics
If you are reading this paragraph, your battery has probably not recharged. The charging attempt failed:
- because the charger has not started the charging phase;
- the battery has not recharged enough to start the bike or scooter;
- even if it recharged, the battery did not last even a week!
In these cases, the battery must be replaced. The operation can certainly be carried out by the trusted mechanic or electrician, which will carry out a work in a workmanlike manner.
If, however, you have a little technical capacity, it may also be worth trying to replace the battery alone. Before seeing step by step how to change the battery to the bike, we learn to choose it.
The choice of battery may not be easy, because there are many models, with different characteristics.
The first choice, of course, must be about compatibility with the motorcycle / scooter. The model of the battery to be purchased must be compatible with the one to be replaced, in terms of: Tensione (V - Volt), capacity (ah - ampre*hour), in-turn current (Ampere) and size.
The Nominal tension it must be identical: for example on a 12V system, you can not put a 6V battery and vice versa. the capacity of the new battery can be equivalent, but also greater than that of the old battery. The same goes for the inrush current, which can also be equal to or greater.
Relative to size, it is obvious that the new battery will have to be identical to the previous one or, at least, smaller, in order to enter the housing compartment.
This evaluation can be made by the shopkeeper (or by the e-Commerce site), indicating the make and model of the motorcycle. However, I recommend to personally check if the technical data of the battery are compatible with your motorcycle or your scooter.
Which battery for motorcycles / scooters to choose? Lead, Gel, Lithium-Ion, LiFePO4?
In addition to the technical data of the battery, you will also have to choose the type of battery to buy. On the market there are batteries with different construction technologies.
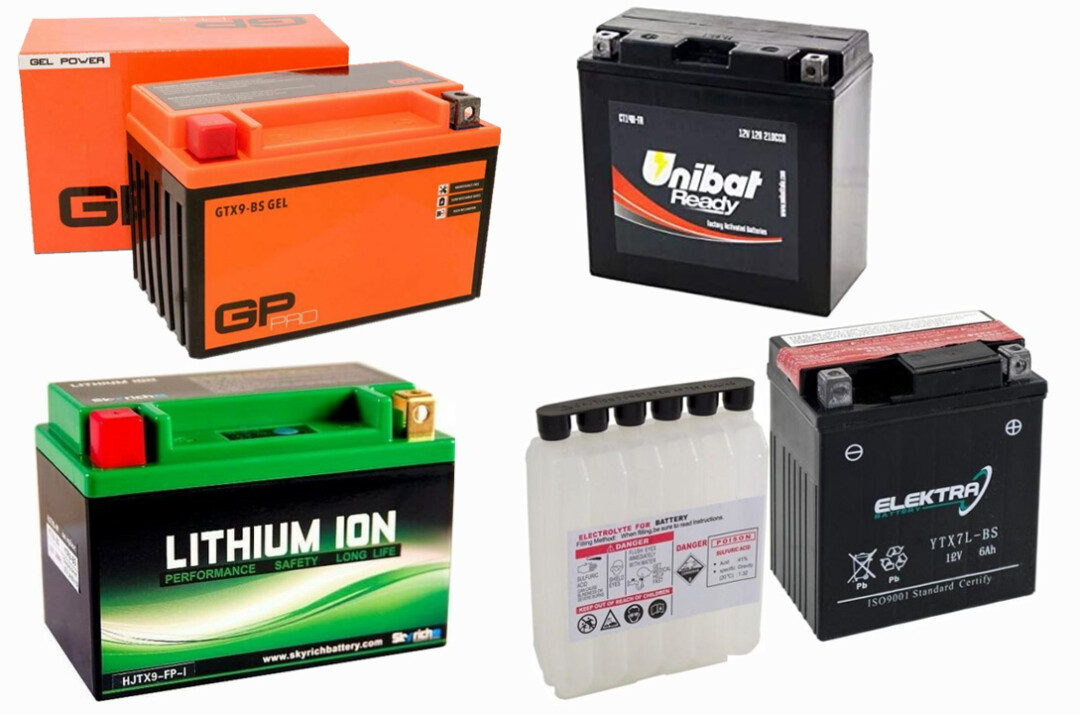
You can choose a normal one lead battery - acid. They exist with and without maintenance. They can be supplied with a separate electrolyte or ready and charged. When making the purchase, you have to check if, in support of the battery, acid vials are also provided. If the lead acid battery was supplied with the bottles of acid Sulfuric aside, before mounting it in the bike, the acid must be poured into the battery cells. Attention! Follow the instructions accompanying the battery and use gloves and goggles.
After pouring the acid into the battery, it will be necessary to wait a few hours before proceeding with the assembly of the battery. The time varies between battery and battery. Normally, during the waiting time, you can hear the sizzle acid, fry, boil inside the cells.
The maintenance-free lead-acid batteries There are already charges and ready to use. After the purchase, you can mount them directly in the motorcycle (or in the scooter), following the instructions in the next paragraph.
If your budget allows, you can buy a lead gel battery. Compared to traditional lead-acid batteries, they have a lower self-discharge: they manage, that is, to maintain the charge during periods of inactivity of the motorcycle. They can also be installed upside down, without fear that the electrolyte liquid will escape from the battery (not that it is necessary, mind you). During the recharge phase, they do not emit explosive vapors (hydrogen).
Finally, the lithium batteries They are much more compact and light than those with lead/acid and lead/gel. The life cycle of lithium batteries is much more lasting, even four times greater than lead ones. They can be installed upside down, given the absence of electrolyte liquid. Lithium batteries, compared to traditional lead ones, have a truck less: they maintain the charge during periods of inactivity of the motorcycle or scooter. They can be equipped with LEDs to view their charge. As a contraindication, they are much more expensive than lead ones.
Deepening the technology of lithium batteries, there are several types. The most common are:
- Lithium Ion (Li-Ion, LiCo or LiCoO2), is the first technology born, in chronological order. The rated voltage of lithium-ion batteries is slightly higher than that of lead-acid batteries. If a lead-acid battery, charged, reaches 12.6V, an ion battery reaches 14.8V. A lead-acid battery is considered discharged at 10.8V. The lithium-ion one is already discharged at 12.6V. This technology is less secure than the later LiFePO4 and I'm not particularly excited about it.
- LiFePO4 (lithium-iron-phosphate or LFP), more reliable, stable and safe, with a rated voltage comparable to lead-acid batteries.
With regard to the charge of lithium batteries, you can use a normal charger but without desulfation function. However, the purchase of a dedicated charger is recommended. Lithium batteries support the quick charging function. During the charging phase, the lithium batteries do not emit explosive vapors.
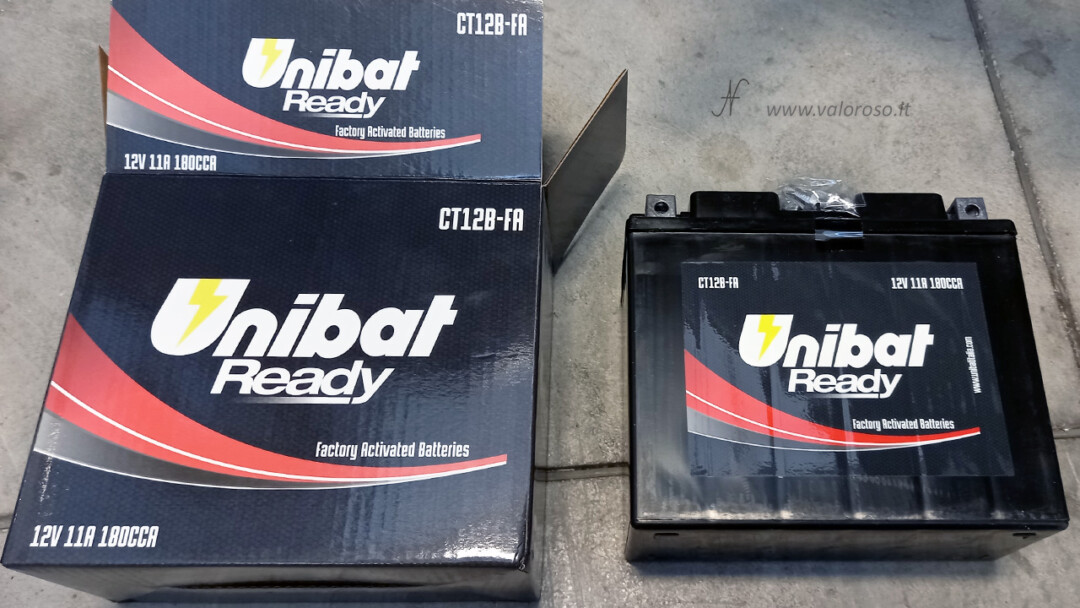
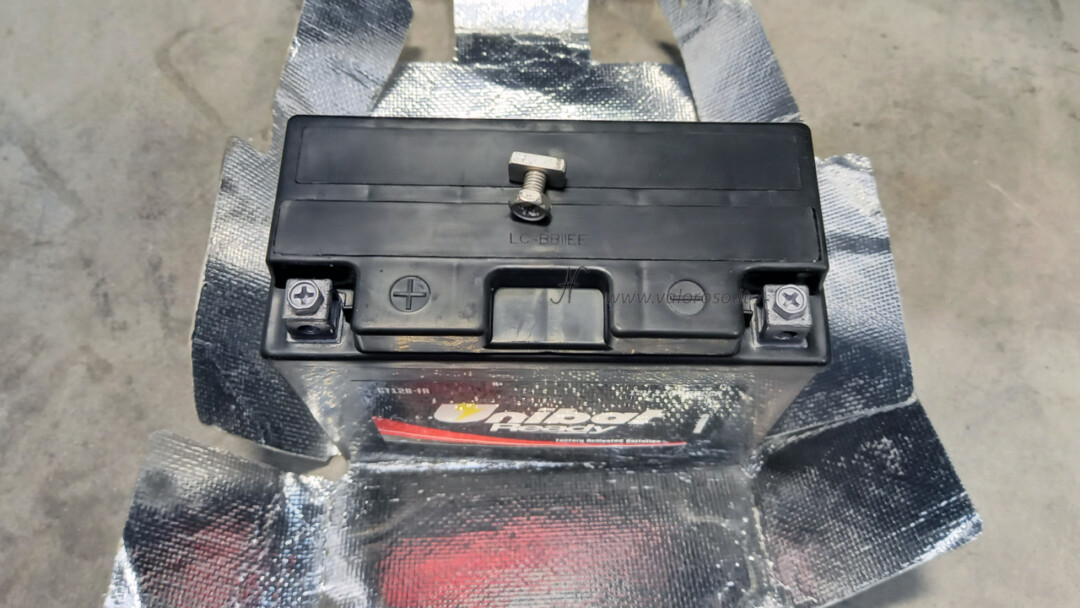
After all these considerations, I decided to buy a Unibat Ready battery, lead/acid without maintenance, very cheap, already provided. Moreover, the battery was also on offer! I don't need to insert acid manually into the battery cells, which is a great advantage. In addition, I spent about a third compared to a lithium battery. These, of course, are only personal considerations.
How to replace the battery of the motorcycle and scooter
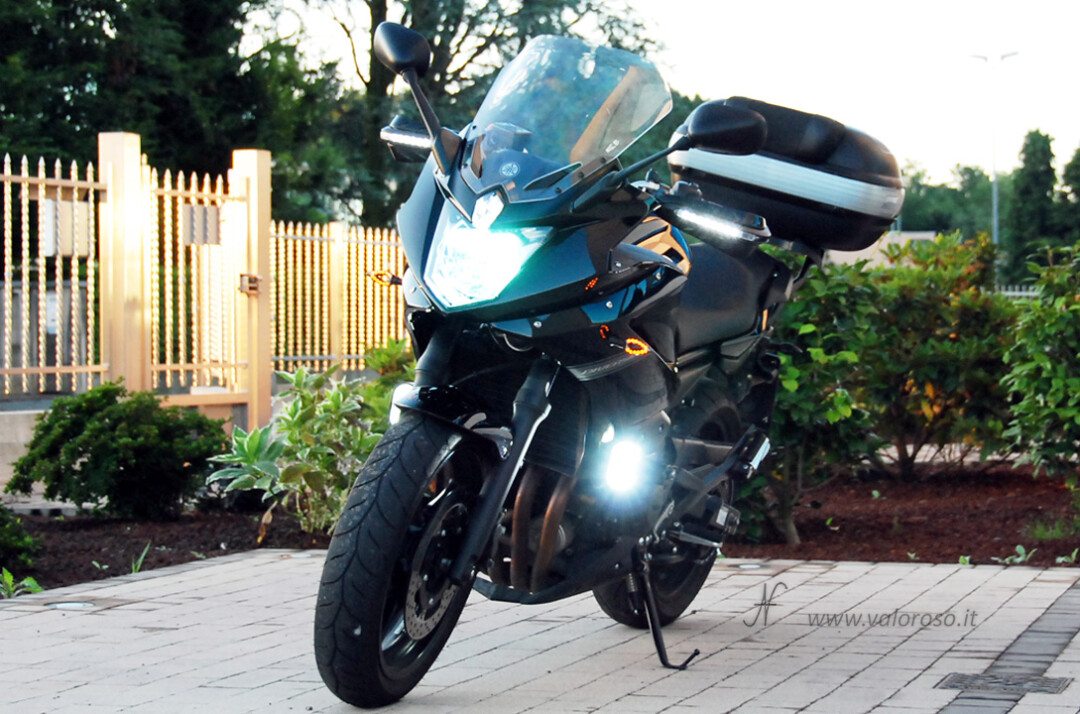
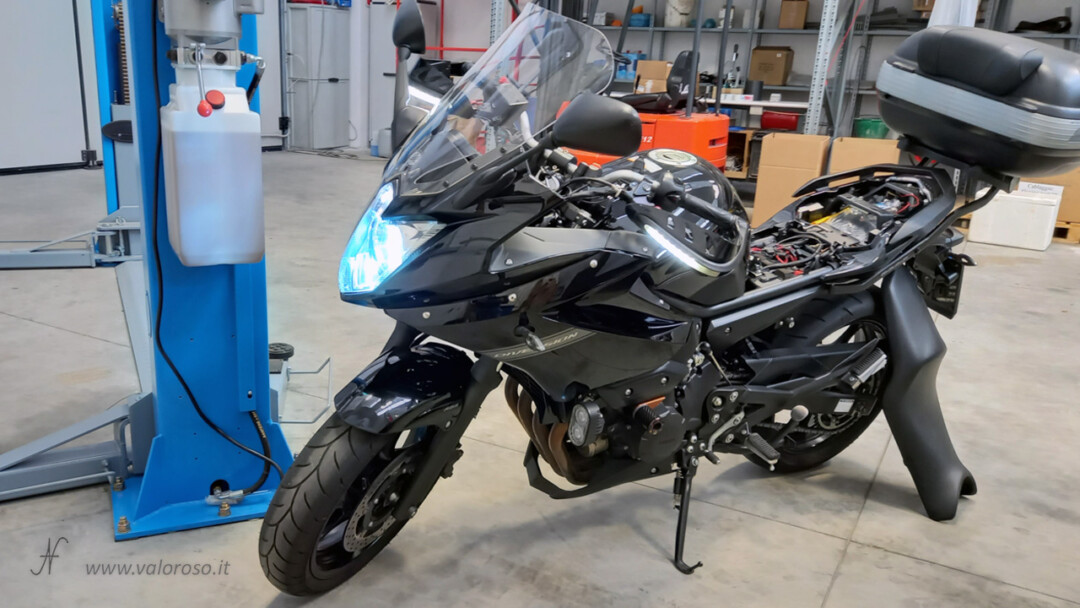
We finally arrived in the heart of the speech! Let's see, step by step, how to change the battery to the bike or scooter. The motorcycle of the example is a Yamaha XJ6 diversion.
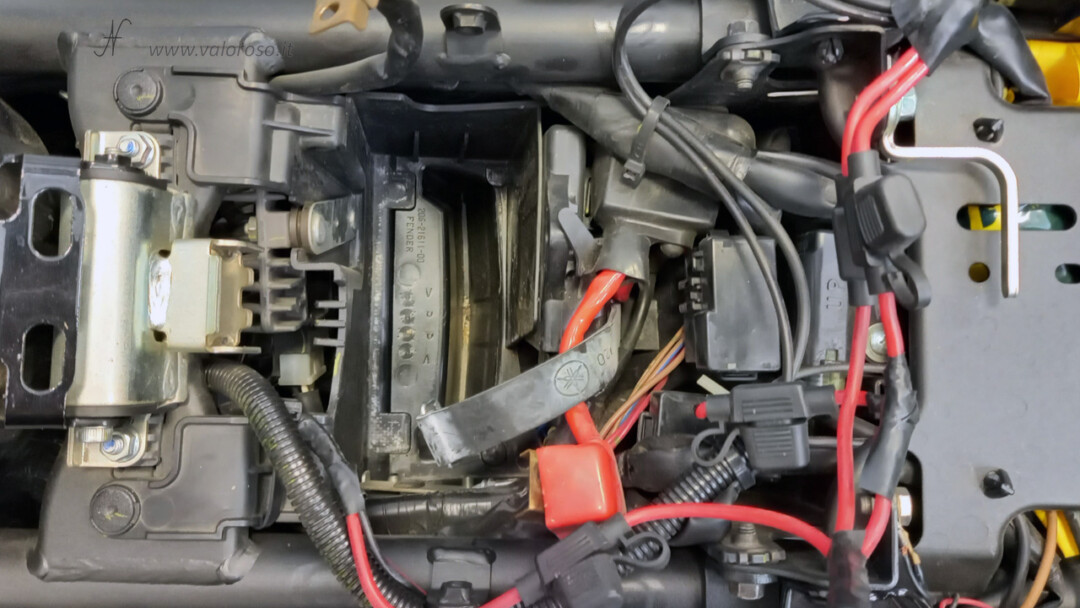
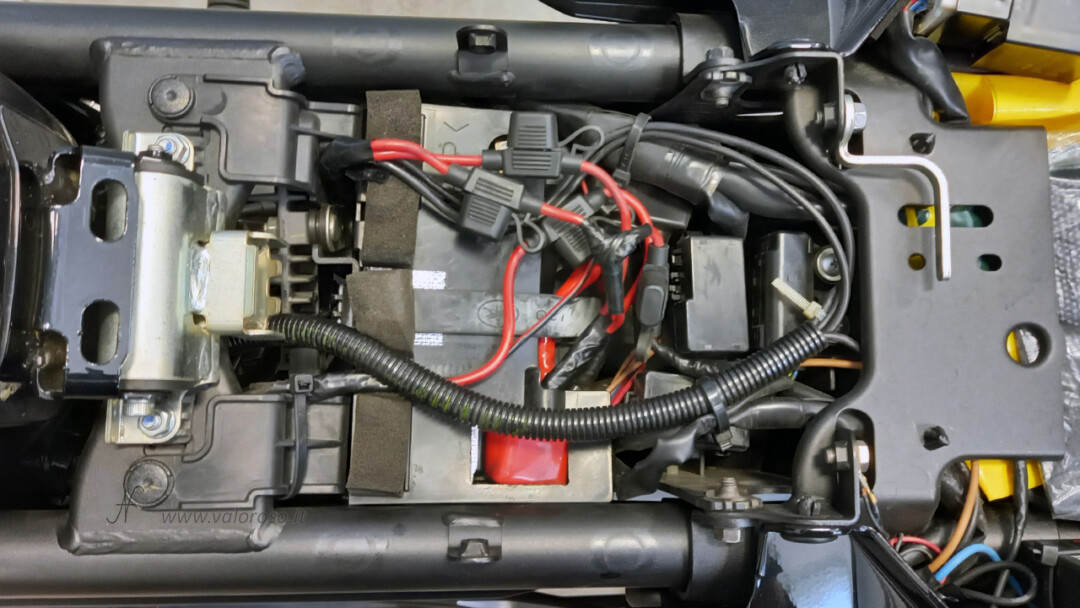
Identify where the battery is located. The battery can be located in the undersealing compartment, in the central tunnel or behind the front crankcases. Mine is located in the undersealing compartment.
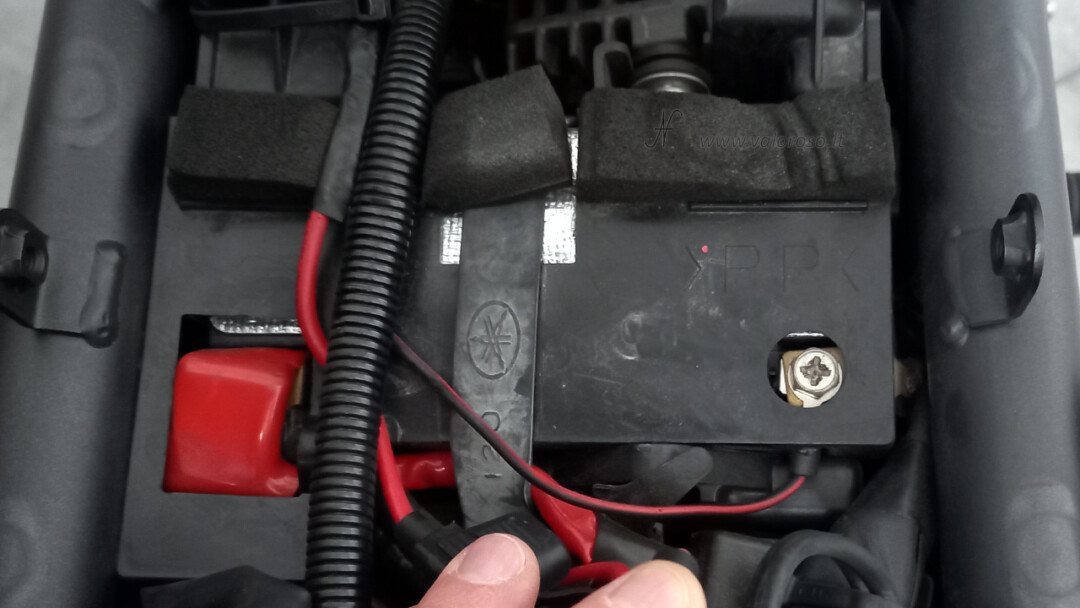
Release the battery. The battery of the bike, in my case (Yamaha XJ6 Diversion), is fixed via a rubber belt.
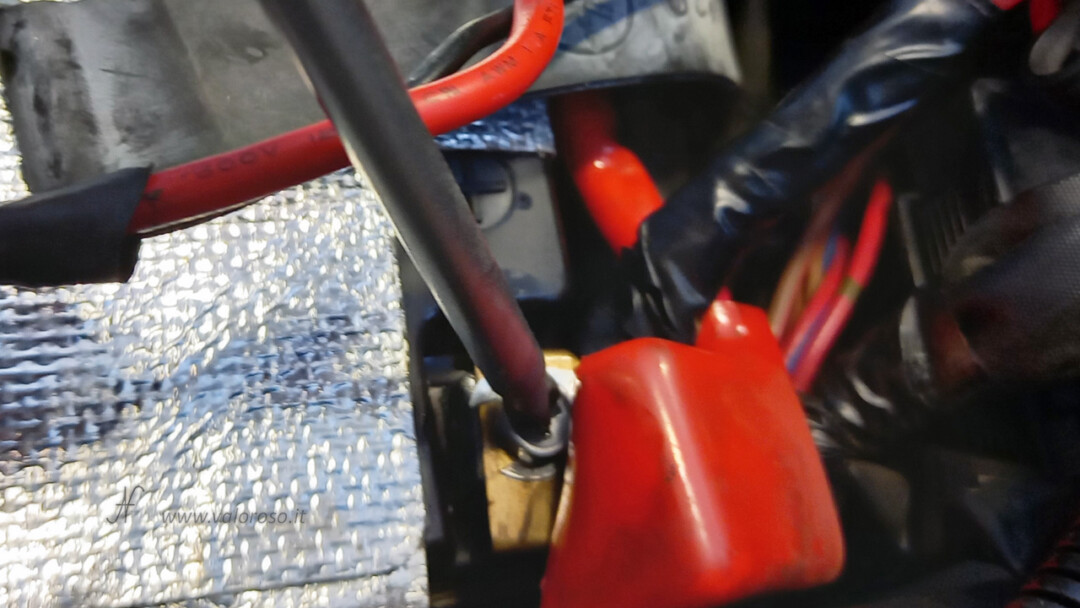
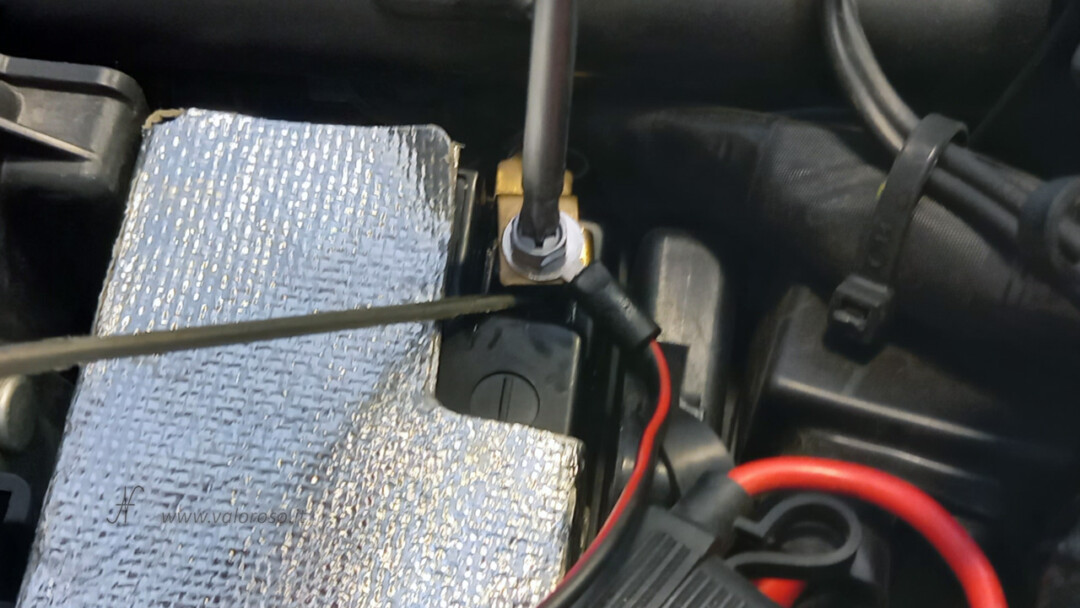
Remove any protection cards and disconnect the electrical system cables. To disconnect the cables, you have to unscrew the screws that keep them fixed at the battery poles. Use a screwdriver or a key. Normally, the mass cable is disconnected first (the negative, the black one, also identified with the symbol -).
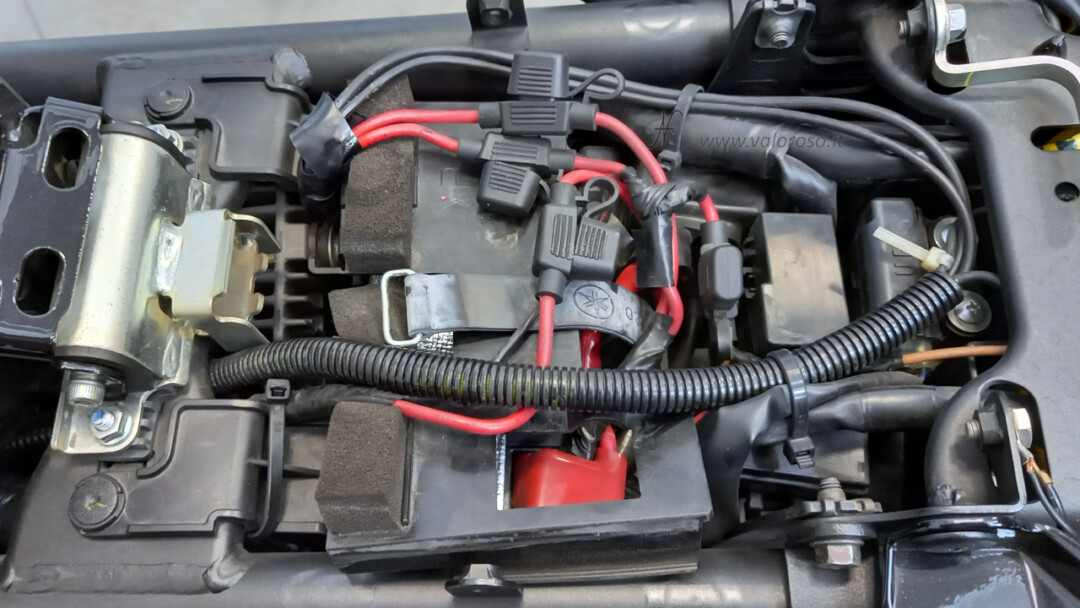
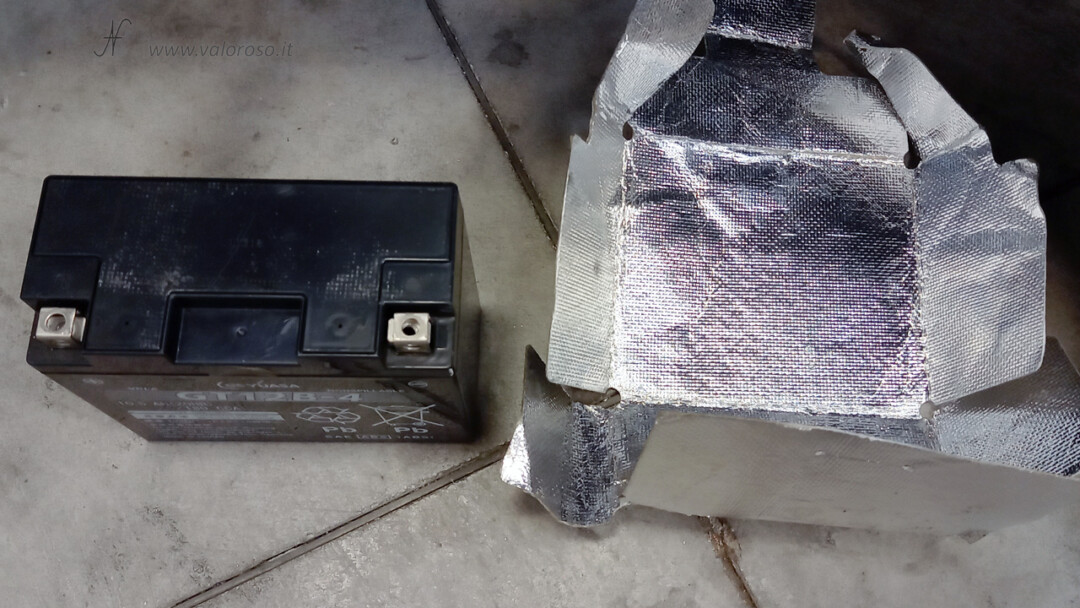
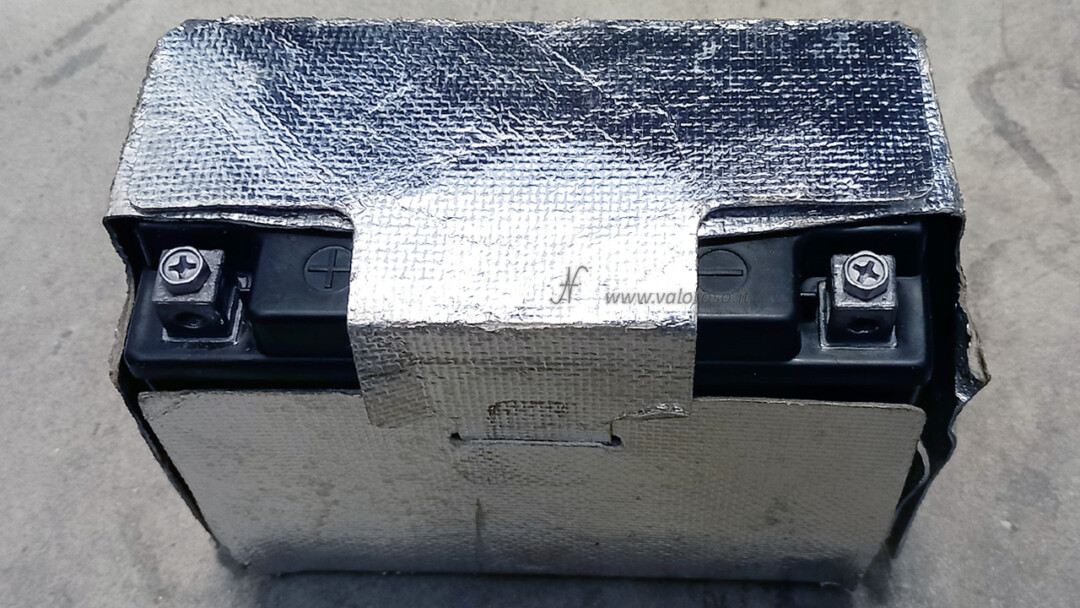
The battery can be wrapped in a heat protection. To replace the battery of the motorcycle or scooter, have the order between the cables so that you can easily parade it.
At this point, you can remove the battery from the compartment. You don't have to strain: if the battery does not move, obviously there is some detention or support to unscrew. However, keep in mind the weight of a battery: if it is lead, it can also weigh 5kg. Appropriately adjust your strength to extract it.
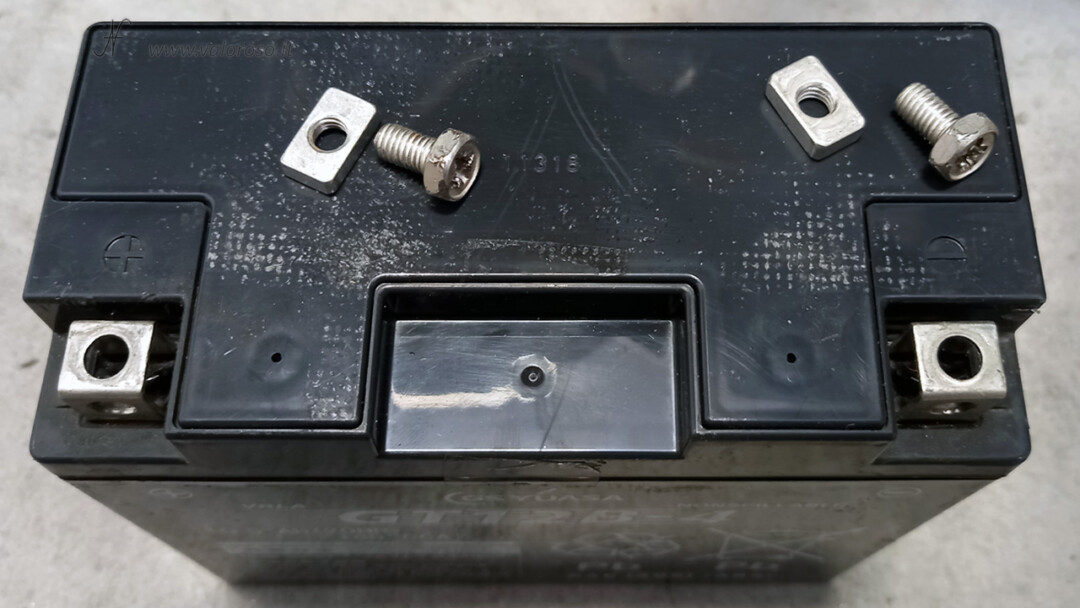
Unless the new battery is identical to the old one, most likely the screws and the fixing pins of the cables are different. The new battery must be equipped with its own kit of nuts and screws for fixing the cables.
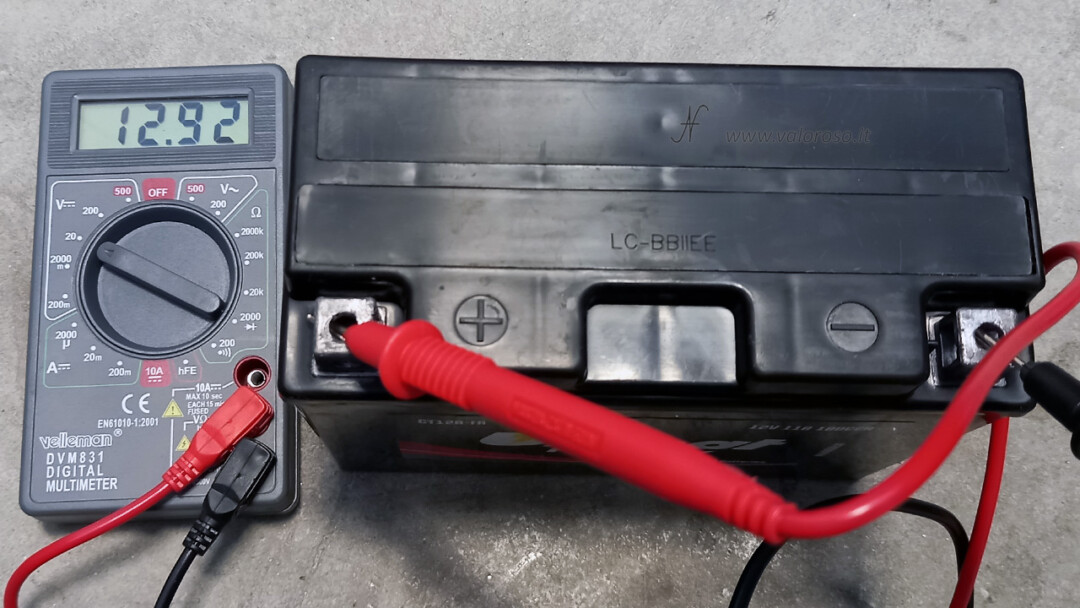
Before changing the battery to the bike or scooter with the new one, I recommend checking, through a multimeter, the voltage of the battery just purchased. It must be higher than 12.6V (in case of lead-acid battery). Do this to avoid mounting an already low or defective battery.
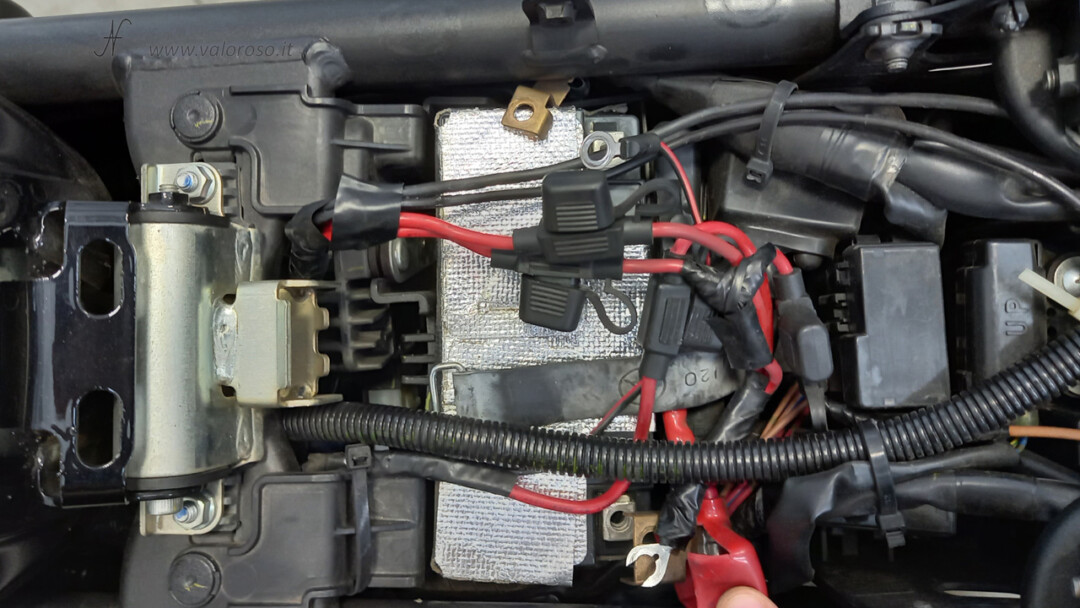
Insert the new battery into the heat protection. If the battery has an identical size to the previous one, you will have no problem. If, on the other hand, a lithium battery has been chosen, it is normally supplied with a kit of modular spacers, in order to obtain the height of the old battery.
Mount the screws and nuts for the cables, without tightening them. In the photo you can also see the difference between the old screw to tighten the battery cables and the new ones, already mounted (they are only pointed, not tight).
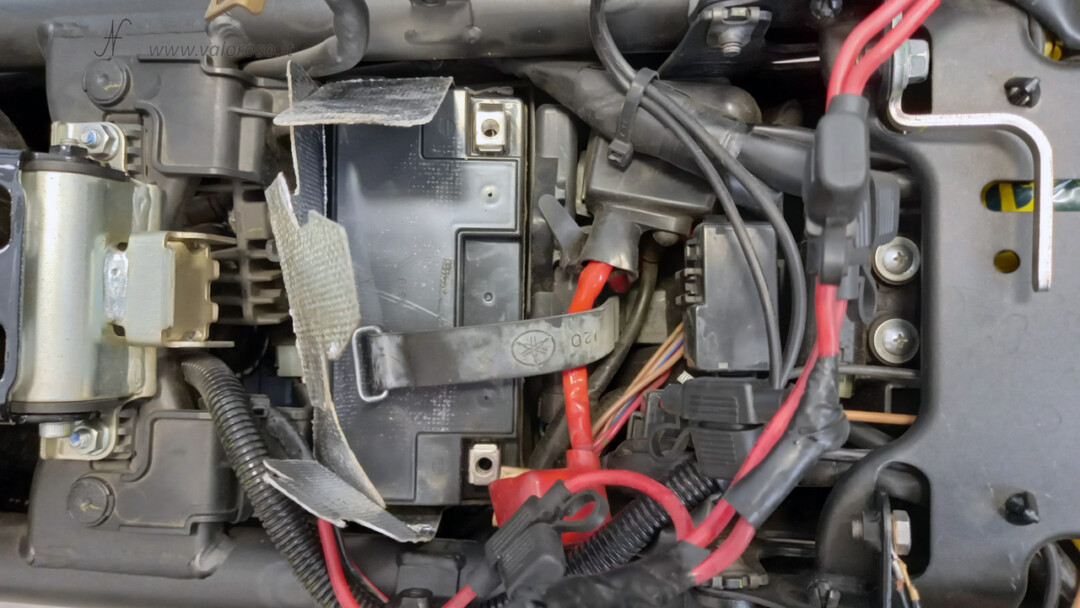
House the new battery in the compartment. Obviously, mount the battery with the same orientation as the previous one, so as to have the poles (positive and negative) in correspondence with the correct cables.

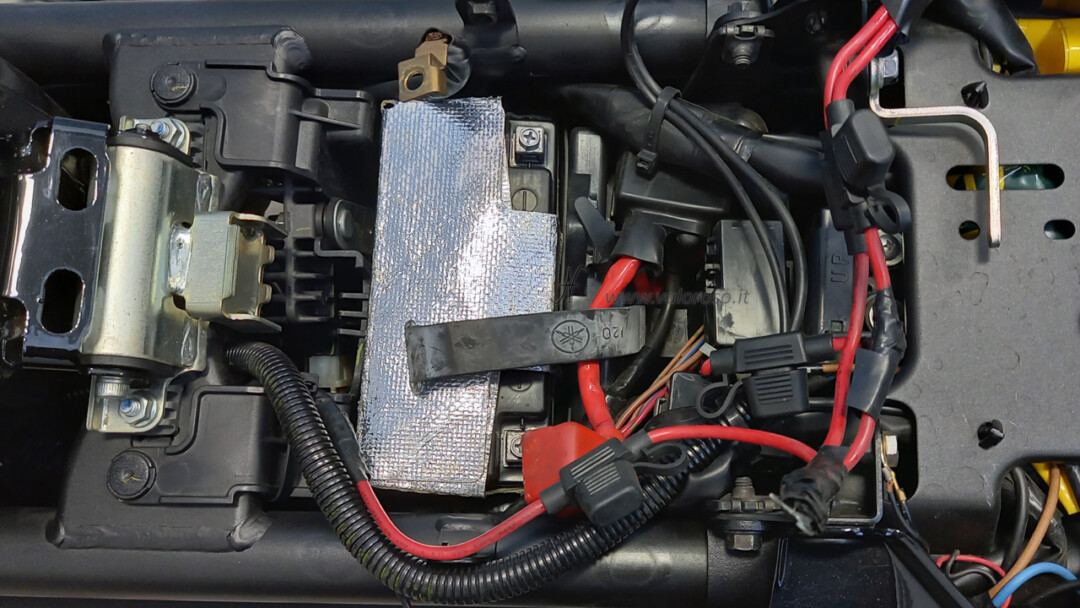
If you have available, sprinkle a little inexidant on the battery poles and on the cables of the motorcycle (or the scooter). In this way, we will guarantee the absence of oxide and a better conductivity of the electric current.
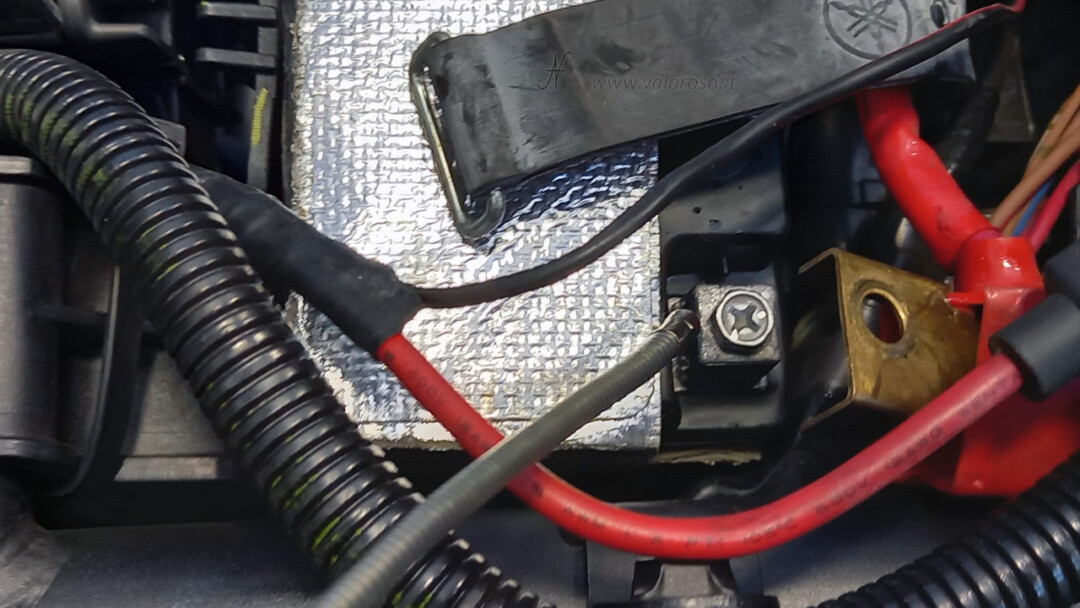
Starting from positive pole of the battery, indicated by the symbol +, screw in the red cable.
After that, you can also screw the black cable to the Negative pole (marked with the battery symbol -). It may be necessary to unscrew the screw, to insert the eye cable eyelet. In this case, pay attention not to drop the nut. It is also possible to help yourself with a second screwdriver, to keep the nut in place while pointing the tightening screw of the cables. Attention! The battery is charged and there is tension! If the screwdriver touches the positive pole of the battery (with the negative already connected), it should not touch any metal part of the motorcycle! Do not combine the positive pole with the negative pole of the battery!
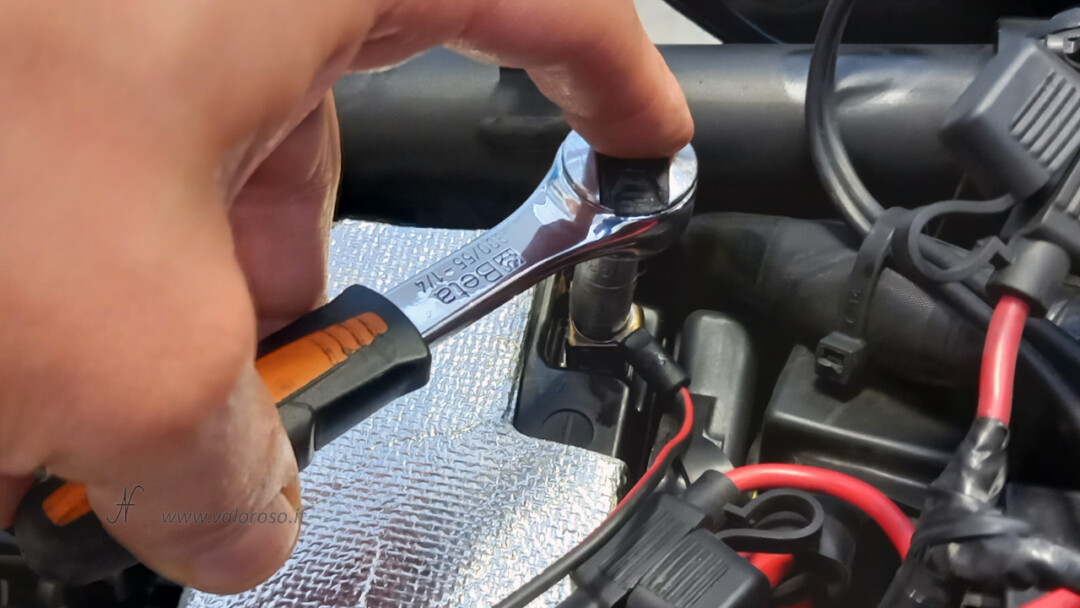
Screws can also be screwed in via a wrench. When tightening the screw, be careful not to apply too much force, otherwise the screw can spread. Attention! I remember the battery is charged and there is tension! If the screwdriver touches the positive pole of the battery (with the negative already connected), it should not touch any metal part of the motorcycle! Do not combine the positive pole with the negative pole of the battery!
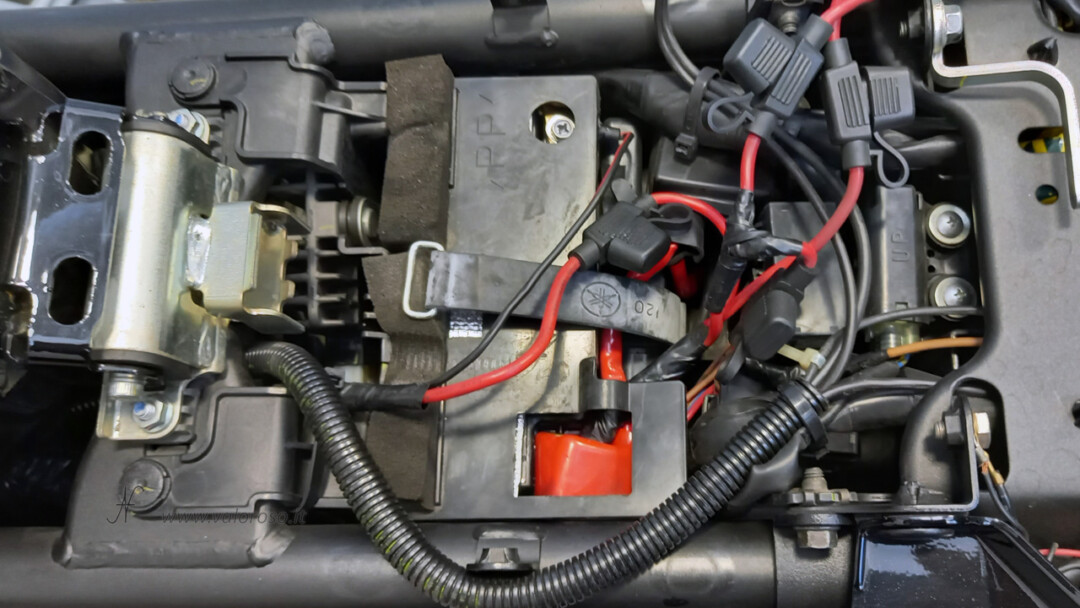
Ci siamo quasi! Siamo quasi arrivati alla fine del tutorial "come cambiare la batteria alla moto"! Mancano solo due operazioni: montiamo il carter di protezione della batteria, stando attenti a sfruttare i passaggi corretti dei cavi elettrici.
Finally, fix the new battery. In my case, I had to pull and tighten the rubber belt.
Before closing the saddle, check that the cables pass in the appropriate positions and that they do not interfere with the size of the saddle. Check well that you have tightened the cable clamping screws well.
Also try to turn on the bike or scooter, in order to verify the correct operation of the new battery. Visually, you can check that the new battery does not emit smoke, odors, and that there are no parts that heat up.
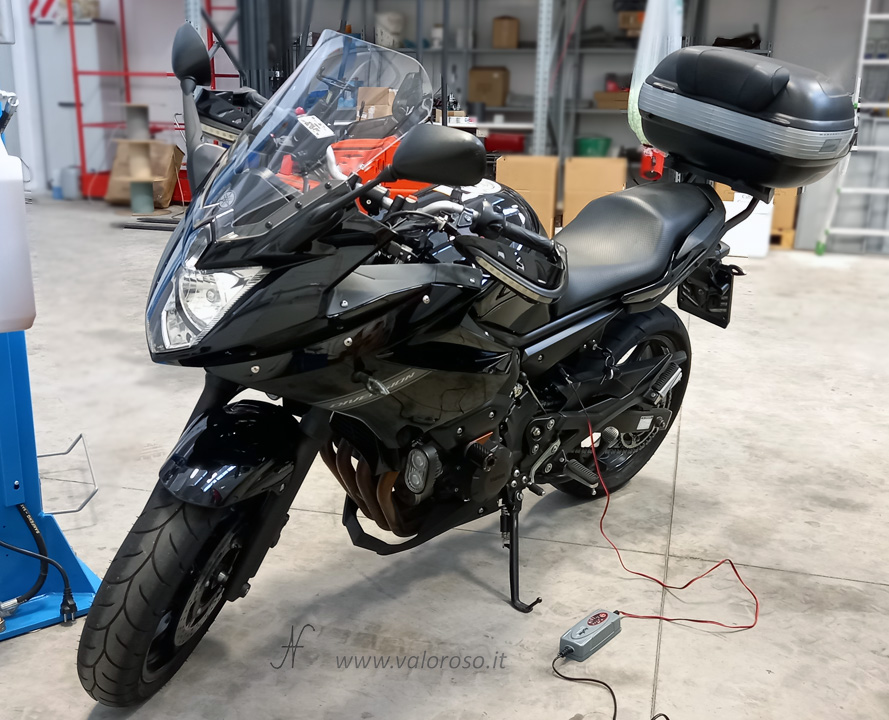
At this point, you can close the saddle (or the protective casings)!
And here, we finished the work and also the tutorial on how to change the battery to the bike and scooter. From time to time, especially if the bike is not used for long periods, it is good to recharge the battery with an appropriate battery charger for motorcycles. If you have purchased a lithium battery, I suggest using a dedicated charger.
Disposal of the exhausted battery
Last recommendation: the exhausted battery must be taken to the collection center (landfill), putting it back in the appropriate dumpster! The batteries, in fact, contain acid and metals dangerous for the environment and must be disposed of correctly.
Almost 8 months after the battery was replaced, everything is still working correctly. The new battery allows the bike to start immediately, even after long breaks (without charger or maintainer).
Optimal! 2 years after the battery installation, everything works perfectly!
The battery is still operational, after 4 years.