Does your GameBoy monitor have vertical lines? Here's how to fix the problem. In this article, we talk about repairing lines on the GameBoy monitor (Nintendo Game Boy Classic, DMG-01). Let's see, step by step, the opening of the console, the diagnosis on the flat panel of the LCD display, the restoration of the contacts, the possible cleaning of the console and the reassembly.


Remove batteries before starting. Work on a clean bench, be careful not to force when disconnecting the connectors and removing the cards. I recommend taking photos and organizing screws and components neatly for reassembly.
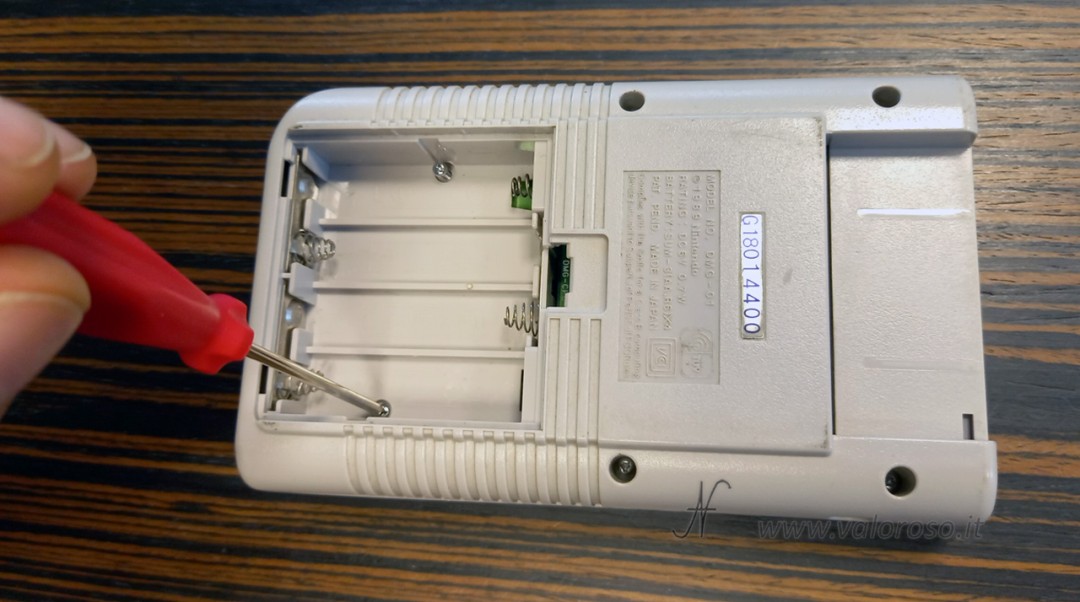
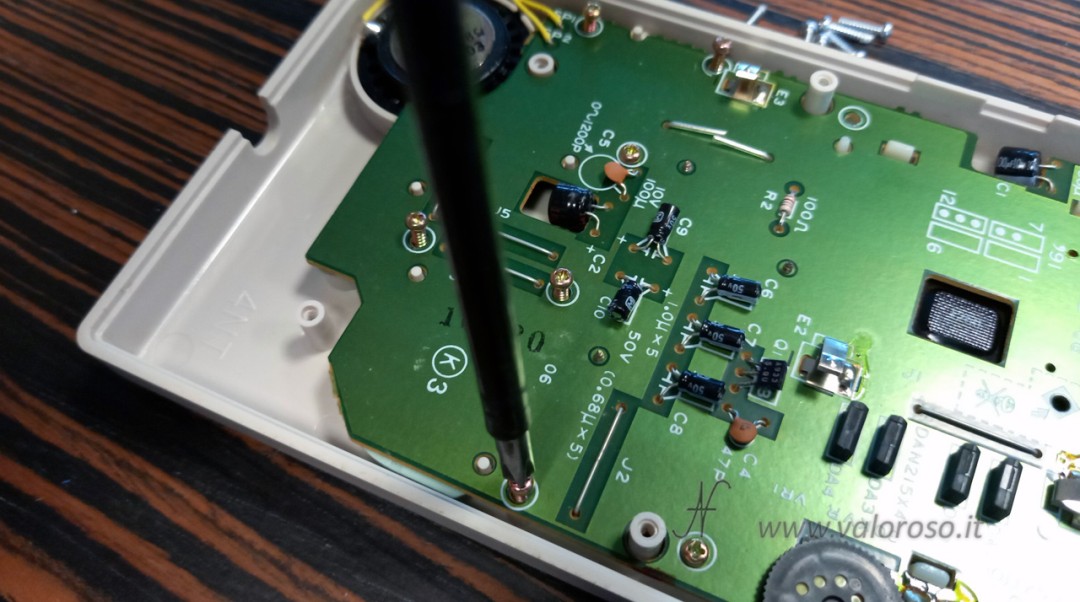
Opening the GameBoy with a tri-wing screwdriver
The symptom is clear: vertical lines (columns of dull pixels) appear on the screen. To repair GameBoy monitor vertical lines, turn the console over and remove the battery door. Identify the triwing screws (also in the battery compartment). If you don't have the dedicated screwdriver, look for it online (e.g. "Game Boy tri-wing screwdriver"): once you have the screwdriver, you can proceed to unscrew all the screws.
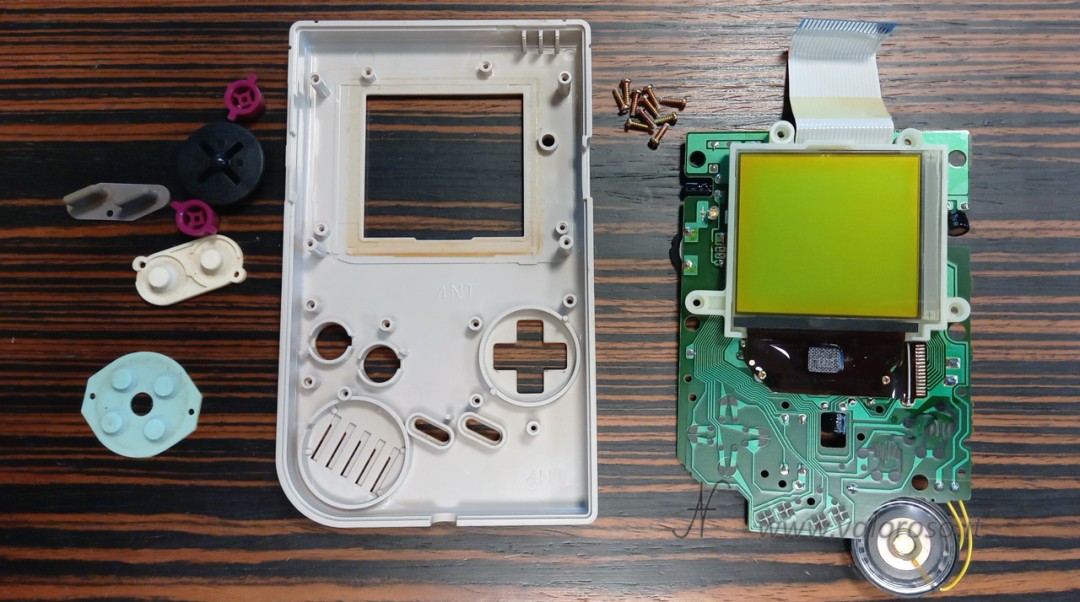
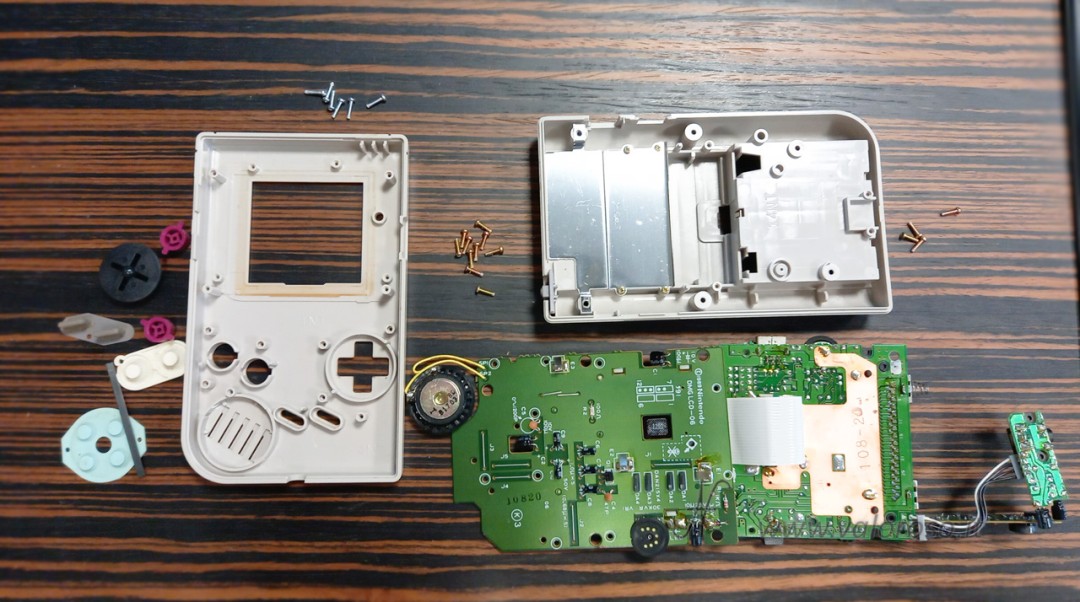
We lift the back shell to separate it from the front. Inside, in the back shell, there are the power/audio connector/CPU boards; the display board, on which we work, is housed on the front shell. We prefer to repair and maintain the originality of the pieces, without replacing boards or bodies unless strictly necessary.
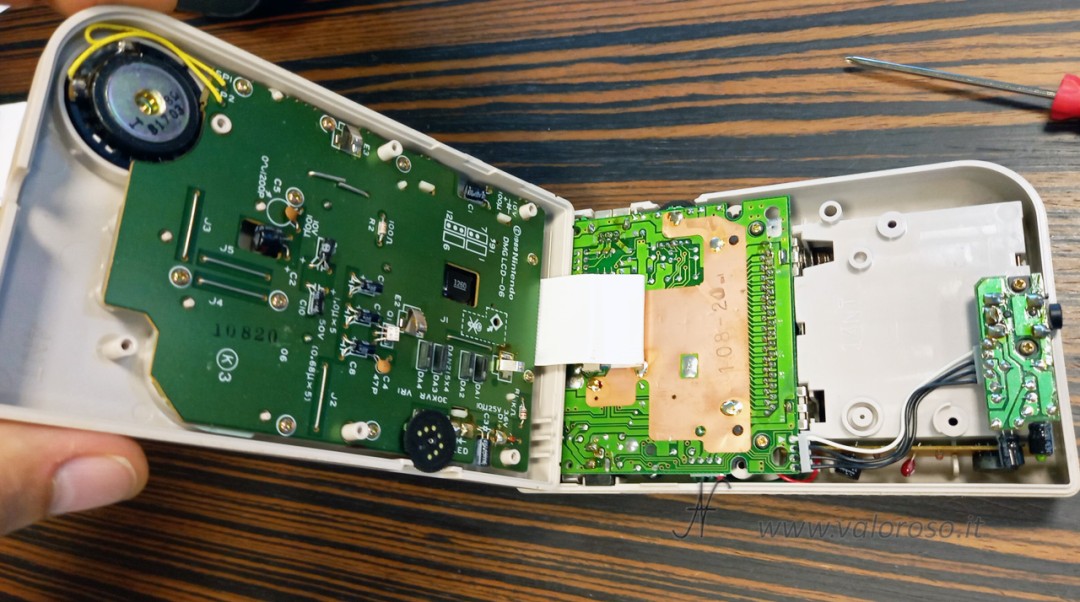
Separation of the shells, disconnection of the flat cable
The shells are connected by a flat cable inserted into the CPU board connector. To conveniently separate the halves, you can remove the flat by pulling gently and evenly from both sides.

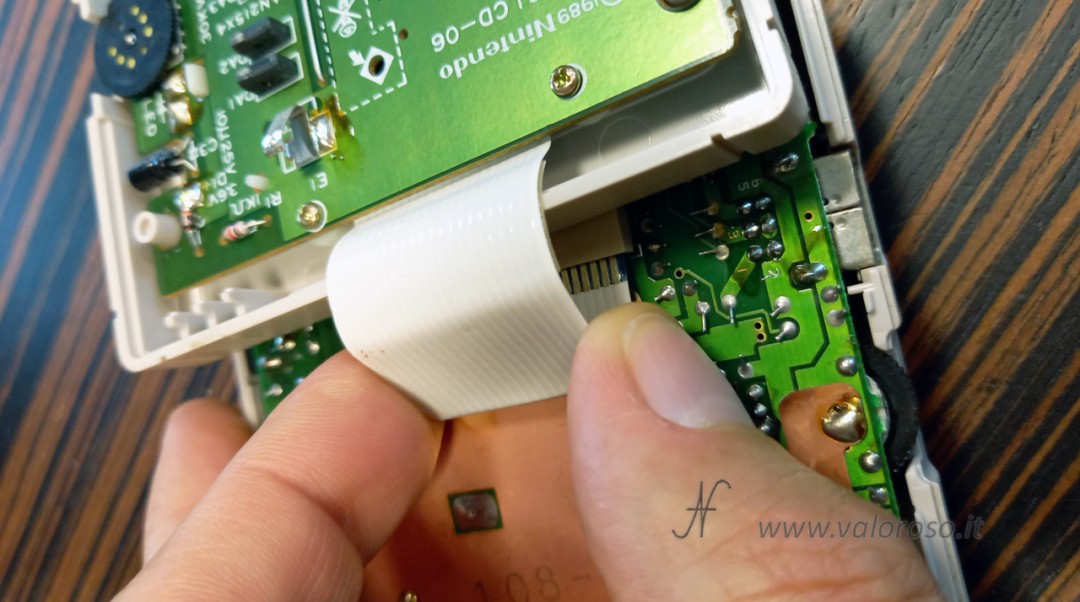
The operation is optional: you can also proceed by leaving it connected, but the work space is more uncomfortable. With the shells separated and the vines collected, we arrange the pieces on the bench.
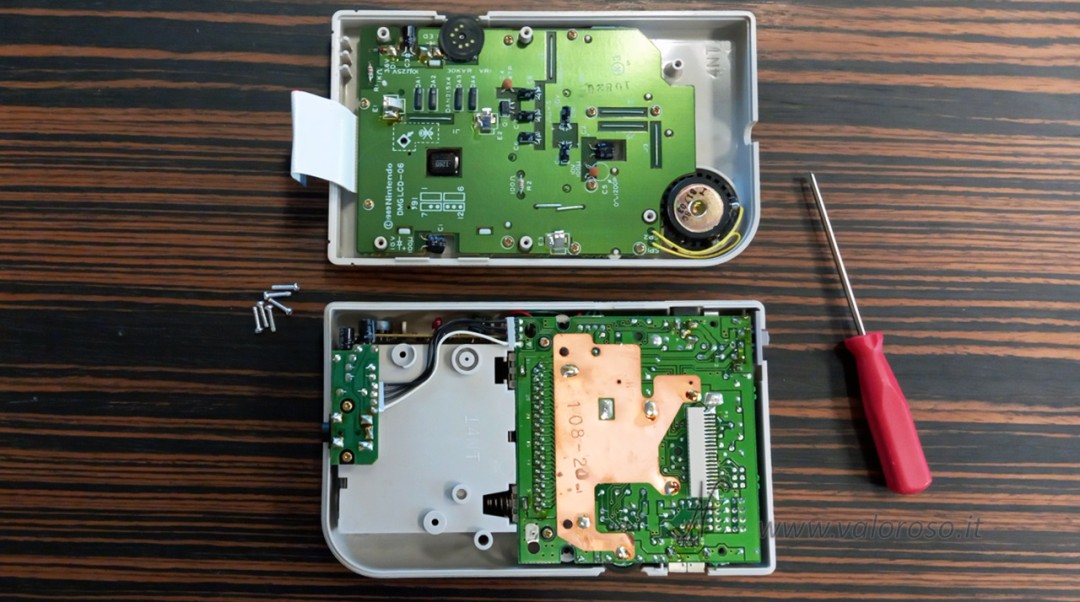
Removing the display board
To remove the GameBoy display board from the front shell, we use a Phillips screwdriver: here the screws are not tri-wing, but Phillips. After unscrewing all the screws, the card lifts out of the shell. There may be a slight sticking to the shell near the monitor: lift it patiently, being careful not to bend the LCD glass.
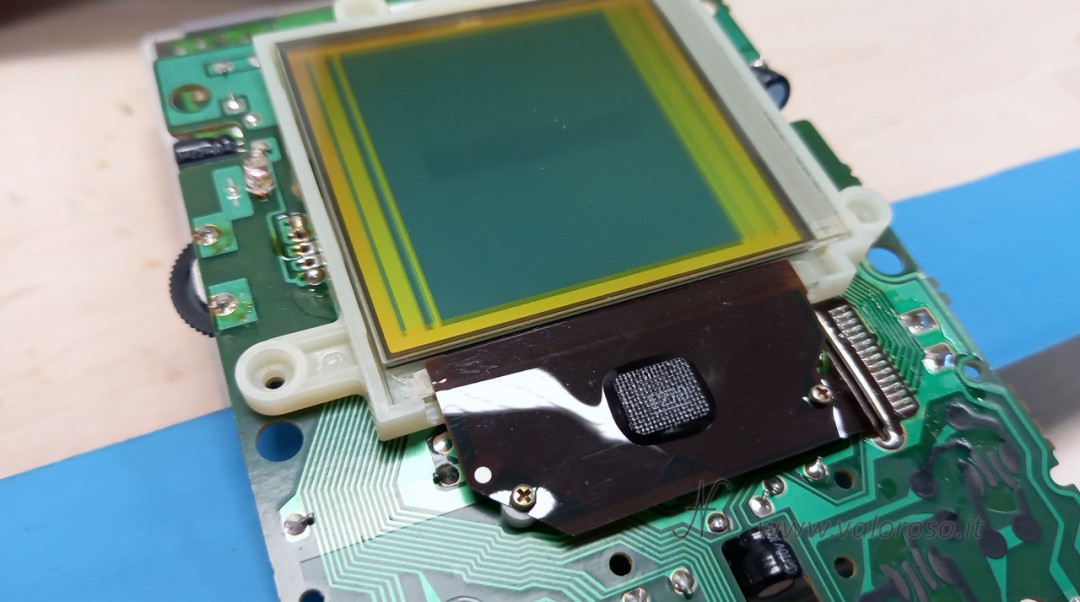
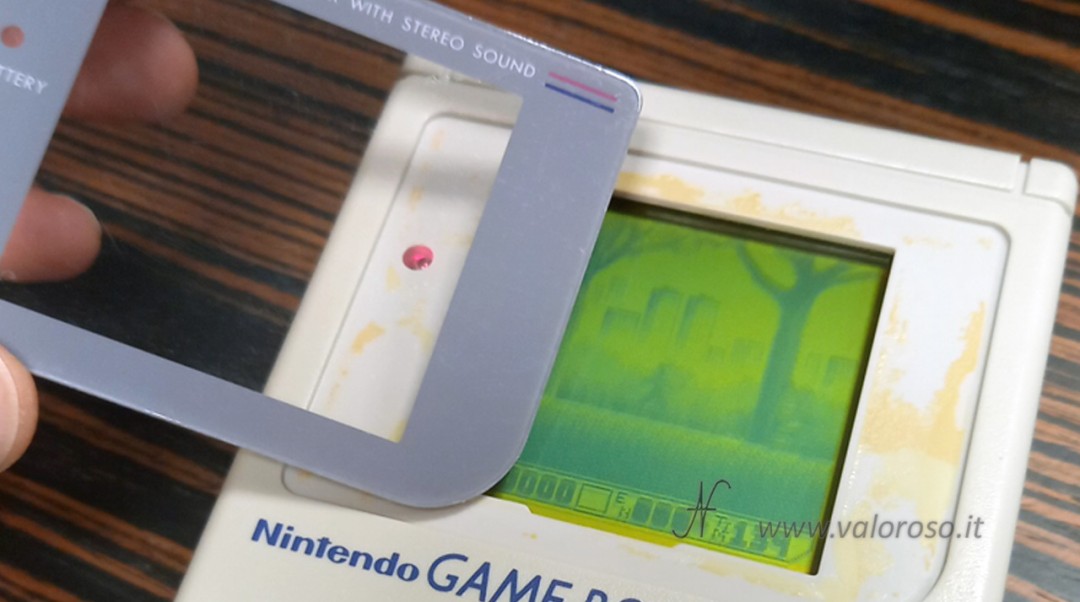
Preparation of the LCD edge (spacer and double-sided tape)
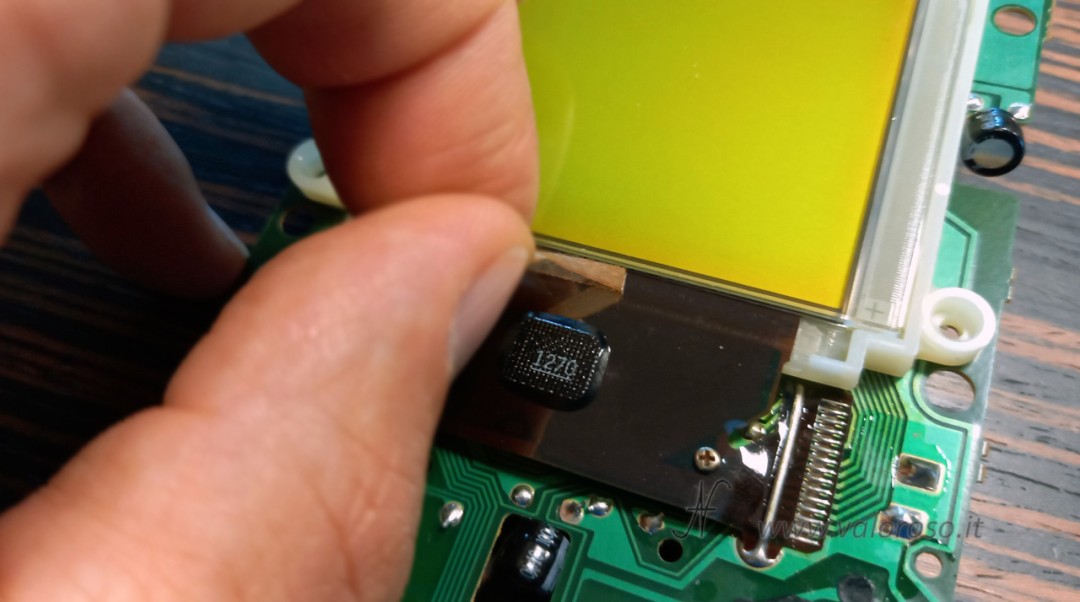
With the display board separated, we turn the assembly over to work on the lower edge of the panel, where the membrane cable (flat) connects the LCD to the printed circuit.
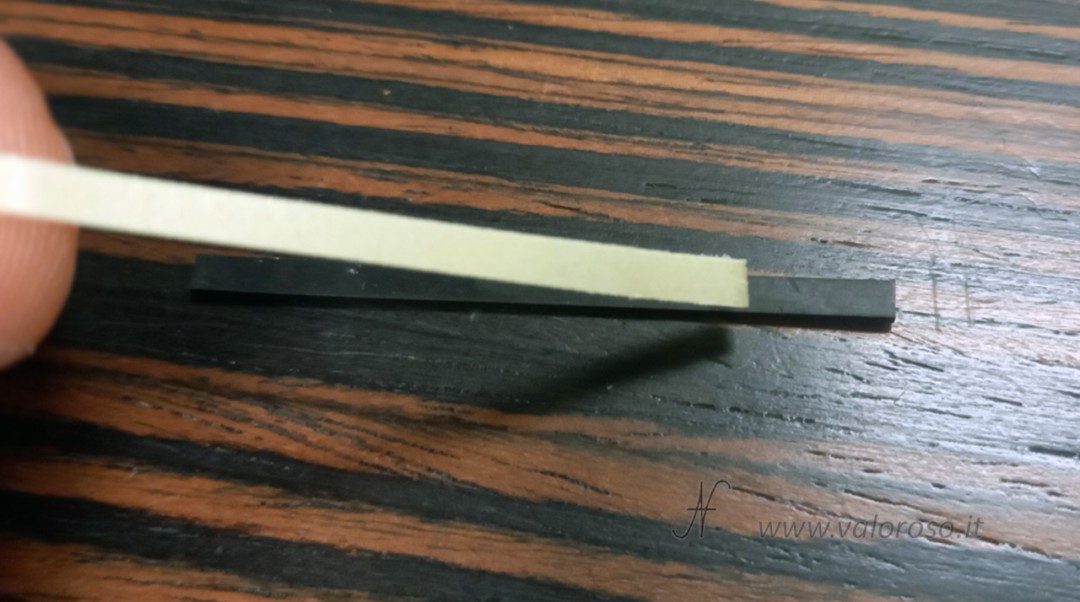
Remove the rubber spacer glued to the flat and also remove the double-sided tape that held it in place.

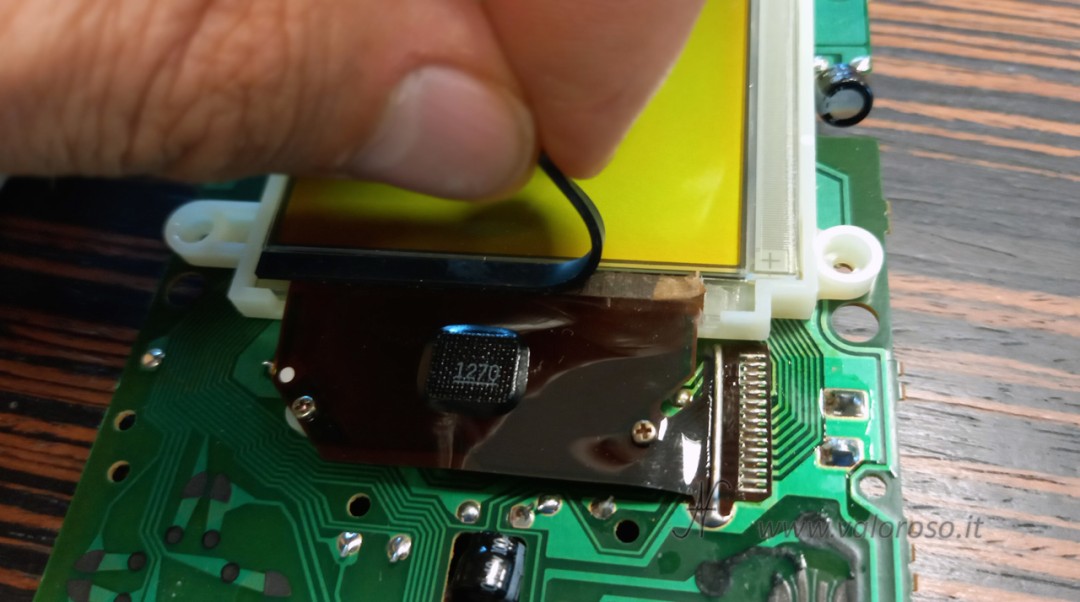
This cleaning frees the contact area and prepares the operation.
GameBoy Classic Damaged Monitor Test and Contrast Adjustment
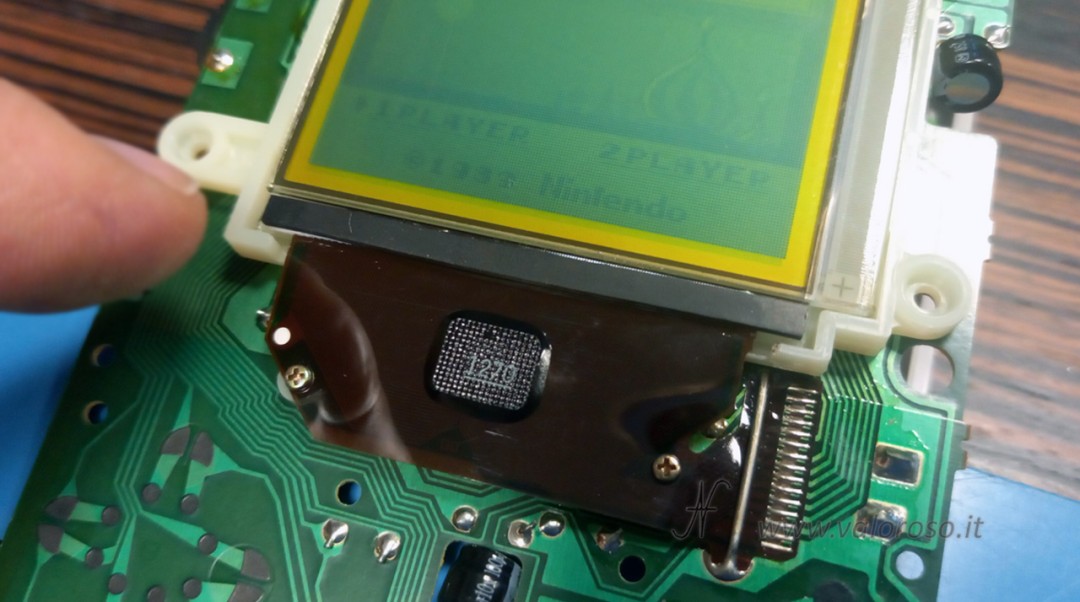
We reconnect the display board to the CPU board by reinserting the flat in its connector (this is why I said that the operation of disconnecting the flat is optional). We isolate the two boards from each other (a small plastic ruler is ideal as a spacer). We insert the batteries and turn on the console. We adjust the contrast towards the dark: the vertical lines become evident and the area to be treated is precisely localized. Where the membrane no longer adheres to the glass, the relevant column of pixels remains off.
Thermal intervention on the Game Boy plate (with clean soldering iron, without tin)
Let's proceed with the repair of vertical lines on GameBoy monitors with controlled heat. We use a very clean, solder-free, flat-tip soldering iron (screwdriver type), set between 300 and 350°C. The objective is not to solder, but to reactivate the adhesion of the membrane to the glass contacts.
We place the tip on the membrane in correspondence with the missing lines, with light pressure and small lateral movements to distribute the heat evenly. Don't overdo it and don't linger too long.
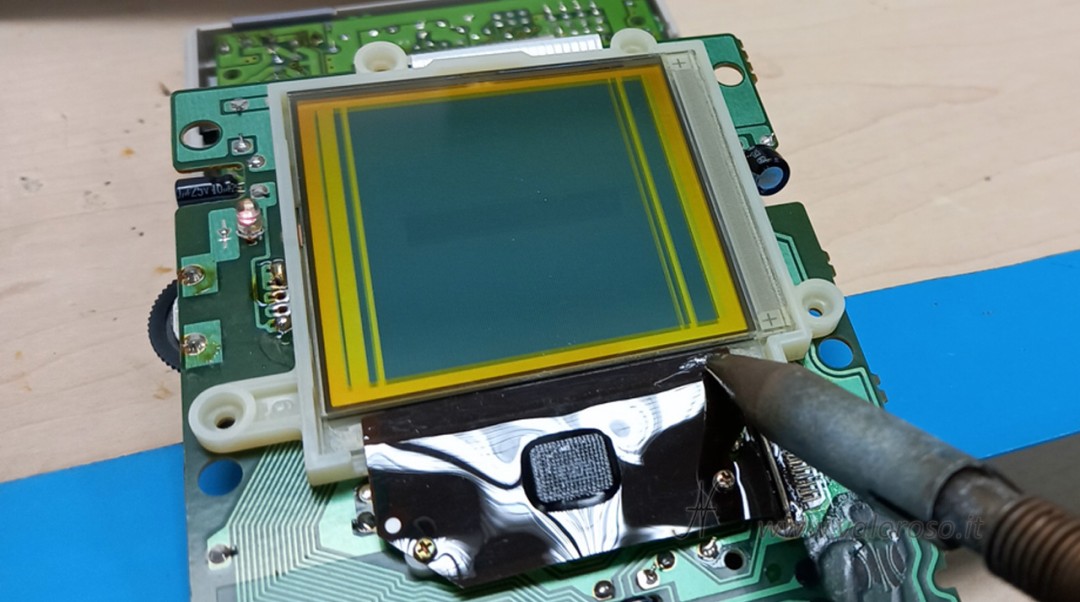
We proceed in short passes; if a line remains in an area, we don't insist on the same point for long: we return to it after having treated the opposite side. This avoids overheating and preserves the LCD.
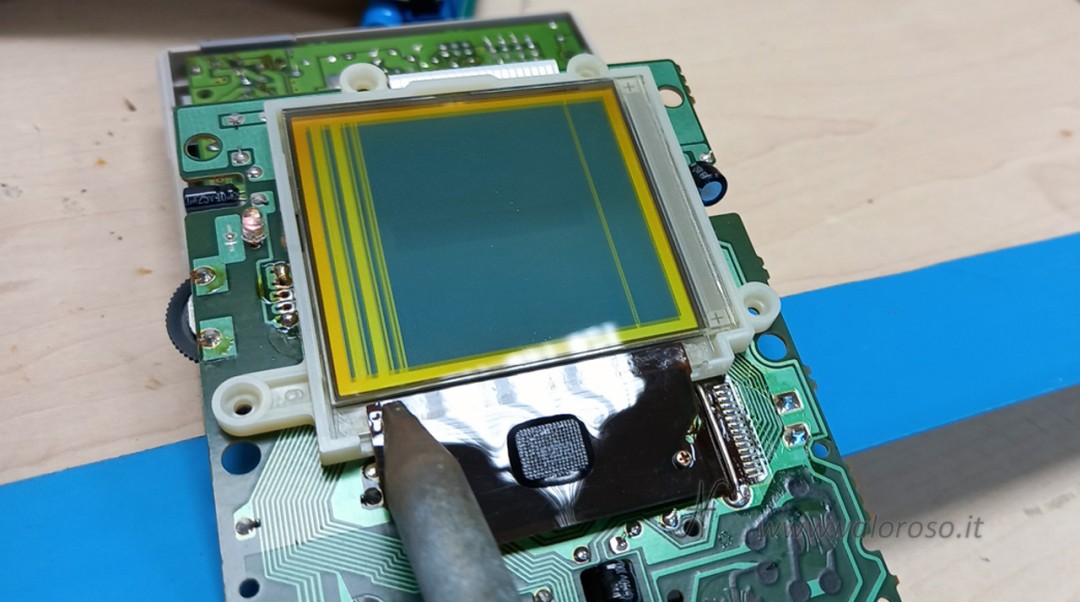
When, again with dark contrast, the screen appears uniformly filled with pixels, we have restored adhesion on all columns.
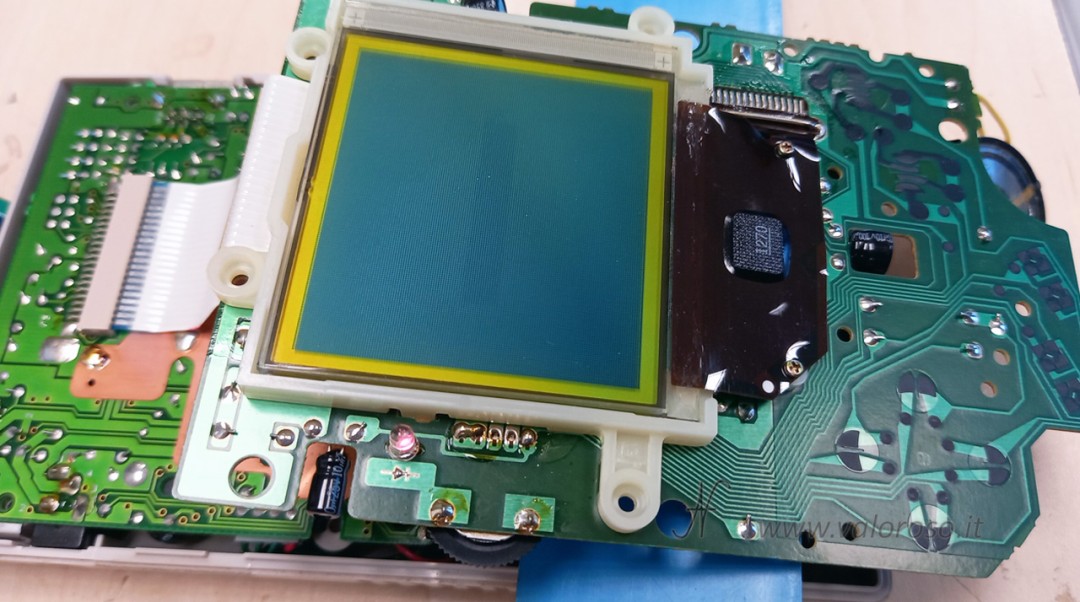
Verify pixel recovery and cartridge test
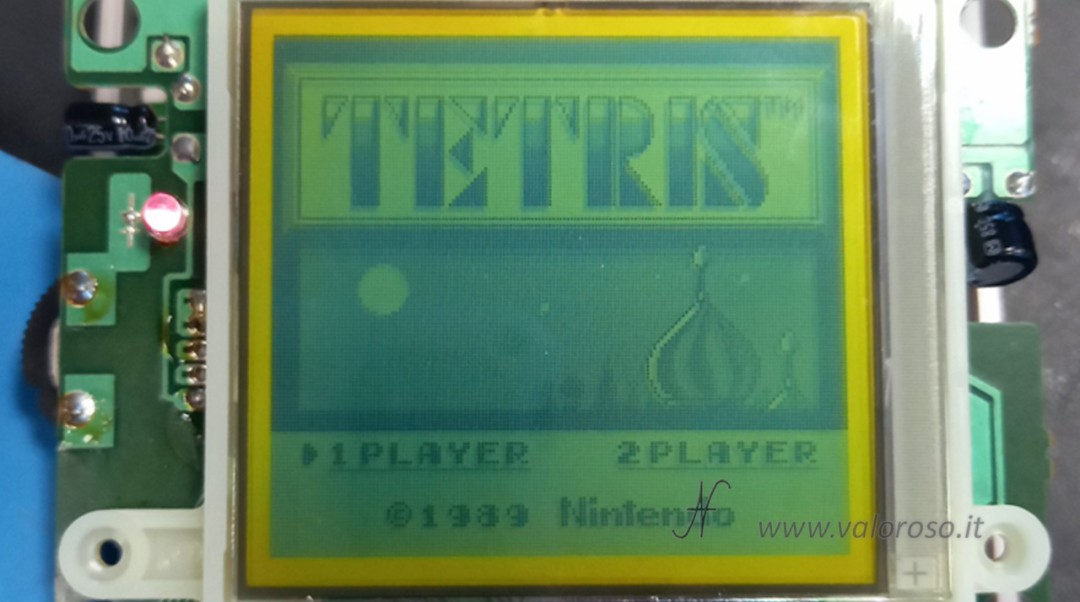
Once the repair has been completed, we observe the full screen: there must be no columns that are lighter or completely dull. We turn off the GameBoy, insert a cartridge (example: Tetris), turn it back on and adjust the contrast slightly lighter. We check that no residual vertical lines appear. This test confirms the stability of the contact between the membrane and the LCD glass.
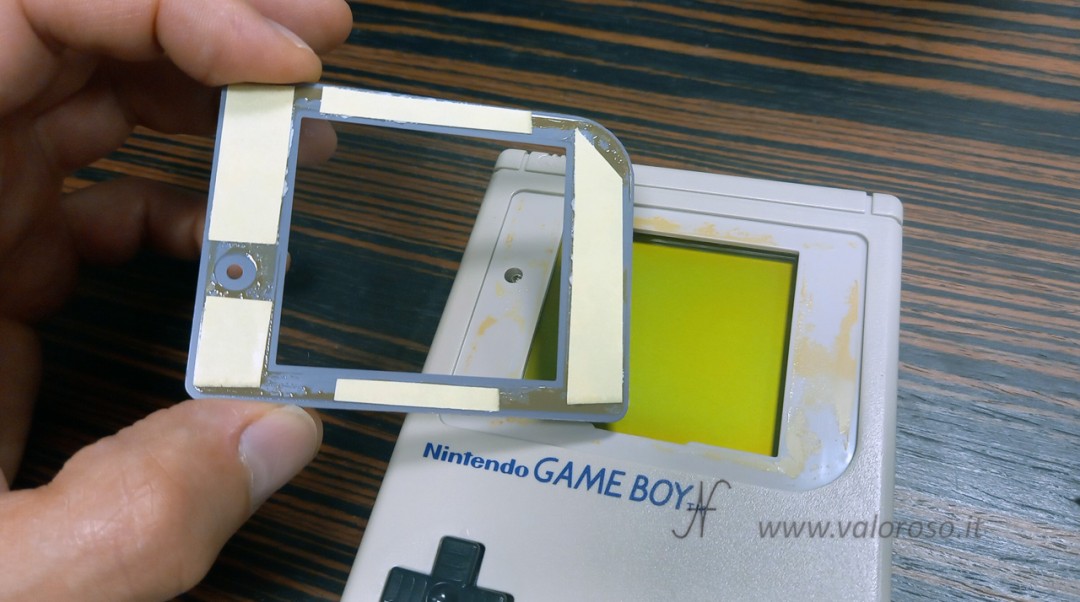
Fixing the rubber spacer
The original mechanical pressure is now restored. We cut double-sided tape to the size of the spacer and place it on the spacer.
Reglue the rubber spacer to the flat. You can keep the console turned on during this operation to check in real time that no new lines are generated: if everything remains clean, the adhesion is stable.
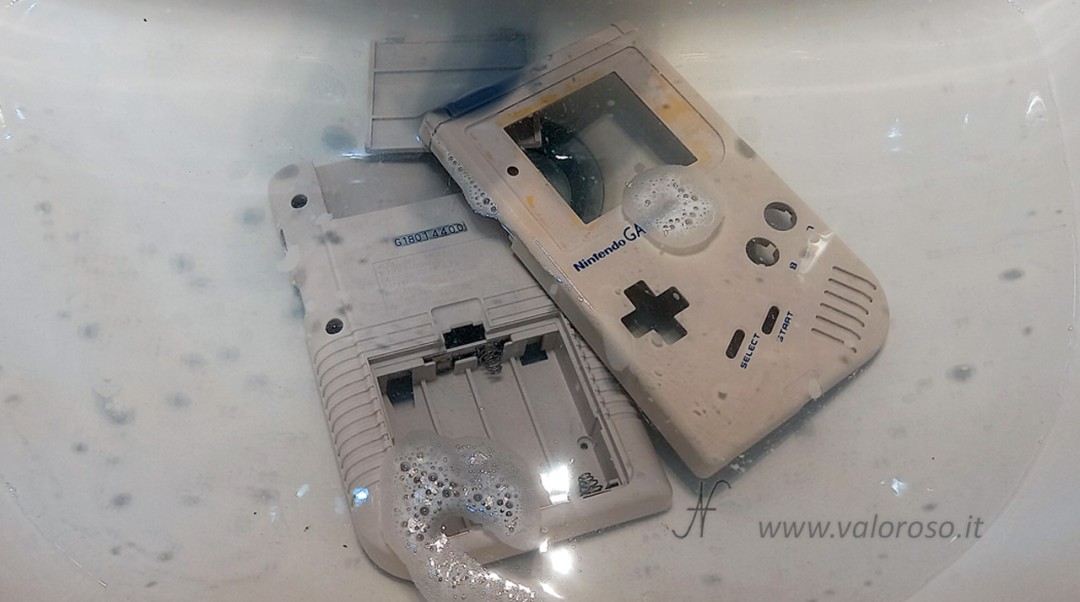
Cleaning the case (optional) and reassembly
If the case is dirty, you can proceed with a thorough cleaning. We disassemble the boards from the back shell and separate all the plastic parts.
We wash shells and buttons with water and degreaser (for example Chanteclair): crevice brush, soft sponge on flat surfaces, then rinse and dry thoroughly.
To reassemble, we proceed in reverse: insert the buttons into their housing.

Then, we reposition all the components as they were originally and screw on the electronic boards.
Front mask: reuse or replacement?
On my GameBoy, the front bezel was off.
We can glue it with double-sided tape on the front case (an operation that can also be performed with the console closed).
Alternatively, there are cheap spare parts (also made of glass) by searching, for example, for "GameBoy mask" on marketplaces such as AliExpress. If the original GameBoy faceplate is not tarnished or scratched, it is best to keep it to preserve its originality.
Final results
Upon startup, the Nintendo writing and game screens (e.g. Spider-Man 3) appear clean, without vertical lines. The combination of thermal intervention on the flat and pressure of the spacer re-establishes full continuity of the contacts and readability of the screen.
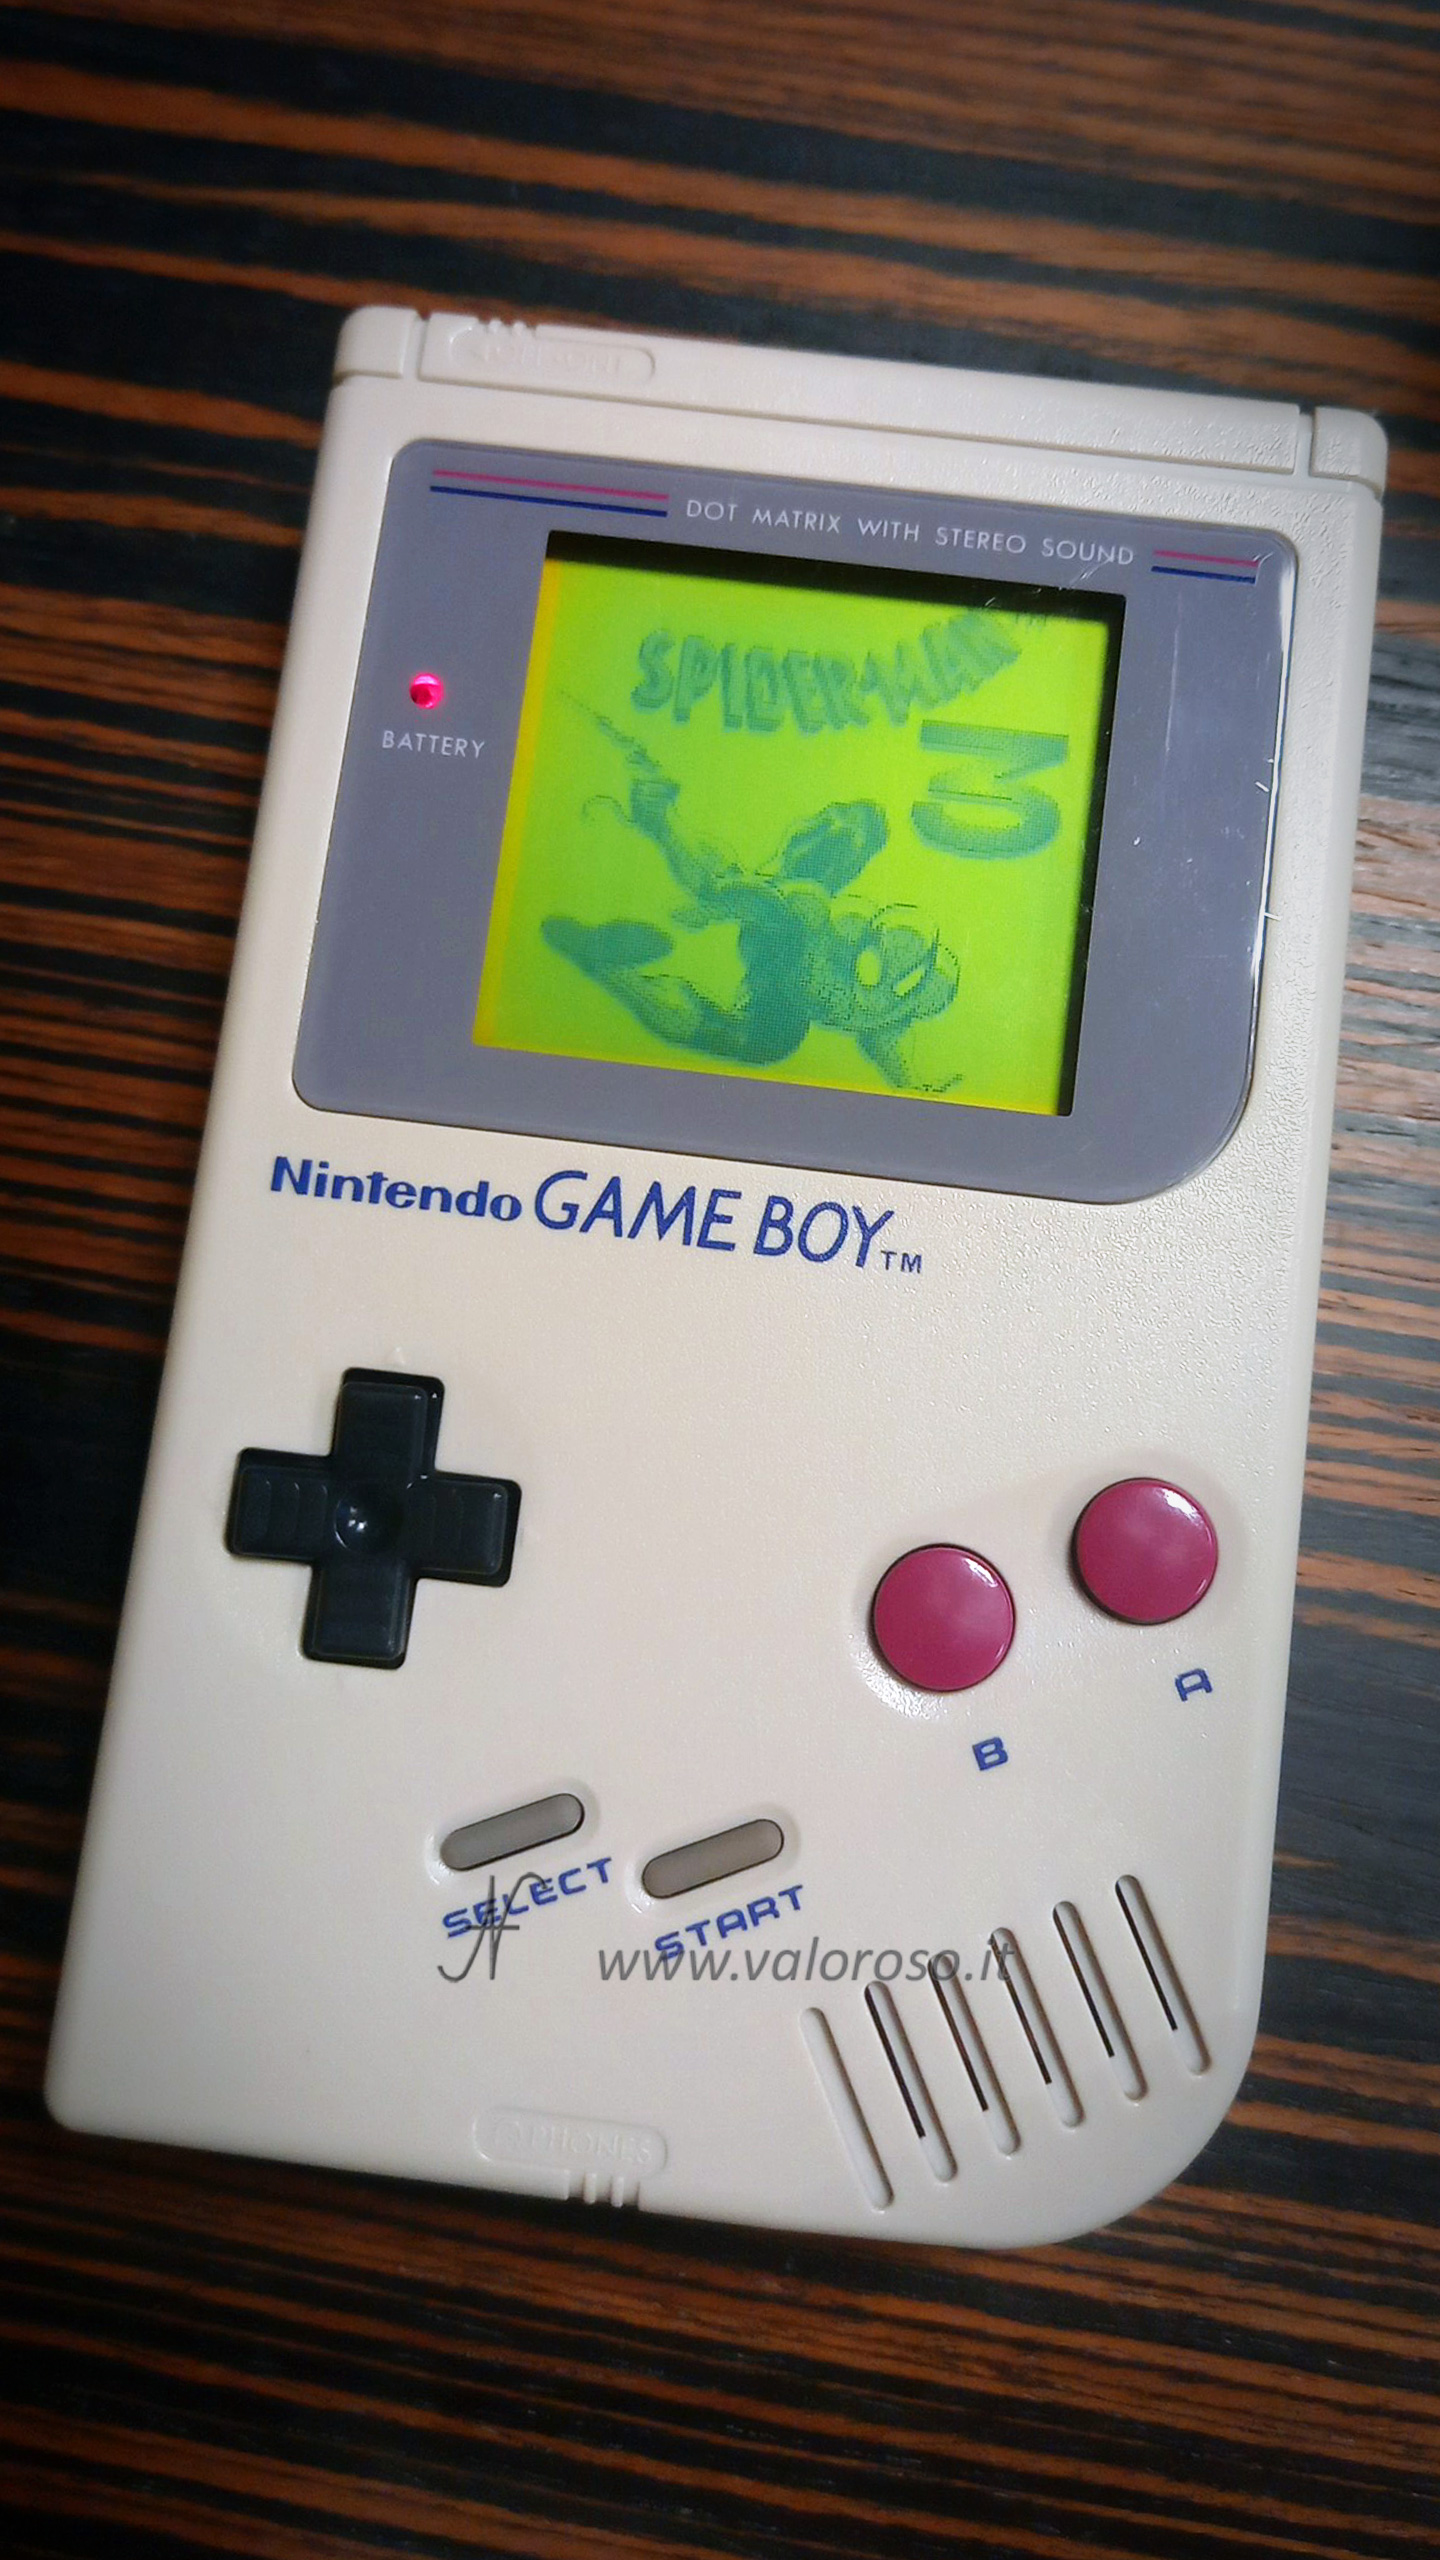
The GameBoy Classic is clean and... looks like new!

If you like this type of content on retrocomputers, retroconsoles and vintage electronics, subscribe to the ValorosoIT channels, on all social networks, to stay updated!