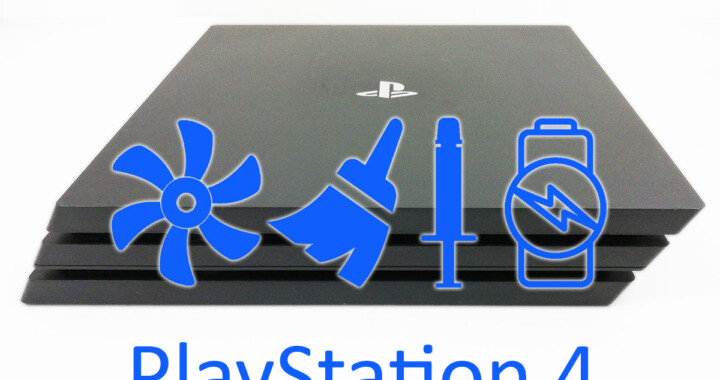
Welcome to the second article in the series dedicated to cleaning and maintaining the PlayStation 4 Pro! Let's see how to proceed with the replacement of the thermal paste of the PS4 Pro. Not only that, let's also see how to replace the CR2032 backup battery and how to clean the heatsink and all the internal components of the Sony PlayStation console well.

Have you just bought a used Sony PlayStation 4? Does the fan run so fast that your PS4 will soon take flight? Does the PS4 Pro make too much noise? Let us tell you one thing: it is not normal. Thankfully, the solution is quite simple. You have to clean the Sony PlayStation 4 console and change the thermal paste of the CPU.
In the first article We dismantled the whole PS4, with all the precautions of the case, and we saw the cause of the overheating of the PS4: there is dust on the cooling alletta and the thermal pasta of the CPU is dry.
In this second article, let's see how to change the thermal paste of the CPU with the Night NT-H1, how to change the internal battery and how to clean the heatsink and fan. Finally, in the third and last article, we will see how to reassemble the PS4 Pro.
Clean the PS4 Pro chassis
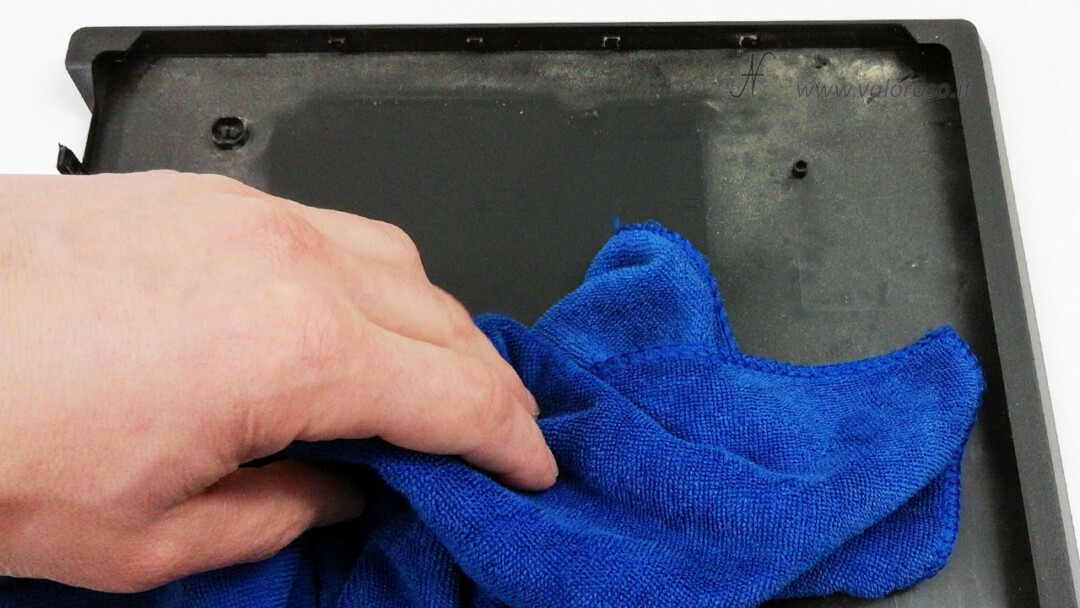
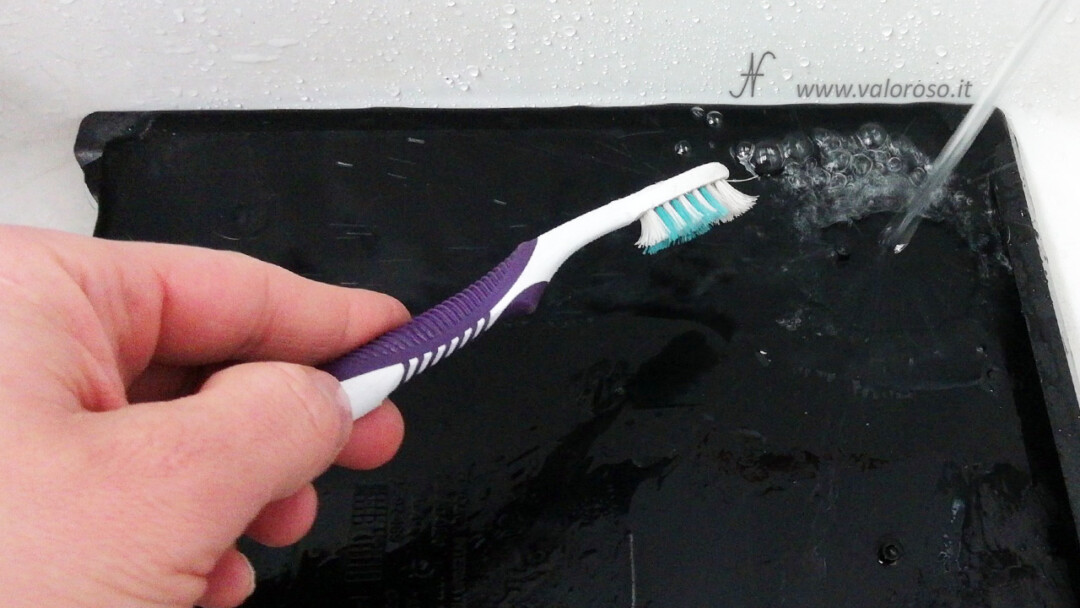
Before proceeding to replace the thermal paste of the PS4 Pro, we can clean all the parts that we have disassembled. Plastic parts, such as the two upper and lower covers of the PS4 Pro, do not contain electronic components.

We can dust them with a microfiber cloth.
If the two lids are particularly dirty, we can also immerse them in water, brushing them with a soft bristle toothbrush. It is possible to use a small amount of degreaser, to be added to the water.
After washing well, with water, all parts that do not contain electronic components, we can dry them with a microfiber cloth and compressed air. The compressed air must be used delicately, in order not to break the most delicate plastic parts.
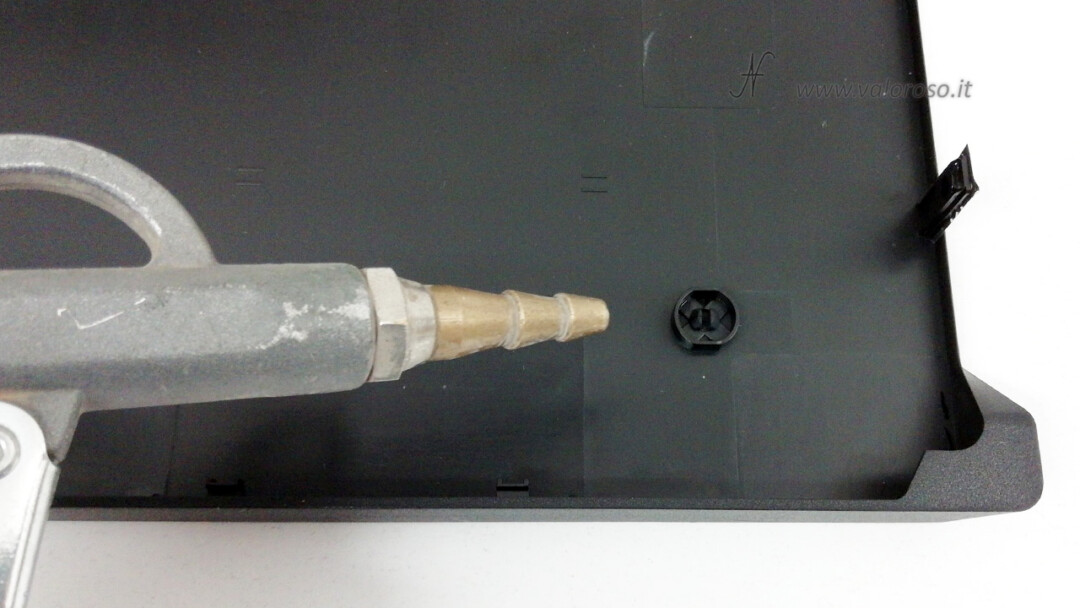
Drying must be complete. To clean the parts of the chassis that contain electronic components, we use the microfiber cloth and a soft bristle brush. We can also use compressed air, gently!

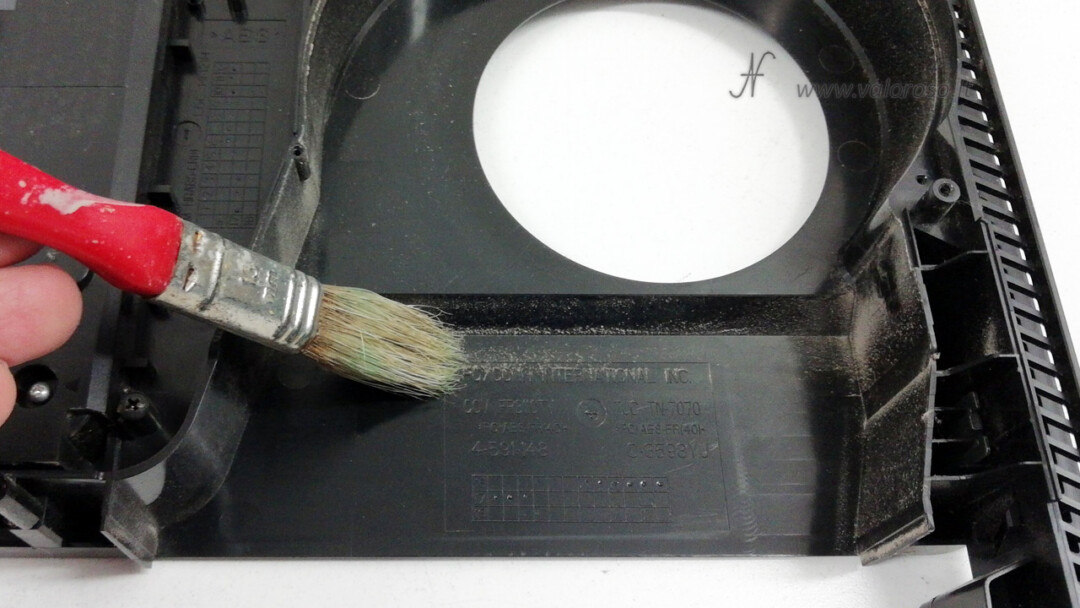
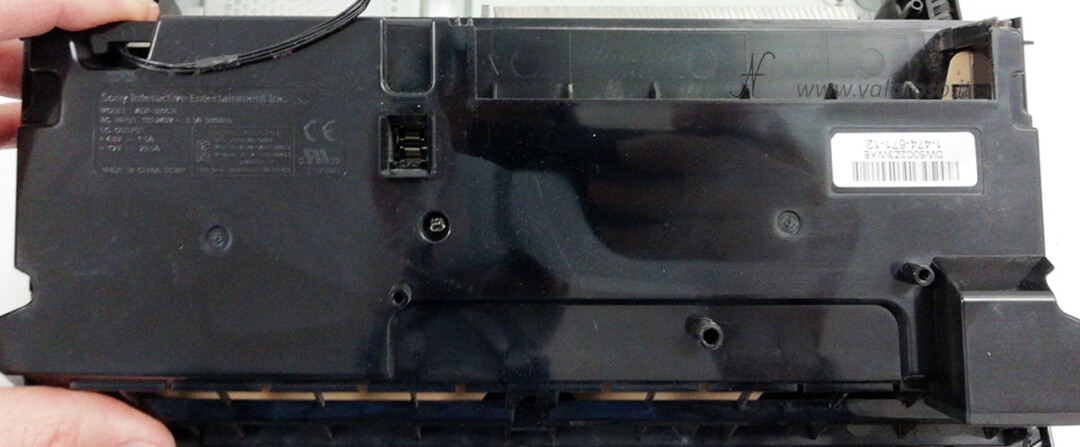
You have to clean the PS4 Pro power supply. For the interior, we can blow it with compressed air, while the outside can be cleaned with the soft bristle brush and the microfiber cloth.
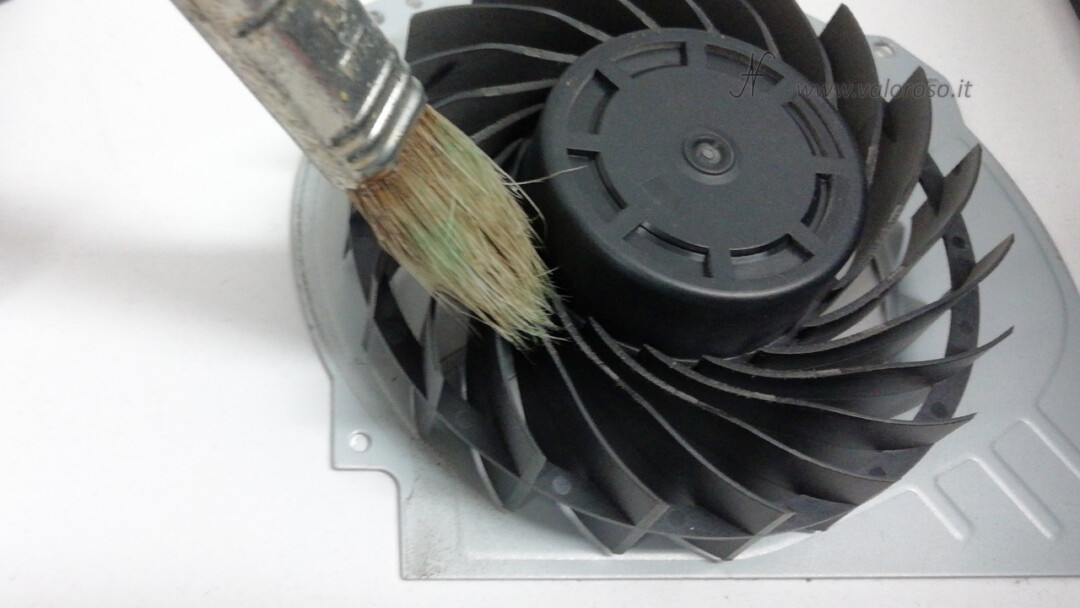
Clean the PlayStation 4 Pro fan
The fan must be sprinkled very delicately. I recommend cleaning all the wings well with a soft bristle brush. To use the compressed air, the fan must be kept firm. You don't have to let it rotate with the compressed air, otherwise it can be slammed!
As I pointed out in the first article in the series, if the fan made a clean noise, like... a private jet, then it is only to be cleaned. If, on the contrary, its noise was more like that of a helicopter, or that of a diesel engine, it is possible that the fan has gone astray and you have to replace it.
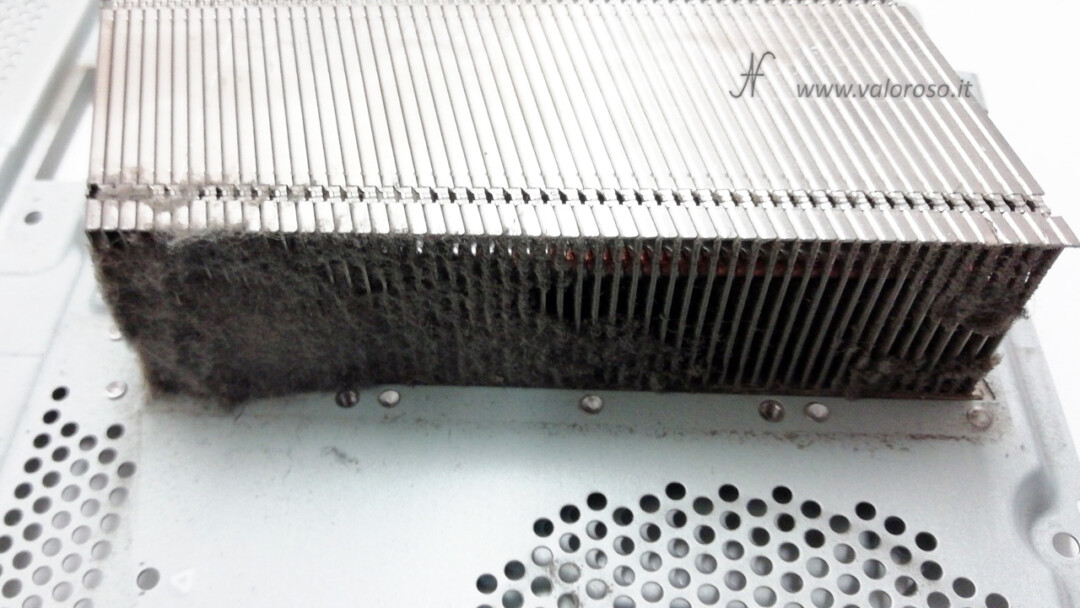
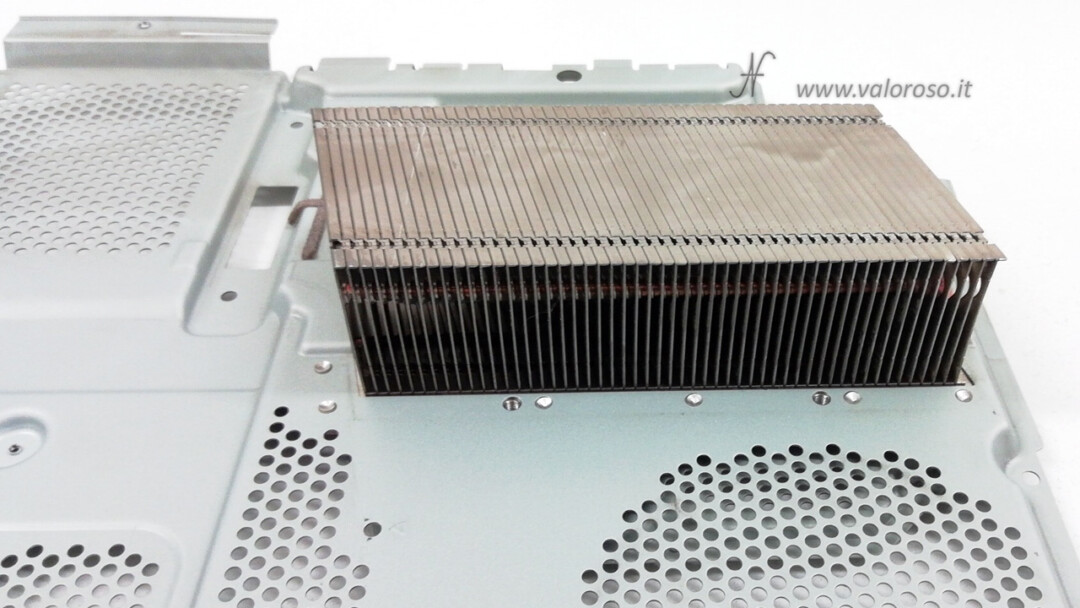
Clean the PlayStation4 Pro CPU heatsink
The heatsink must be cleaned with the soft bristle brush and compressed air. Being a rather robust component, you can use the compressed air at maximum power! Any form of dust must be blowing out of the heatsink. The heatsink must return new! If this was the dirty heatsink:
After the careful cleaning, the heatsink must seem new!
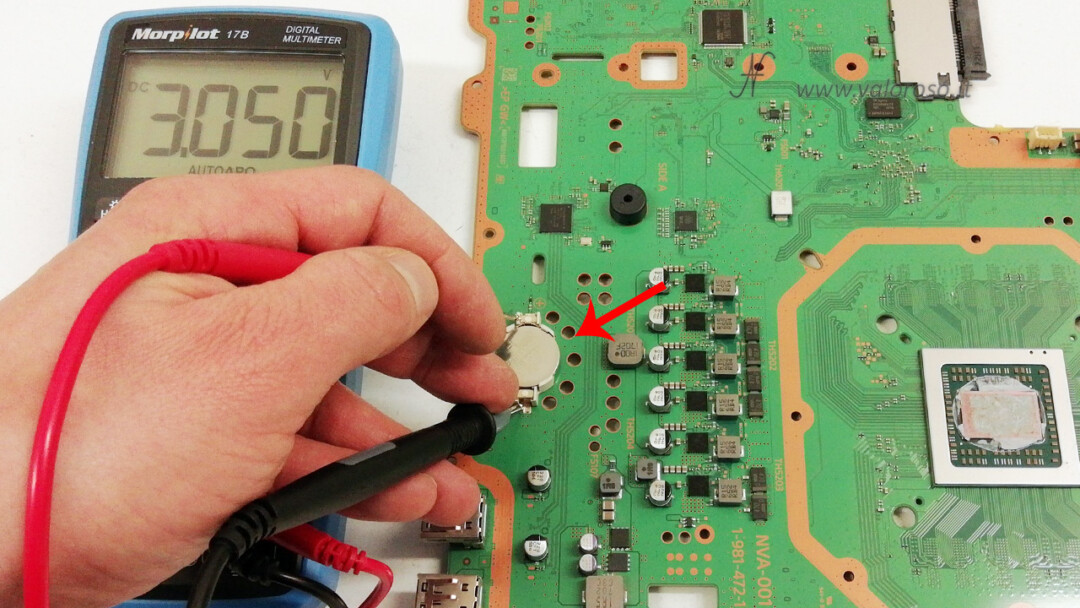
How to replace the ps4 clock battery
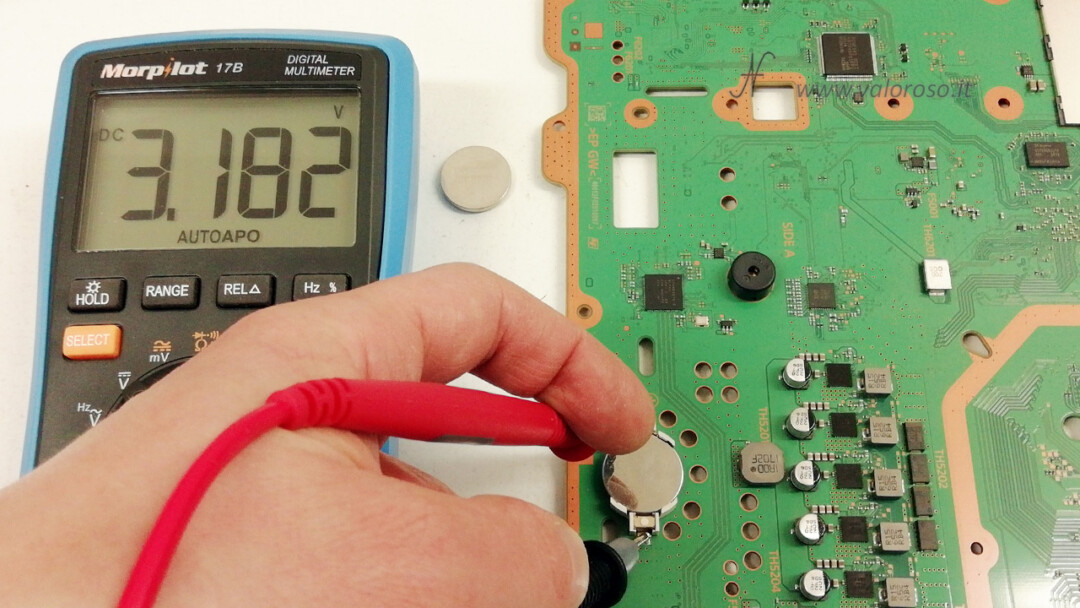
While the PS4 is disassembled, we might as well check the battery in the clock. It's a CR2032 lithium battery: it's easy to find. With the tester, we measure the tension: in my case, we can read 3.05V. The pile is not yet downloaded, but a lithium battery, charged, is more tending to 3.2v.
We proceed to replace the battery: remove from the battery holder in a simple way, gently widening one of the tabs and extracting the battery.
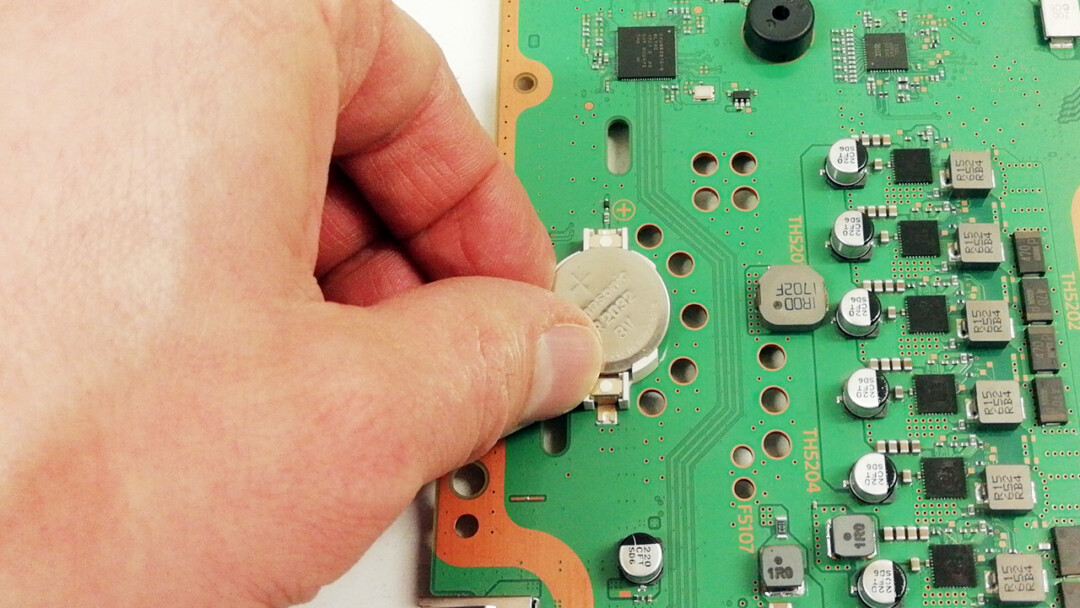
We can then install a new CR2032 lithium battery, charged.
As soon as the PS4 connects to the Internet, it will take the correct time. Alternatively, in the PS4 settings, there is the possibility of manually adjusting the date and time of the system.
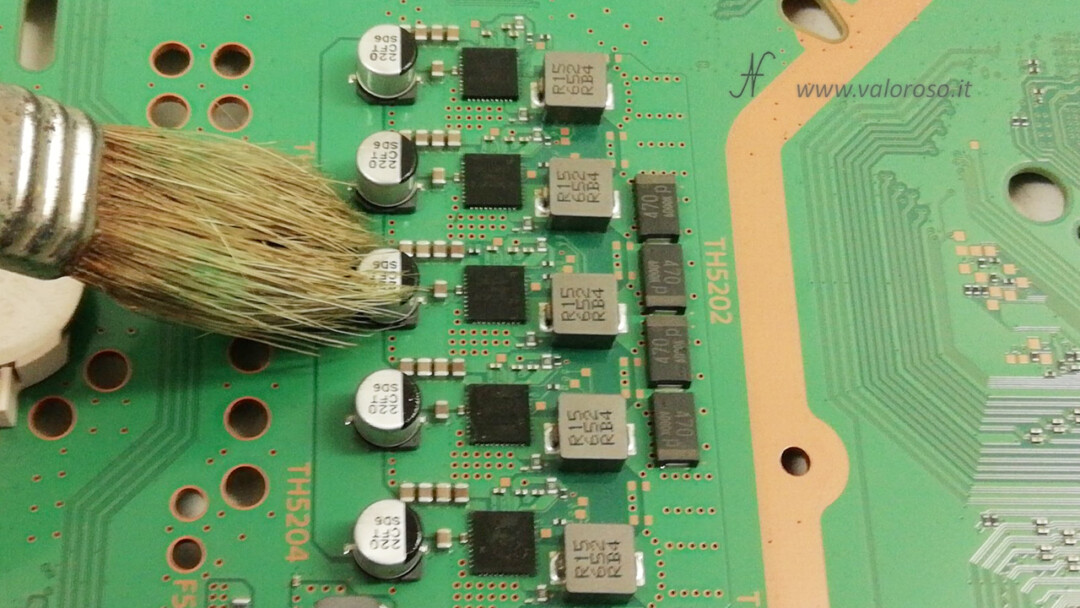
How to clean the motherboard of the PS4 Pro
As I pointed out in the first article, when handling electronic components, remember to wear NON-electrostatic clothing. In particular, avoid wool sweaters or fleece sweatshirts. Also, before touching electrical cables or components, place your hand on a metal leg of the table, on a metal door or other objects connected to the ground. In this way, you will avoid damaging the components with the electrostatic discharges of your body.
We dust the motherboard of the PS4 with a soft bristle brush. If you want, you can use light compressed air. Light! Otherwise you will detach the components and you will irreparably damage your console!
PS4 Pro Thermal Paste Replacement
And here we are at the long-awaited moment! How to change the thermal paste of the PlayStation 4 Pro CPU! Using a cotton rag, soaked in alcohol, we begin to clean the part of the heatsink in contact with the CPU.

You have to remove the old thermal paste from the PS4 CPU. We always use a cotton rag soaked in alcohol.
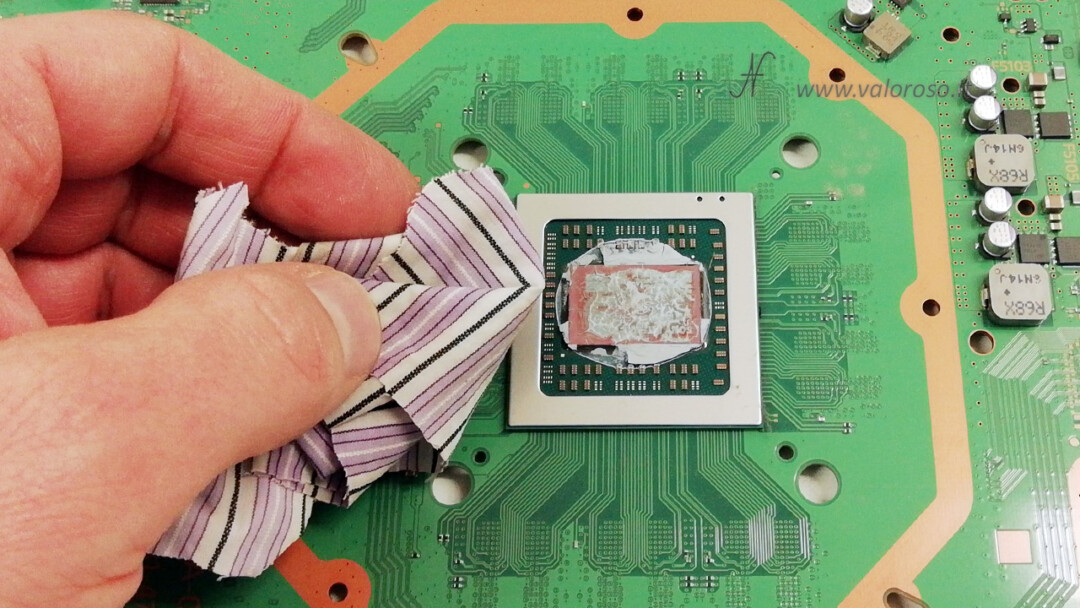
Thermal paste is not electrically conductive: even if it ends up in the small electronic components of the CPU, nothing happens.
In my case ... I wanted to remove it. I risked and used a soft bristle toothbrush, soaked in alcohol. You ... you can avoid.
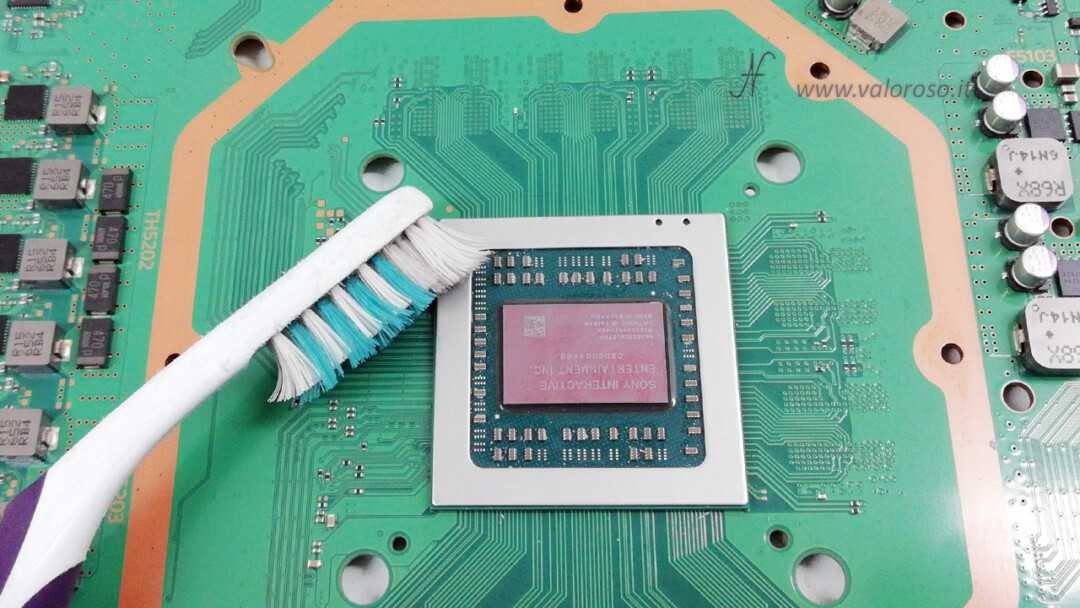
Cleaning the glossy surface of the CPU must be thorough, but gentle.
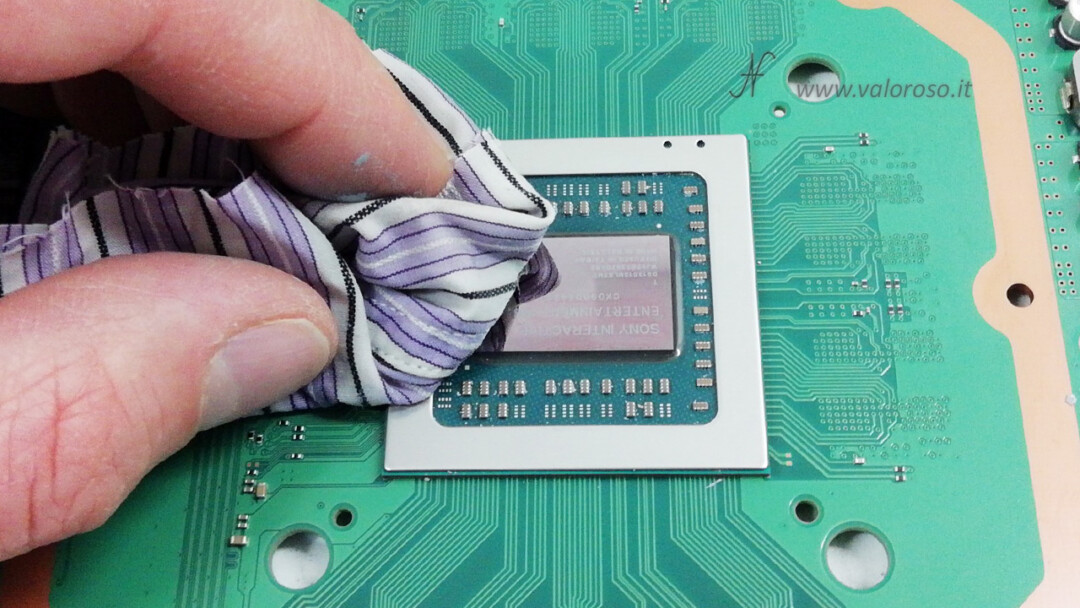
And here is the nice clean CPU, ready to welcome the new thermal paste!

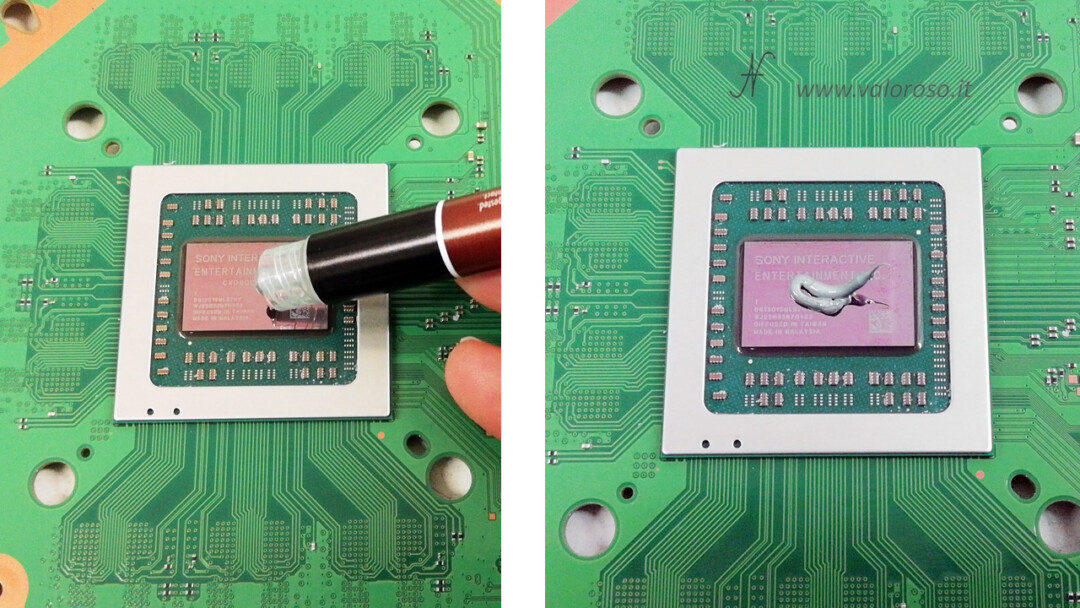
Thermal paste is used to improve heat transfer from the CPU to the cooling alletta. I chose the thermal pasta Night NT-H1.

By pressing the pube of the tube, the first stretch of thermal pasta that comes out can be a little dry. I recommend throwing away the first millimeters of pasta that come out of the tube. Place a small amount of thermal paste on the PS4 CPU, pressing the pub the tube of the Night NT-H1. The quantity to be inserted must be sufficient to cover, once spread, the entire surface of the CPU. There are those who suggest to put the amount of thermal pasta equivalent to a grain of rice, and then let the pressure between CPU and heatsink to spread it.
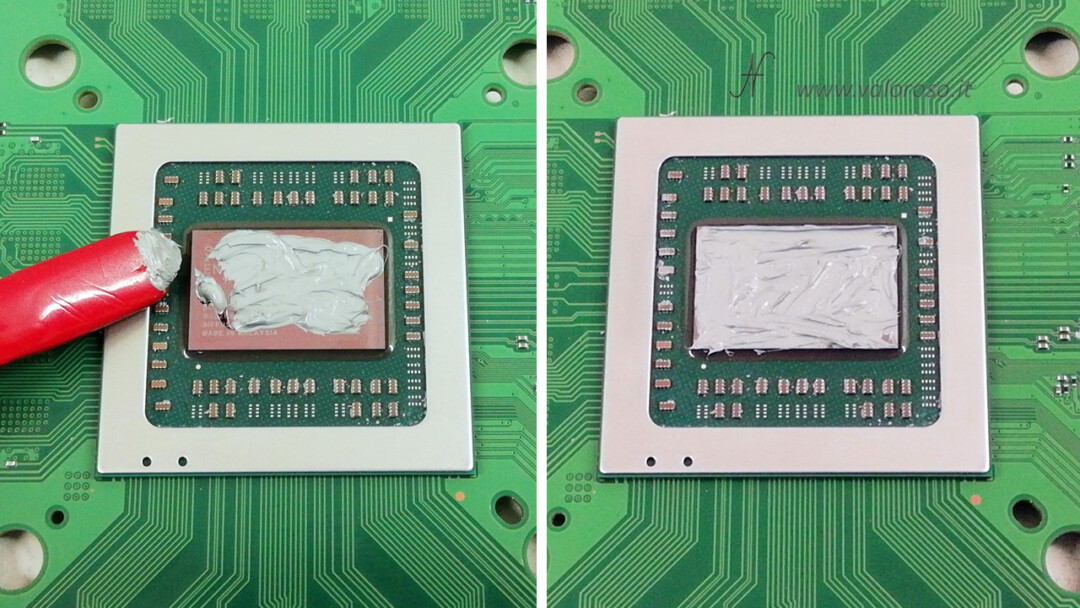
I recommend placing a small amount of thermal paste on the PLAYStation 4 CPU, and then spreading it with a small plastic or rubber spatula. In this way, you will be sure to put the right amount to reach the entire dissipating surface of the CPU, but without exaggerating. The layer of thermal paste on the CPU must be quite thin, as you note in the photos below.
Both situations are wrong: too much thermal paste, as well as too little, can compromise the transfer of heat from the CPU to the heatsink.
Continues...
Perfect, we have completed all internal maintenance:
- thorough cleaning of all parts of the PlayStation 4;
- cleaning of the heatsink and fan;
- replacement of ps4 pro thermal paste;
- replacement battery in the clock buffer.
We can proceed to reassemble the PlayStation 4 Pro. This is the subject of the third article.