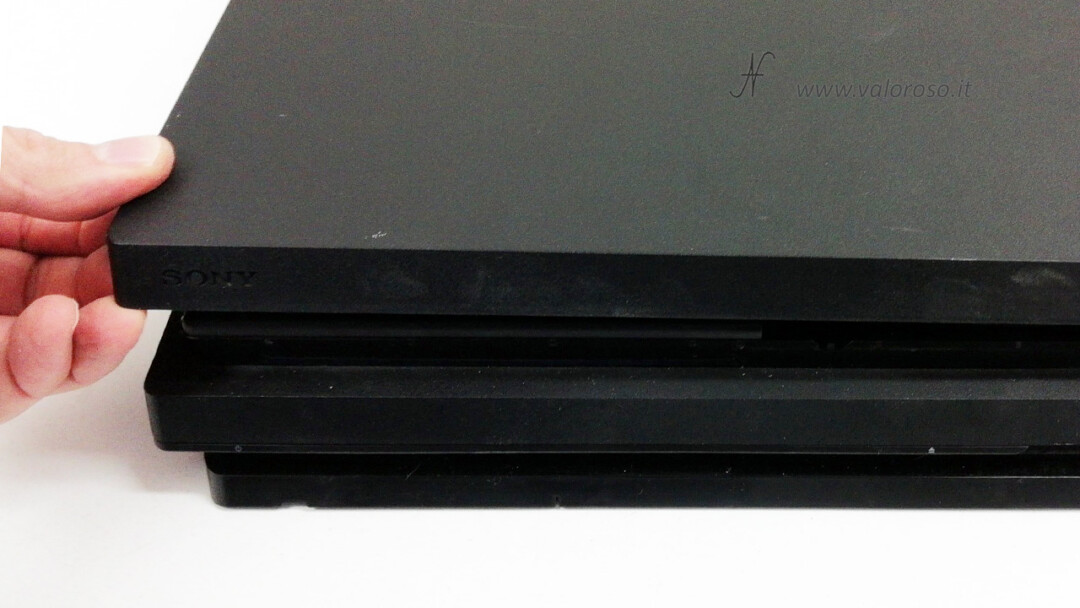
Have you just bought a used Sony PlayStation 4? Does the fan run so fast that your PS4 will soon take flight? Is the PS4 Pro too noisy? Well, let me tell you one thing: it's not normal. Thankfully, the solution is quite simple. You have to clean the Sony PlayStation 4 console and change the thermal paste of the CPU. In this first article, let's see how to disassemble the Sony Playstation 4 Pro. In the second article, we will see how to change the thermal paste of the CPU with the Night NT-H1, how to change the battery and how to clean the heatsink and fan. Finally, in the third and last article, we will see how to reassemble the PS4 Pro.

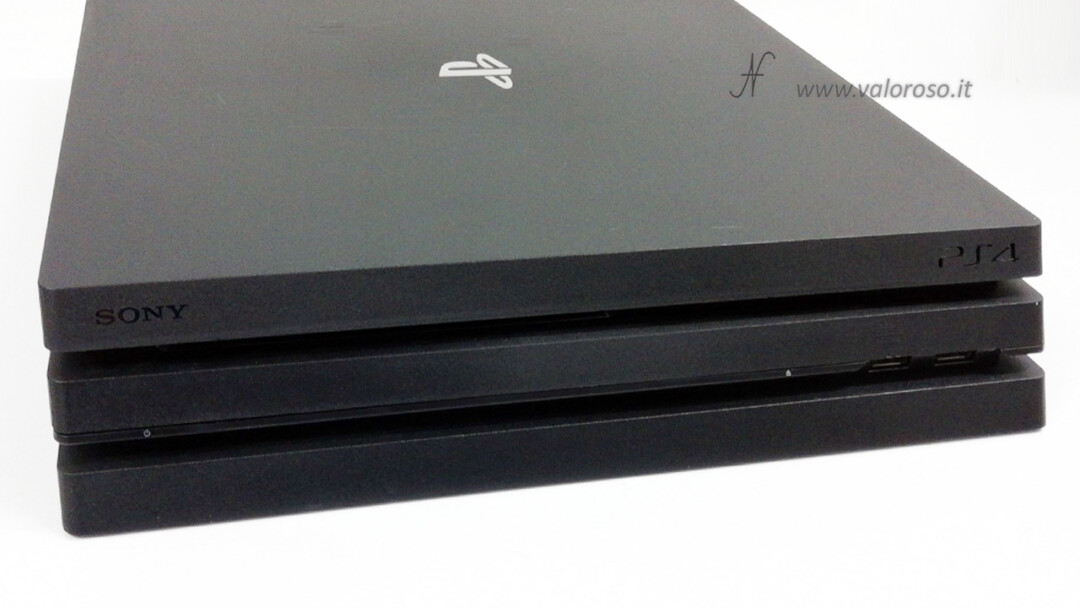
It is necessary to clean all the Sony Playstation4, also the slim. In this article we see how to disassemble the Sony PlayStation 4 Pro, but it is evident to clean on all used consoles.
In all, The disassembly, cleaning and reassembly operation can take about 4 hours, as long as you already have the tools and thermal paste. Read on to find out what you need.
Problems Sony Playstation console used, dirty
If you notice that the PS4 fan is spinning too fast, even if you're not playing games, the console is most likely dirty. Does the PlayStation 4 make too much noise?
I recommend cleaning the Sony Playstation console even if you purchased it new, but time has passed. There is no precise deadline. You can think of cleaning it every two years, or you can evaluate it only when you notice that the fan runs too quickly.

By reading these three articles, you will realize if you are able to dismantle the Sony Playstation 4 Pro without combining Casini. Then ... you also have to come back! This is why I recommend, if you don't have a good manual skills, to contact a professional.
The necessary tools are quite common, reading these articles, you will realize it.
How to disassemble the Sony Playstation 4 Pro
Let's start with a couple of precautions:
- Try your PlayStation before you open it, especially if the work was commissioned by a friend. In this way, if there is something wrong, you will find out before you disassemble it and make yourself accuse of damage!
- Disconnect the power cord! Before opening any electrical equipment, you must disconnect all cables, in particular, the power supply one.
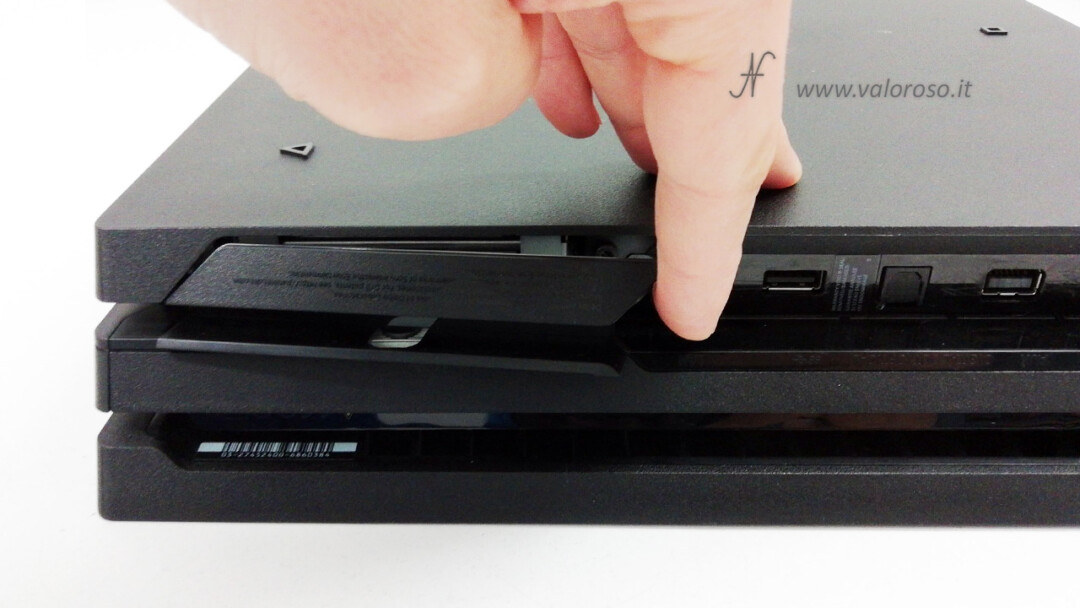
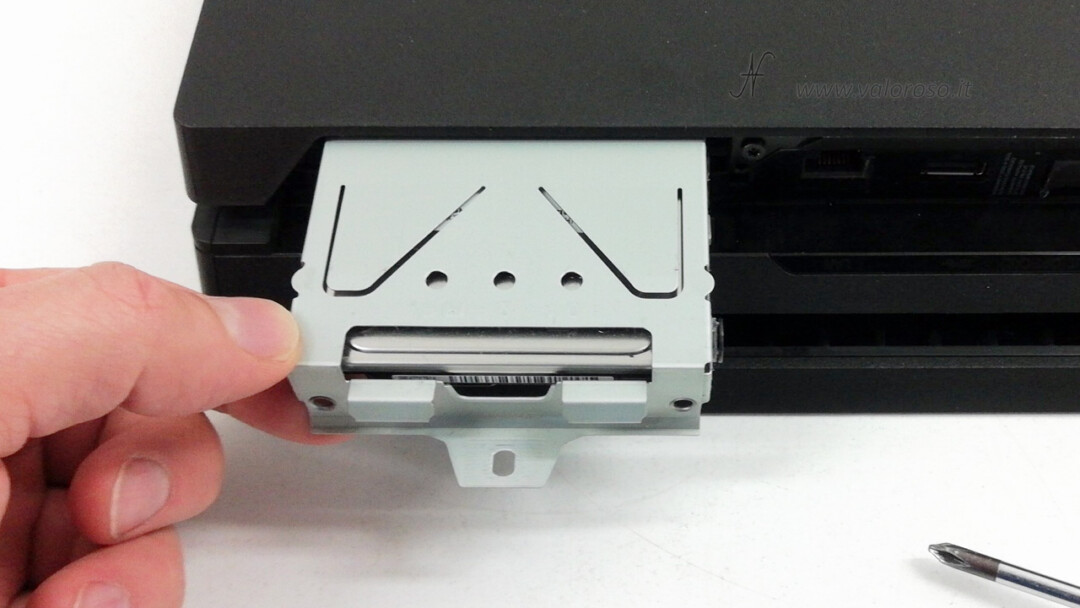
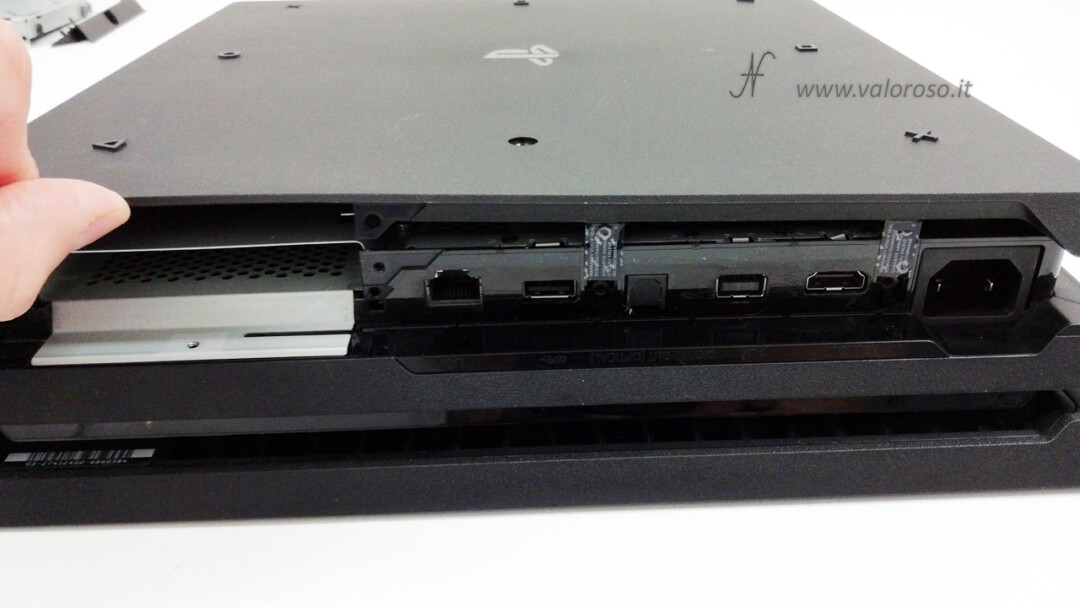
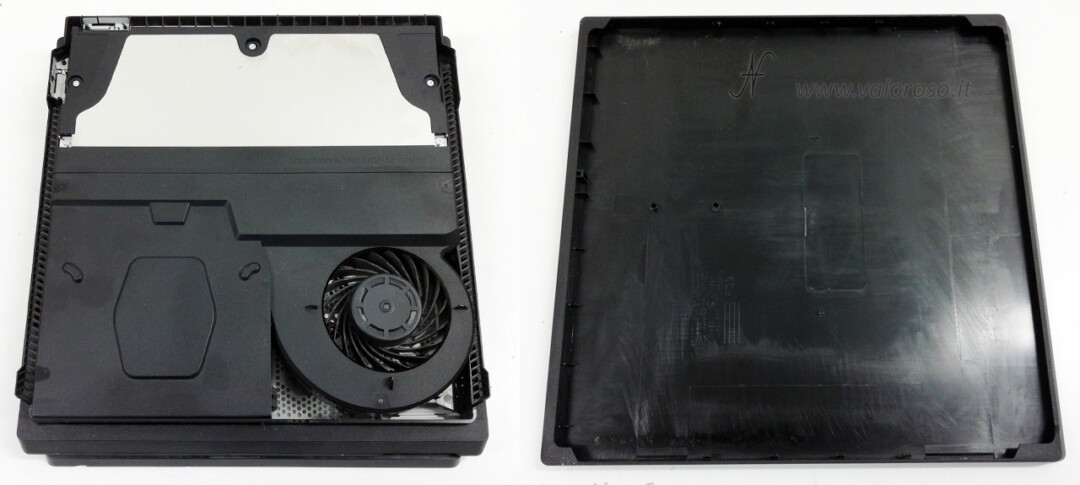
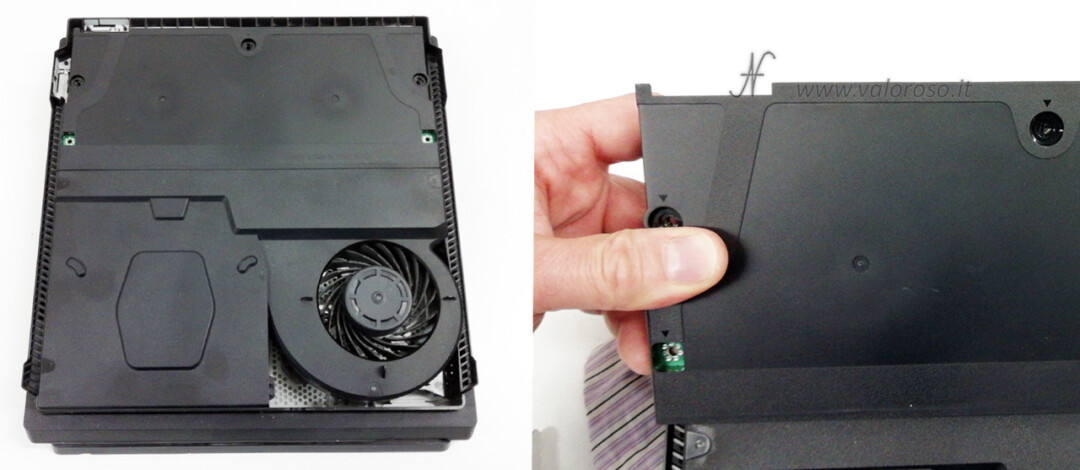
Let's see how to disassemble the Sony PlayStation 4 Pro. Let's turn it up above and detach the rear door of the hard disk.

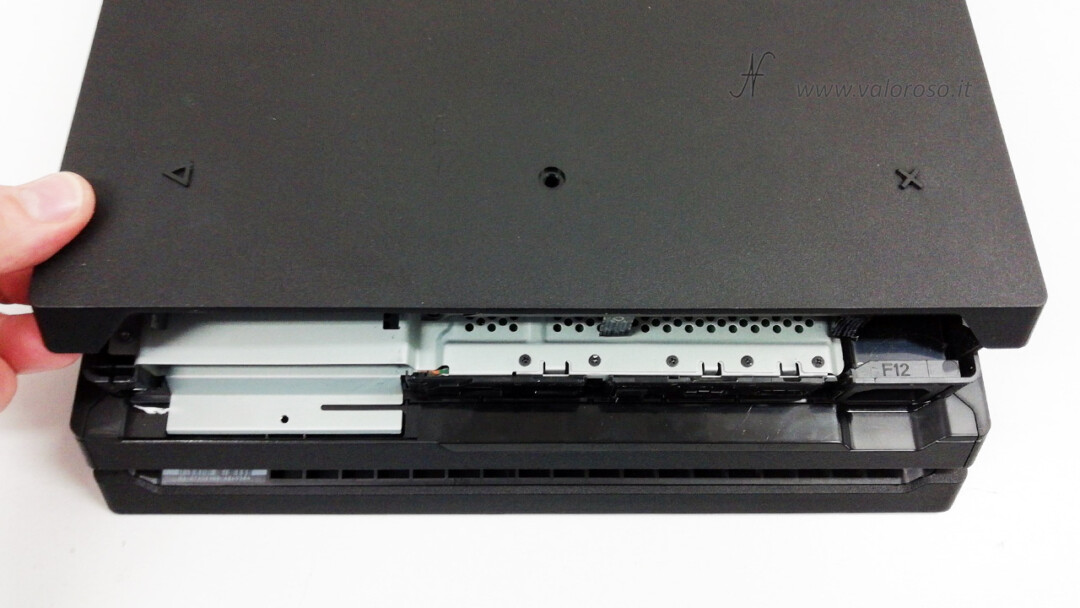
At this point you can reach the PS4 hard disk. We unscrew the screw that keeps it fixed to the support.
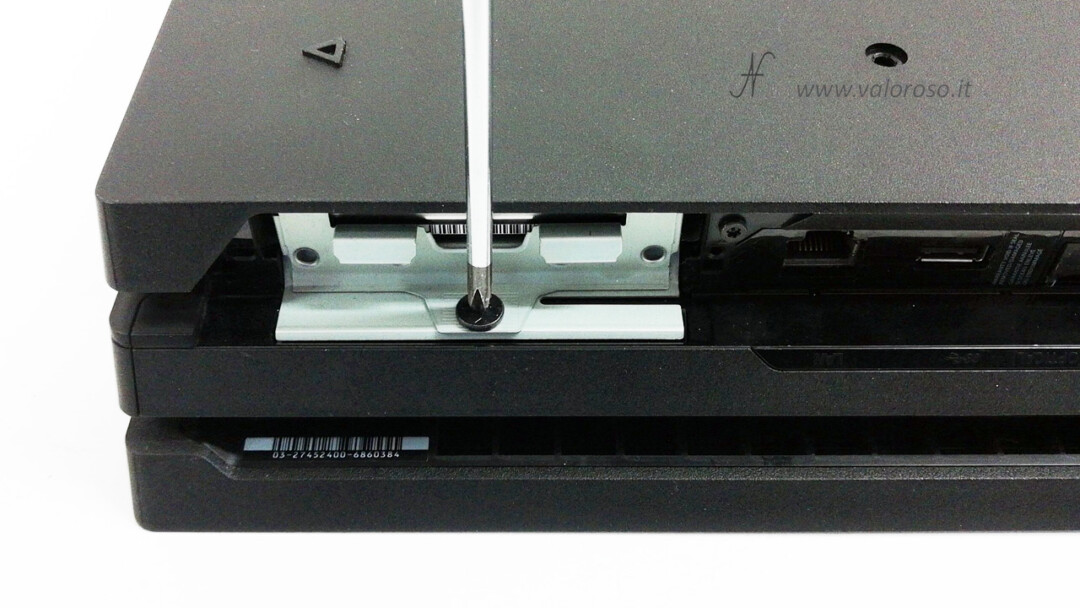
Possiamo sfilare l'hard disk dalla PlayStation 4 Pro. In questa PS4, l'hard disk è da 1TB, ma ci sono anche modelli differenti: con hard disk da 500GB o anche da 2TB. L'hard disk in dotazione con questa Sony PlayStation 4 è un normale HDD meccanico da 2,5", SATA, 1TB.
Remove the bottom panel of the PS4: how to disassemble the Sony Playstation 4 Pro
You disconnected all the connectors, didn't you? Especially the feeding one? Continue! Let's see how to disassemble the Sony Playstation 4 Pro.
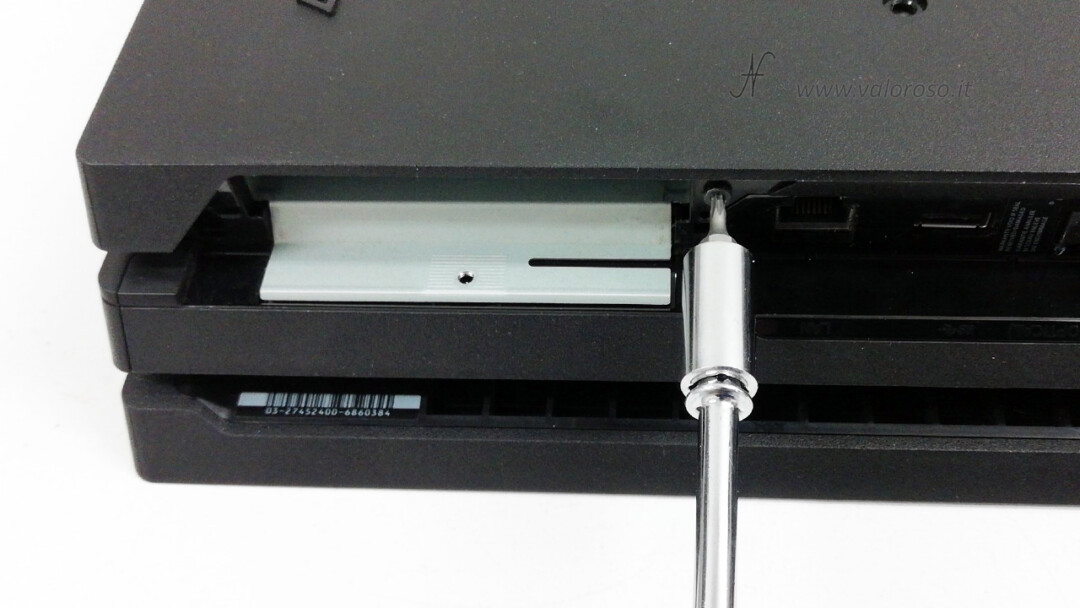
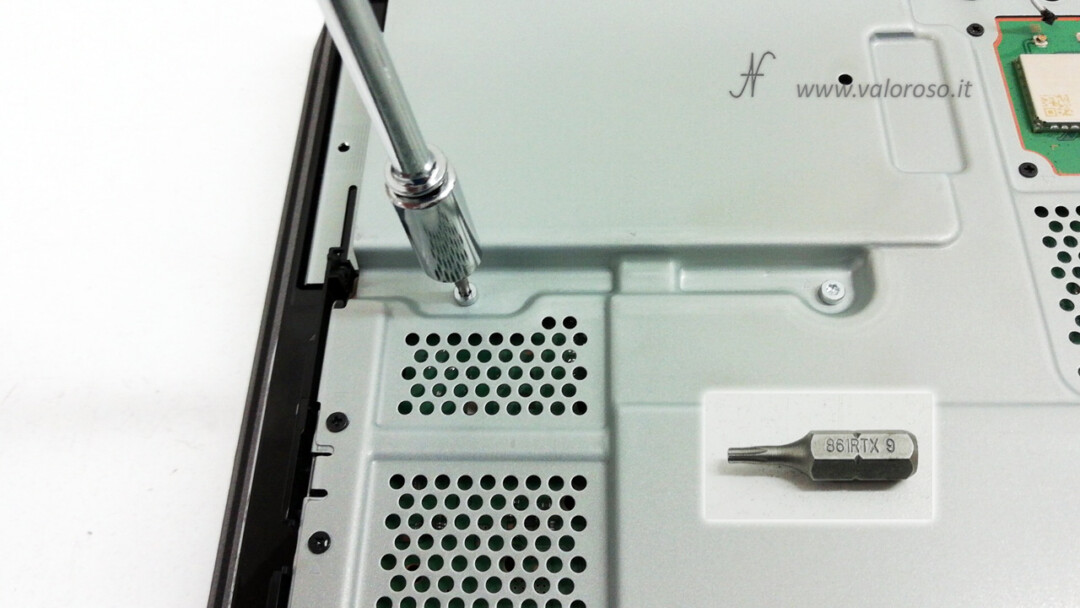
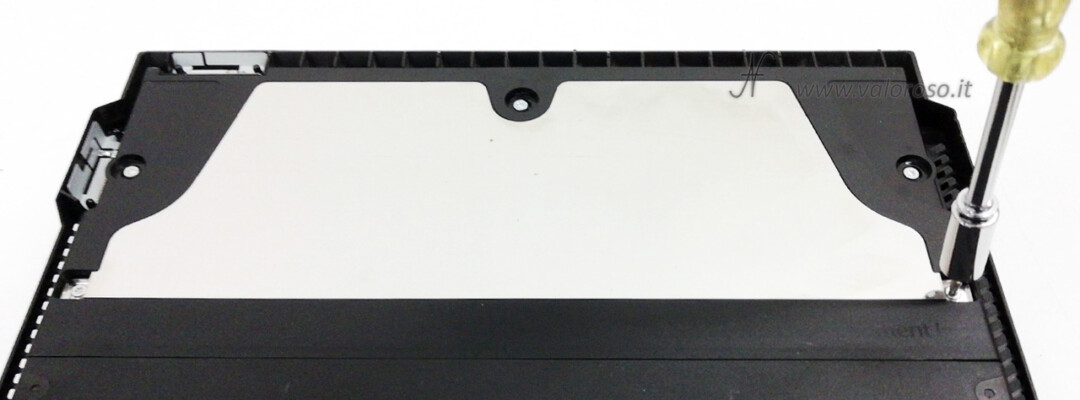
We remove the lower panel. There are 3 Torx T9 screws to unscrew. The first is just on the right of the hard disk compartment.
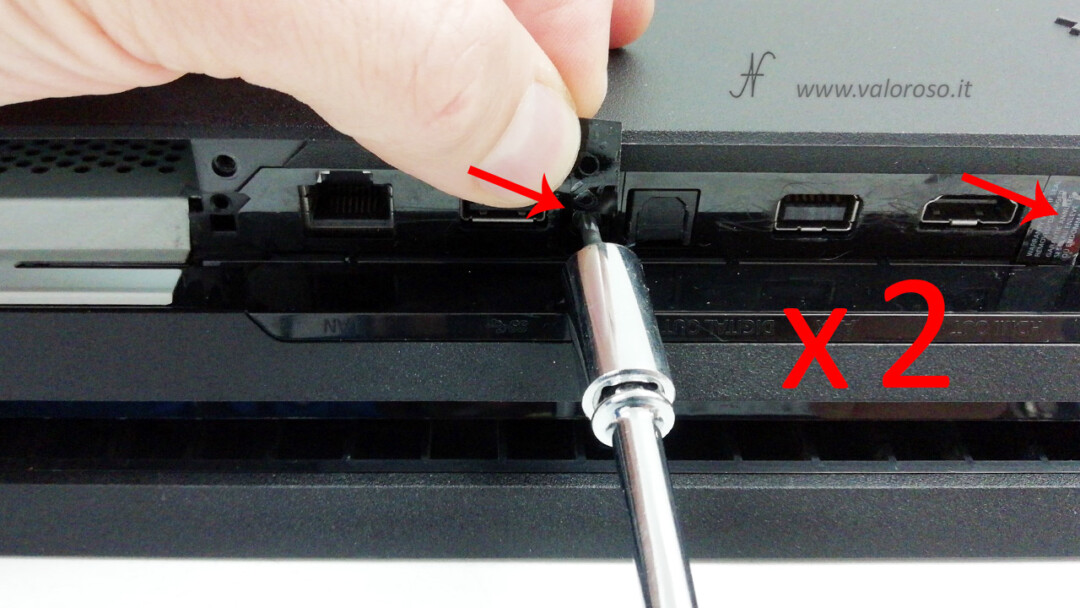
The other 2 screws are located a little further to the right, behind the warranty labels. The labels come off quite smoothly, without breaking. These 2 screws are also torx T9.
This operation is rather delicate: you have to lift the lower lid, but without breaking it! Pull up the part of the lid just to the left of the hard disk. Continuing to the right, there are clips to be released in the center, where we unscrewed the Torx screws. Lift the lid to release them.
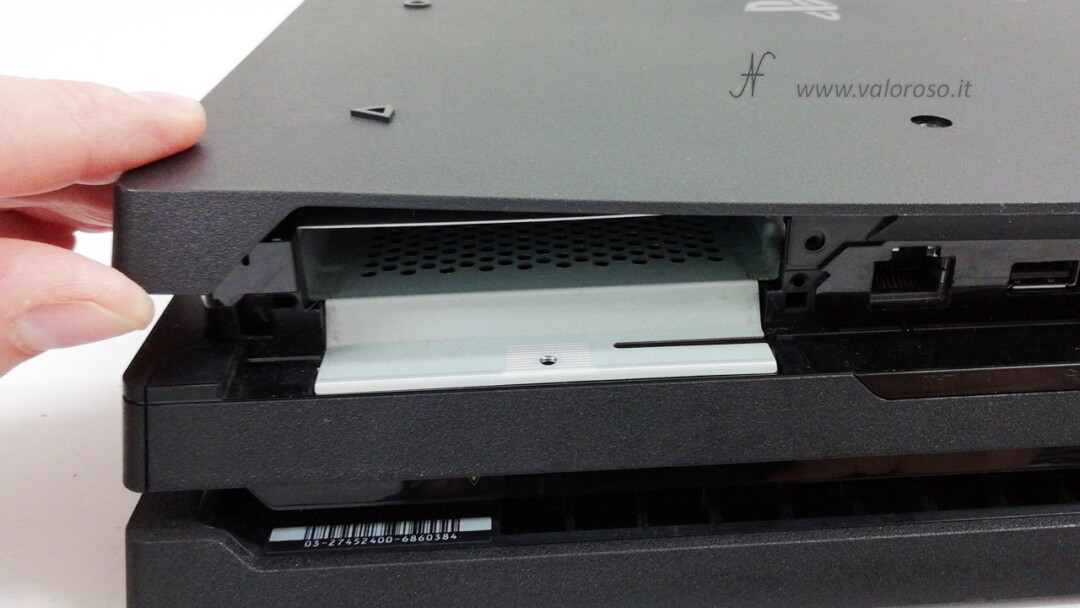
Finally, the right side of the lid must also be lifted.
To remove the lower panel, also on the other side, simply push it backwards. Or rather, since we were lifting the panel from the back of the PS4, when it has lifted, we must push it towards the front of the console. The panel slips and completely releases, effortlessly.
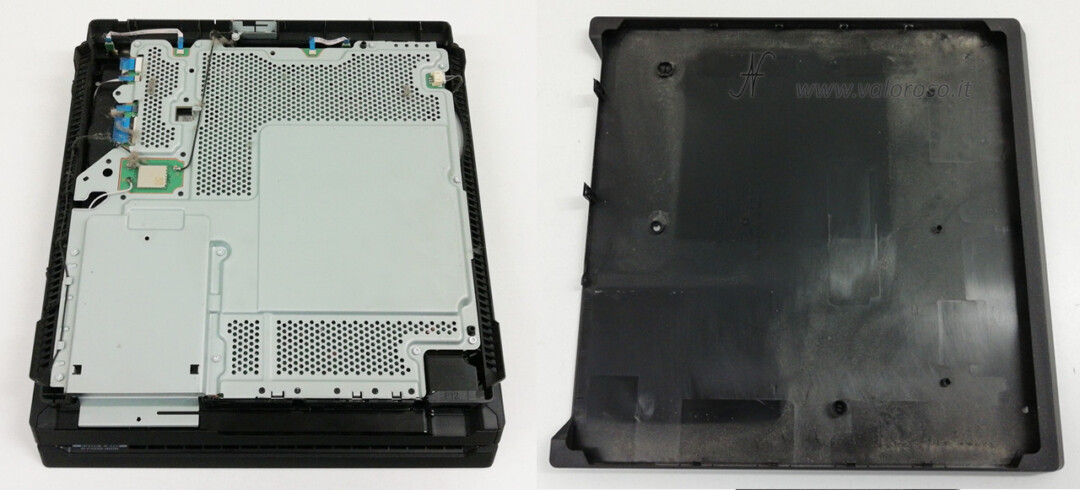
At this point we can see the interior of the PlayStation 4 Pro, which is protected by a metal shielding foil. We can also notice the first dust balls, but ... it is nothing compared to what we will see next!
Let's start to give a dusting, although we will see how to clean the PlayStation 4 Pro in the second article. Always in the second article, we will see how to change the thermal pasta of the CPU and how to replace the clock CR2032 battery.

Disconnect the cables from the Sony PS4 Pro motherboard
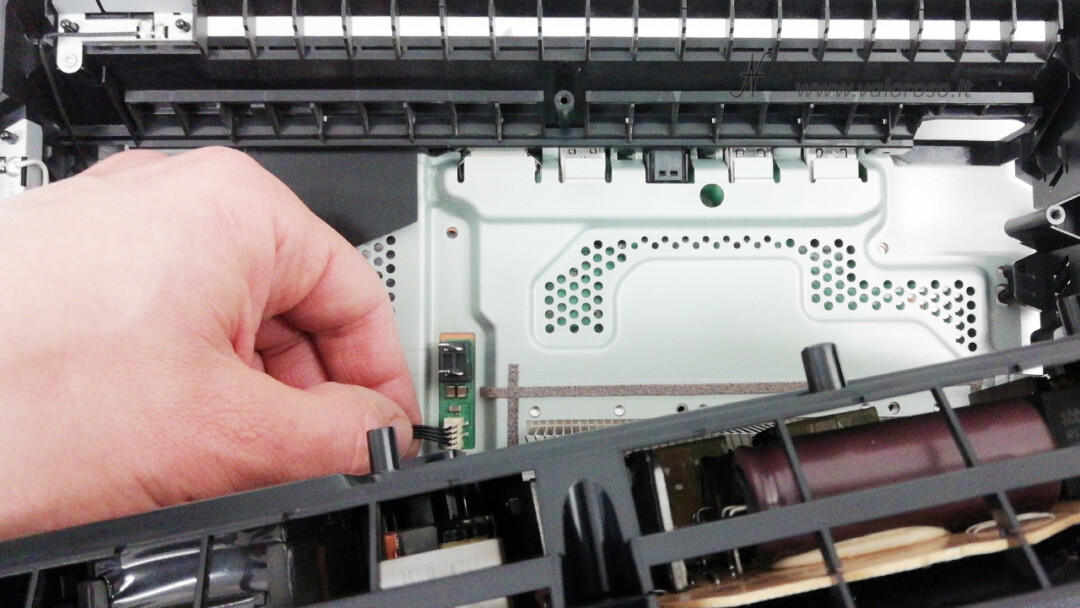
Before removing the protection sheet, we must disconnect all the cables. There are cables of all types and on different sides of the mainboard. We start disconnecting the smaller dishes: simply pull them, taking them from the blue side, in the opposite direction to the connector, towards the outside of the motherboard.
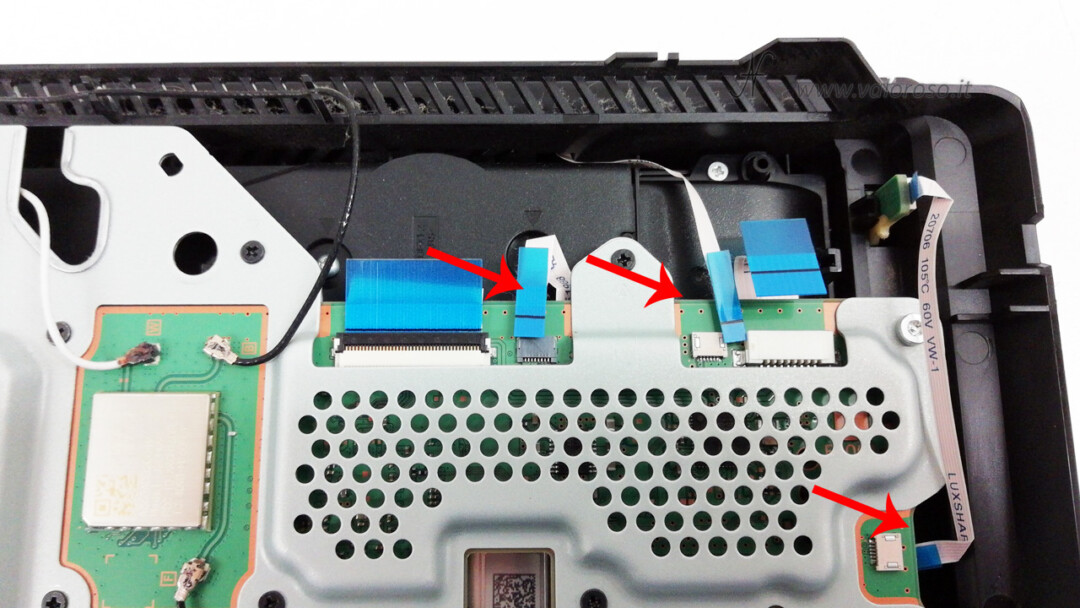
The wider cable, the one with the most poles from the CD player, DVD, Blue Ray, should not be pulled immediately. At first you have to open the connector, lifting the dark plastic tongue. Subsequently, we can remove the flat cable, to the outside of the motherboard.

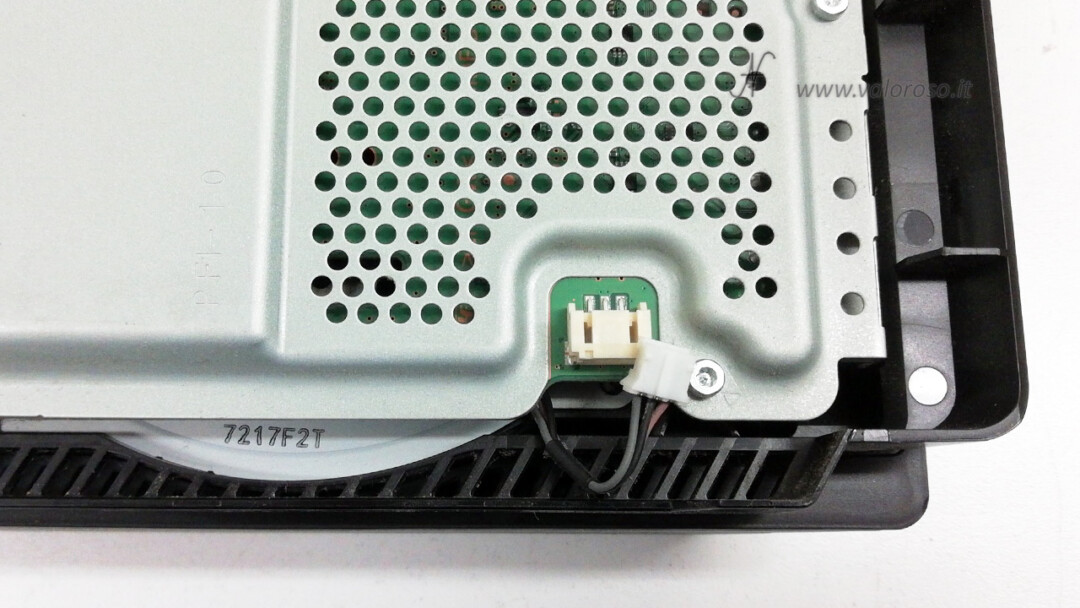
We also disconnect the three-pole cable of the fan, on the opposite side of the motherboard. In addition, there is another small flat cable, near the fan connector.
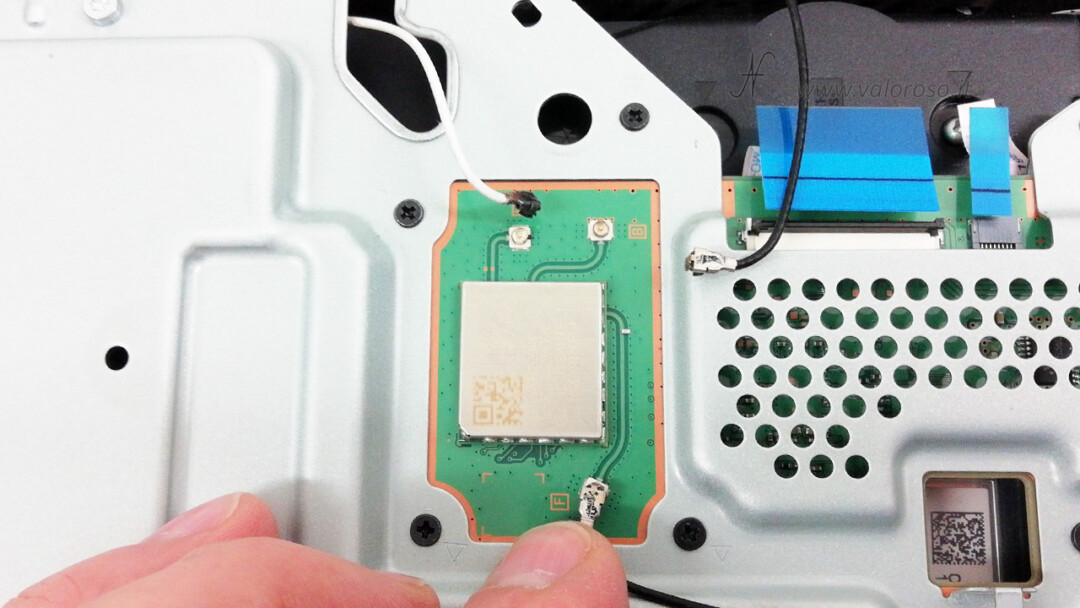
Let's now take care of the three coaxial cables with U.FL connectors We disconnect them from the WiFi and Bluetooth card simply by pulling the connectors upwards (towards the sky, so to speak!), Without bending them.
Disassemble the bottom metal casing of the PS4 console
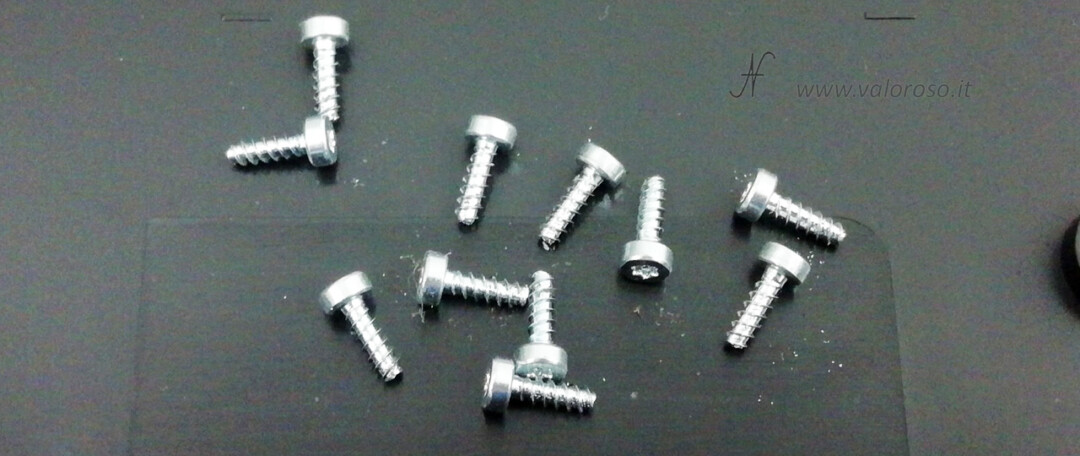
When the cables are all disconnected, move them away slightly so that they do not get in the way of the metal screen. We can unscrew all the screws of the shielding. There are two types: torx T9, steel-colored, and also cross-shaped, black. Let's start with the torx T9 screws.
We put the screws aside, so as to remind us that they are part of the metal shielding.
Now unscrew small black star screws. These too ... are several. Near each screw there is a small arrow, which will help us in reassembly.
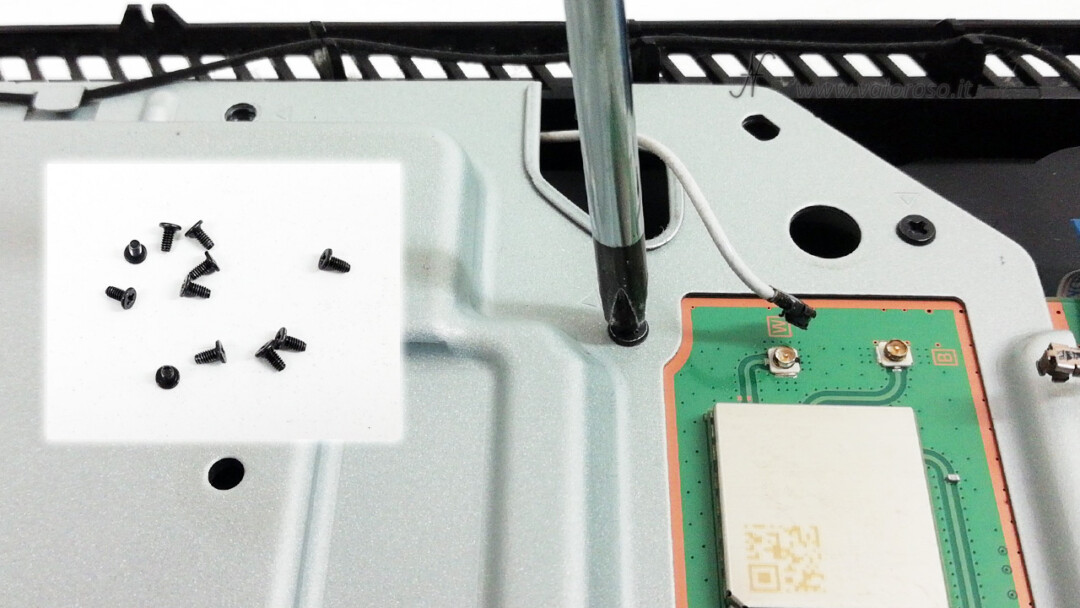
Detach the thin coaxial cable from both the plastic chassis clips and the guides on the metal shield.

Let's continue the maintenance: how to disassemble the Sony Playstation 4 Pro.
Paying attention not to tear any cable, without making force, we can move the metal sheet away from the motherboard. In the photo, we see the free shielding, front and back.

You can see the motherboard of the Sony Playstation 4 Pro, which has another metal shielding to be removed.
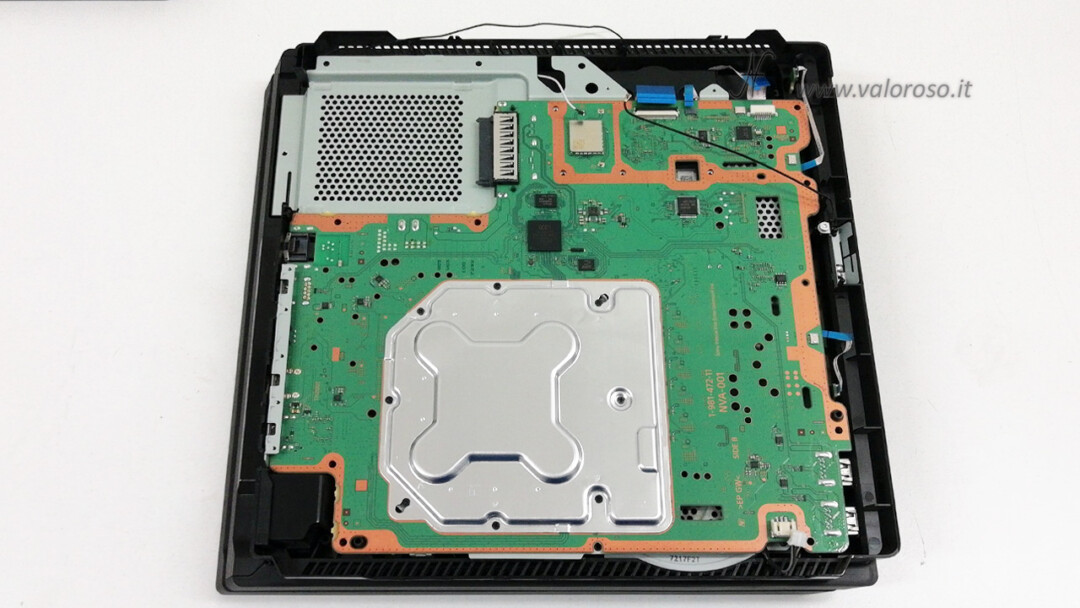
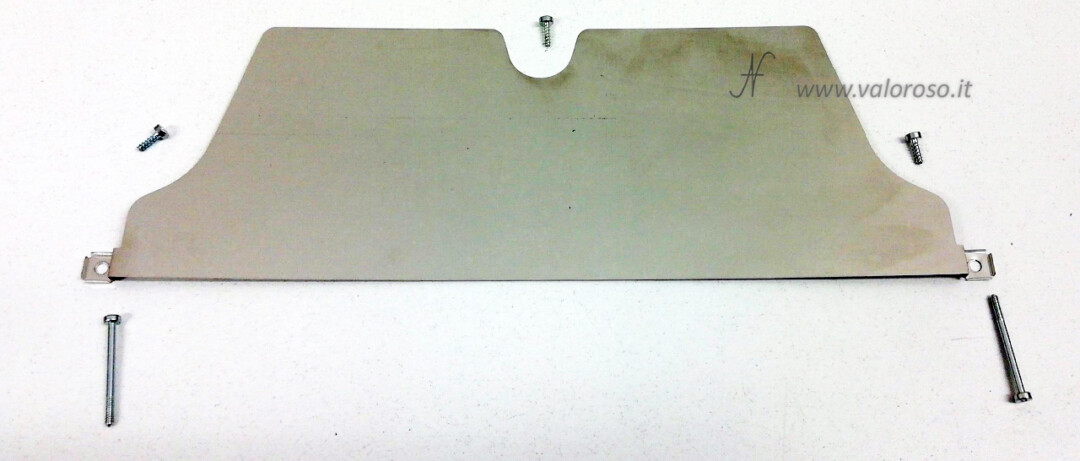
This shield protects the underside of the PCB, below the PS4 CPU. We unscrew the black star screws. There are small arrows next to the screws.
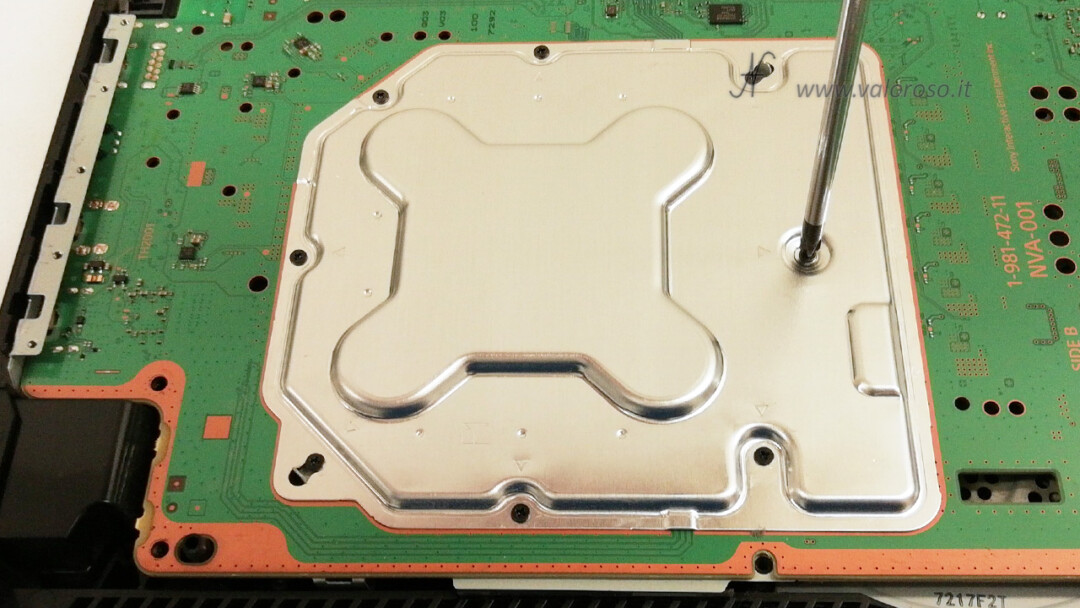
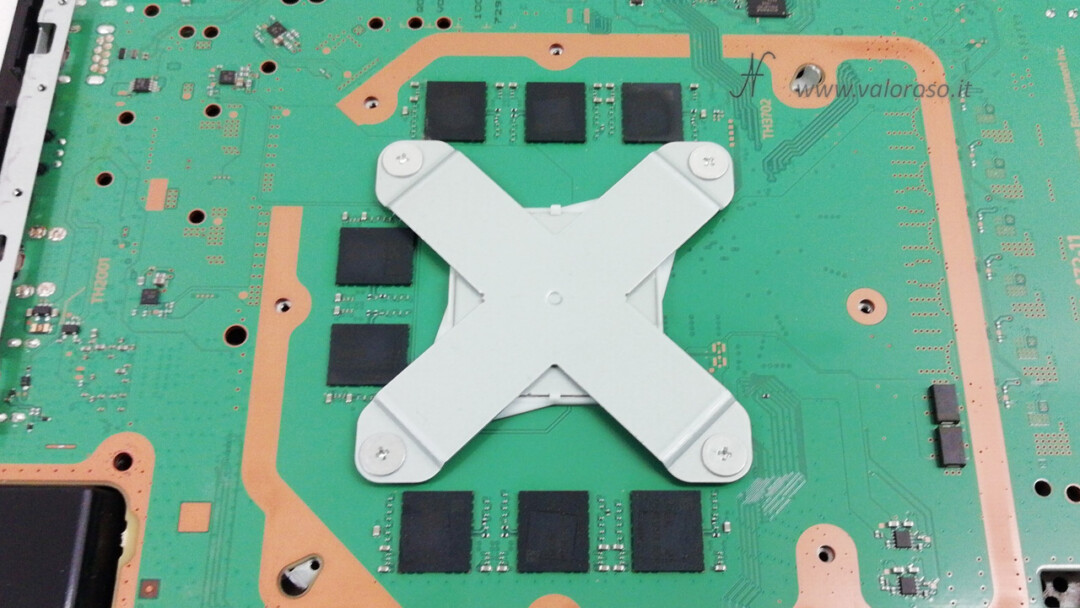
We lift the small metal screen, effortlessly. Here is the bottom support (X clamp) of the PS4 microprocessor.
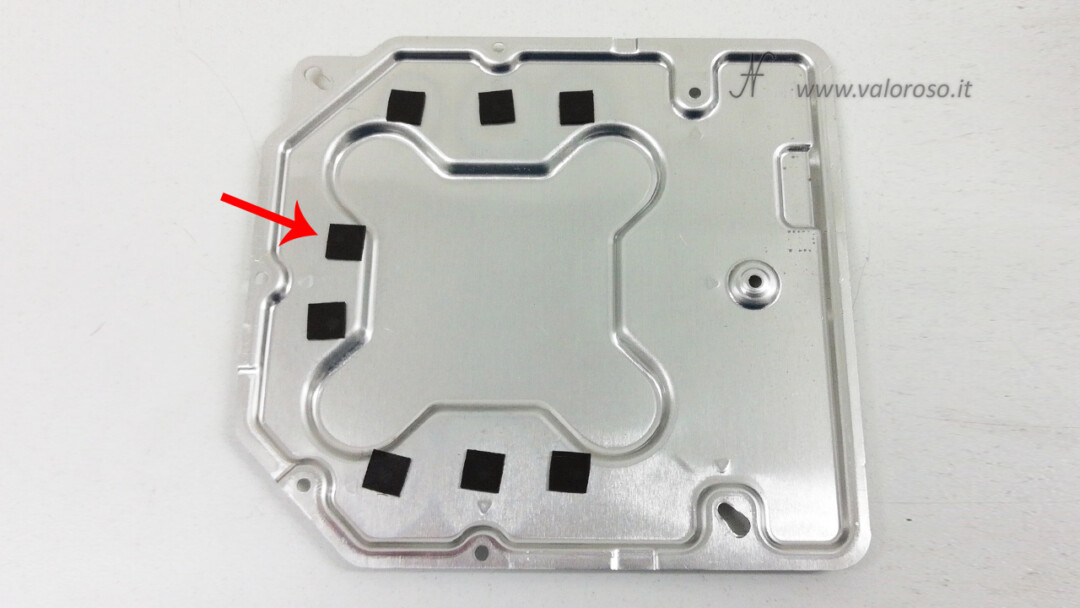
Pay attention to the underside of the small metal shield that we have just removed. There are 8 thermal pads that serve to dissipate the heat generated by the PS4's GDDR5 RAM. These pads must all be present and must correspond to the positions of the 8 RAM. In all, the PlayStation 4 comes with 8GB of GDDR5 RAM.
Unscrew the X clamp of the PS4 CPU
The PS4 CPU is also called Apu. It is an integrated AMD circuit, personalized for Sony.
It consists of the actual CPU (an X86-64 AMD Jaguar processor, 8 cores) and the GPU (the AMD Radeon graphic engine from 4.20 TFLOPS).
The graphics engine of the PS4 Pro is more powerful than that of the standard PS4, in fact it is fast 4.20 TFLOPS, against 1.84 TFLOPS of the standard PS4. TFLOP is a Tera FLOP, that is, a trillion floating-point operations per second.
Theory aside, let's unscrew the 4 star screws of the X clamp. Let's unscrew them by proceeding to X, so not making a complete turn.
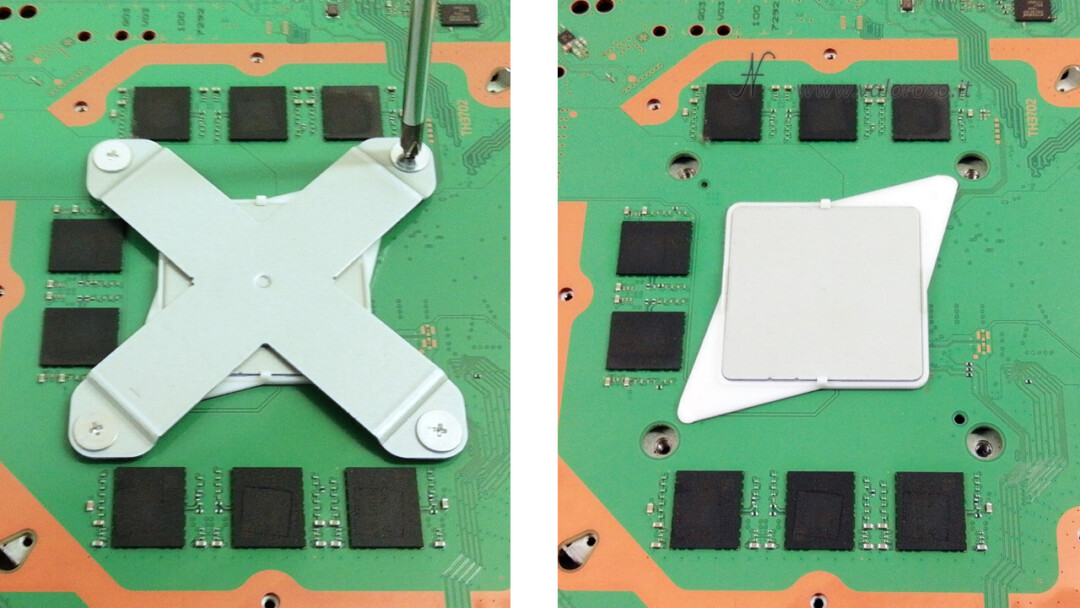
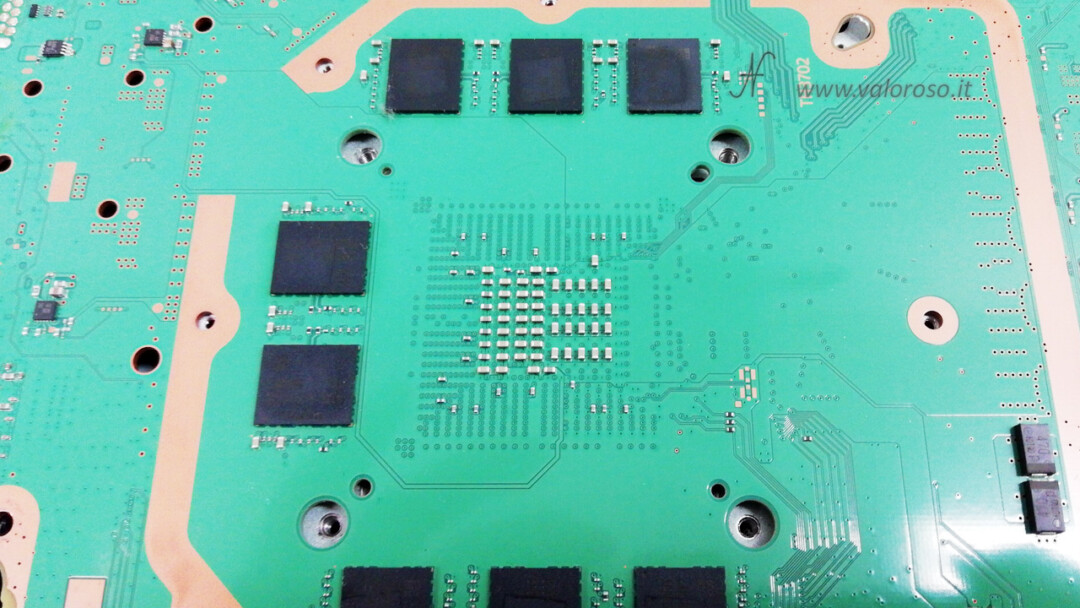
Under the X CLAMP, there is another support, which is removed simply by lifting it. The lower part of the mainboard does not show the processor, which is located on the other side. There are some filter capacitors.
How to disassemble the Sony Playstation 4 Pro: the motherboard
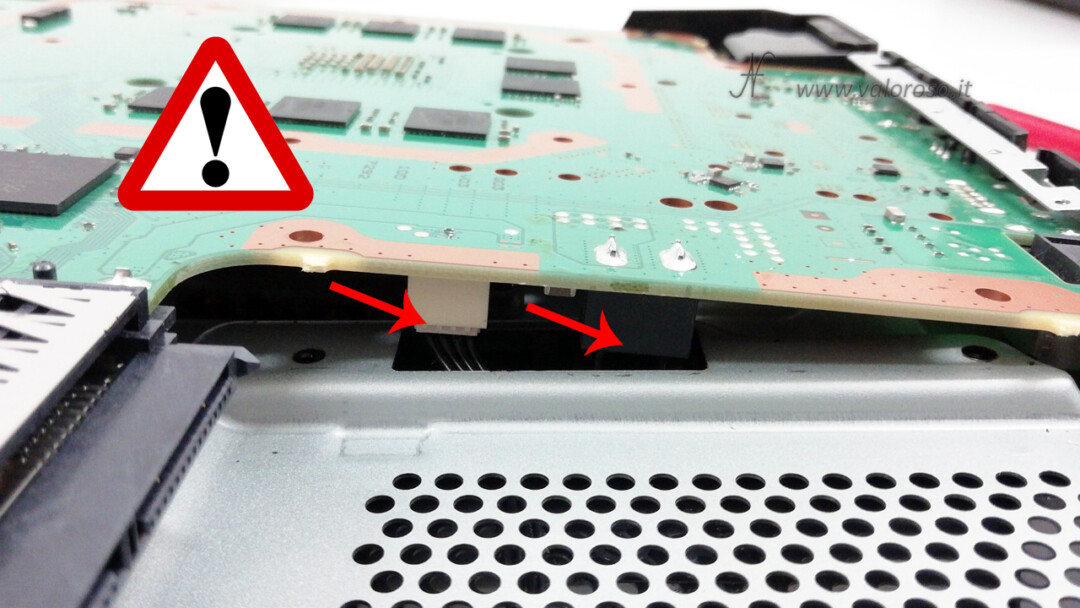
Now, to remove the motherboard there is an absolutely uncomfortable school of thought. There are those who remove it simply by lifting it and disconnecting the cable that comes from the power supply. In reality, our goal is to clean the fan and the cooling foam found on the opposite side. It is therefore more convenient to disassemble the power supply, on the other side of the PS4, disconnecting the connectors on that side. Therefore avoid following the following image and proceed further.
Remove the top panel of your Playstation 4 Pro
Turn the PS4 on the other side and remove the upper plastic panel. It releases by lifting it upwards (towards the sky!), With decision, but being careful not to break it. It must be lifted on the front, one part at a time, where there are the Sony and PS4 writings.
As we did for the bottom panel, when you unhooked the front clips by lifting the panel, you can slide it back to the console, to unhook it completely, effortlessly.
The interior of the PS4 Pro, on the upper side, shows the power supply (PSU), covered by a metal screen, and the cooling fan.
We continue further, let's see how to disassemble the Sony Playstation 4 Pro. As I said before, to easily remove the printed circuit board, you have to disassemble the power supply. There are 5 Torx T9 screws to unscrew.
Put back the screws and the protective plate so as not to mix it with the other components of the PS4 that we have previously disassembled.
Paying attention not to rotate it too much, at least initially, you can raise the PlayStation power supply. Don't raise it too much, just raise it by an centimeter, then rotate it towards you.
Behind the power supply you can see:
- the power supply slats;
- another power connector.
From this side, it is very easy to unplug the power connector from the PS4 motherboard.
The PlayStation 4 mainboard is now free. It separates from the case easily, without any effort. When handling electronic components, remember not to wear electrostatic clothing. In particular, avoid woolen sweaters or fleece sweatshirts. Also, before touching electrical wiring or components, place your hand on a metal table leg, metal door, or other grounded object. In this way, you will avoid damaging the components with the electrostatic discharges of your body.
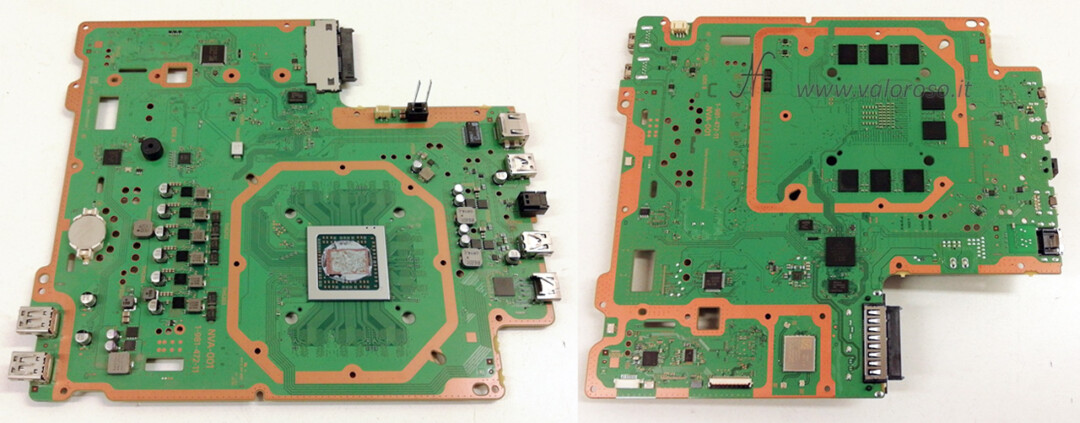
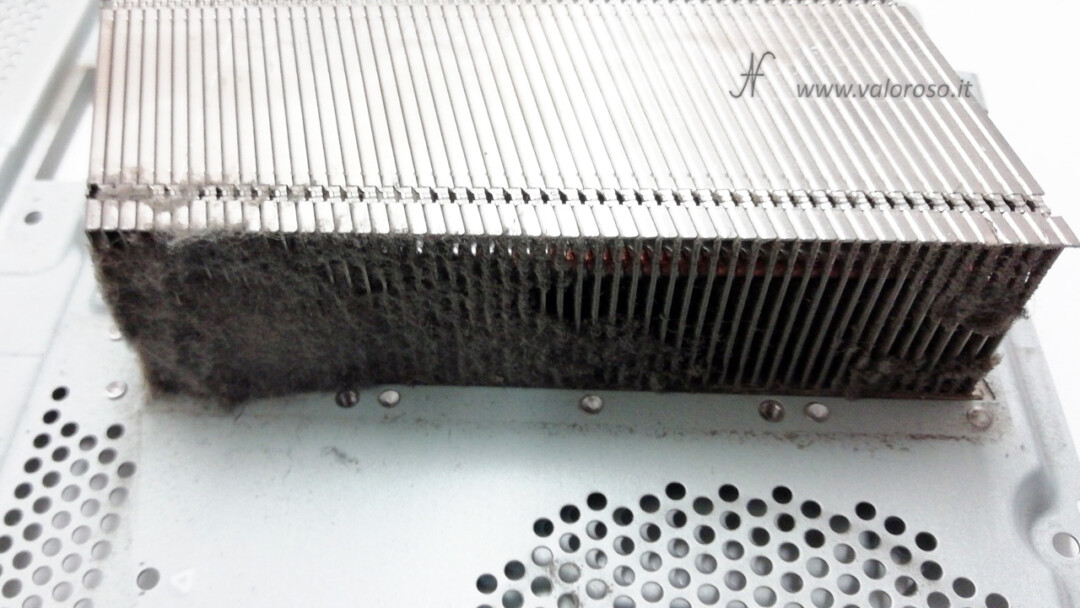
Finally we can also look at the CPU. Here's what's the first cause of the PlayStation 4 overheating: the thermal paste on the CPU is dry. In the second article in the series, we will see how to remove it. The dry thermal pasta is also present on the cooling alletta.
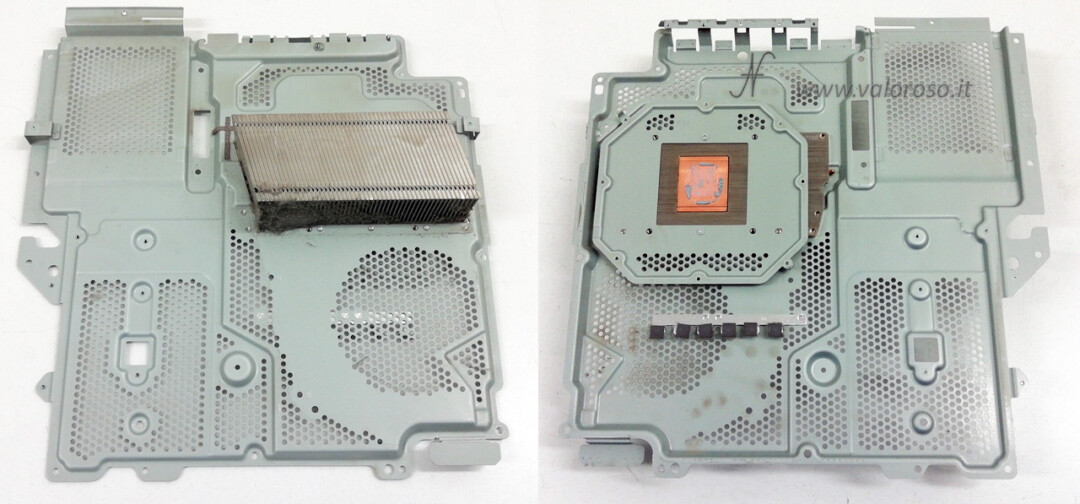
And now ... you can also see how poor there is among the slats of the cooling alletta! How can the air pass, with all this dirt? It is normal for the PS4 CPU to overheat, with these crap: the fan of the fan cannot pass.
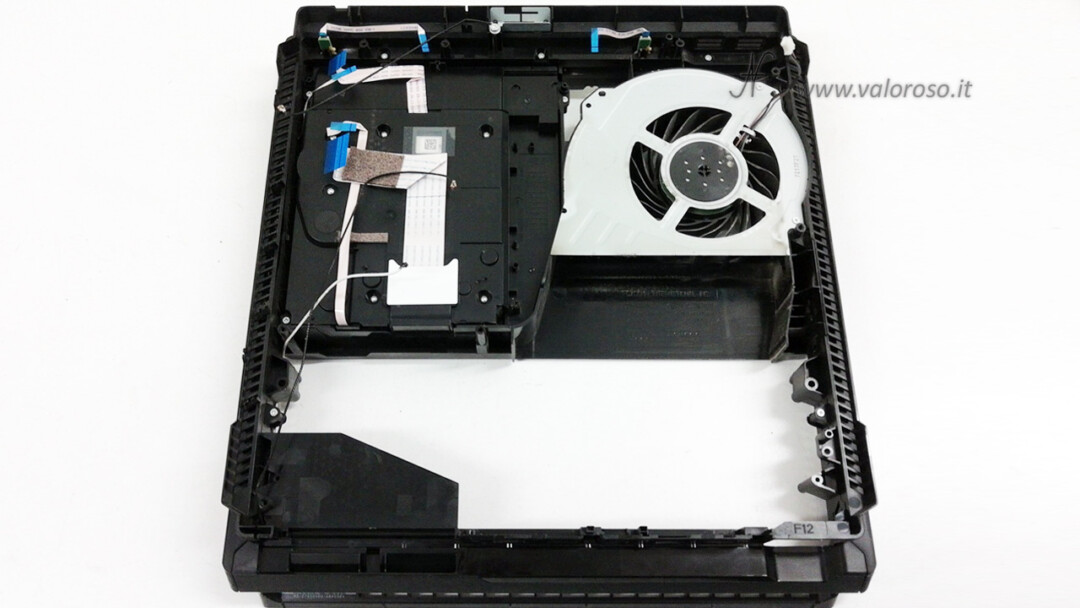
After removing the sheet with the cooling flap, there is not much left to disassemble on the PS4 ... We only see the CD player, DVD, BD on the left and the cooling fan on the right.
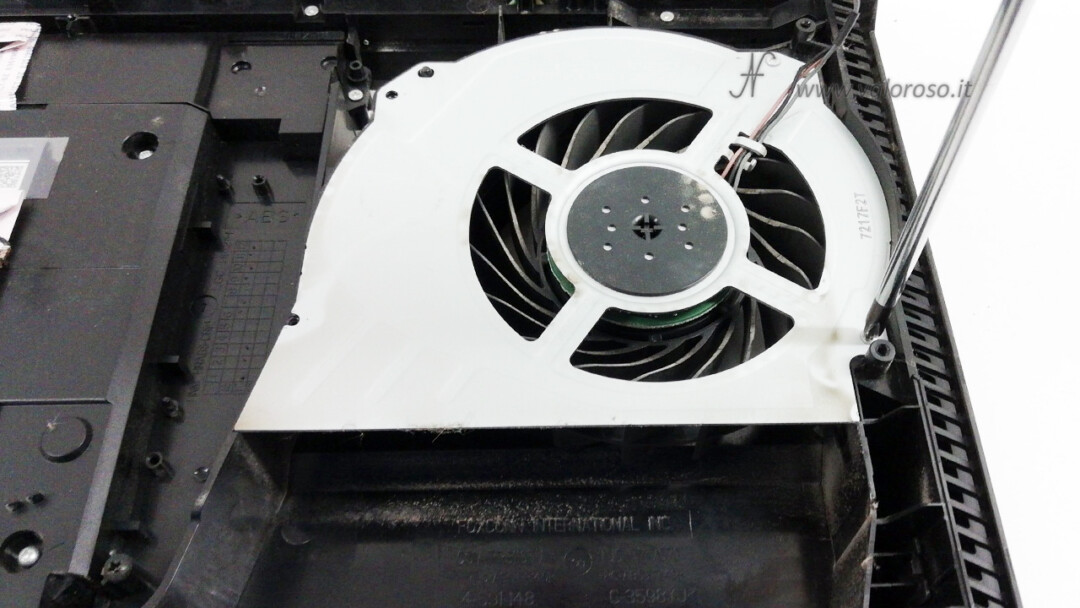
We continue to disassemble the PS4: we remove the cooling fan. There are only two Phillips screws to unscrew.
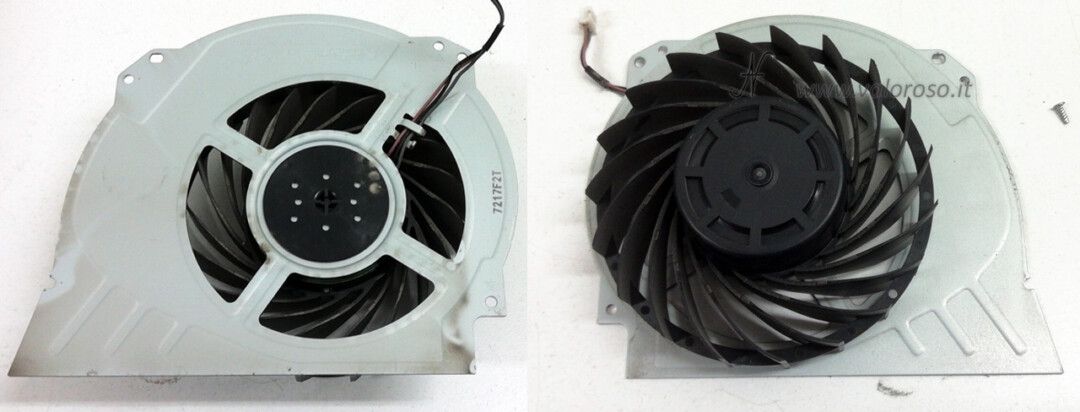
And here is the cooling fan. If it made a clean noise, like ... a private jet, then the fan is only to be cleaned. If, on the contrary, its noise was more like that of a helicopter, or that of a diesel engine, it is possible that the fan has disarmed and you have to replace it.
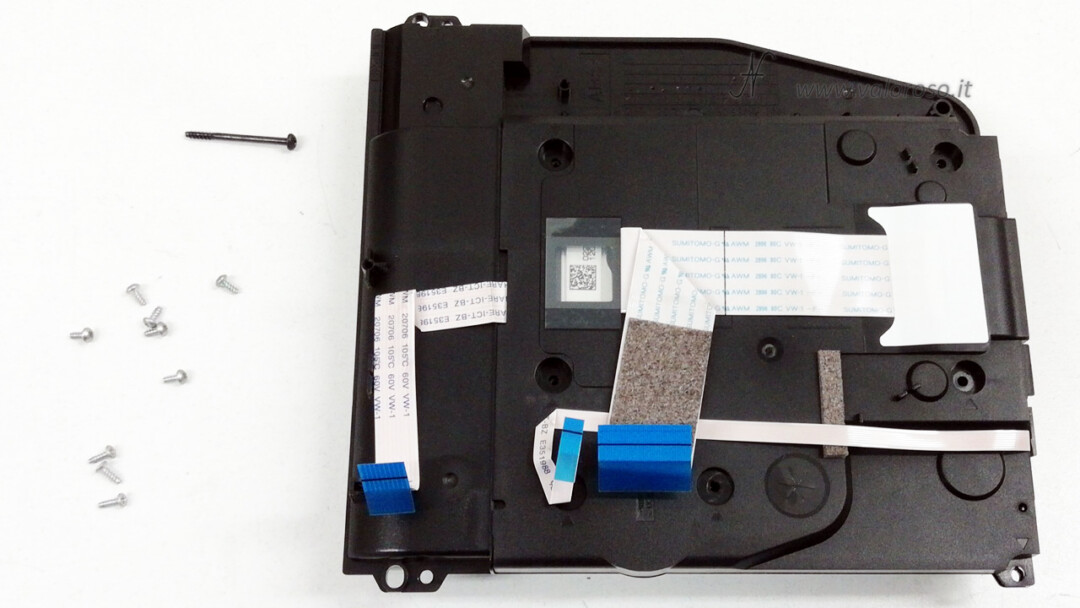
Out of pure curiosity we also remove the CD, DVD, Blue Ray Disc player from the PS4 chassis. This operation can be useful if you need to replace it, because it does not read discs, or if you see it particularly dirty.
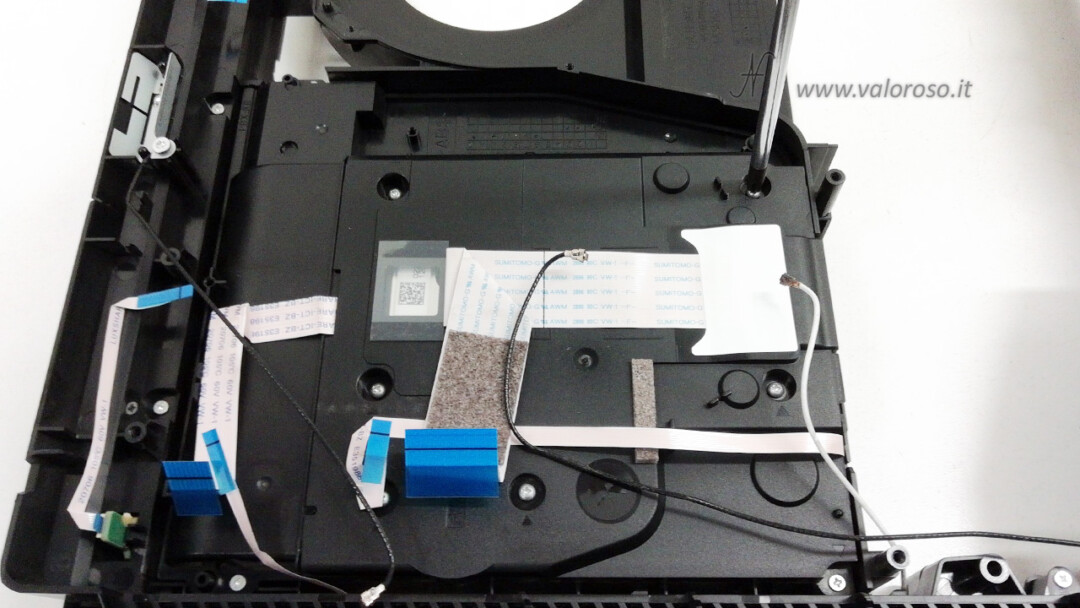
There are several Phillips screws to unscrew. Since they are of different shapes, you will have to remember the positions where they will be screwed back on.
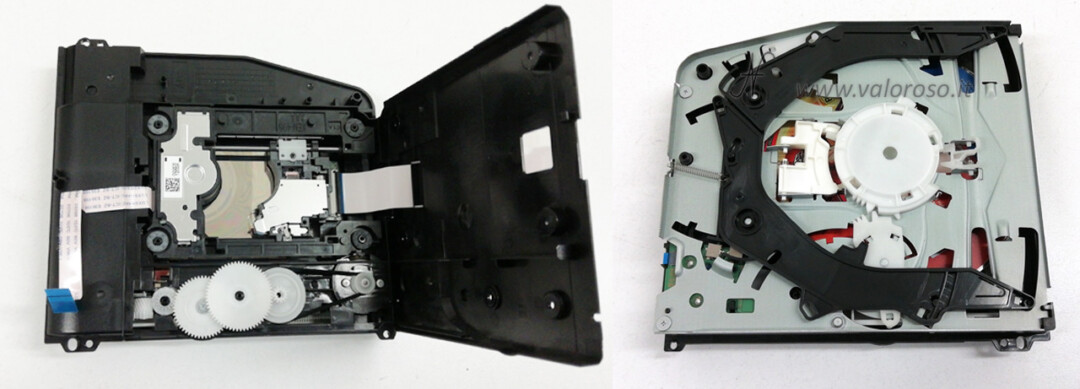
Here's how, inside, the CD player, DVD, BD of the PlayStation 4 Pro. This photo is for pure curiosity: as I wrote before, it is not necessary to disassemble the reader if there are no particular problems concerning him.
Continues...
Perfect! Now that the PS4 is in pieces and you have organized all the components so as not to mix them, we can proceed to clean everything. In the second article, we will also see how to change the thermal pasta of the CPU and how to replace the battery in the clock.
Hello. I have a Ps4 Pro with the problem of reading disc based on vertical or horizontal position. How can I fix it?
Hello. I would start by disassembling it to see if the headlight is clean and if there are any parts that are coming off. However, the spare part can be purchased online.