If you are among vintage computer enthusiasts, you certainly know the Commodore Amiga: real masterpieces in the history of computers. This machines, launched in the late 80s and during the 90s, conquered the heart of numerous users with a wide range of games and software, which have left an indelible imprint in the memory of all of us. Is there a way to get an excellent audio and video quality from these computers, when you connect them to the TV? Thanks to the RGB video adapter - Scart of Retromaniak, this is possible.

In the video and in today's article, I show you the assembly and use of the RGB-SCART video adapter designed by Retromaniak. This device allows you to connect your Amiga to the TV through an RGB connection.
RGB Audio / Video Adapter - Scart for Amiga: what it is and how it works
The RGB-Scart Audio/Video adapter is a solution designed specifically for Amiga users who try to improve the video quality of their computer.

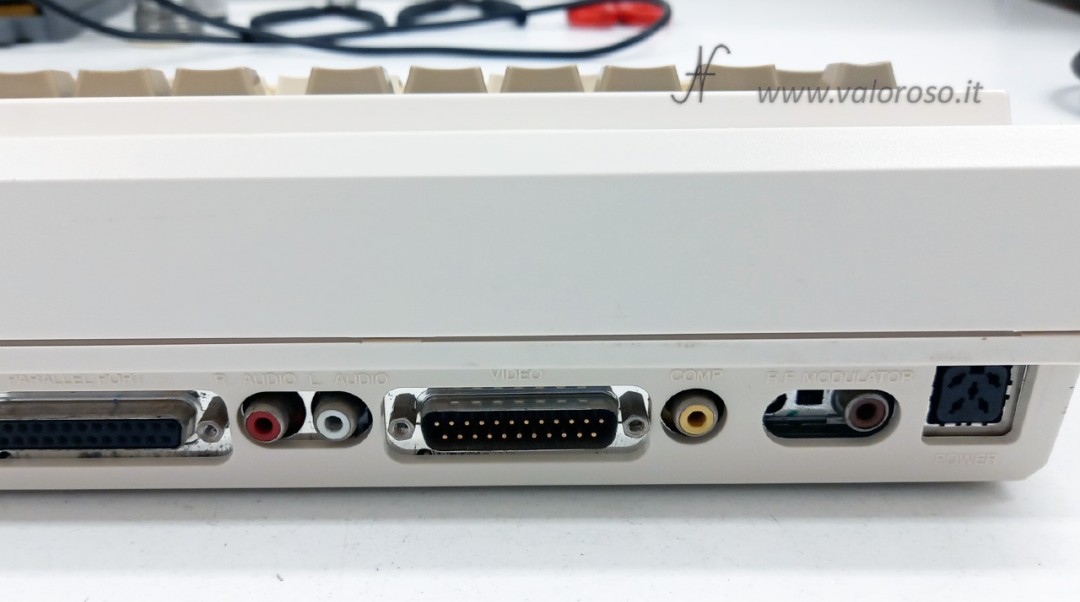
This device, designed by a retroelectronic expert like Retromaniak, is a solution for the Amiga Commodores that have a video exit with a DB-23 Poli connector. This means that it is compatible with a wide range of Amiga models, including Amiga 500, Amiga 600, Amiga 1200, Amiga 2000 and others.
This design is suitable for all TVs (both CRT and LCD) that are equipped with a SCART connector.

But how exactly does this adapter work? Its operation is quite simple: it takes the RGB video signals generated by your Amiga from the DB23-pin connector and the audio signals from the RCA connectors and sends them to the SCART port of the TV.
Assembly of the RGB video adapter - Scart
Mounting this adapter requires some basic technical skills, but, thanks to detailed diagrams and a step-by-step tutorial I showed in the video, it's an accessible process even for those who aren't experts in electronics.
Alternatively, you can buy the adapter already mounted by Retromaniak.
The video guides you through each passage of the editing of the adapter, from the welding of the components to the connection of the audio cables. Before starting, make sure you have all the necessary components, including the printed circuit, DB-23 connector (or a modified DB25), the disadvantaged capacitors, the resistance and the Scart connector. In addition, you will need basic tools such as a welder, tin, flow, Tronchesini, third hand and pliers.

Furthermore, it is essential to pay attention to the polarity of the decoupling capacitors during assembly, since they are polarized components and must be welded following the correct orientation.
Once assembly is complete, it is important to clean the board and ensure that all components are soldered effectively.
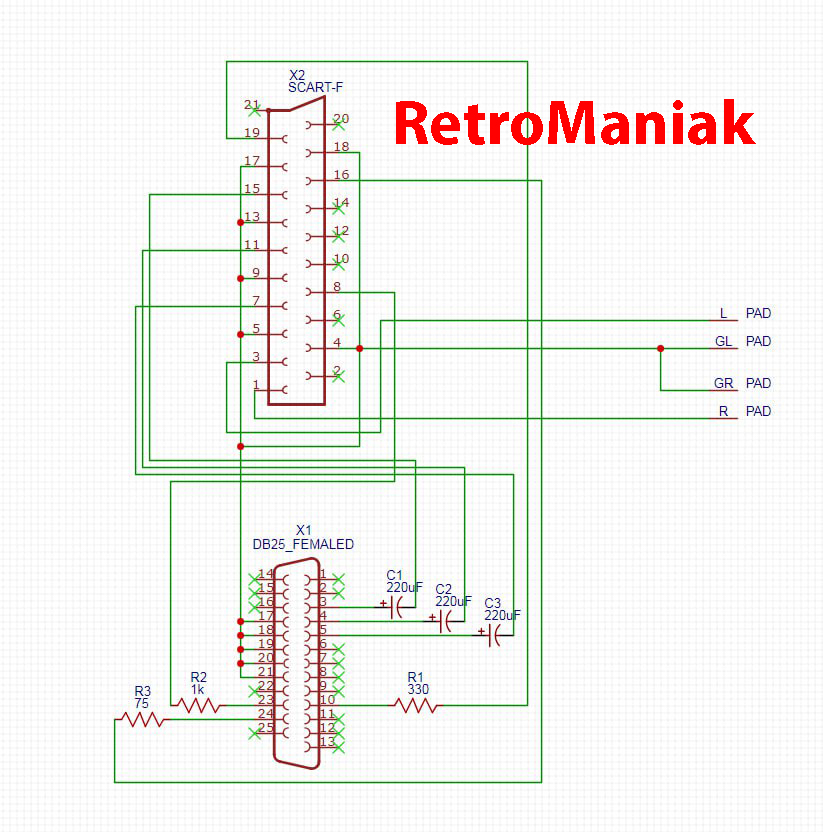
Parts List:
- Circuito stampato "Amiga scart adapter" di Retromaniak
- C1, C2, C3: 220 uF 16 V electrolytic capacitors
- R1: 330 Ohm 1/4 W resistor
- R2: 1 KOhm 1/4 W resistor
- R3: 75 Ohm 1/4 W resistor
- DB23 pin female connector, solder contacts for wire
- SCART connector
- RCA molded cables (red and white) with shielded wire
Instead of the DB23 connector (23-pin DSub), a DB25-pin can be used, taking care to modify it, by cutting two contacts.
Practical Demonstration: Connection and Testing
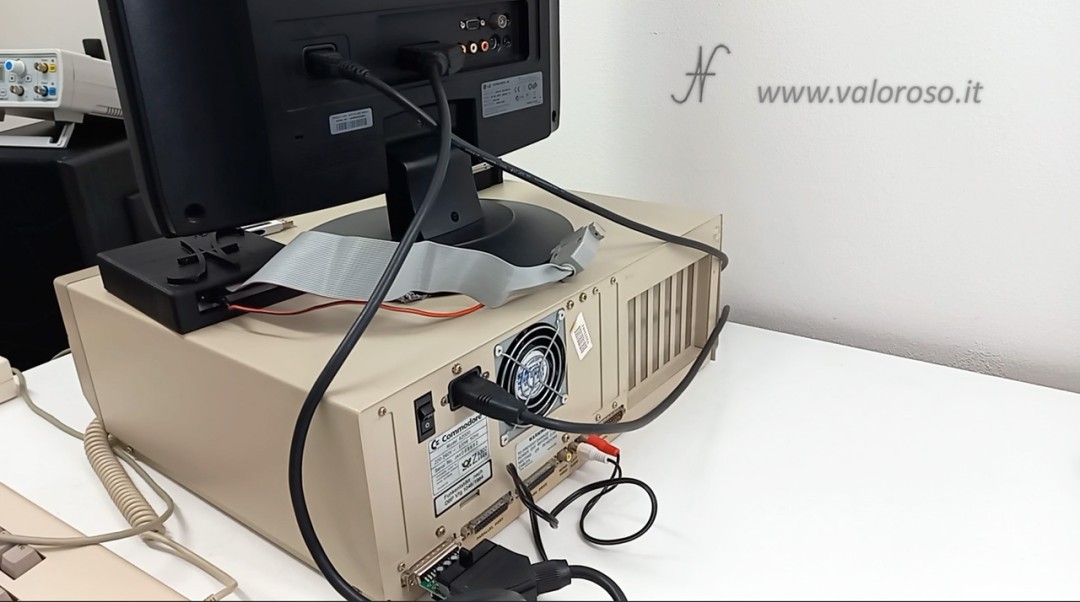
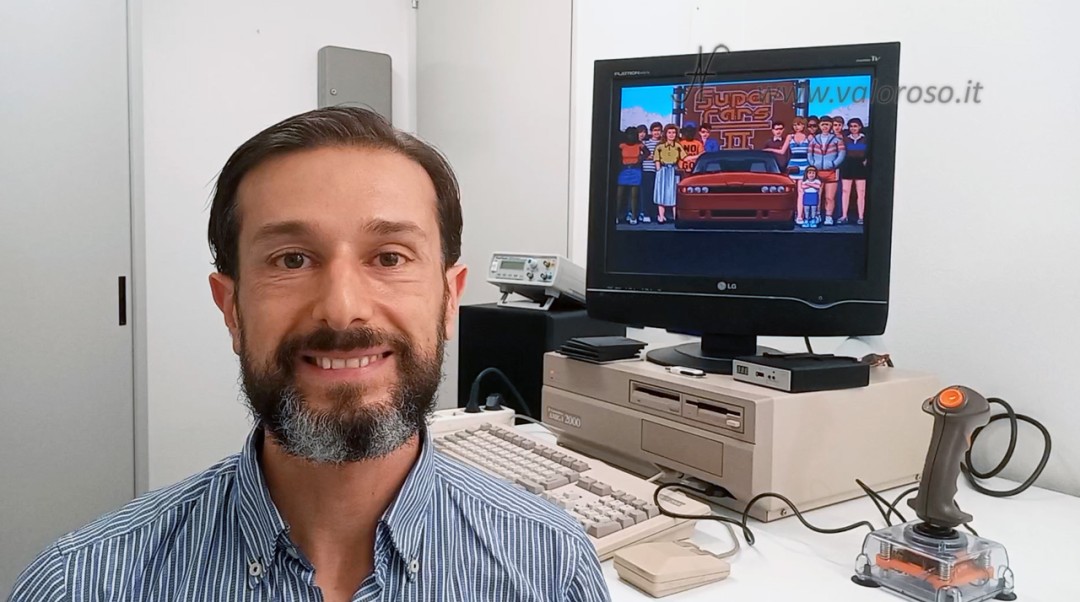
After mounting the adapter, the time has finally come to connect it to the Amiga and the TV. In the video, the adapter is connected to an Amiga 2000 and to a LCD M1917A LCD TV, in 4: 3 format. The result? A back game experience with exceptional video quality and crystalline audio.
The practical demonstration in the video allows you to see the advantages of the adapter in action. I tried to use the Super Cars II game, but ... I'm a little a landslide as a gamer!
Subscribe to @ValorosoIT channels
For further guides, tutorials and videos relating to the back computer and vintage electronics, I invite you to subscribe to the YouTube channel @valoRo. They are also on other social networks, such as Facebook, Instagram and Tiktok.
The link to Retromaiak to buy the cable?
Thank you
Write me here and I'll send you the contacts: https://www.valoroso.it/contatta-amedeo-valoroso/
Chi o cosa sarebbe "Retromaniak"? Nell'articolo non c'è alcun riferimento, solo questo nome buttato lì, e anche facendo una ricerca online, ogni riferimento a questo nome porta alle tue pagine. Potresti svelare questo mistero e fare chiarezza? Grazie.
Contact me and I will introduce it to you. https://www.valoroso.it/contatta-amedeo-valoroso