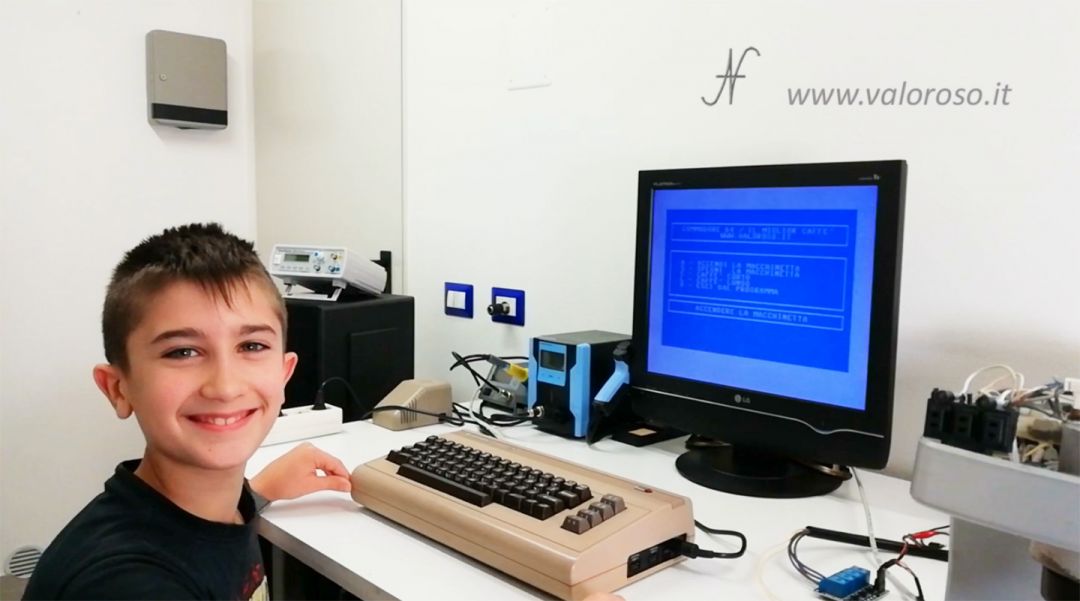
Today I want to offer you a coffee ... made by the Commodore 64! Here, in fact, is the coffee machine controlled by the Commodore 64!

35 years after Andrea De Prisco's Directorate 64 project, here is another version of the project. There are, however, some variations: in the first place, the Data Sassete port was used in the Directo 64 or a single exit port exit, while in this project I use three entrances/outputs of the PB port of the User Port of the Commodore 64. The second difference is in the quantity of controls available: in this project, in addition to turning on the coffee machine, I can also pilot the pump and detect if the boiler is in heating.
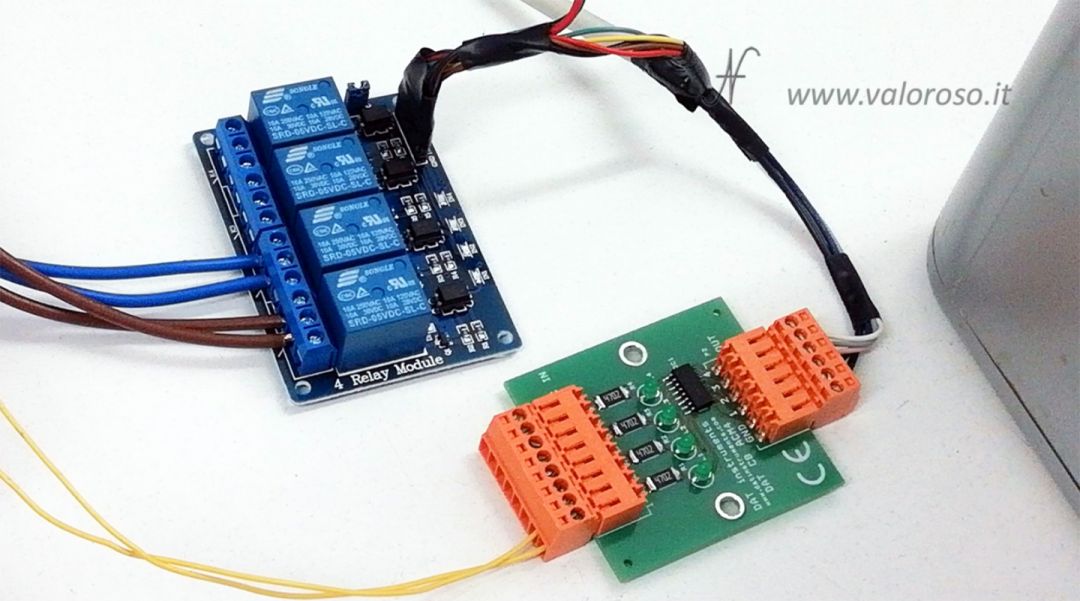
For this experiment, I connected a Saeco Via Veneto espresso machine to the Commodore 64 User Port, via two interfaces:
- an output card with 4 relays, optoisolated (the relay contacts are suitable for loads of 10A at 240Vac);
- an input interface, with 4 optocouplers, suitable for 230Vac mains voltages;
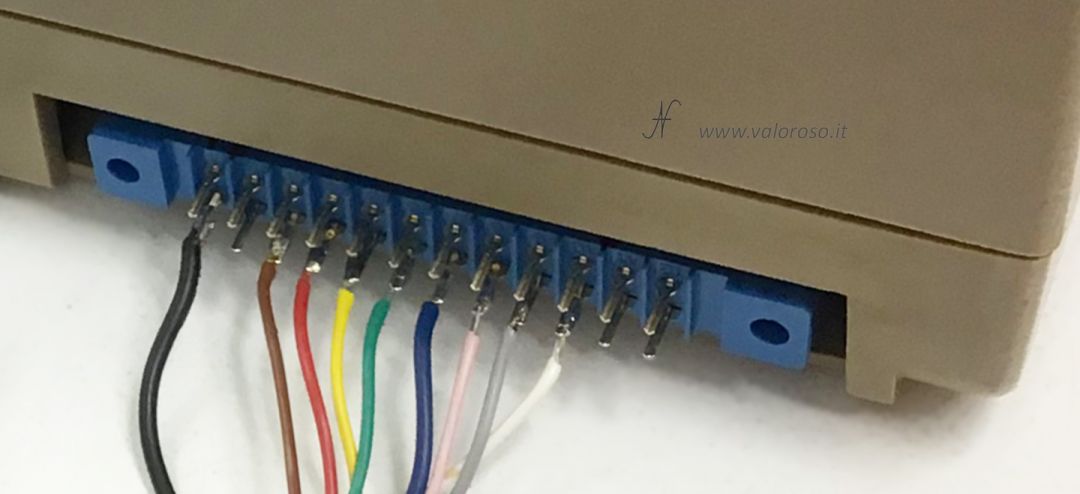
- a connector for the User Port of the commodore, type 3.96mm edge with 24 poles.
I had already described the interfaces and how to control the Commodore 64 User Port with instructions in Basic in this article.
Warning! If you want to carry out this experiment, get help from someone experienced! In fact, there is a dangerous proximity to water, high voltage electricity and heat!

Electric operation of the coffee machine
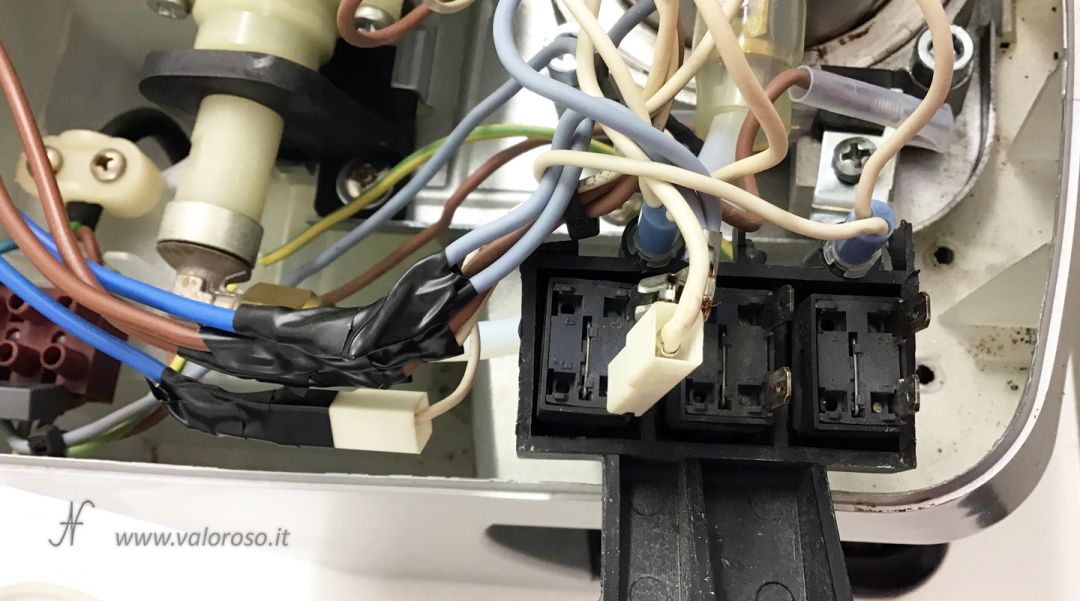
The coffee machine I changed is very simple. The control unit is simply made up of three switches and two bulbs!
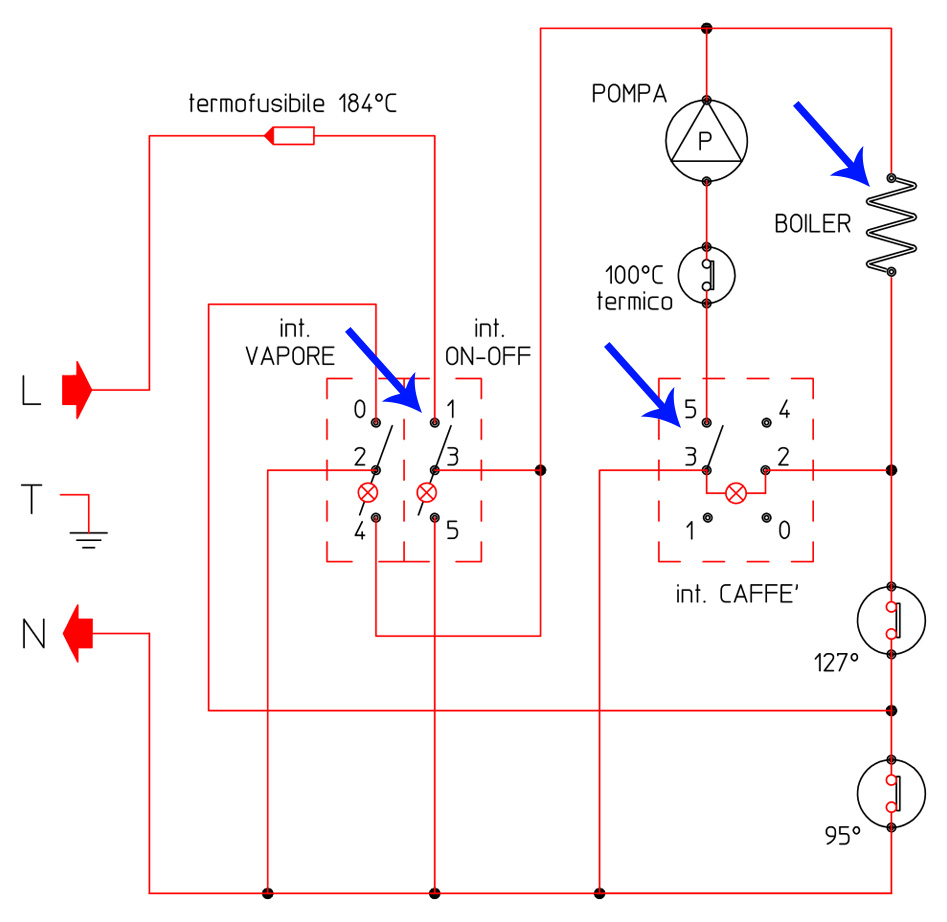
The first switch, in the diagram shown as int. ON-OFF, commands the ignition of the coffee machine and the internal boiler. The boiler (in the scheme indicated as BOILER) is powered until the temperature is reached, which is detected by a bimetallic thermostat. When the optimum working temperature is reached, the resistor that heats the boiler switches off.
The second switch (referred to as int. CAFFE') commands the water pump. By activating the switch, the water pump is lit which allows the water to flow under pressure through the coffee powder, before entering the cup.
The third switch (int. VAPOR) is used to activate the steam, but is not used in this project.

Finally, the two lights are used to indicate the ignition status and the heating status of the boiler.
As indicated in the following paragraph, I have not changed the coffee machine system. Rather, I simply connected in parallel:
- to contacts 1 and 3 of the ignition interview int. ON-OFF, with the contact N.O. of a relay;
- to contacts 5 and 3 of the pump bowl int. CAFFE', with the contact N.O. of another relay;
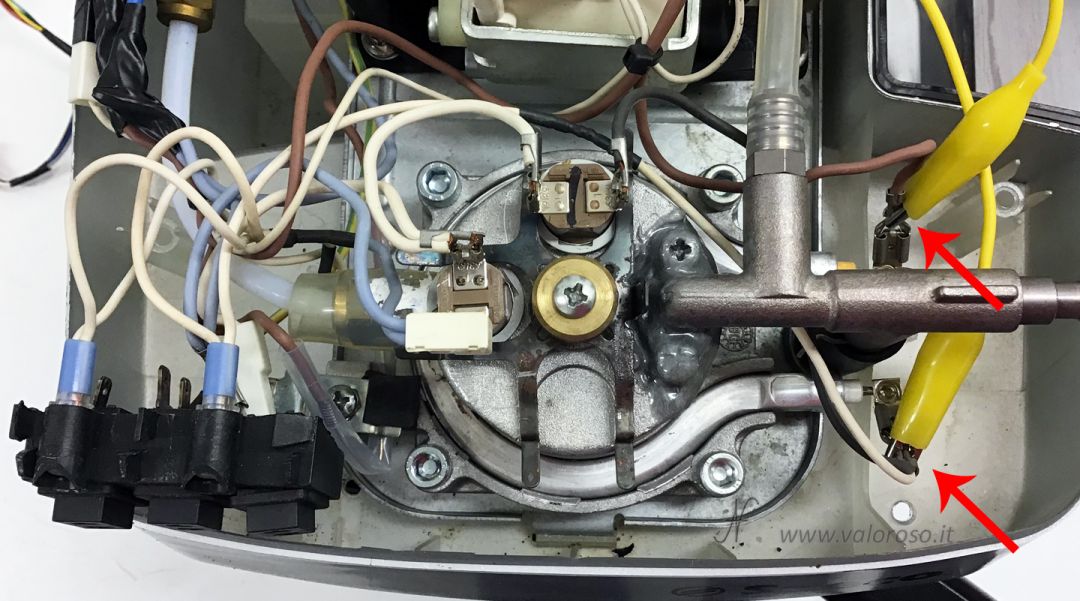
- to the heating resistor of the boiler (BOILER), with a high voltage optocoupler.
Connect the interfaces for the coffee machine controlled by the Commodore 64
In itself, the project is very simple. This is the wiring diagram for connecting the coffee machine to the Commodore 64.
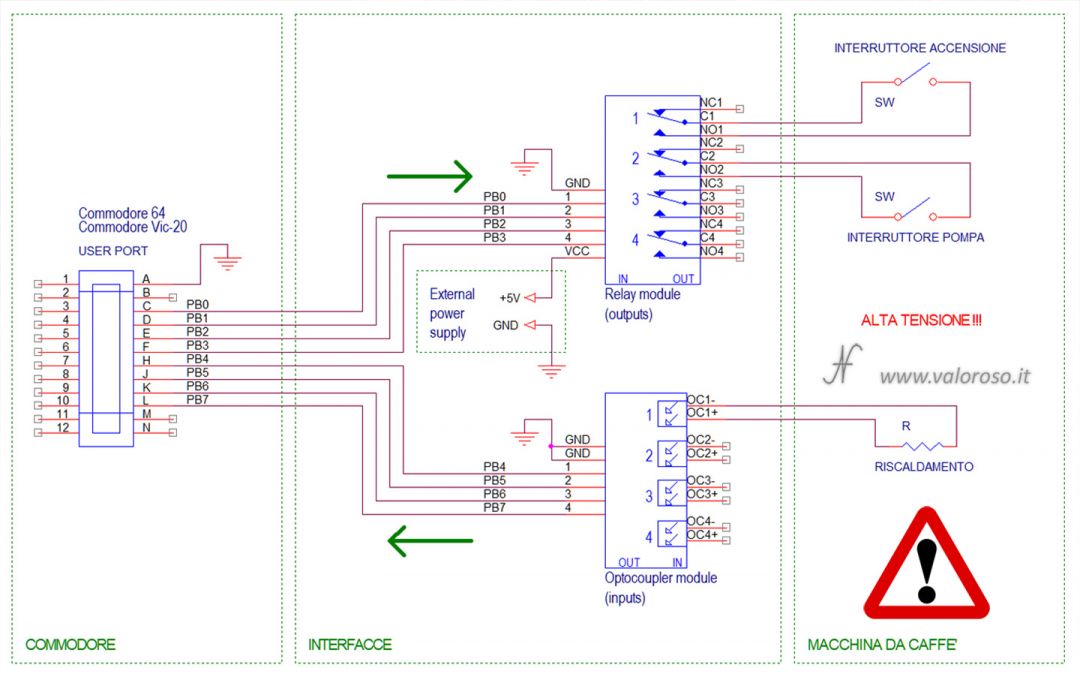
As you can see, I used two relay card outputs:
- to turn on the machine;
- for the activation of the pump.
The relay card requires an external 5V power supply to the Commodore 64.
I also used an opto-isolated input to check the heating status of the espresso machine's boiler.
Following the links, it is clear that:
- to turn on the machine (and the boiler) I used the Relay 1, connected to pin PB0 the Commodore User Port;
- for the activation of the pump I used the Relay 2, connected to pin PB1 the Commodore User Port;
- finally, to check the heating status of the boiler, I used theopto-isolated input 1 of the optocoupler board, connected to the pin Pb4 of the User Port.
From cafes cards, the connection is simple. It is sufficient to connect in parallel to the two switches that manage the ignition of the coffee machine and the pump. Alternatively, it is possible to disconnect the wires from the switches and connect them to the relays.
Relative to the heating resistor of the boiler, I connected in parallel with two electrical crocodile clips. When the resistor is powered (with 230Vac, attention!), The voltage also enters the first of the inputs of the optocoupler board.
Chi non volesse utilizzare una scheda con optoisolatori per rilevare anche la fase di riscaldamento della caldaia, può tranquillamente non installarla. Se il programma non rileva lo 0 logico sul pin PB4 della User Port, la funzione viene ignorata. Infatti, caricando il programma con l'emulatore, non mostra la dicitura "ACQUA IN RISCALDAMENTO ...".
Remember to turn on the Commodore BEFORE the interface, otherwise the relays will activate randomly and the coffee machine will turn on without your consent!
For the same reason, when the experiment is over, it is necessary turn off the interface FIRST and then the Commodore 64.
Description of the program in Basic: CAFFE.PRG
The Basic program to manage the coffee machine controlled by the Commodore 64 can be downloaded at the bottom of this page. It is available both in text format, to be viewed from PC, and in PRG format, to be launched by Commodore 64 or by an emulator.
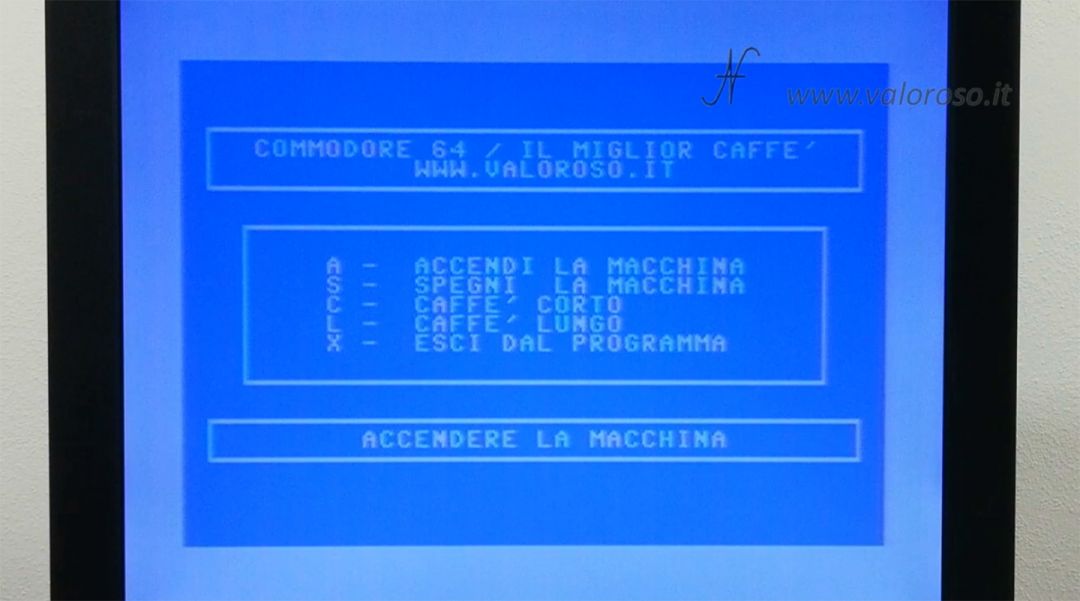
The available commands are:
- A to switch on the coffee machine and to activate the boiler at the same time;
- S to turn off the coffee machine;
- C to prepare a short coffee;
- L to prepare a long coffee;
- X to exit the program (and switch off the machine).
What changes between C and L, to prepare coffee, it is only the switch-on time of the pump inside the coffee machine.
The use procedure is simple:
- load the program CAFFE.PRG and start it with RUN;
- turn on the coffee machine by pressing A on the Commodore keyboard;
- Wait for the heating of the water boiler;
- press C O L depending on the coffee you want to prepare (short or long);
- At the end of the use, turn off the coffee machine with S;
- exit the program with X.
Basic commands to manage the coffee machine controlled by the Commodore 64
In the program listing, downloadable at the bottom of this page, there are some peculiarities. First, the command to activate the boiler of the coffee machine is:
POKE 56579, 1
To activate the pump, relays 1 and 2 must be kept on at the same time, therefore the following is used:
POKE 56579, 3
To turn off the pump, you can use the same command already used to switch on the boiler (boiler on and pump off):
POKE 56579, 1
Finally, to turn off boiler and pump, you use the following command:
POKE 56579, 0
As I had already specified in this article, actually the command POKE 56579, number is used to set the pin of the PB port as the output. As soon as it is set as an output, the corresponding pin immediately goes to logic level 0 (to ground), therefore activates the relay.
The program is also able to detect if there is voltage on the heating resistance of the coffee machine boiler. When the resistance is powered, it means that the coffee machine is not ready. The detection of this state is a little manifest. In fact, the PB4 foot of the User Port of the Commodore, oscillates between 1 and 0 logical to a frequency of 50Hz (the frequency of the network voltage that feeds the boiler resistance.
Therefore, it is not enough to carry out a single detection of the PB4 pin, by means of:
IF (PEEK(56577) AND 16) = 0 THEN ...
Instead, it is necessary to carry out this detection for a certain number of cycles, in order to be sure, during the oscillations between 1 and 0, to detect at least one logic 0. If at least a logical 0 is detected, it means that the coffee machine is heating up and is not ready.
List of the program in Basic
And here are the listings of the Basic program to manage the coffee machine.
The program is available in two formats:
- CAFFE. TXT, in text format, to analyze it on a PC (this file can not be immediately loaded or transcribed on the Commodore 64: to convert it into PRG you have to use C64LIST);
- CAFFE.PRG, to be unpacked, in loadable and bootable format from the Commodore 64 and emulator.