Welcome to the ValorosoIT blog, the point of reference for vintage electronics and IT enthusiasts! If you have ever found yourself faced with vintage objects with an annoying rubbery patina, then you are in the right place. In this article, let's try together an effective method to clean and remove melted and sticky rubber, returning plastics to their original shine... but without the annoying sticky feeling!

The problem of melted, sticky rubber
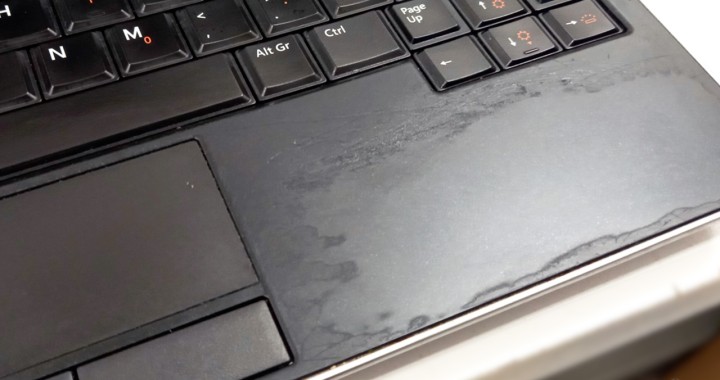
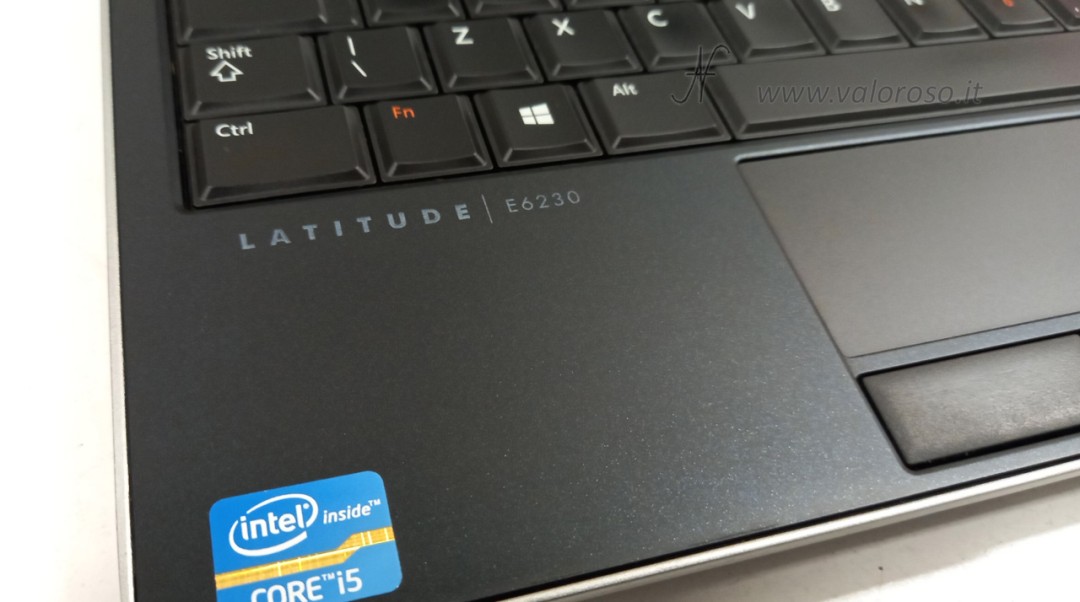
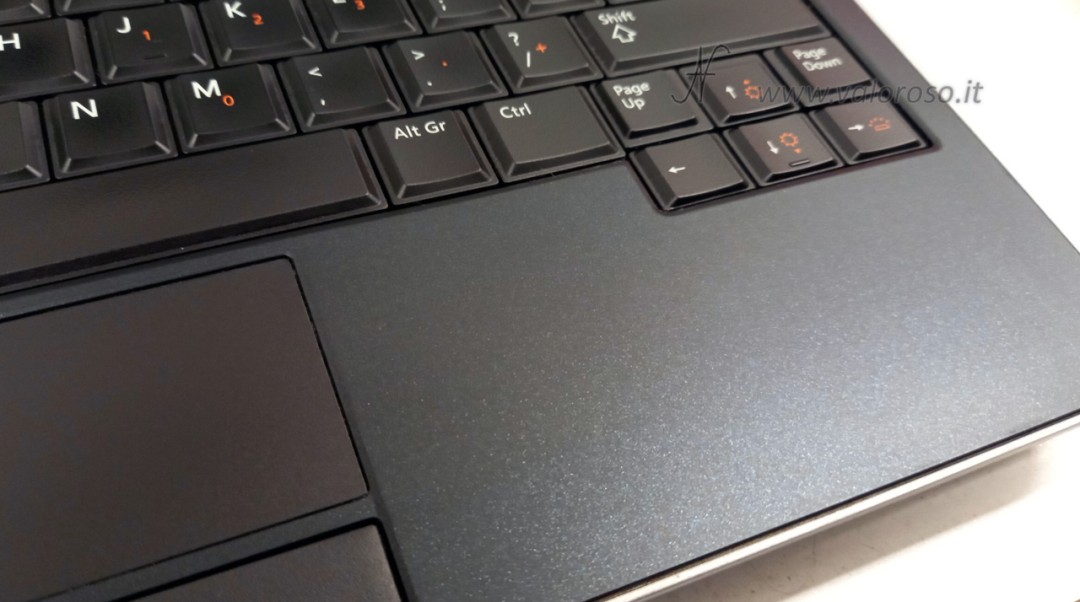
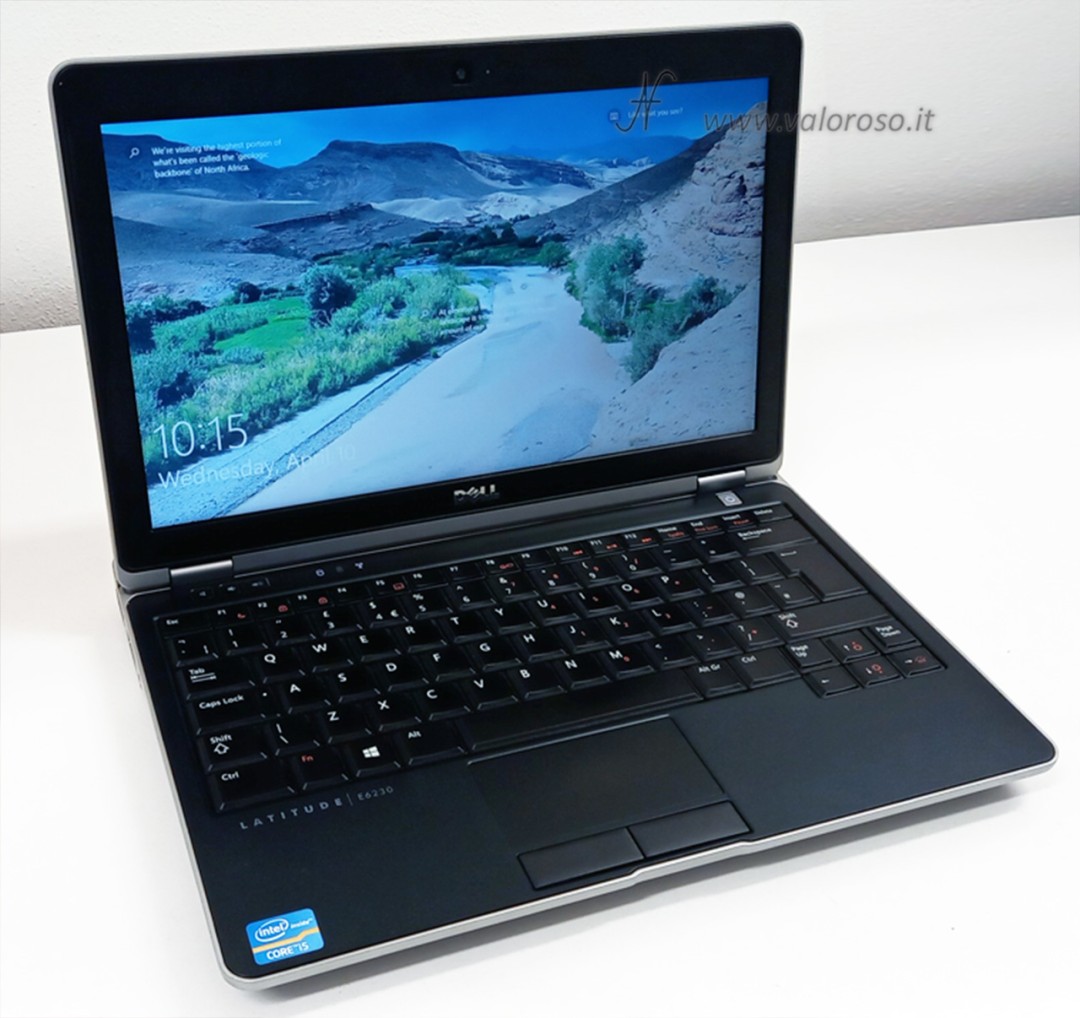
Anyone who has dealt with vintage objects will surely have encountered the problem of loose and sticky rubber. Personally, it happened to me with the internal plastics of my beloved Fiat Coupé from 1994 and, more recently, with my laptop of the Latitude E6230. But do not fear, with a little patience and the right products, we can easily solve this annoying problem, removing the sticky rubber and bringing back to the surface underlying plastic.
Necessary products
Before going into the details of the procedure, make sure you have the following products available:
- A powerful degreaser, such as Chanteclair.
- 90% denatured ethyl alcohol (some use isopropyl alcohol, but I have seen that the results are excellent even with the alcohol that is normally purchased in supermarkets).
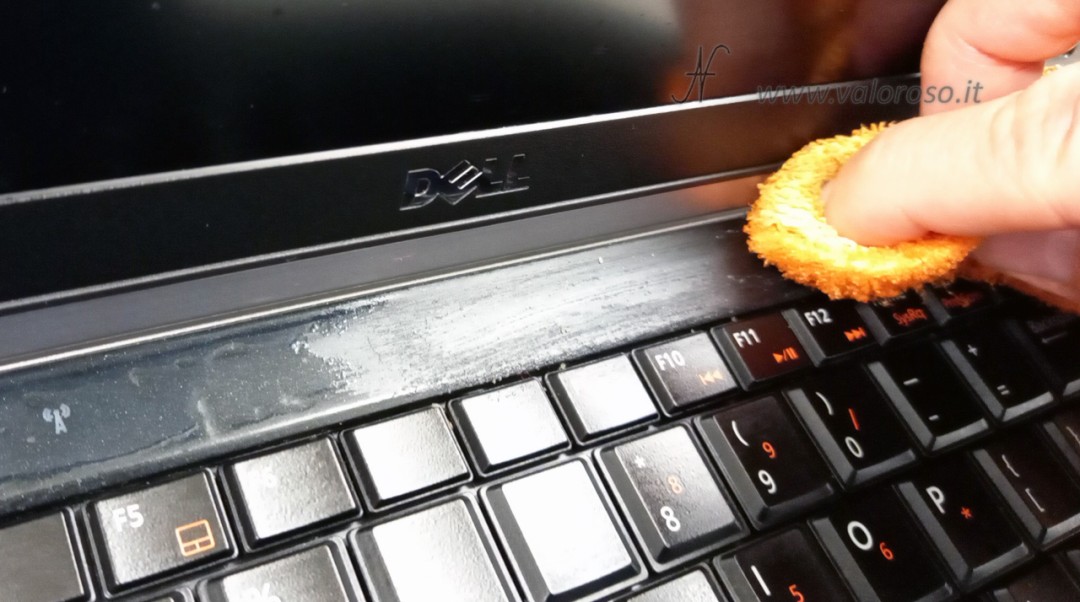
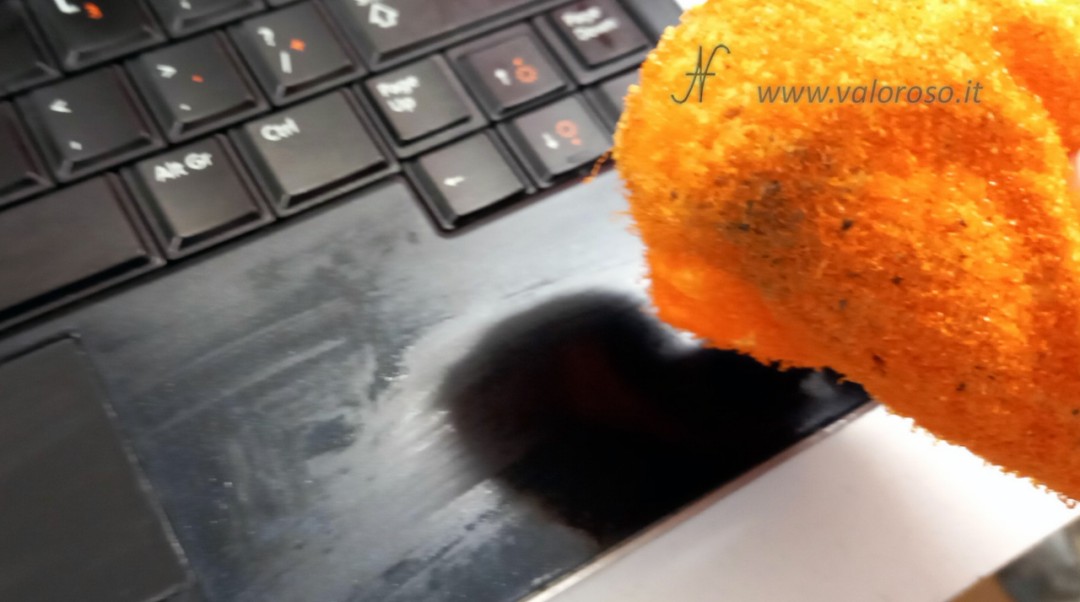
- An abrasive microfibre kitchen sponge, non-scratch, with two sides: one soft and one more abrasive.
- Optional: a product renews car dashboard plastics to ensure a brilliant finish.
- Some cotton or microfibre rags to gently dry the treated surfaces.
Procedure for cleaning loose and sticky rubber
Now that we have all of our products ready, we can proceed with cleaning up the loose, sticky gum. Follow these steps carefully for best results.
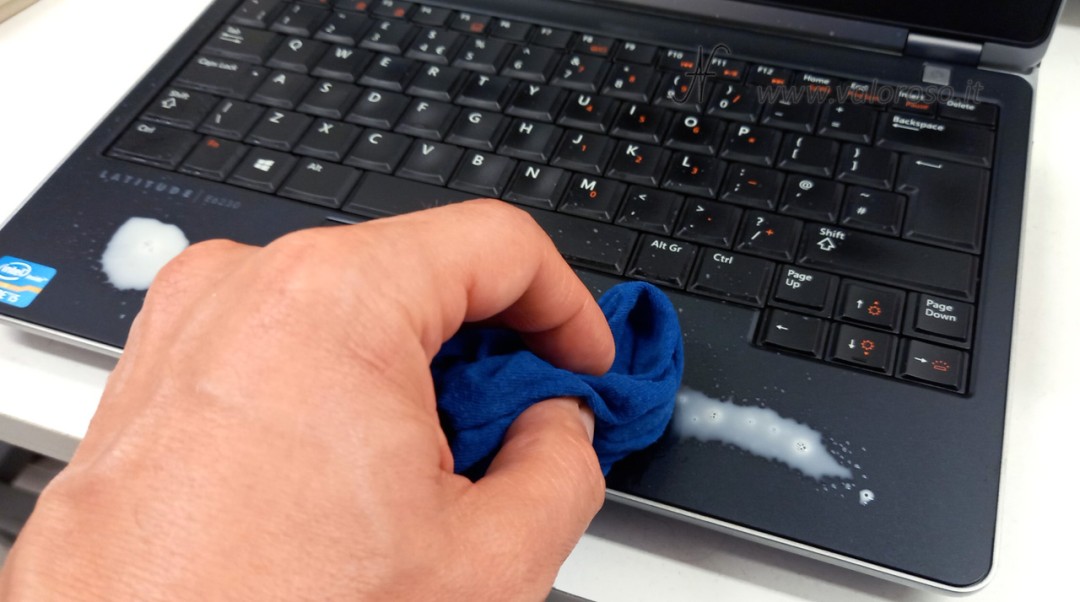
- Preparation: First of all, make sure you unplug your computer from the power supply and, if possible, remove the battery as well. Work in a ventilated environment.
- Removing sticky rubber, step 1: Apply a generous layer of degreaser only on the parts affected by the loose rubber. Carefully avoid that the product enters the keyboard or computer. Using the abrasive sponge in microfiber, gently scratch away the molten rubber layer.
- Removing sticky rubber, step 2: Apply the ethyl alcohol (or isopropyl) on the areas treated with the degreaser, to remove the melted and sticky rubber even more vigorously. Make sure not to make the liquid penetrate the computer.
- Repeat steps 1 and 2 of removing the loose gum until you achieve the desired result, i.e. you have removed all of the now sticky gummy coating!
- Rinsing and Drying: once the loose gum has been removed, wipe with a cloth moistened with water to remove all alcohol and degreaser residues. Dry the surfaces thoroughly.
Advanced options: renew plastics and paint
Once you have completed removing the loose rubber and cleaning the plastic underneath, you may want a finishing touch to ensure a flawless appearance and additional protection. Here are two advanced options to consider:

- Application of the plastic renewer: If you want a brilliant and protective result, you can opt for the use of a product renews plastics for cars of cars. These products are designed to revive the treated plastics, making them darker and protecting them from sunlight. Apply the product by carefully following the manufacturer's instructions. After application, dry carefully using a microfiber cloth to obtain a uniform and shiny result. Personally, I chose this option for my latitude laptop.
- Painting of the treated parts: if you want a completely new and long-lasting look, you can consider painting the treated parts. After carefully cleaning the surfaces, apply a primer suitable for plastics, followed by a layer of paint in the desired colour. Apply a transparent protectant to ensure greater durability and resistance over time. I chose this option for my Fiat Coupé. I advise you to consult specific tutorials for painting plastics, since it is not a simple operation.
Precautions to keep in mind
Throughout the process, it is crucial to pay attention to several precautions to avoid harm to yourself and your computer:
- Work in a well-ventilated environment, because chemicals are volatile and it is unhealthy to breathe them.
- Avoid that liquid products penetrate inside the computer, they could cause irreparable damage.
- Be sure to protect your monitor and other delicate plastic parts from the chemicals used. Do not use degreaser and alcohol on parts not affected by the melting of the rubber.
- If you opt for the use of the product renew plastics, apply it with caution and carefully dry the treated surfaces. Since the product is a little slippery, be careful not to apply it where you normally keep the computer, since it could slip.
Let's stay in touch!
Do not forget to share your experiences with me and to follow me on YouTube, Instagram, Tiktok @ValorosoIT for further advice and tutorials. I'm also on Facebook. Stay tuned for other adventures in the world of vintage electronics!