Finally, here is a step by step tutorial to build an audio/video cable for MSX Philips VG 8000, VG 8010 and VG 8020! By connecting your vintage computer to the TV via the composite audio/video cable, rather than through antenna, the image and audio are of better quality.

Read the full video transcript →
For which MSX computers is this audio/video cable good?
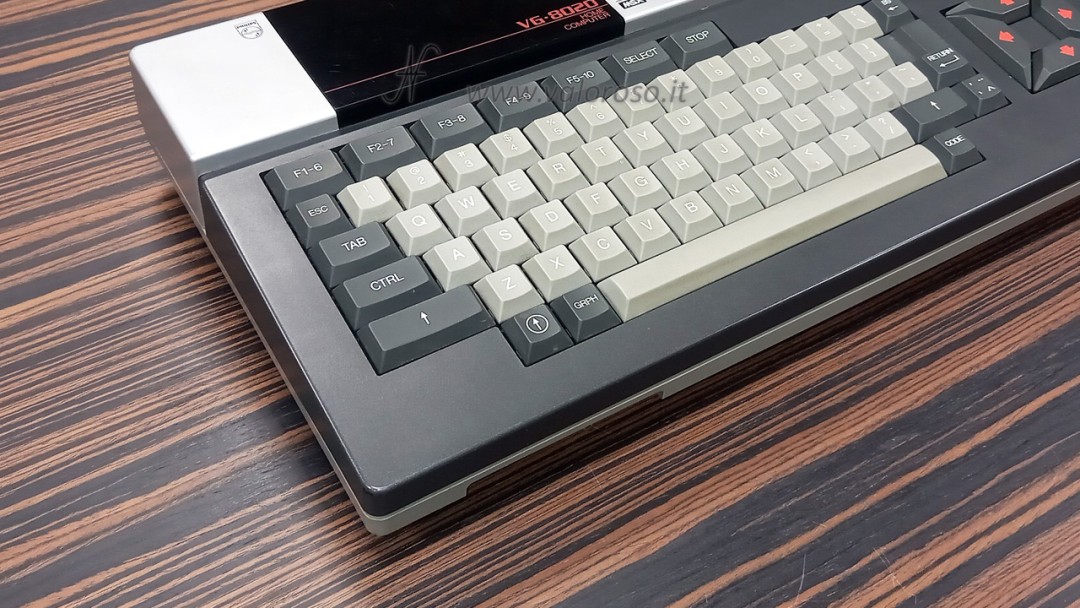
The audio video cable we are about to build is good for old vintage MSX computers: Philips VG-8000, Philips VG-8010 and Philips VG-8020. Check the version well, because not all these computers are compatible. Continue reading ...
Under the computer there is written the version, in this case it is the /40: Philips VG8020 /40.
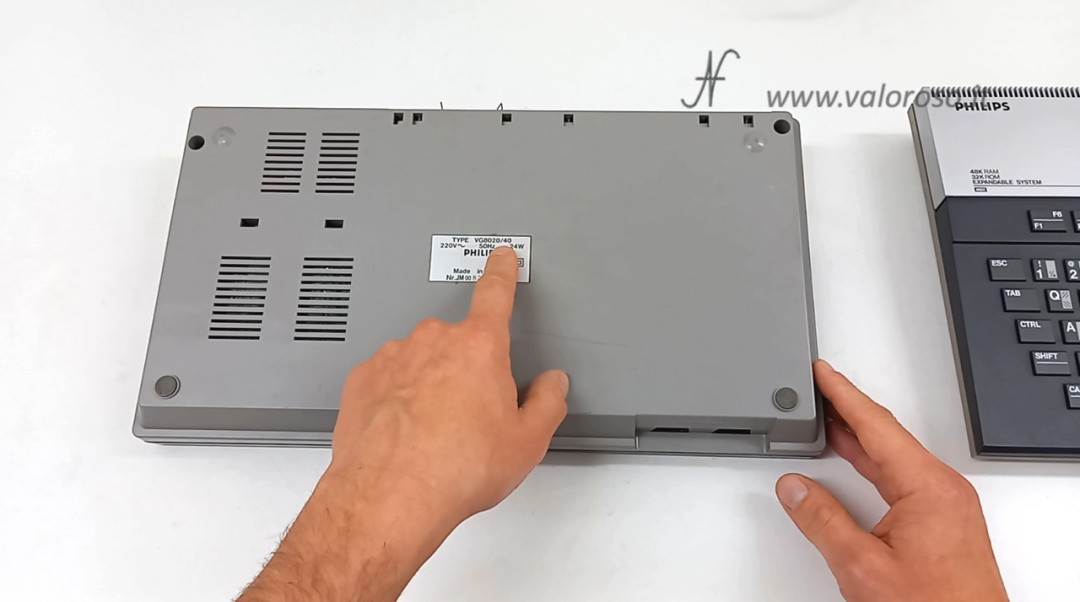
Definitely compatible computers are: Phonola or Philips VG-8000, Phonola or Philips VG-8010/00, Phonola or Philips VG-8020/00, VG-8020/20, VG-8020/29, VG8020/40.

They are not compatible, because they have an RGB exit in the place that PAL Videocomosita, the Phonola or Philips computers VG-8010/19 and VG8020/19. These computers connect to TV via a Din-Scart cable.
Other MSX computers may also be compatible, but you will have to make an evaluation starting from the pinout of the video connector, comparing the signals with the diagrams that follow.
Although the shape is very similar, the cable we are going to build in this article is not compatible with Commodore computers. To connect the 8-bit Commodore to the TV, you can consult this article. Or you can use a s-video cable.
How to connect old Philips MSX computer to television?
In addition to the audio / video cable for MSX Philips that we see in this article, the computer can be connected to the TV via RF antenna cable. The TV must support analog channels.

The channel to tune to the TV depends on the computer model. For example, the Philips VG8020 tunes to channel 36 and the Philips VG8010 tunes to channel 32. The audio/video quality of the RF antenna cable is lower than what we can achieve with a composite audio/video cable.
Components needed to build the audio/video cable for MSX Philips
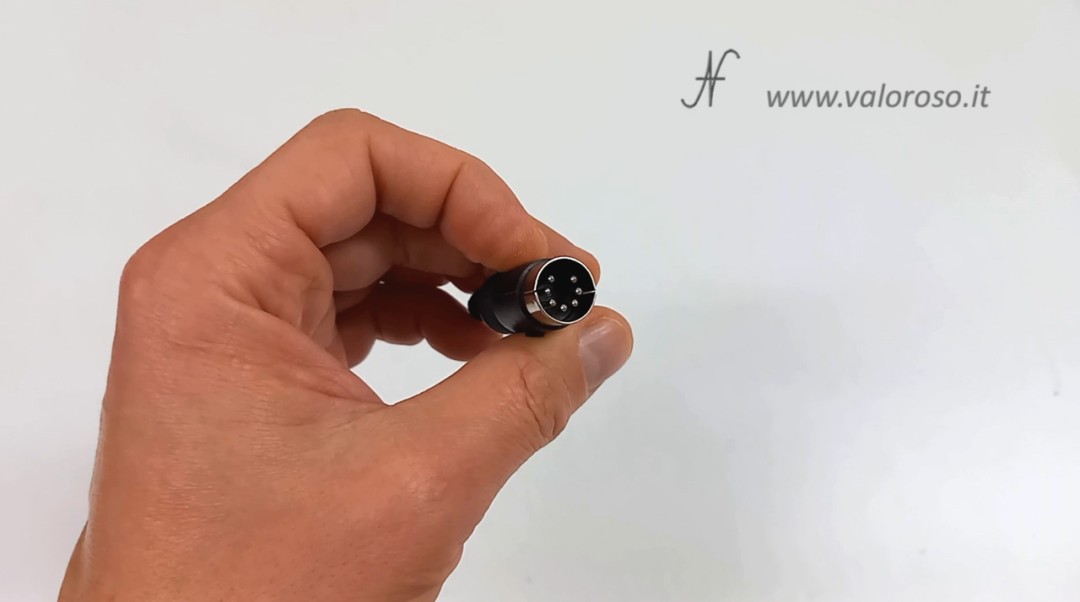
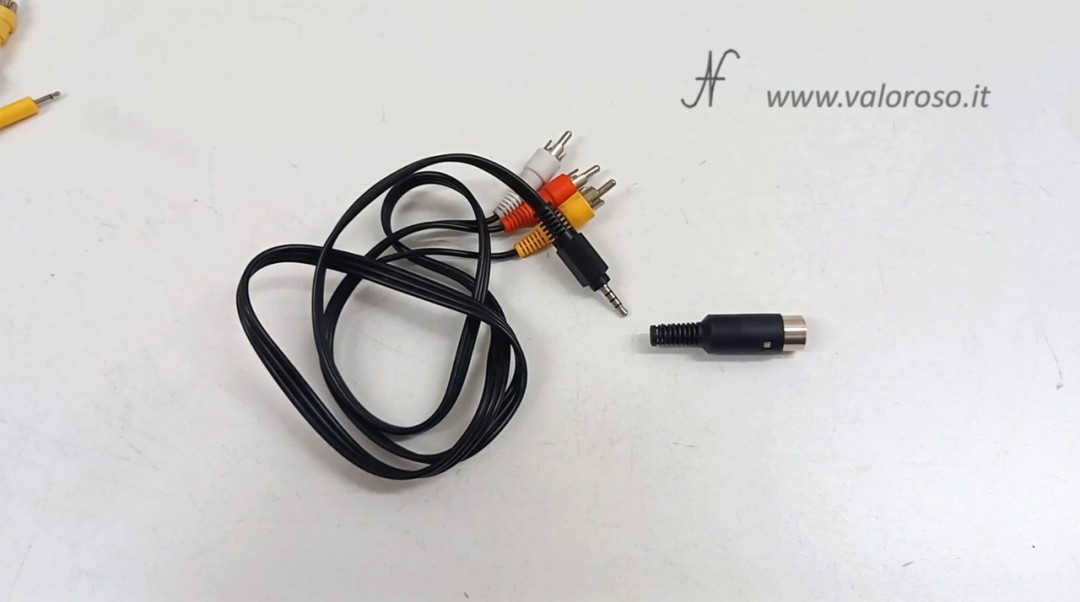
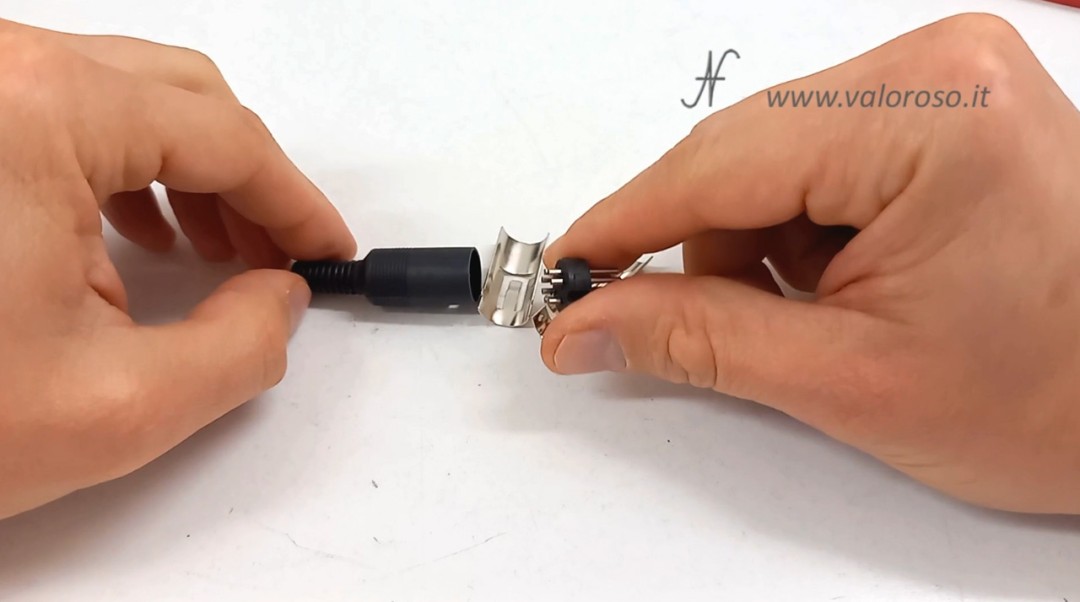
The construction of the cable requires few components. The first is definitely the round DIN connector. You can choose a 5-pin connector, 7-pole circle, or 8-pole circle connector with center pin. The photo better clarifies the type of connector needed and the arrangement of contacts. I used a 7-pin DIN connector.
There are three RCA connectors: yellow for the composite video signal, white and red for the audio signal. The audio output of the MSX computer is mono, but is split on the two white and red RCA connectors, connecting them in parallel. It is also necessary for the shielded cable for low -frequency audio/video uses. The shielded cable must be quite thin: remember that, in the DIN connector, you have to insert three cables!
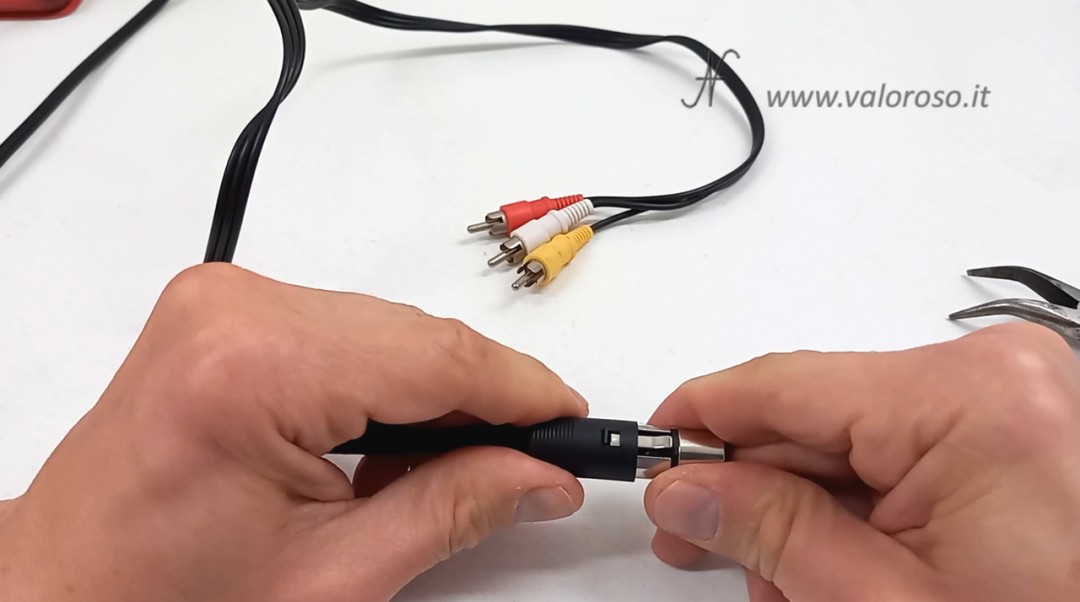
With regard to RCA cables and connectors, I prefer to recover cables already printed, in order to obtain a better aesthetic result.
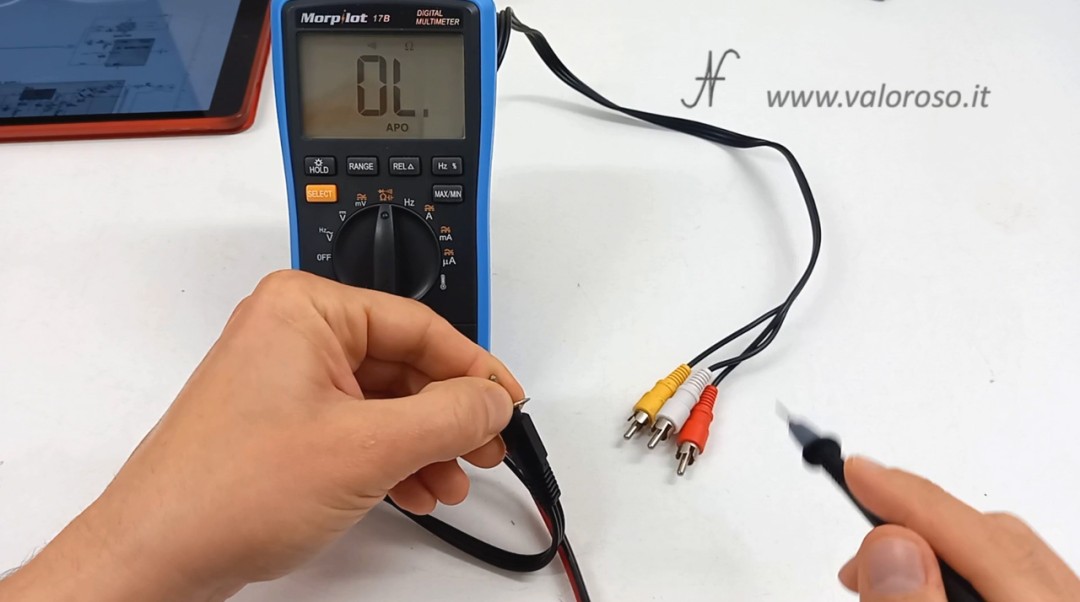
If you use an already printed cable, it is better to try it with the tester before using it. The continuity of audio and video signals must be experienced. In addition, it must be verified that the audio and video signals are not in short circuit with each other or with the mass. It is only one more precaution, but it can take away from scratchers if something does not work!
Wiring diagram
The wiring diagram, to obtain the pinout of the connector and to build an audio / video cable for MSX Philips VG 8000, VG 8010 and VG 8020, can be retrieved from the service manual of the computer.
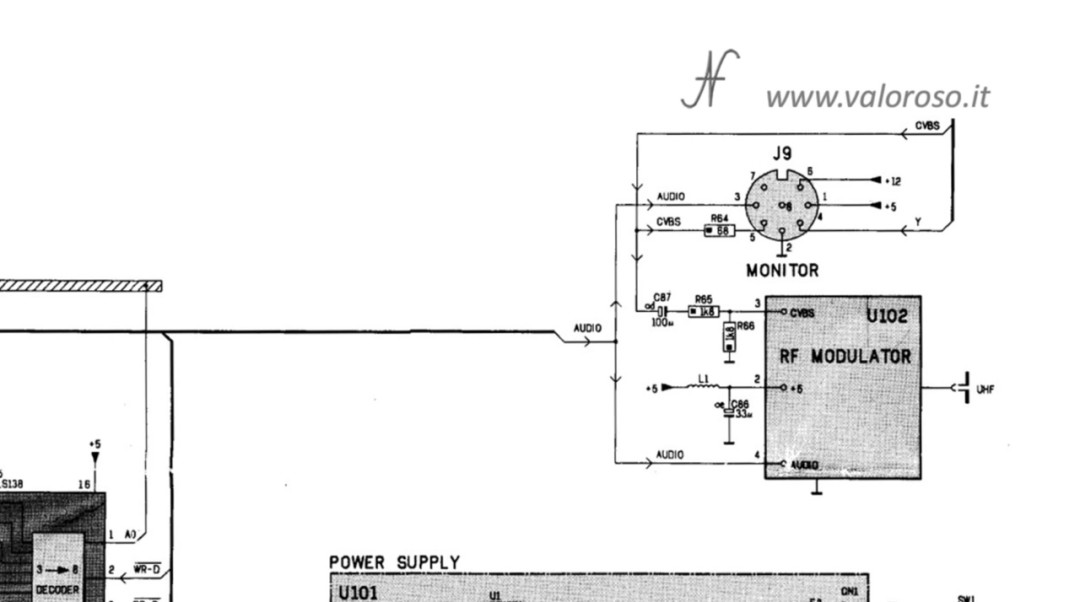
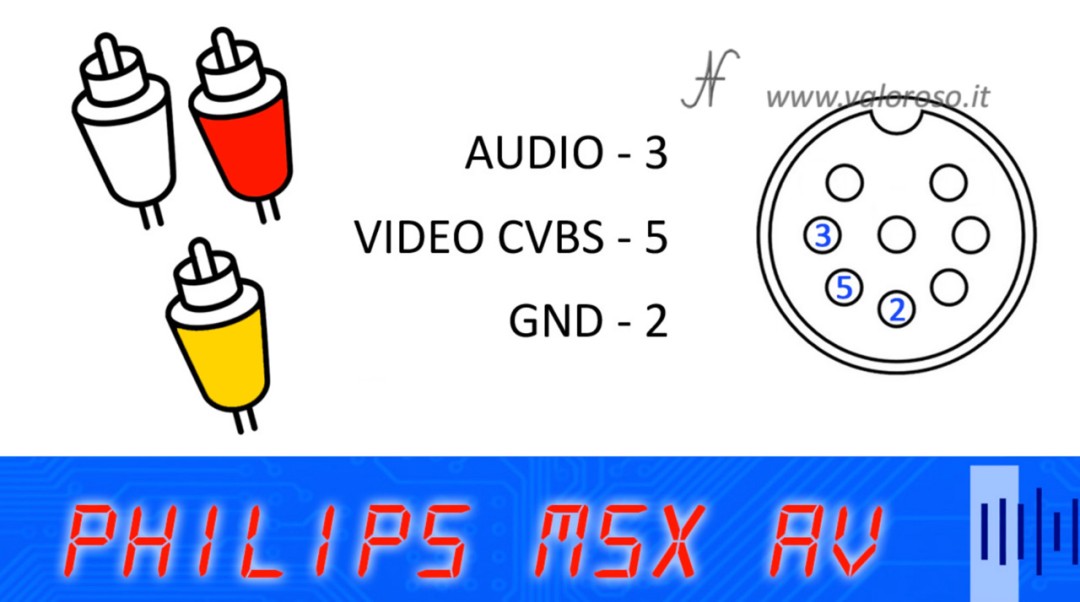
Purgeted by all the signals that do not need, here is the footing of the DIN connector to build our audio/video cable for MSX Philips VG8000, VG8010 and VG8020. There are only three contacts used: mass (pin 2), composite video (pin 5) and audio (pin 3). In the following image, the DIN cable connector is seen from the sale side.
How to build an audio/video cable for MSX Philips VG 8000 VG 8010 VG 8020
Let's get to the heart of the tutorial and see, step by step, how to build an audio / video cable for MSX Phonola or Philips VG-8000, VG-8010 and VG-8020. We begin to open the DIN connector, removing the plastic shell and separating the metal armatures from the connector. To pull out the shell, there may be a small metal lever to press through a slot in the plastic shell.
We prepare the three cables with RCA connectors. We solder the thin shielded cable on the RCA connectors. The metal sock, the screen, connects to the external contact of the RCA connector. The colored cable connects to the center pin of the RCA connector. If you don't know how to strip shielded cables, we'll see it shortly.
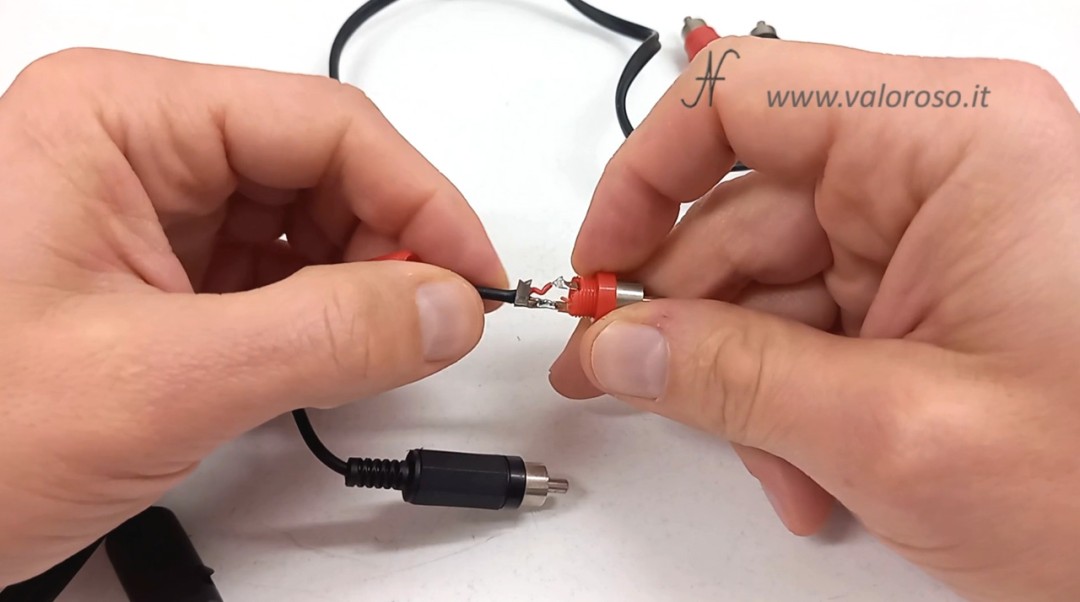
As I suggested before, it is best to get connectors printed on thin shielded cable. In this way, you can avoid the previous step and the result will be aesthetically better.
We put the three shielded cables (two audio and one video) inside the plastic shell of the Tondo Din connector. This operation must necessarily be carried out before soldering the wires on the connector pins.
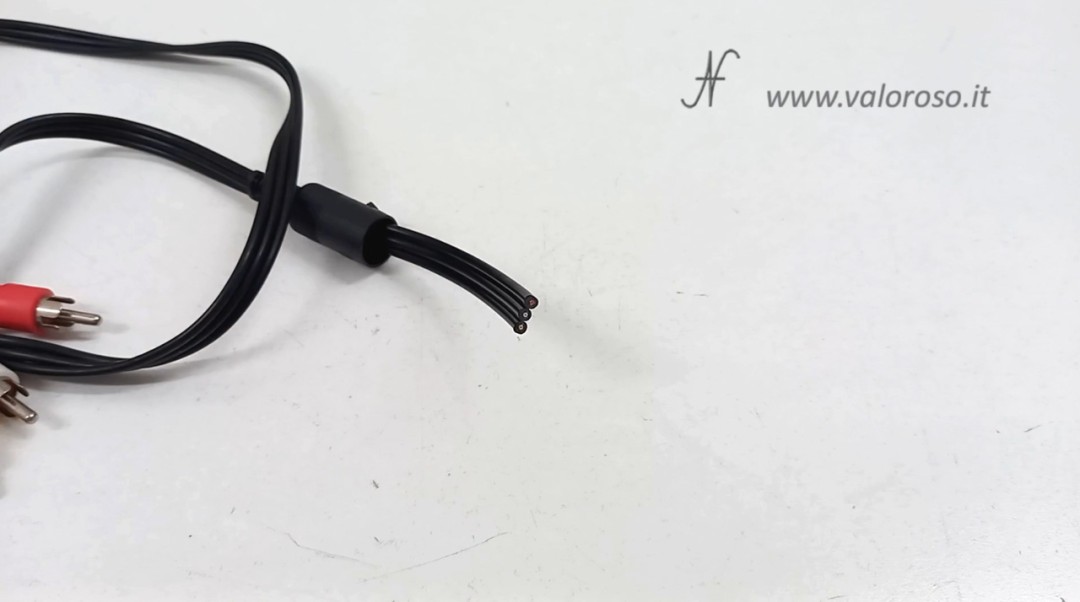
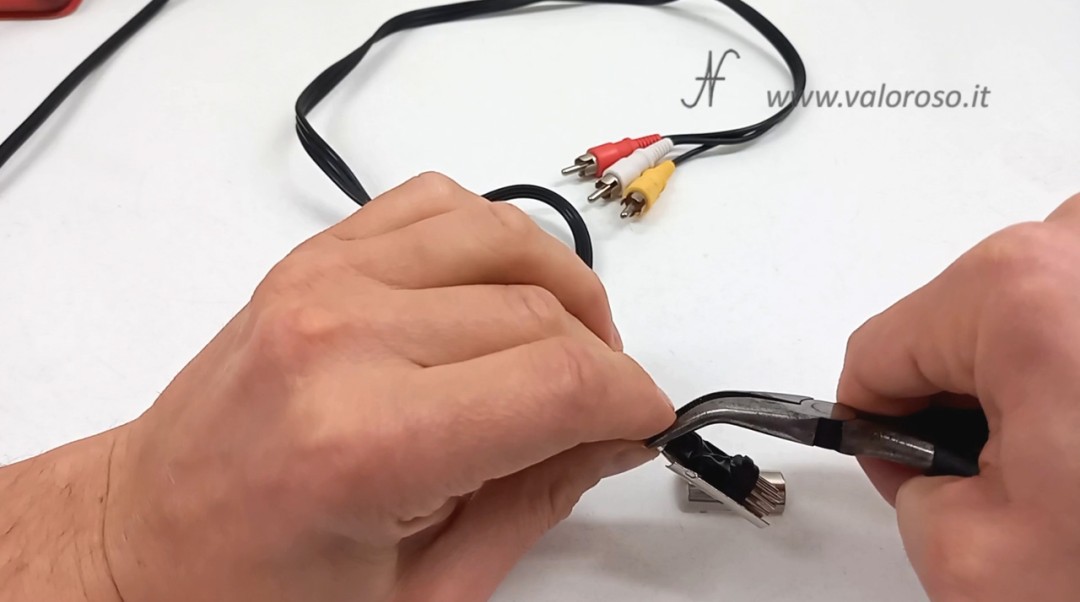
We push the three shielded cables. You can use a special tool, the pese (otherwise said peeling, spelacavi or spelafile), or scissors are used. Delicacy, the black insulator of the cable is engraved, the external one, and about a centimeter of insulator parades away.
The three central threads, red, white and yellow are peeling for a couple of millimeters. The procedure is the one just seen: with the scissors or with the tool, the insulator is gently engraved and parades.
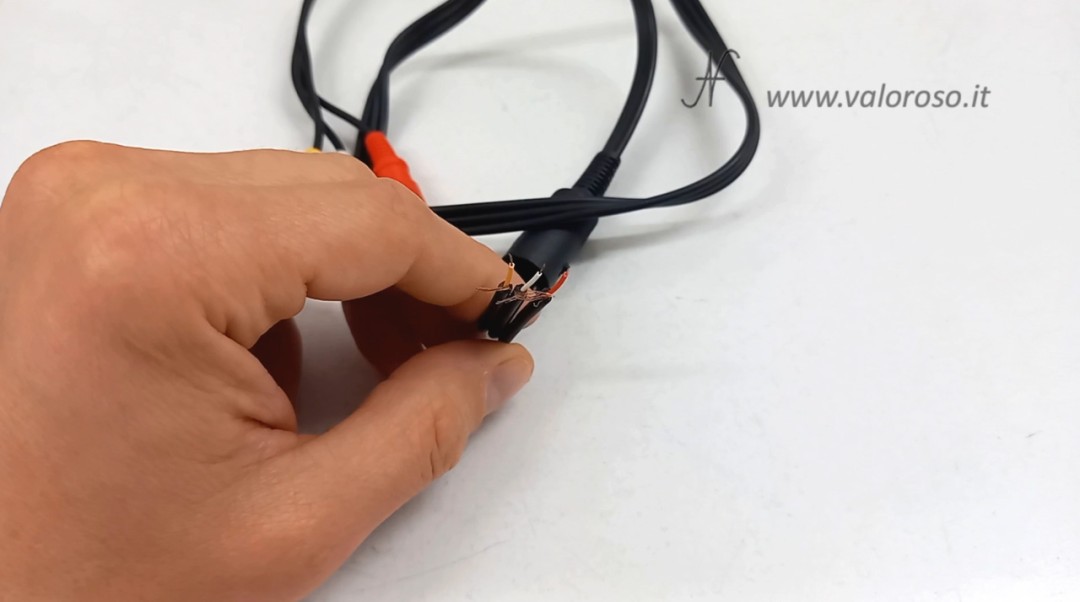
You group the socks (the shields that also act as ground conductors) and connect together.
We join together the two conductors red and white (those of the audio signals).
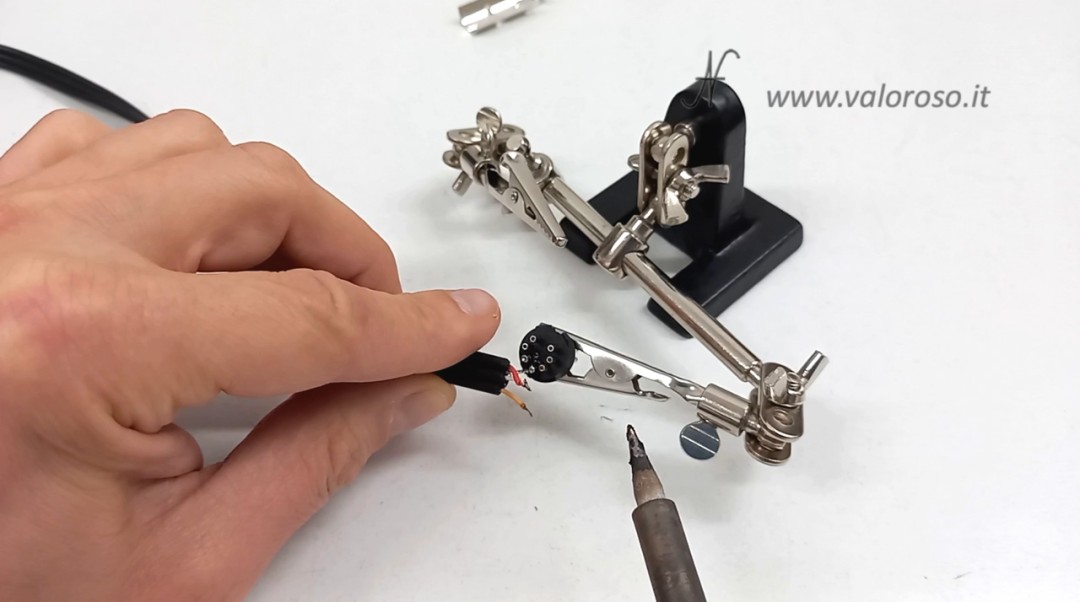
We can use a little flush to dissidant the connector cables and contacts, in order to facilitate the watertight soldering.

We lend the three contacts of the DIN connector and also the metal socks of the three shielded cables and the internal conductors.
We begin to solder the ground contact, which groups all three metal socks of the shielded audio and video cables. For the position of the connector pin, refer to the diagrams attached above.
Successivamente, saldiamo il conduttore centrale del cavo video. Per agevolarsi nelle saldature e non scottarsi, è possibile utilizzare un supporto con pinzette per tenere il connettore. Il supporto si chiama "terza mano" e, in genere, è anche dotata di lente di ingrandimento, che io ho rimosso.
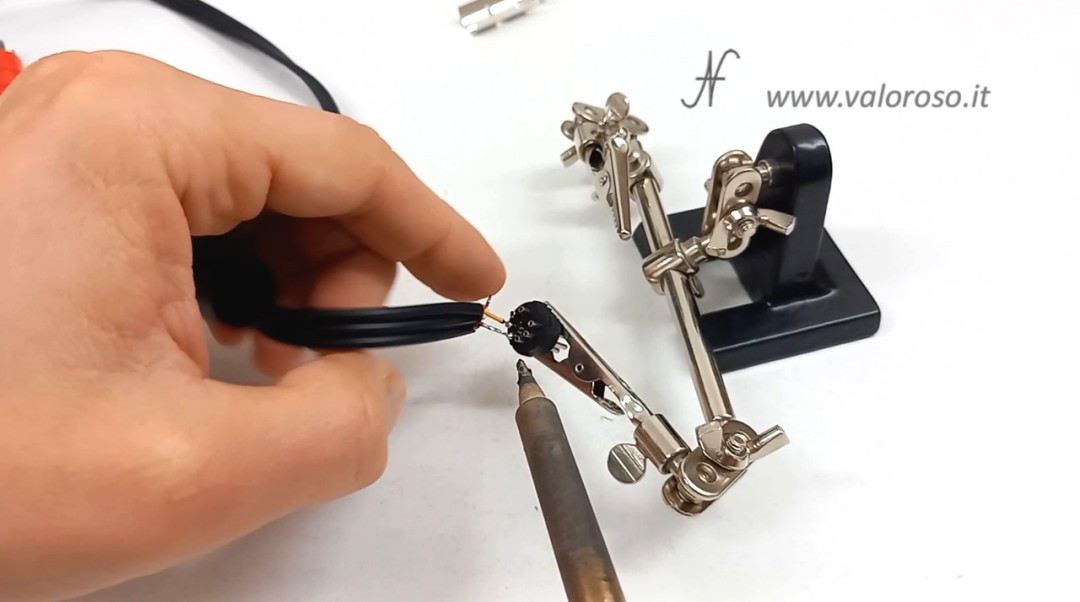
Finally, it is the turn of the two audio cables, red and white, to be soldered together on the contact to the left of the DIN connector.

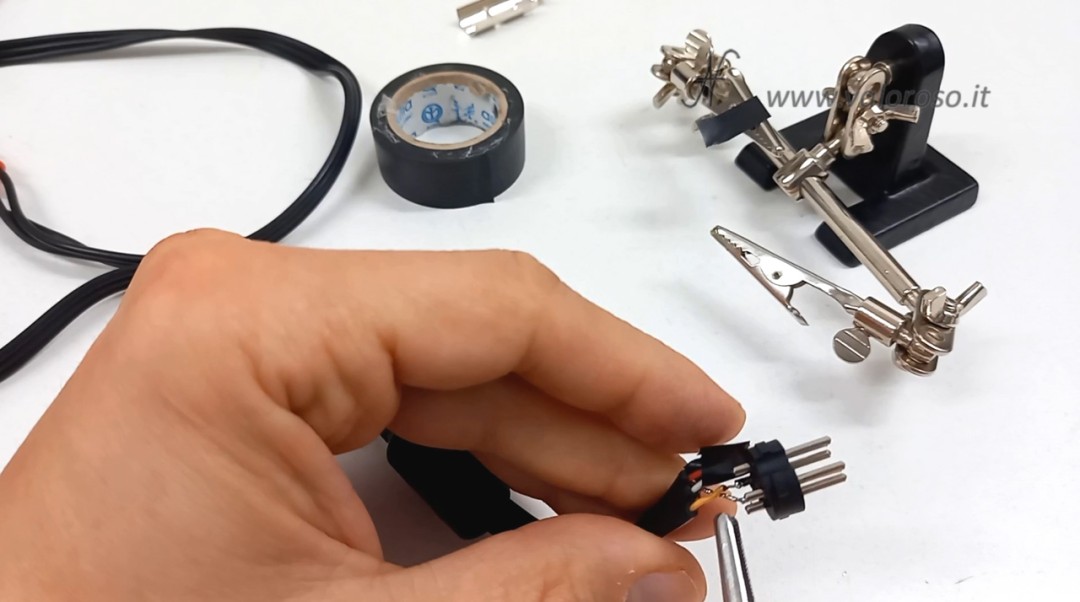
We areolated, with a little appropriately thinned insulating ribbon, the individual conductors, so that they do not touch each other and do not touch the metal armor of the DIN connector that we will soon be upset.
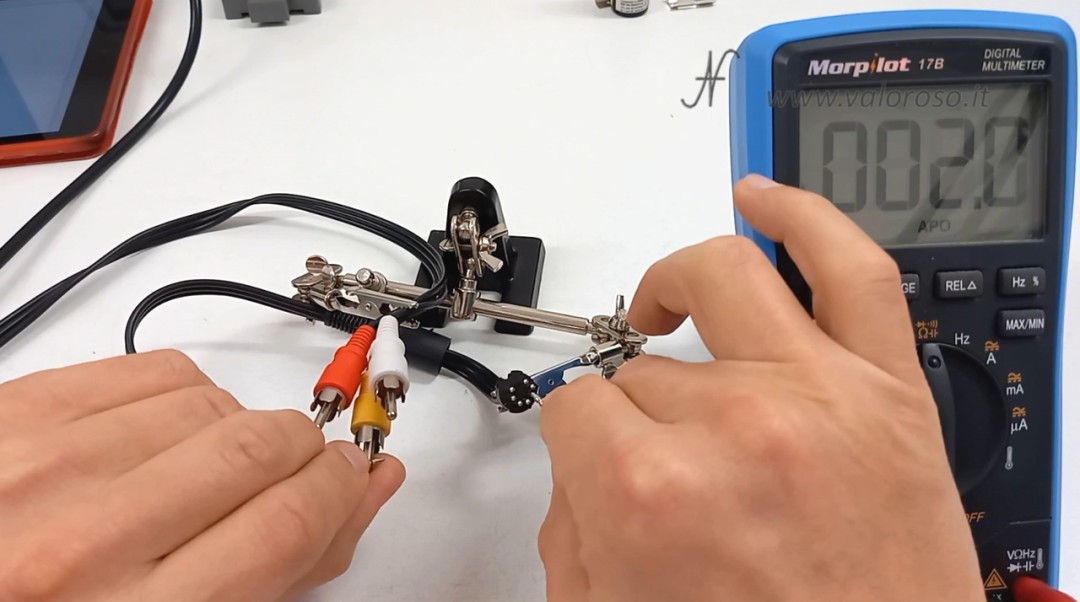
Before closing the DIN connector, it is better to give one last check with the multimeter. We check if there is electrical continuity between the DIN connector and the central Poles of the RCA spines. In addition, we check that the audio and video signal are not in short circuit with each other or with the mass.
Is everything right? We close the connector! We reassemble the metal armor, paying attention to their correct position. We gently tighten the three cables shielded in the appropriate tabs of one of the two armor, through a couple of pliers.
We slightly lift the metal lever that serves to block the connector and close the shell. You had already inserted the shell on the cable, as I suggested, didn't you?
And here, finally, our audio/video cable for MSX Philips VG 8000, VG 8010 and VG 8020! It came very well: it looks like a professional product!
Deoxide connectors
If the connectors were a little oxidized (you can see the metal parts a little opaque or the tester does not return a measure of continuity close to 0 ohm), it is possible to clean the contacts of the connectors with a special fatal spray for electrical contacts.
We spray the spray on a cloth and rub the individual contacts, both internal and external, of the connector.
Let's try the audio/video cable for MSX Philips
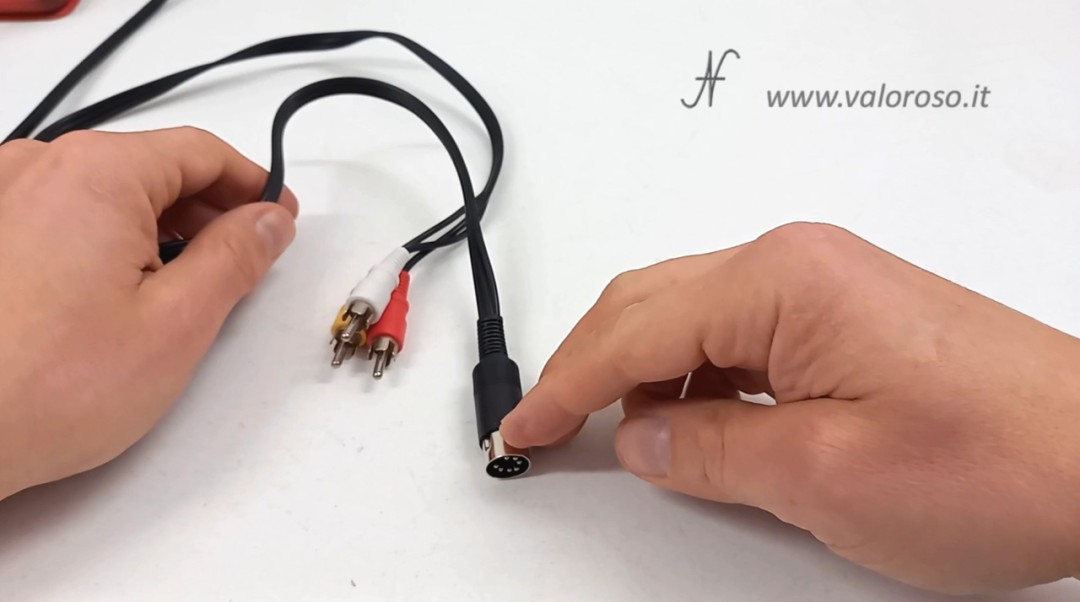
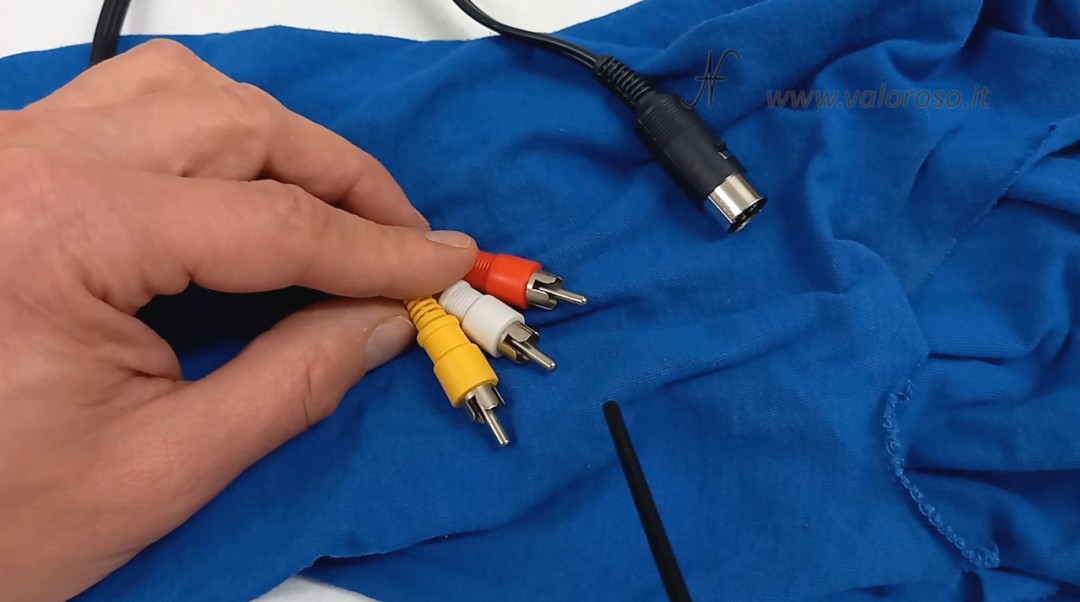
The Philips MSX audio/video cable connects to your TV using the three RCA connectors: yellow (CVBS composite video), white, and red (audio).
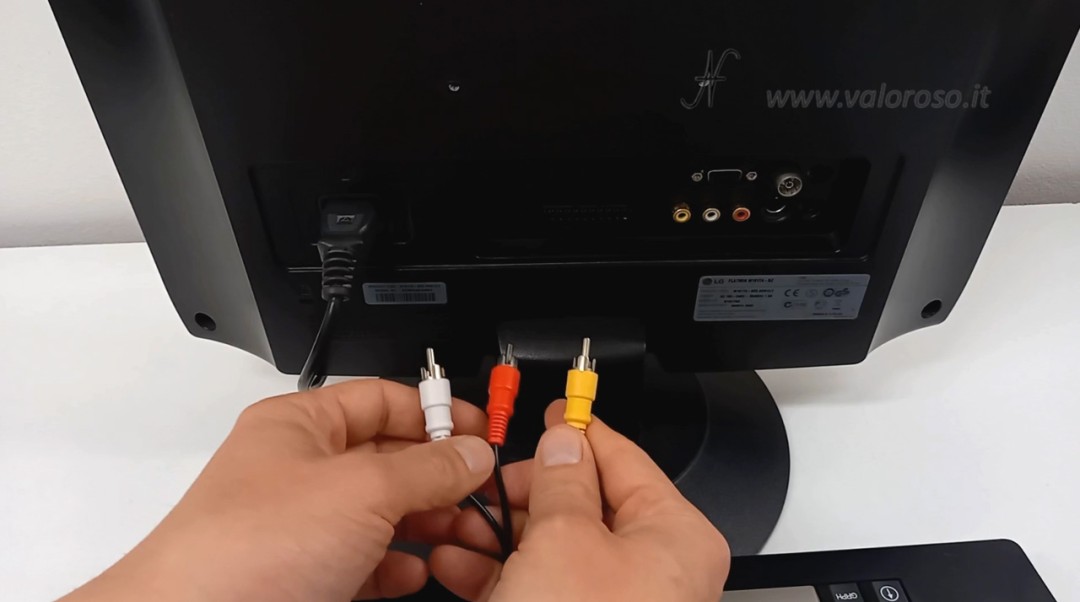
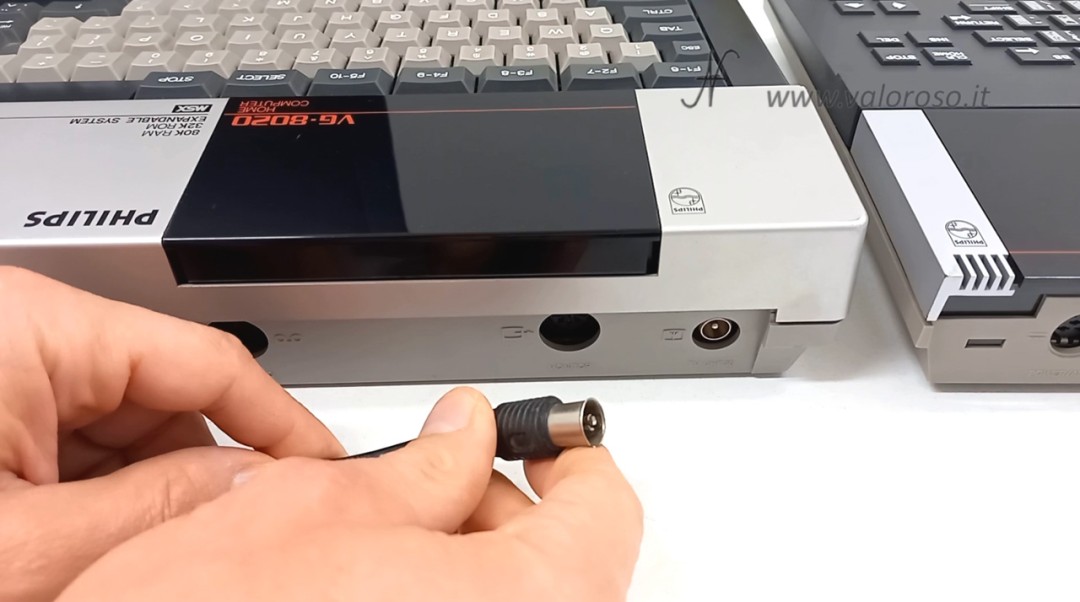
To the computer, you connect the round DIN connector. All cable connection and disconnection operations must be done with computers and TVs turned off.
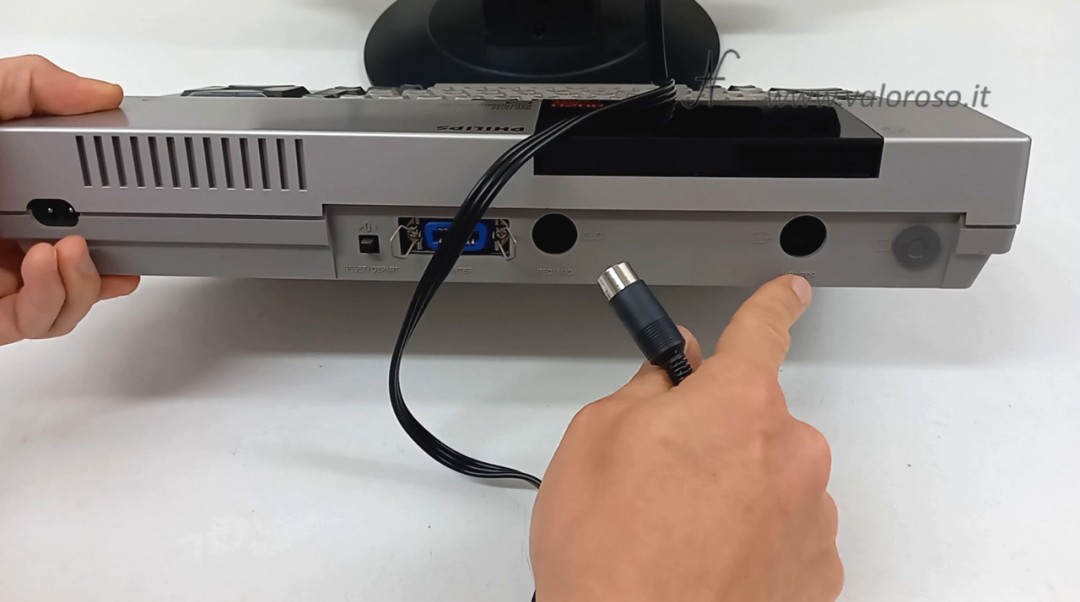
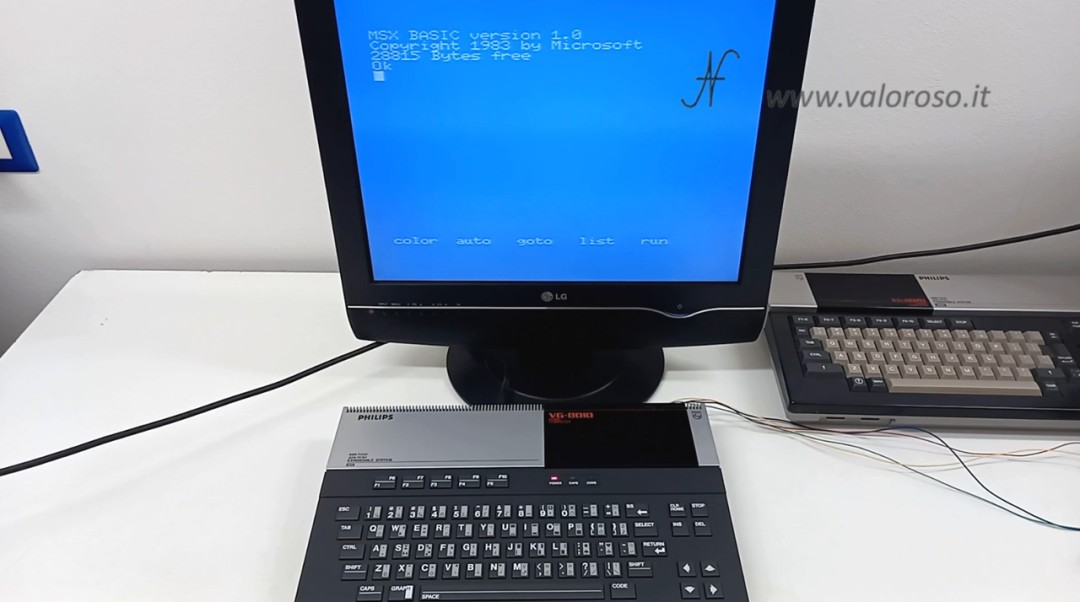
I tried the Philips MSX audio/video cable on a Philips VG-8020 and on a Philips VG 8010.
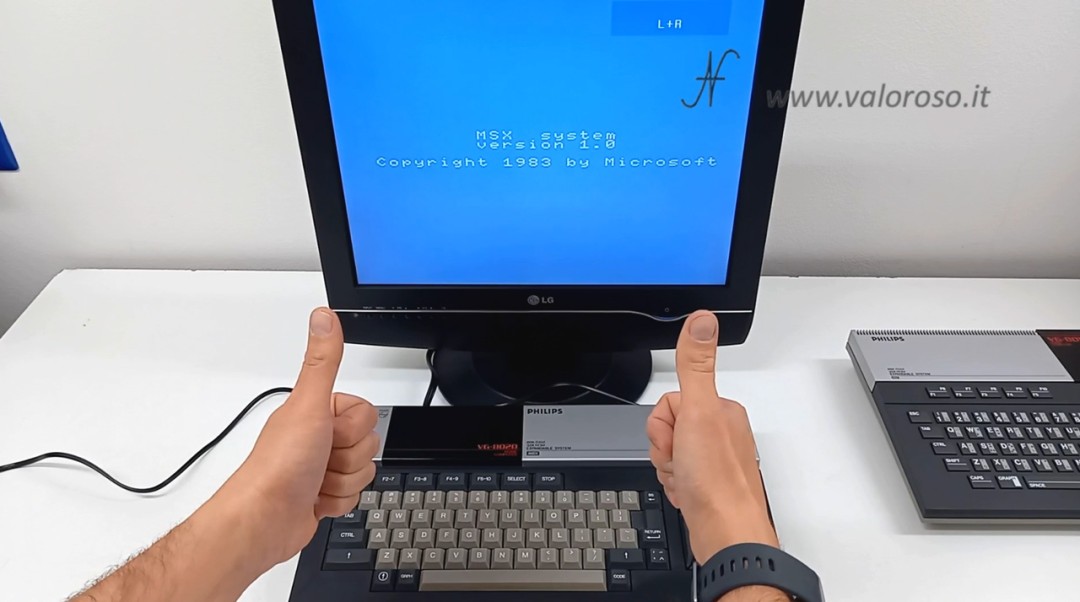
The result is very good!
If you are interested in the back computer and vintage electronics, subscribe to the YouTube channel and activate the notification bell!
The audio/video cable for MSX was exactly what I was looking for ! It works well and the picture quality is way better than using an antenna cable. This has raised my motivation to keep the wonderful vintage MSX machines alive. Thank you !
Great! Keeping vintage machines alive is wonderful! This is exactly my aim!