I love the IBM Model M keyboard! I really like it for its sturdiness, the tactile feedback and the characteristic sound of its keys. In this video, we explore the disassembly and cleaning of this mechanical keyboard in detail. We will follow the necessary procedures step by step to keep your keyboard in perfect condition and make it look like new.

Read the full video transcript →
Technical characteristics of the IBM Model M Keyboard
The IBM Model M keyboard uses the renowned buckling spring mechanism, which offers tactile feedback and a distinctive sound when typing.
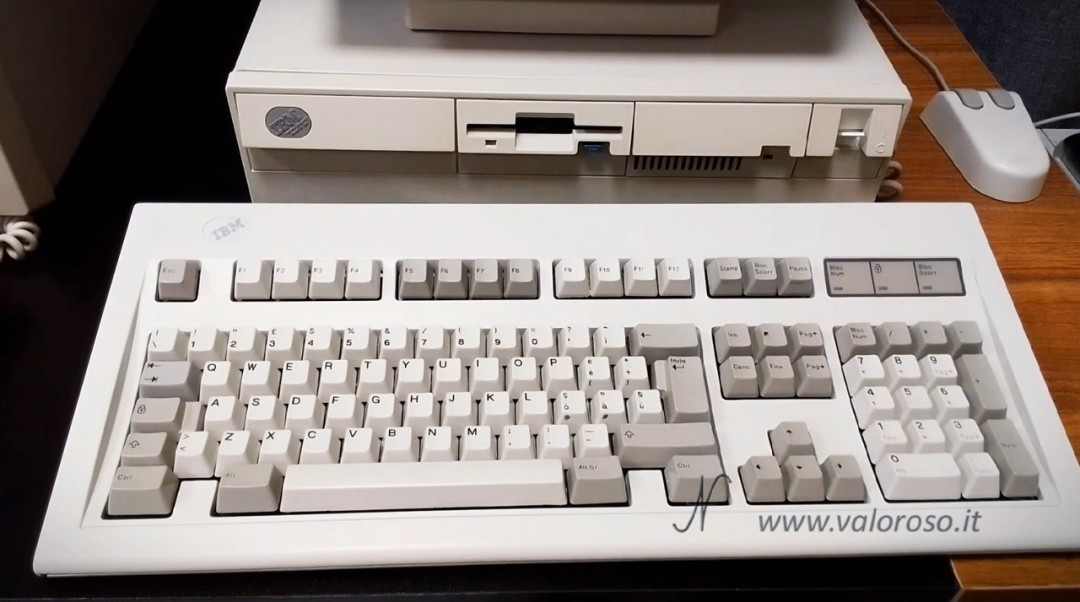
The IBM Model M keyboard I have, which I have had since I was little, has an Italian layout. It is compatible with a wide range of computers, being equipped with a cable with PS/2 connector. It was originally installed on an IBM PS/2 model 60, although I'm now using it on a IBM PS/2 model 30 286.
The keyboard, in addition to being very reliable, has a distinctive sound when you press the keys: the classic click. It certainly cannot be defined as a silent keyboard and, perhaps, you cannot use it at night, but typing on this mechanical keyboard gives a lot of satisfaction.

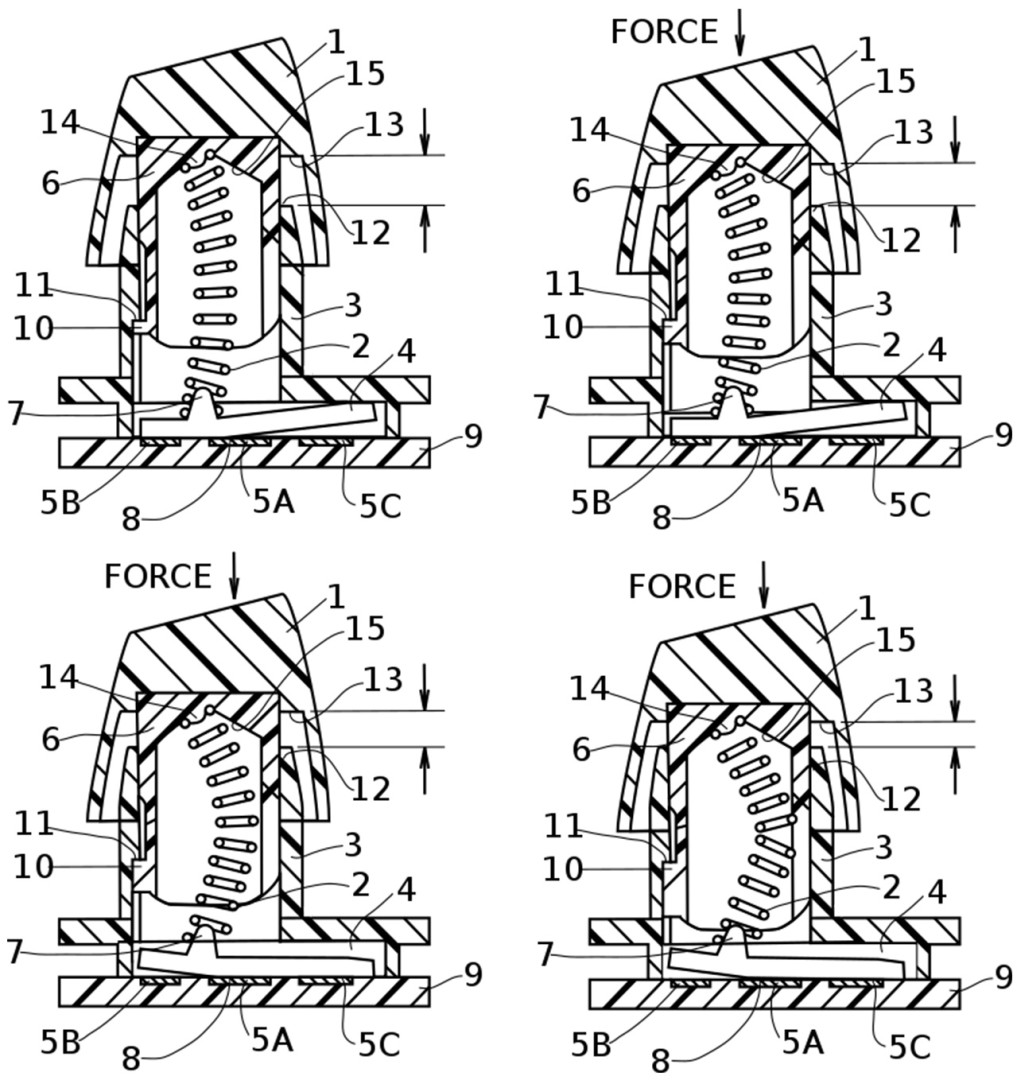
Il meccanismo buckling spring è composto da una molla metallica che si piega ("buckle") quando si preme un tasto. Arrivati ad un certo livello di pressione del tasto, la molla piegata scatta e, a sua volta, ruota un martelletto di plastica sullo stampato flessibile sottostante (membrana), attivando un contatto elettrico.
The mechanism is visible in this photo which was attached to the original patent, now widespread on the internet.
Guide to disassembling and cleaning the IBM Model M Keyboard
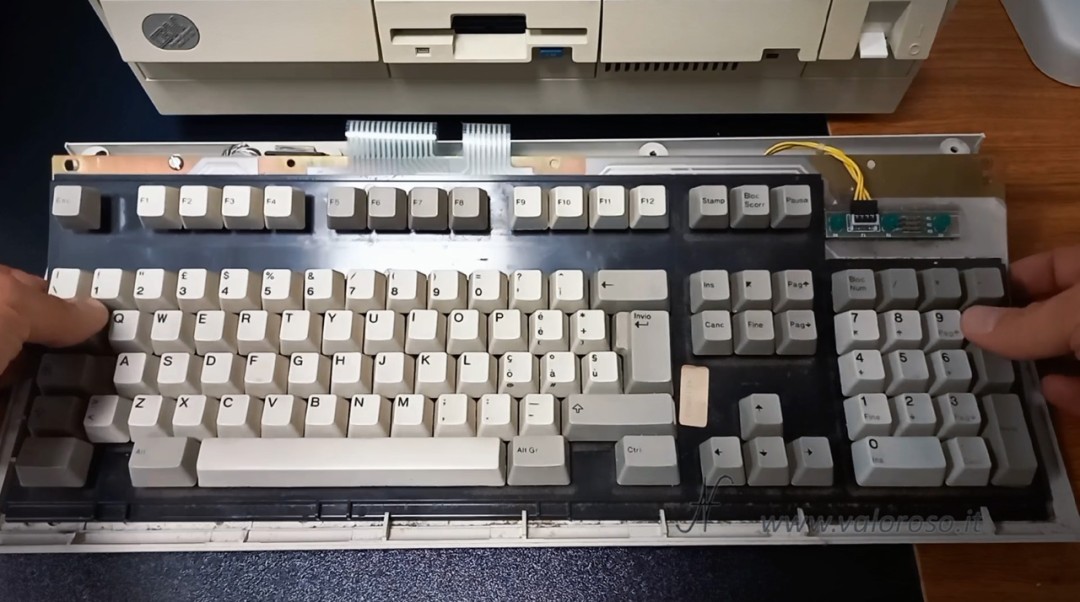
Before starting disassembly, make sure that the keyboard is an IBM model M. Other keyboards, such as the IBM Model M2, or keyboards from other brands, are very different inside and disassembly could be even more complex.
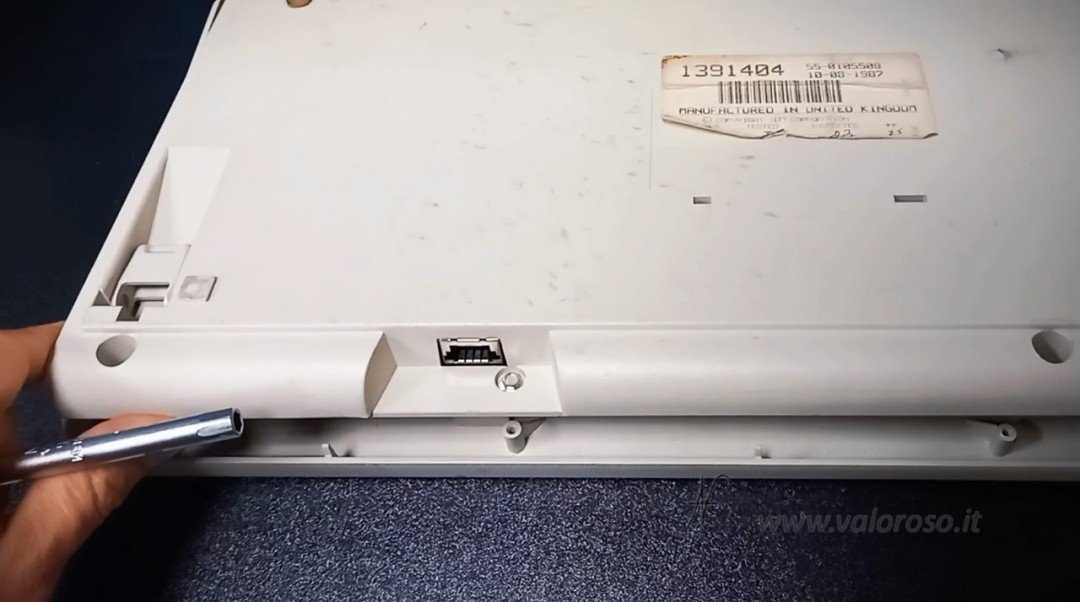
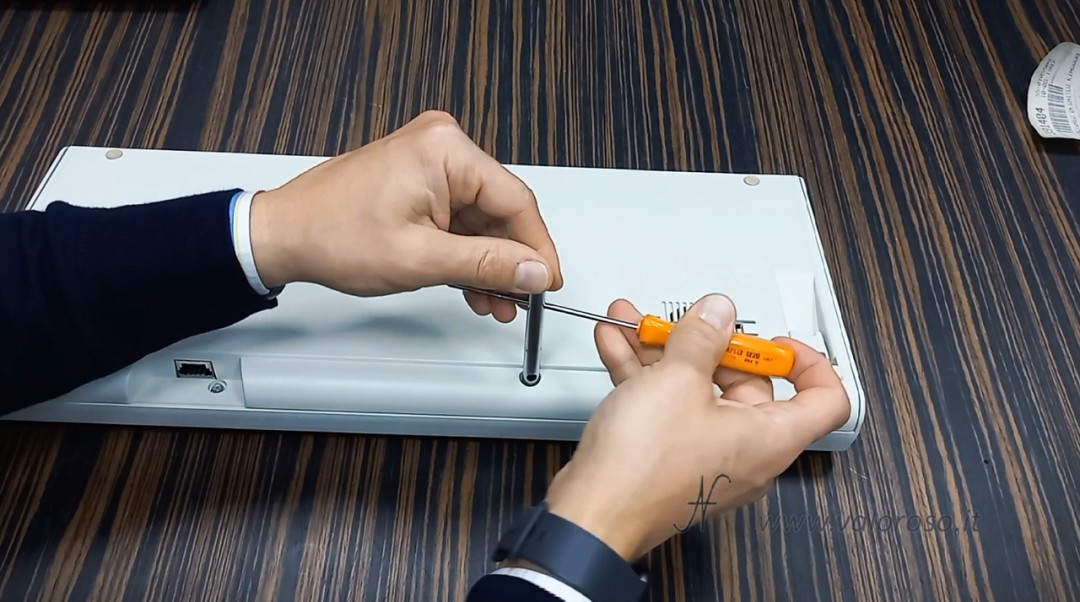
To open the plastic shell of the keyboard, you need a thin 5.5mm socket wrench.

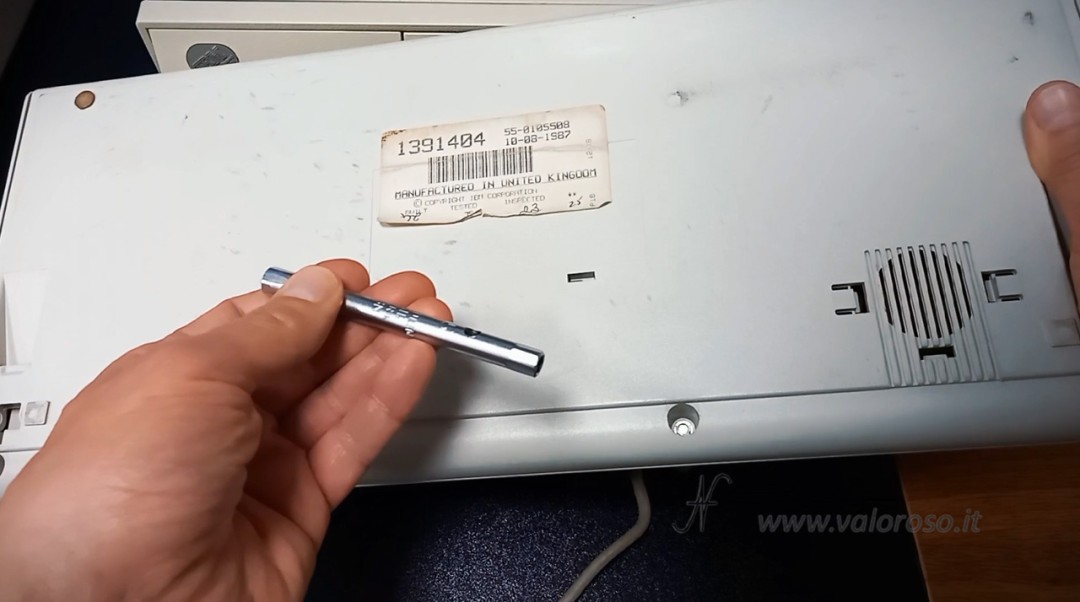
Opening the plastic keyboard shell: Using the thin socket wrench previously described, remove the four rear screws of the keyboard case. Subsequently, carefully open the shell to access the internal components, being careful not to force or break the front plastic hooks.
Remove the internal keyboard mechanism. To do this, there is a screw near the LEDs. Be careful to slide it gently upwards, so as not to damage the plastic hooks.
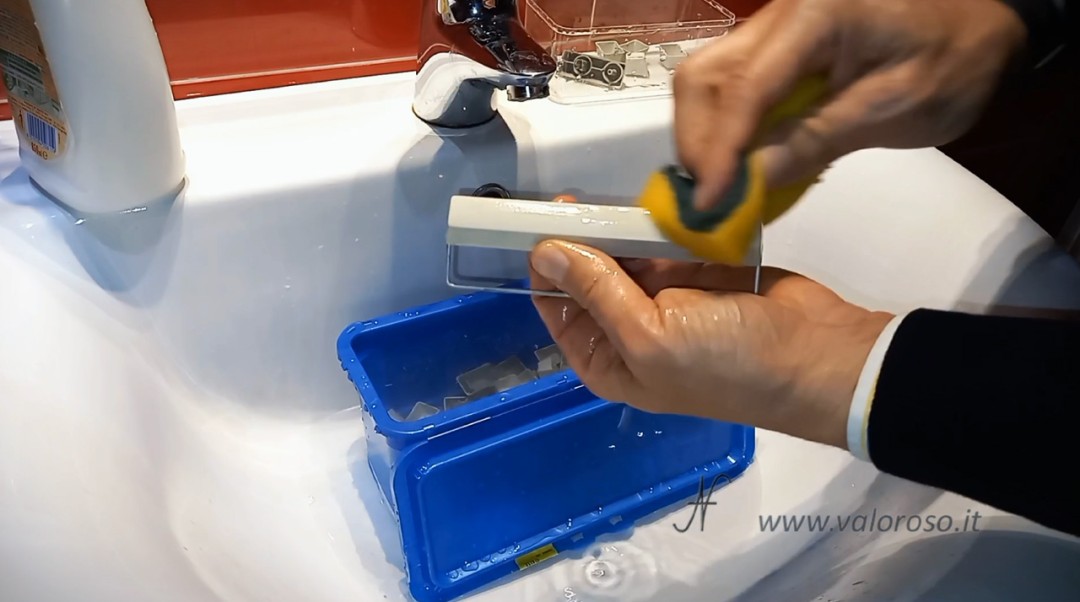
Cleaning the plastic shell: once the case has been opened, carefully clean both the upper and lower shell of the keyboard using warm water, degreaser, a sponge and a toothbrush.
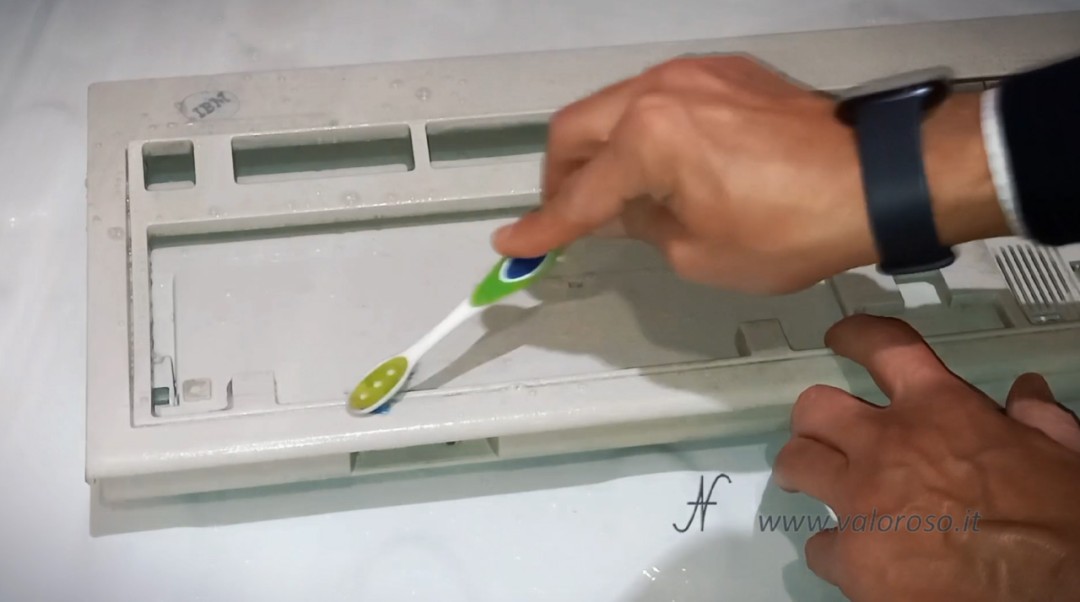
Although I am sometimes a little careless and don't use gloves, I advise those who follow me to adopt all the protections to ensure their health is preserved.
Rinse with plenty of water.
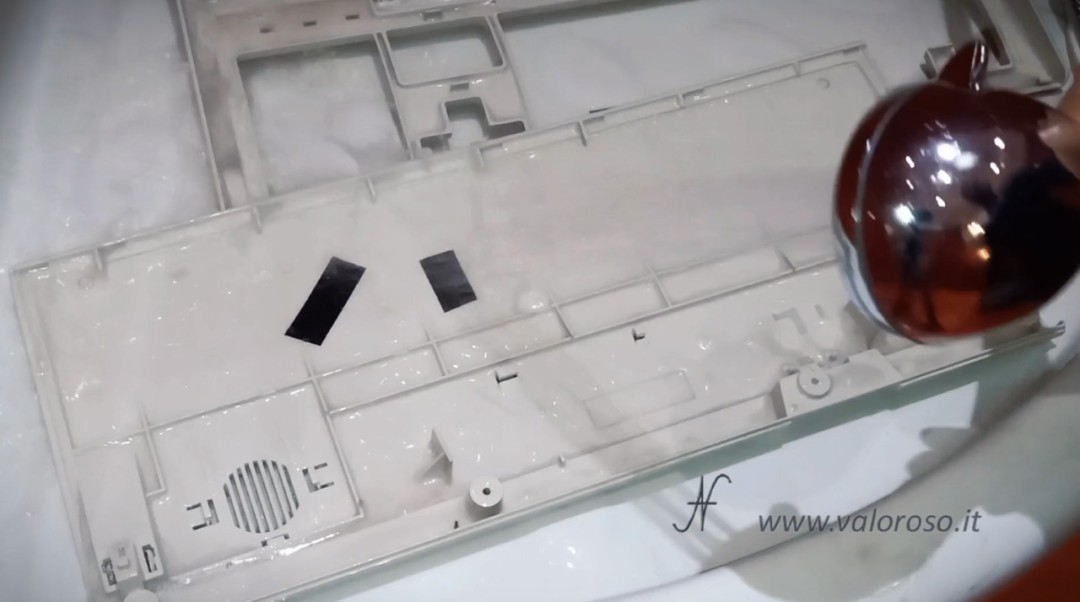
I recommend drying carefully, with a cloth and also with compressed air, taking care not to bend and damage the plastic.
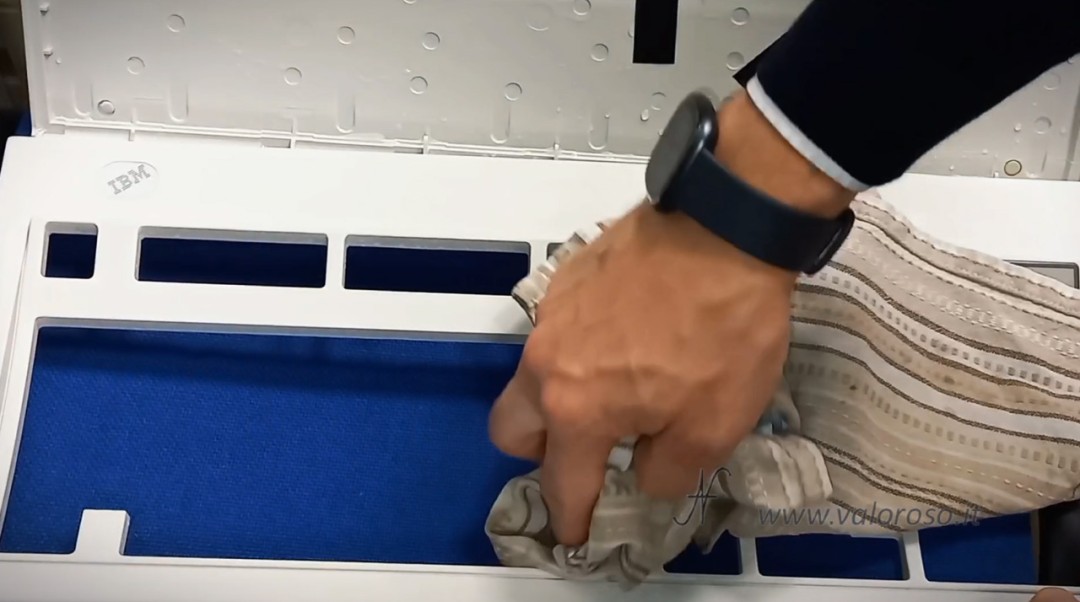
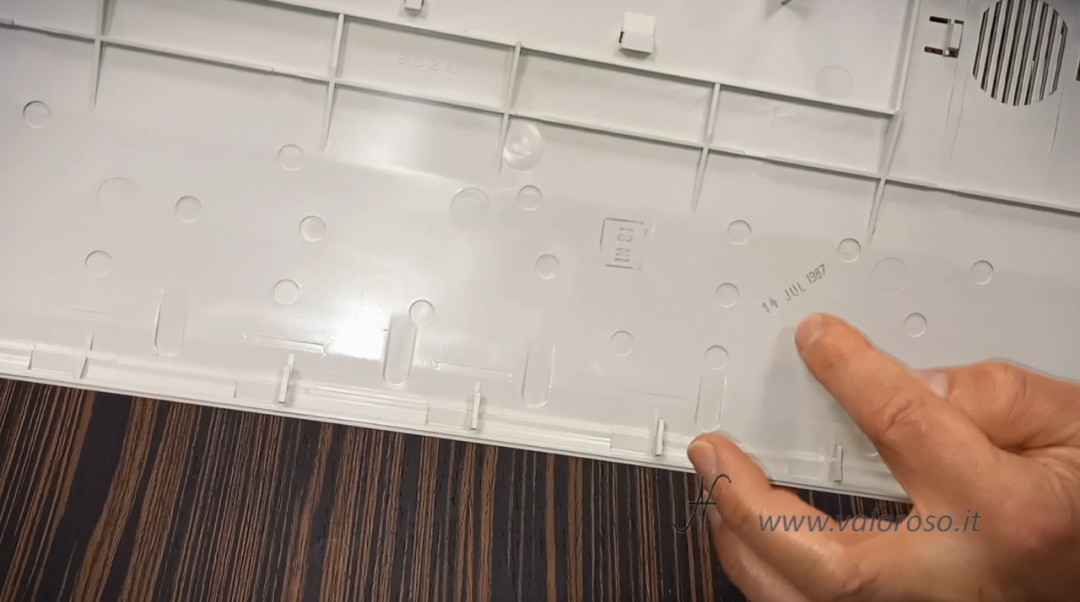
Pay particular attention to details, to avoid damage to the stickers and preserve the writing printed on the bottom shell.
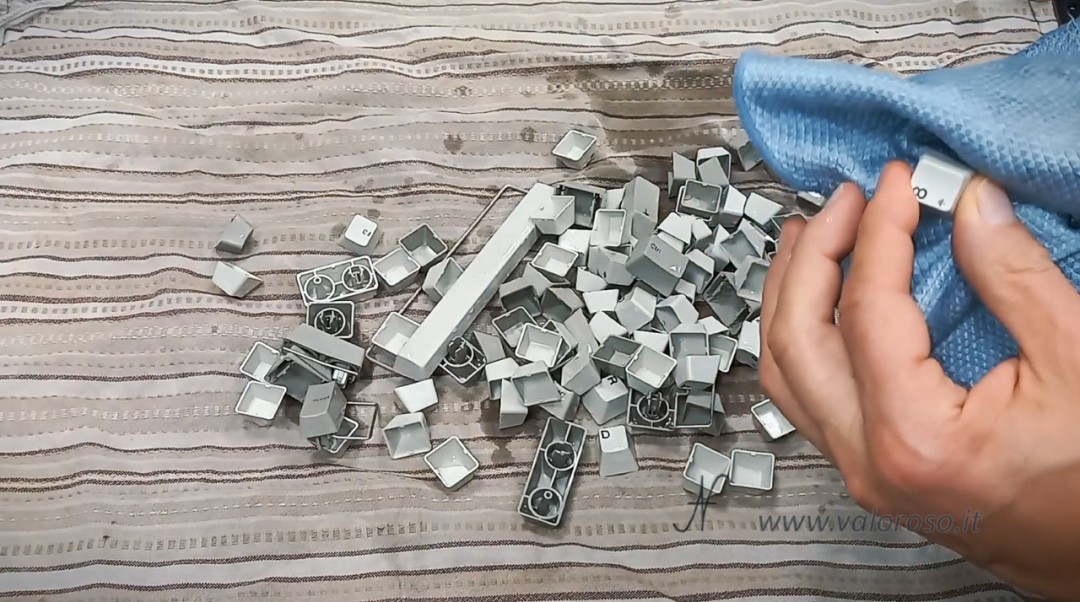
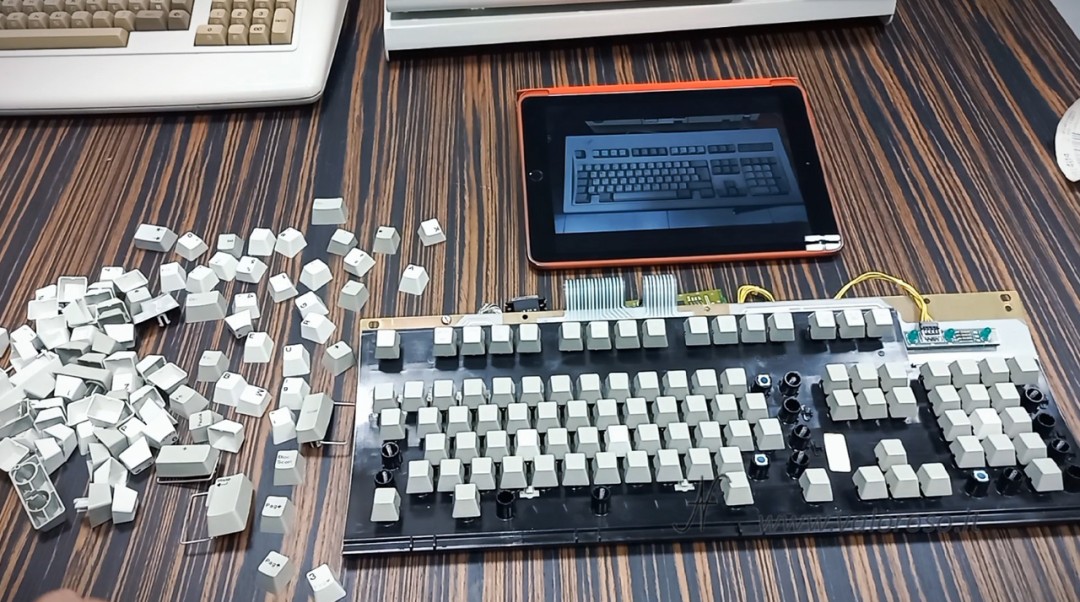
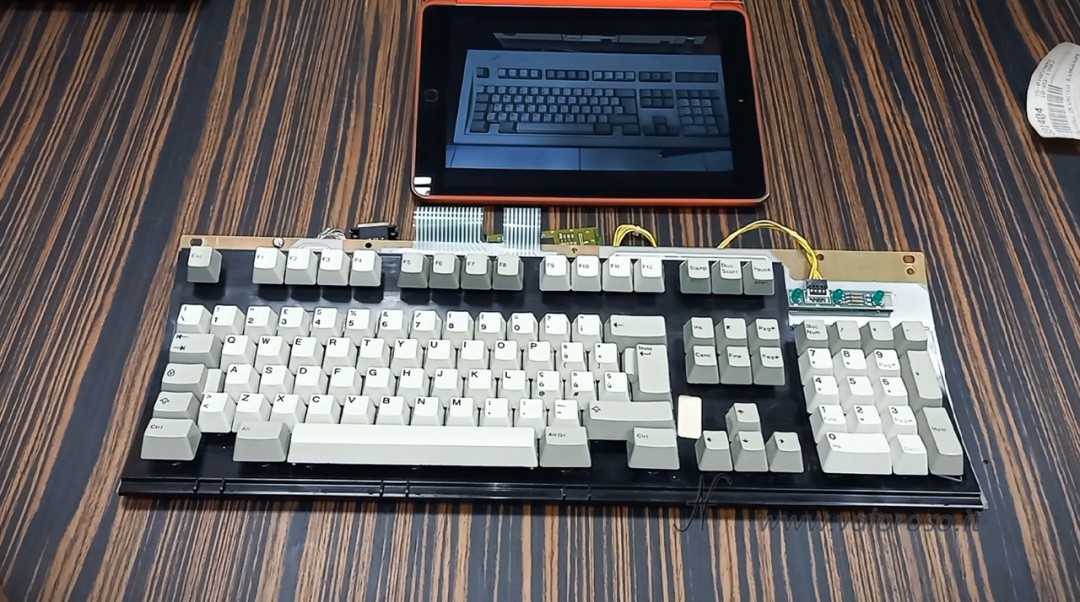
Removing and cleaning the Keys and Keycaps: remove all the keycaps and even the larger keys, one by one. I recommend taking a photo of the keyboard before removing the keys and caps, so that you remember how you will have to reassemble them!
In the video, I also show how to use the key lifter to remove the harder keys.
To clean the keys and keycaps, use a soak in warm water and a little degreaser. Use a sponge and toothbrush to reach the most difficult to clean parts.
Rinse and dry thoroughly.
Cleaning the internal mechanism: use compressed air, a clean brush for dusting. For more stubborn dust, use a damp cloth, taking care not to wet the inside of the mechanism.
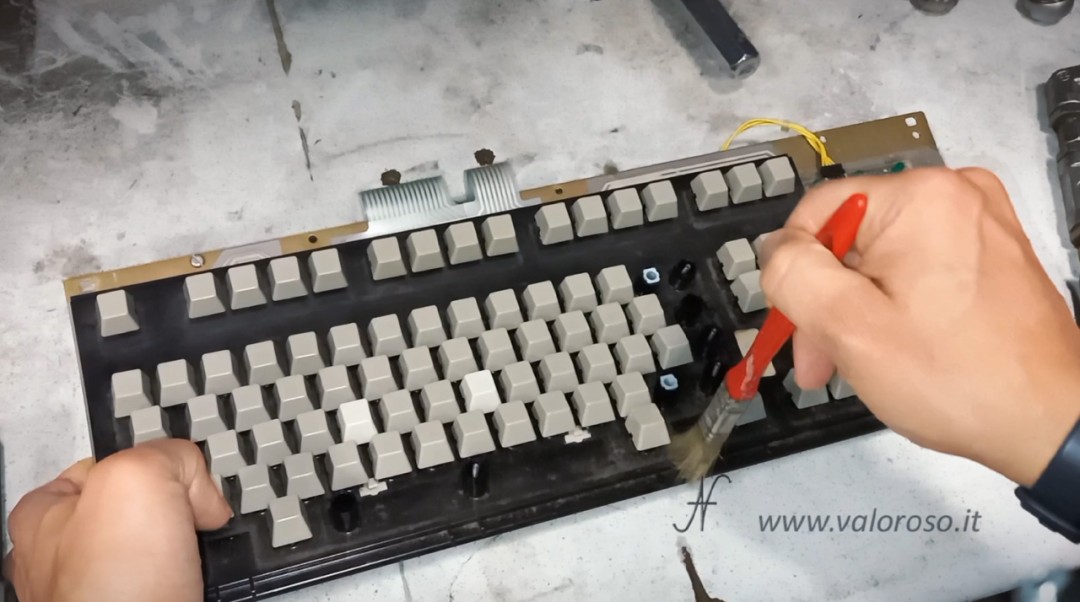
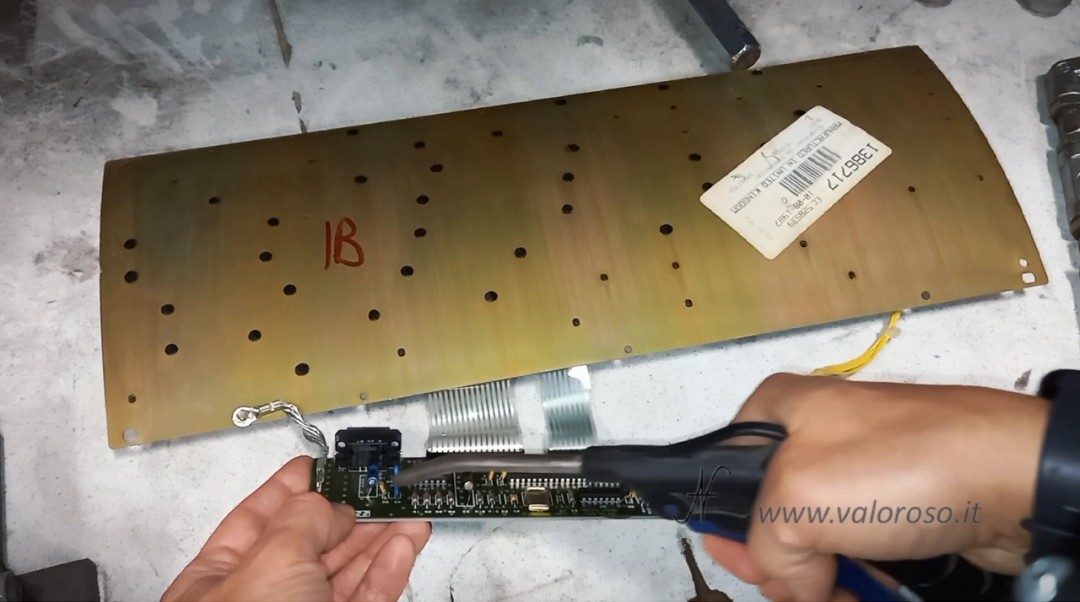
There is an electronic board, behind the keyboard mechanism, connected to the keyboard membrane. Please be careful not to bend the membrane too much to clean the card: it is old and the membrane could break. The electronic board must be dusted.
At this stage you need to be very delicate.
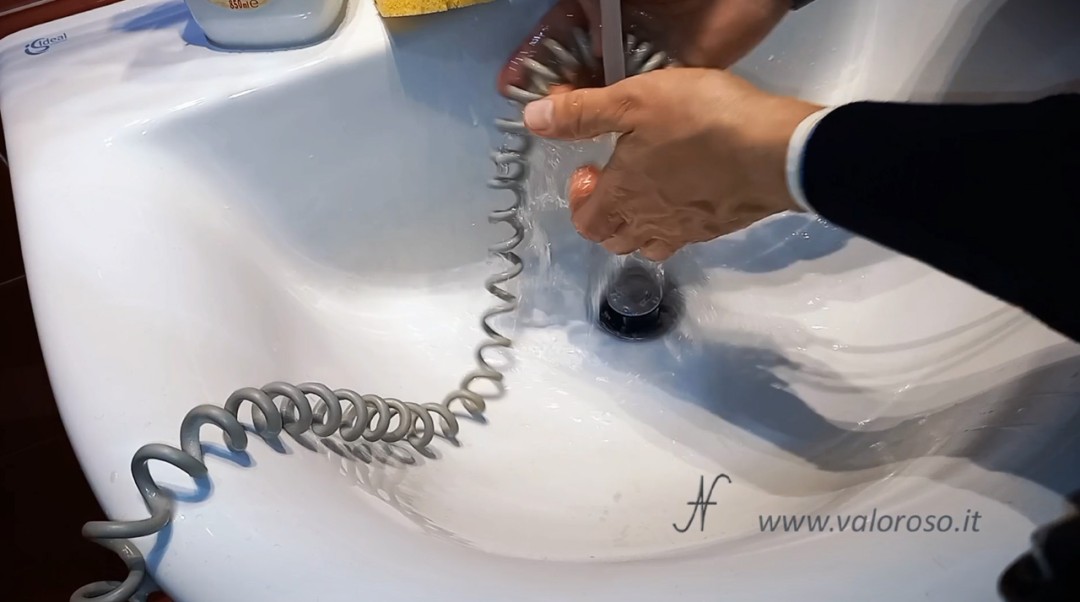
Cleaning the connection cable: also clean the spiral connection cable using warm water and degreaser, taking care not to damage the connectors and any labels.
Reassembling the IBM Model M Keyboard
Once cleaning is complete, make sure everything is perfectly dry.
Carefully reassemble all keyboard components, making sure to return the keycaps to their original position. Regarding the larger keys, those that highlight the buckling spring mechanism, pay attention to insert them correctly. In particular, insert any metal levers inside the appropriate supports and insert the spring into the appropriate hole in the button.
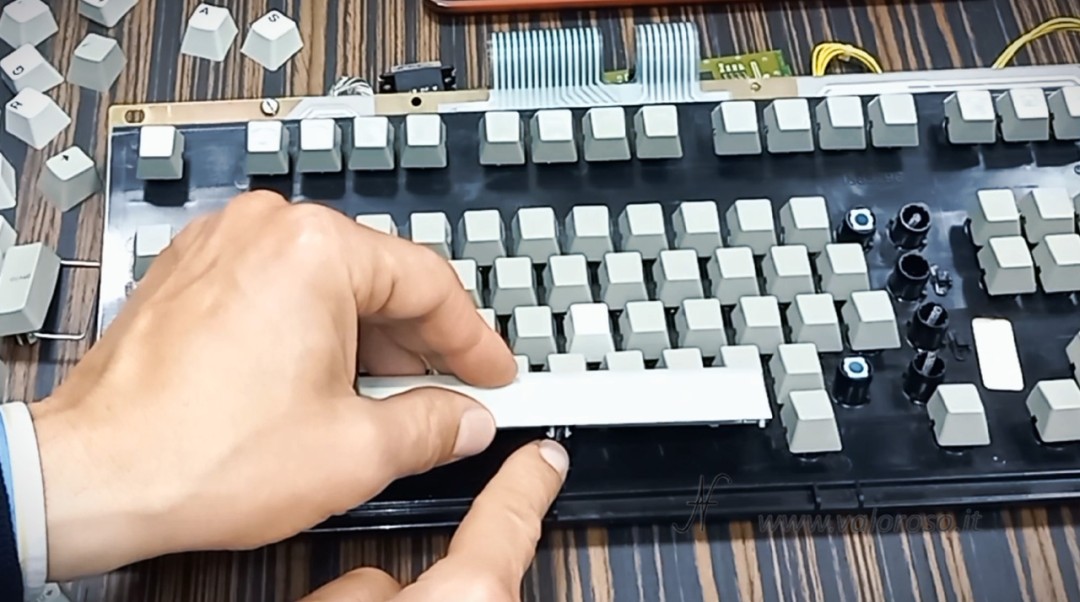
After reassembling each key, check that the mechanism makes the same characteristic click sound. If, when you press the button, it does not click, you will obviously have to remove it and put it back, checking the position of the clip.
If some keys are particularly hard, you can lubricate the plastic parts that slide over each other with a little Vaseline-based lubricant, taking care not to let it penetrate inside the mechanism.
Reassemble the keyboard mechanism inside the lower plastic shell. First, correctly reseat the electronic board in the appropriate guides, making sure that the connector comes out of the appropriate slot. Slide the mechanism from top to bottom, to fit inside the plastic hooks of the lower shell. There are both bottom and top hooks. Tighten the screw near the LEDs.

Close the two plastic shells, retightening the 4 screws. To avoid stripping the thread, avoid using excessive force when tightening the screws.
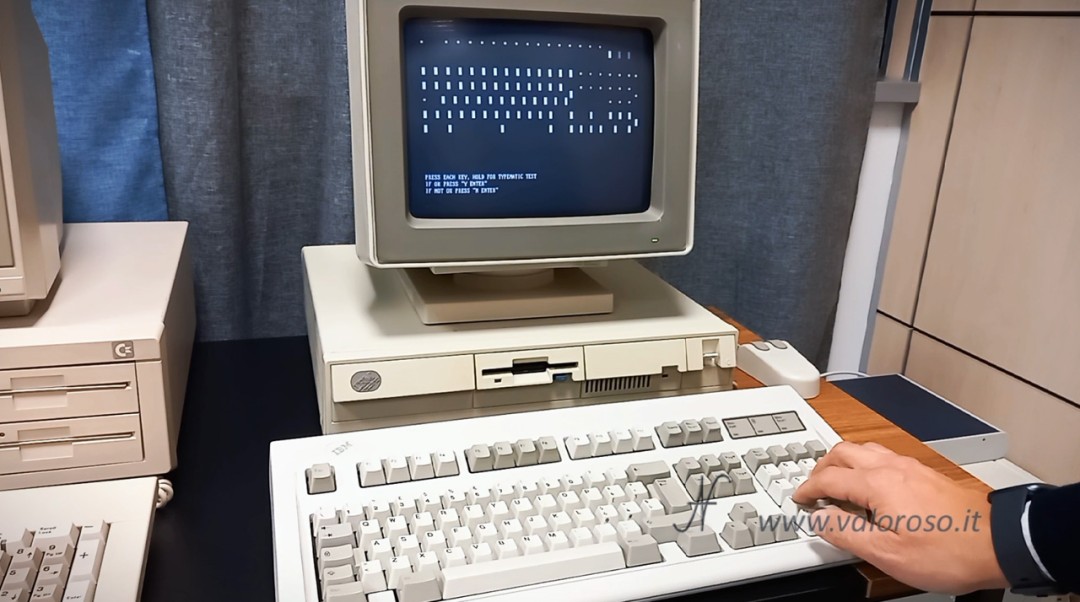
Test and verify: The time has come to test the mechanical keyboard on a computer. I use an IBM PS/2 model 30. Inside the original IBM Starter Disk, there is a utility to test all the keys on the keyboard. Also check whether the three keyboard LEDs light up correctly.
Are you a fan of vintage computers?
Don't miss the technical details and adventures that I share on the @ValorosoIT YouTube channel. I'm also on TikTok, Instagram, Facebook…