We are now in winter and it is starting to get cold. What better opportunity for to make an electric heater controlled by the Commodore 64?

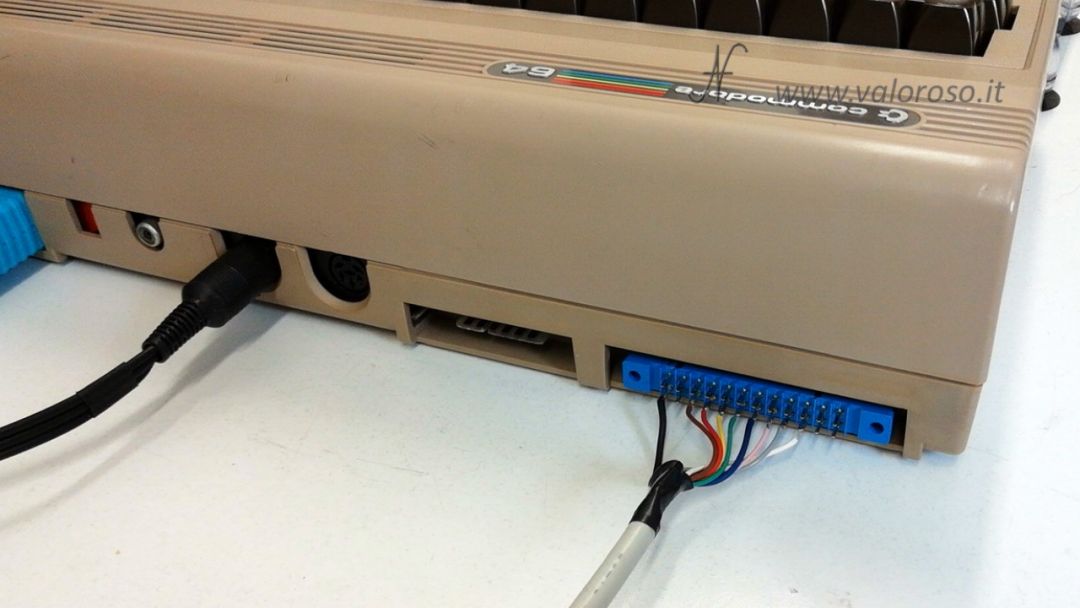
Connection of the interface for the electric stoves commanded by Commodore 64
To connect the electric heater to the Commodore 64 I used ainterface with 4 relays and photocouplers. The 4 relative expansion interface can command as many loads of 10a each. I had already used this form to command one espresso coffee machine. This interface must be powered externally, using a 5V power supply.
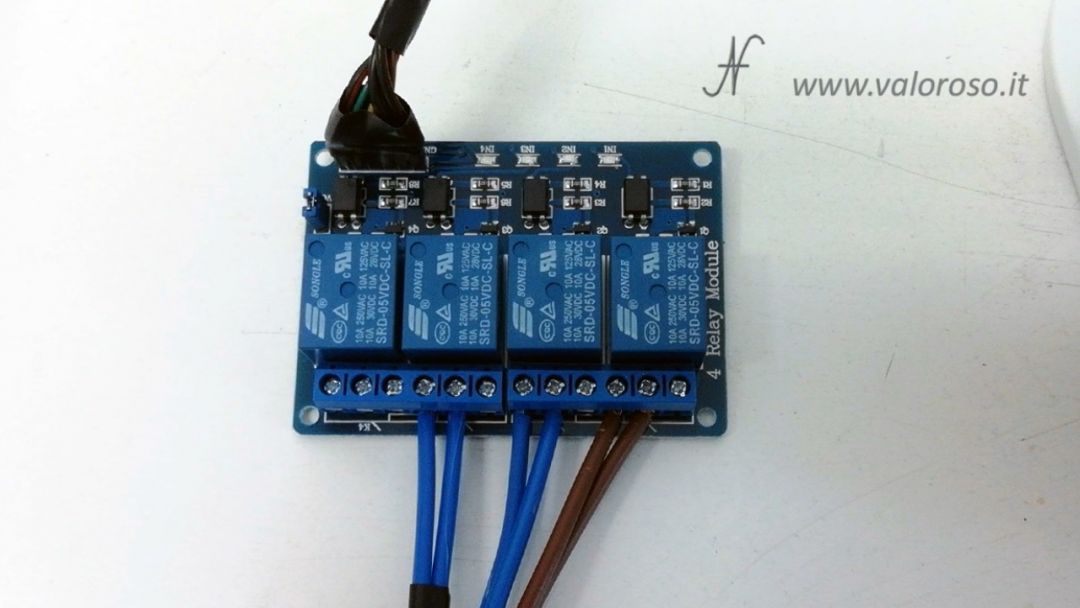
The relay module connects to the Commodore 64 user port, by means of a 3.96mm edge 24-pole connector.
Remember to turn on the Commodore BEFORE the interface, otherwise the relays will activate randomly and the heater will turn on without your consent!
For the same reason, when the experiment is over, it is necessary turn off the interface FIRST and then the Commodore 64.

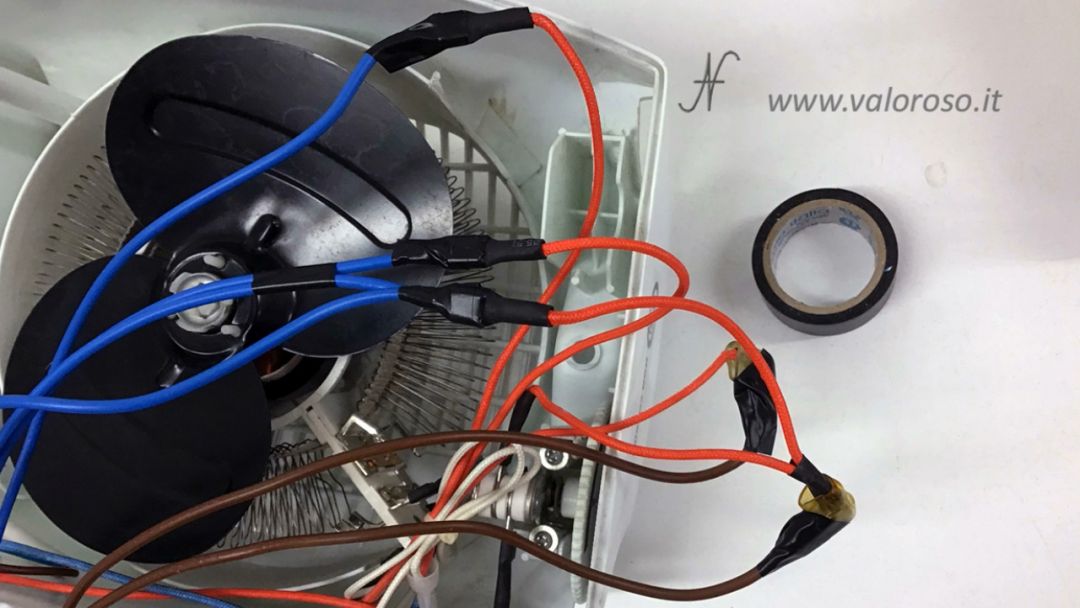
Regarding the connections, I connected the normally open contacts of the relays to the control selector of the heater.
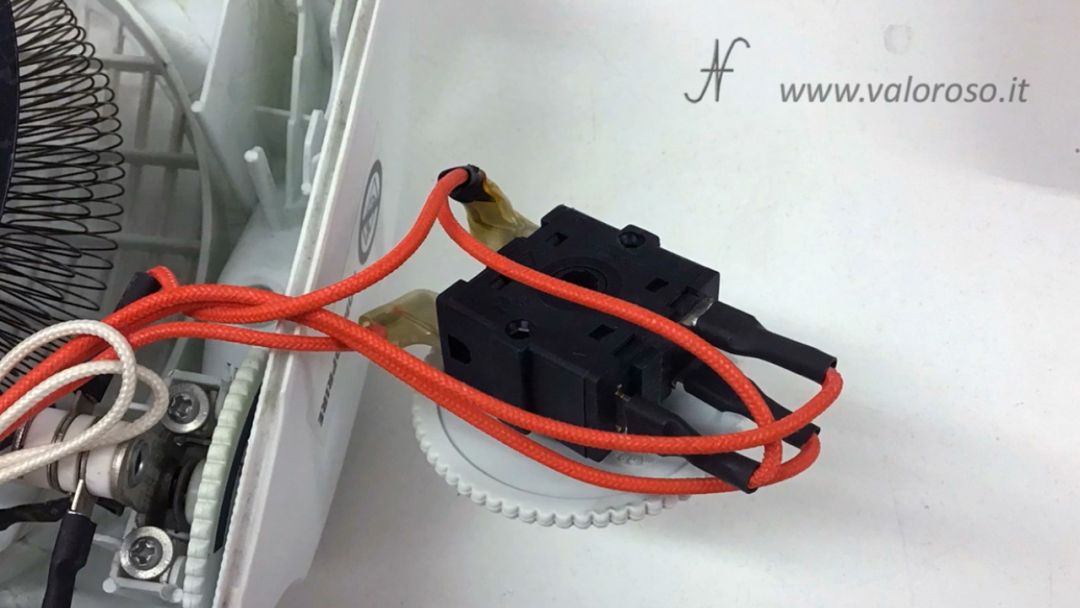
I first disconnected the Faston from the command switch, obviously marking the position so as not to forget the correct position.
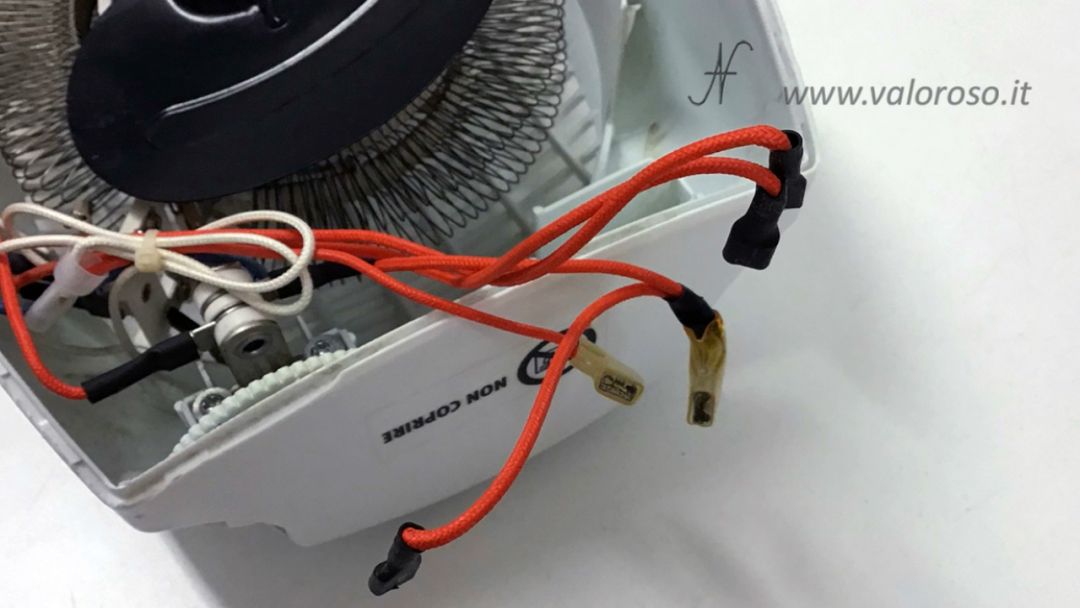
Subsequently, I connected the exits of the relays of the interface form instead of the interruption contacts, isolating them well with insulating ribbon and, of course, moving them as far as possible from the resistance. My project is temporary, but, if you want to use the stove in a stable way with the Commodore 64, I suggest the use of cables and sheaths suitable for high temperature.
Operation of the electric heater
The operation of the heater is very simple: with one contact the fan is activated or deactivated, while the two resistances that heat the air are controlled with two other contacts. Obviously, the resistors must not be turned on if the fan is not active, but this aspect is managed by the software.

So, summing up:
- is activated fan with the Relay 1, connected to pin PB0 the Commodore User Port;
- to turn on the first heating resistor we use the Relay 2, connected to pin PB1 of the C64 User Port;
- to activate the second heating resistor we use the Relay 3, connected to pin PB2 of the C64 User Port.
With regard to power management, to obtain power 1, only one resistance must be activated. To obtain full heating power, both relays that control the resistors must be activated.
Be careful! There is electricity here! If you want to carry out this experiment, get help from someone experienced!
Basic software for managing the fan heater
The Basic program to manage the electric heater controlled by the Commodore 64 can be downloaded at the bottom of this page. It is available both in text format, to be viewed from PC, and in PRG format, to be launched by Commodore 64 or by an emulator.
For those wishing to deepen, I had described the interface and how to check the user port of the Commodore 64, with the instructions in Basic, in this article.
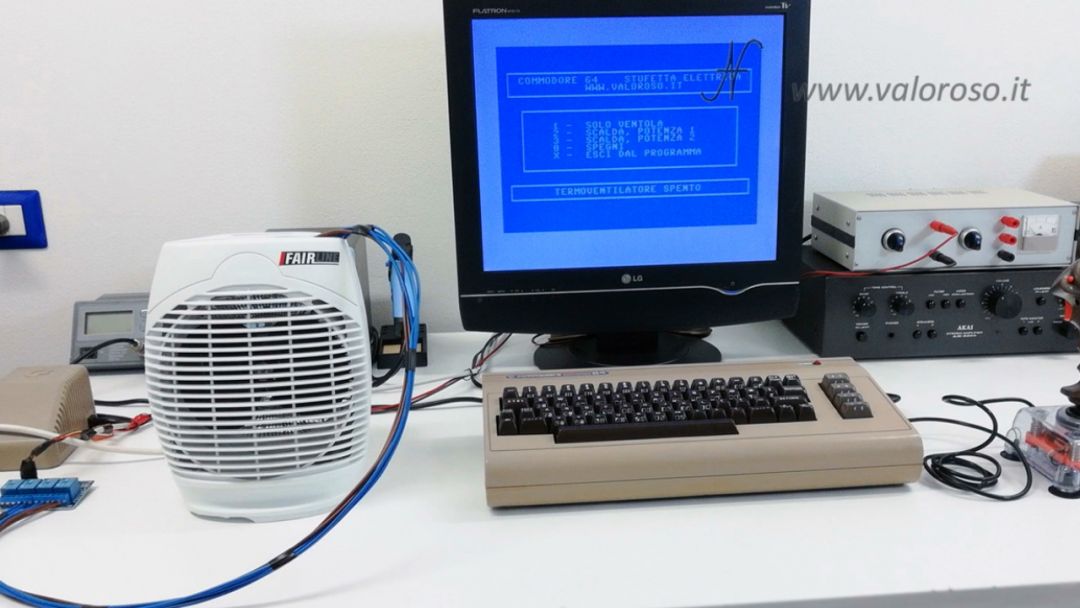
To load the program I made in BASIC, I used the Kung Fu Flash, which behaves just like a real cartridge. As soon as the Commodore is turned on, the program is loaded!
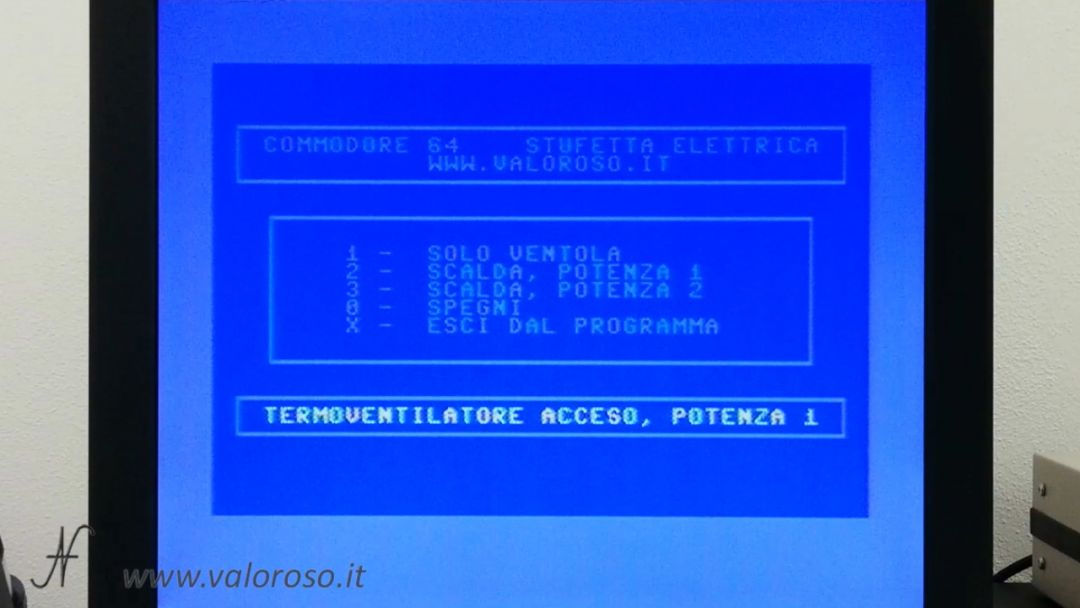
The commands available are to control the fan heater with the Commodore 64:
- 1 to turn on the fan;
- 2 turns on the heating at power 1 (as well as the fan);
- 3 to turn on the heater at maximum power;
- 0 turns off the fan heater;
- you can also exit the program by pressing X: when the program is exited, the heater is switched off automatically if it had remained on.
Finally, I wanted to improve the experiment by also using a joystick to control the electric heater!
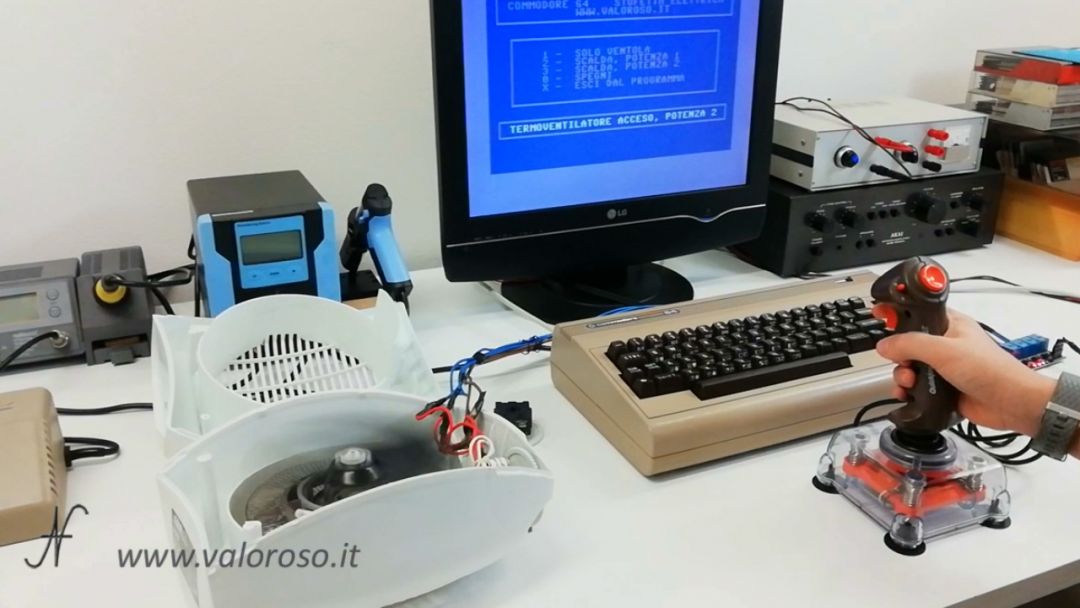
To turn the heater on and off, press FIRE.
When the fan heater is on, by moving the joystick up and down, the heating power can be adjusted, passing from "fan only" to "power 1" and then to "full power".
Basic commands to manage the coffee machine controlled by the Commodore 64
In the program listing, downloadable at the bottom of this page, there are some peculiarities. First, the command to activate the fan of the electric heater is:
POKE 56579, 1
Per activate power 1 (half power), with the fan, relays 1 and 2 must be kept on at the same time, therefore the following is used:
POKE 56579, 3
Per activate power 2 (full power), together with the fan, relays 1, 2 and 3 must be kept on at the same time, so the command is:
POKE 56579, 7
Finally, for turn off the fan heater, you use the following command:
POKE 56579, 0
As I had already specified in this article, actually the command POKE 56579, number is used to set the pin of the PB port as the output. As soon as it is set as an output, the corresponding pin immediately goes to logic level 0 (to ground), therefore activates the relay.
List of the program in Basic
And here is the listing of the Basic program to manage the fan heater.
The program is available in two formats:
- STUFETTA_C64. TXT, in text format, to analyze it on a PC (this file can not be immediately loaded or transcribed on the Commodore 64: to convert it into PRG you have to use C64LIST);
- STUFETTA_C64. PRG, to be unpacked, in loadable and bootable format from the Commodore 64 and emulator.
Credits: in the video tutorial, SID music is Alloyrun by Jeroen Tel.