In this video (at 1:50 pm) I showed how download for free, install on Windows 10 PC, configure and use l'VICE emulator (WinVICE) for Commodore a 8 bit.

Unlike CCS64, another emulator I have described in this article (and is present in the same video, at the beginning), deputy can emulate different commodore models and installs on different operating systems.
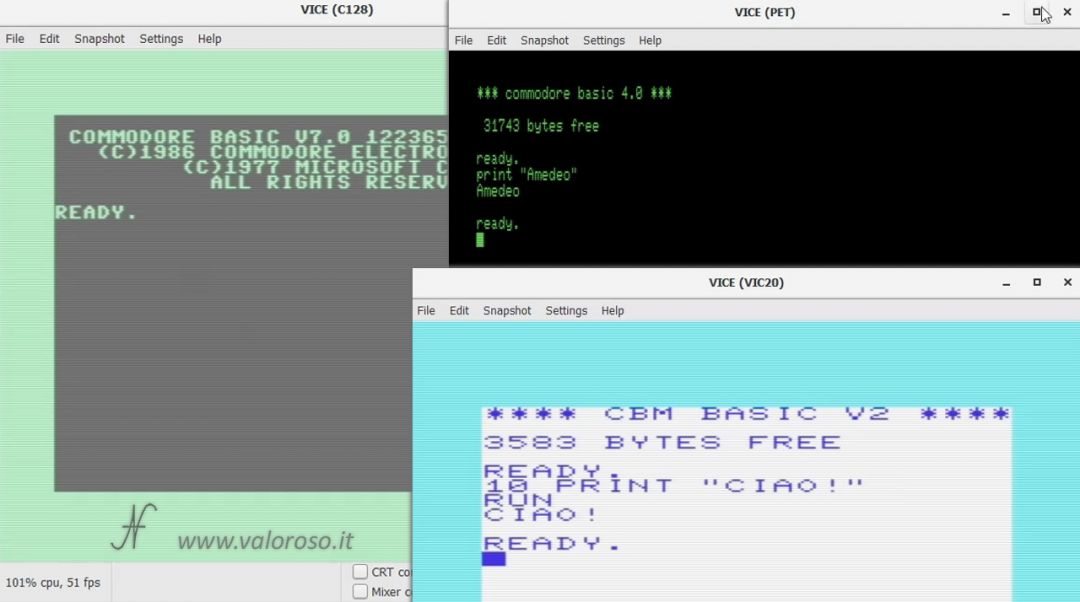
In fact, VICE works on Unix, MS-DOS, Win32, OS / 2, BeOS, QNX 4.x, QNX 6.x, Amiga, Syllable and Mac OS X. VICE emulates the following 8-bit computers: C64, C64DTV, C128, VIC20, PET models, PLUS4 and CBM-II (aka C610 / C510).
Download and install the deputy emulator for 8 -bit commodores for free
To download the deputy emulator for the Commodore, on PC Windows 10, I recommend going to the official website, which is Sourcefortge. I would avoid others, because they may contain or programs of an older version, or we can even infect your computer with malware. The video refers to version 3.4, but the procedure is the same for later versions as well.
From the official page of the deputy emulator, go to download, Windows. We have to download the compiled files, not the sources.


IThe downloaded file is in 7Z format, so we have to download and install Seven-Zip (7Zip) to extract the compressed archive. Also to download 7-Zip, we go to the manufacturer's site, then 7zip.org, avoiding downloading it from other sites.
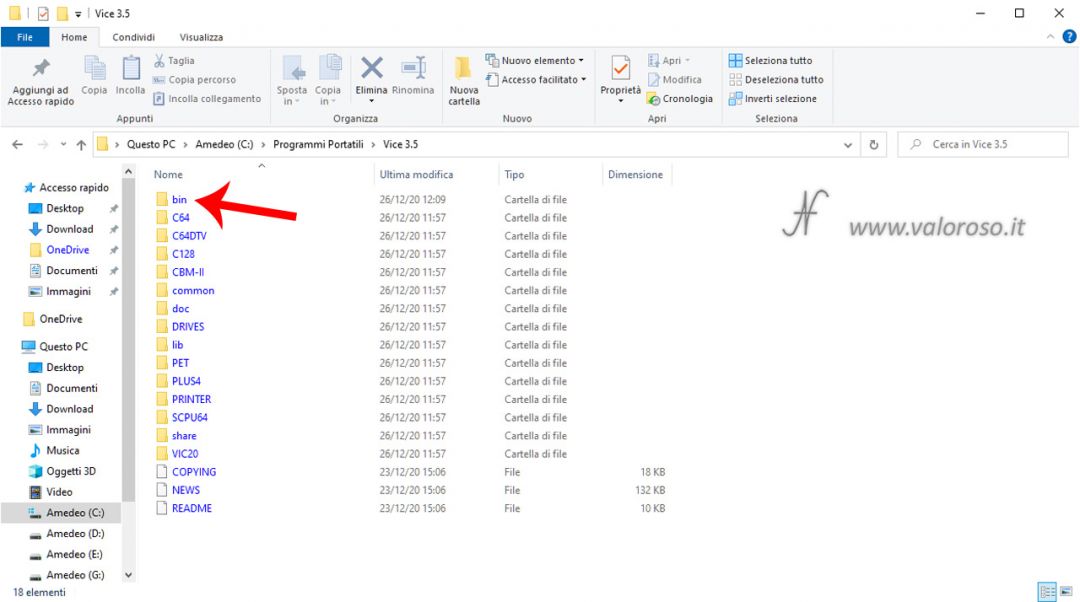
After unpacking the VICE files with 7-ZIP, we can consult the contents. Since version 3.5 the executable files are located in the folder bin and not in the main one.
There is not an Installer, so we can move the folder we have disappeared where we get closer to the computer hard disk.
I copied it to C: portable programs (where I put the programs that do not require installation).

Start and configure the deputy emulator
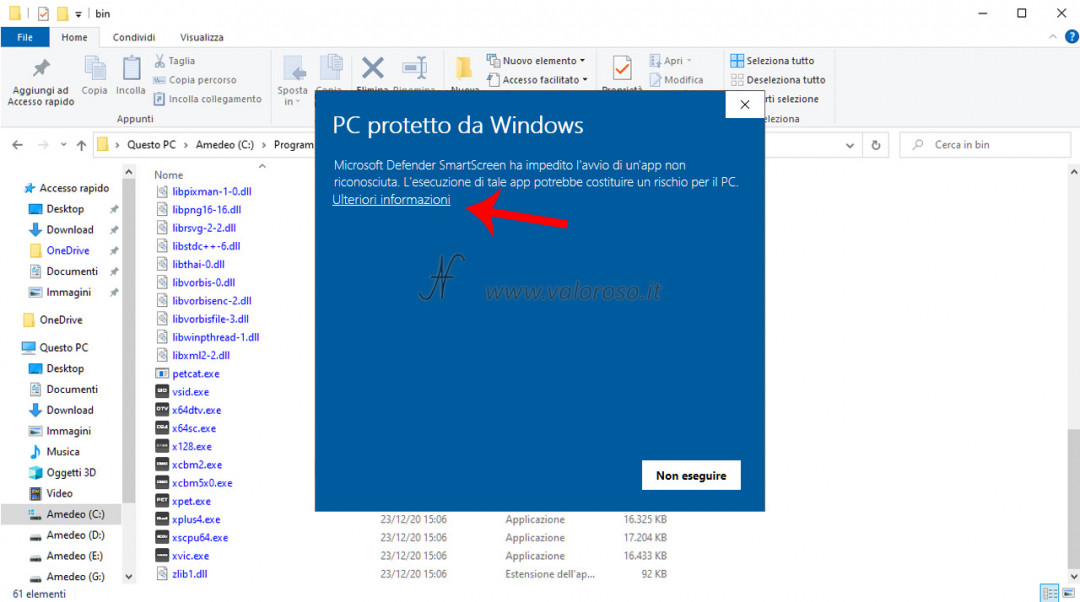
From the list of emulator files, we can see that the deputy emulator can support several 8 -bit commodores, therefore not only the Commodore 64 (X64SC.EXE file). There is also the Commodore 128 (X128.EXE), the PET (Xpet.exe), the Plus (XPLUS4.EXE), the VIC-20 (XVIC.EXE), and also other models.
I remember that, from version 3.5 the executable files are located in the folder bin and not in the main one.
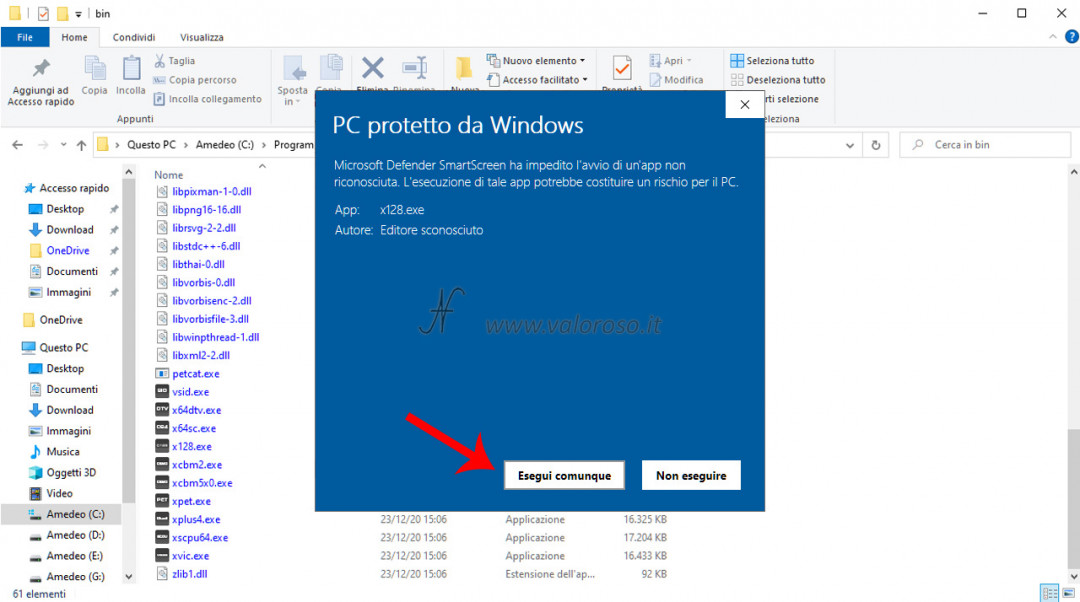
If, trying to start an emulator by clicking on the executable file, you were to open Windows Defender SmartScreen, you must still confirm that you want to start the program. The first step is to click on Further information of the blue window that opens.
Then click on Run anyway.
After starting the X64SC.EXE file, which is the emulator for the Commodore 64, we can see that the emulator presents itself with a monitor that is very reminiscent of the cathodic tube (CRT). If you like this setting, perfect, that's okay. Alternatively, the emulator is very rich in settings.
To change monitor settings, click with the mouse on Settings, Settings, Display, VICES: we can choose whether to keep or remove the watermark.
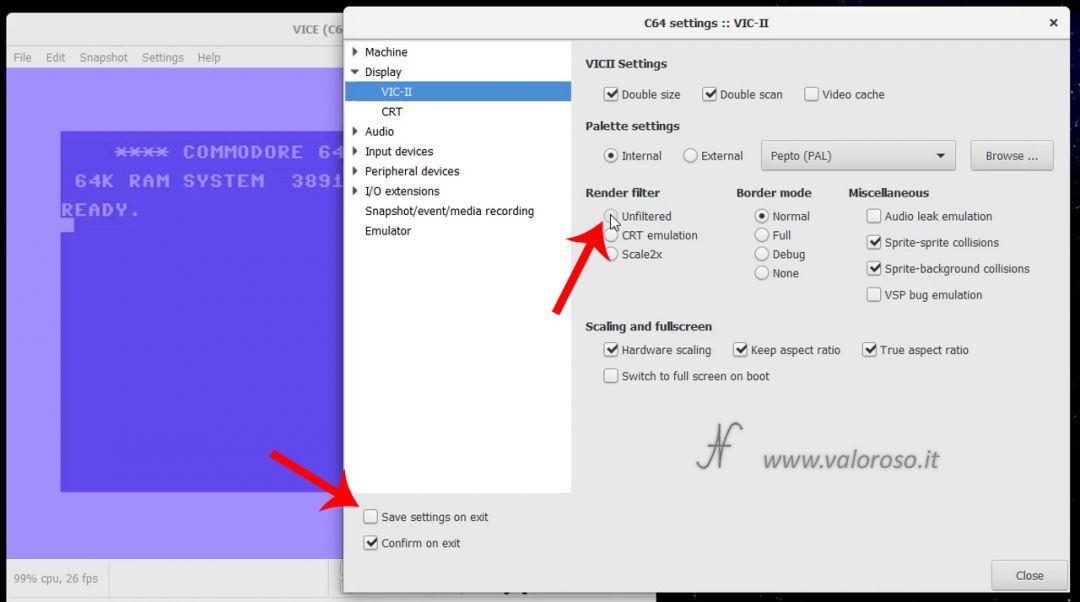
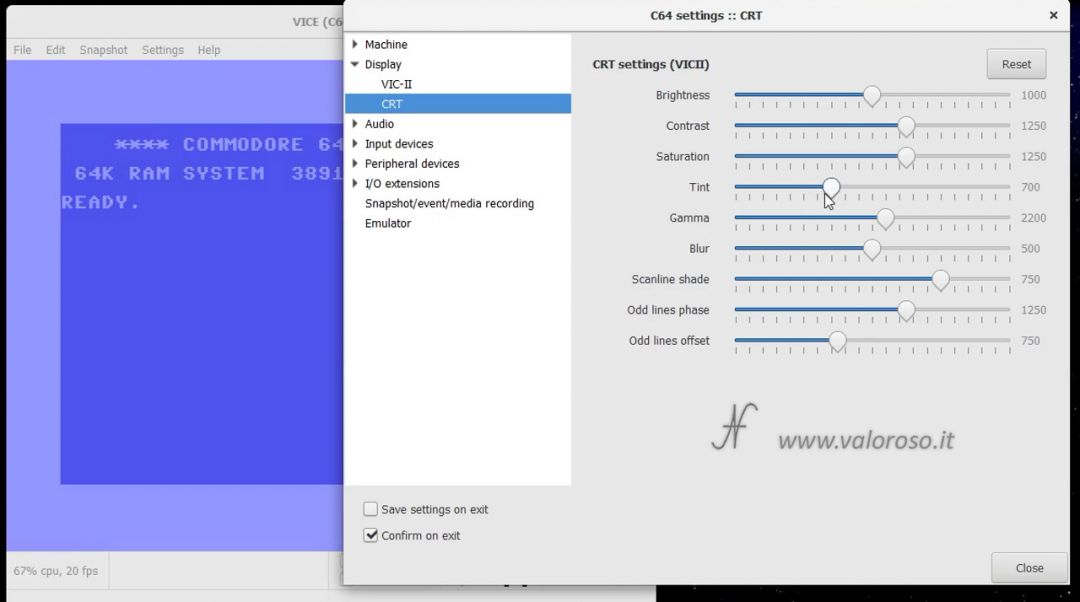
Another thing that is more regular is the color balance. The settings are found in Settings, Settings, Display, CRT.
To save the settings, click Save settings on exit, because otherwise, when you reopen VICE, it will always be in its initial configuration, the default one.
To set the joystick, go to Settings, yet Settings, Input and we find the section Joystick. In this example, I have set the joystick in port 2, emulated by the NumPad: the numeric pad which is located to the right of the keyboard.
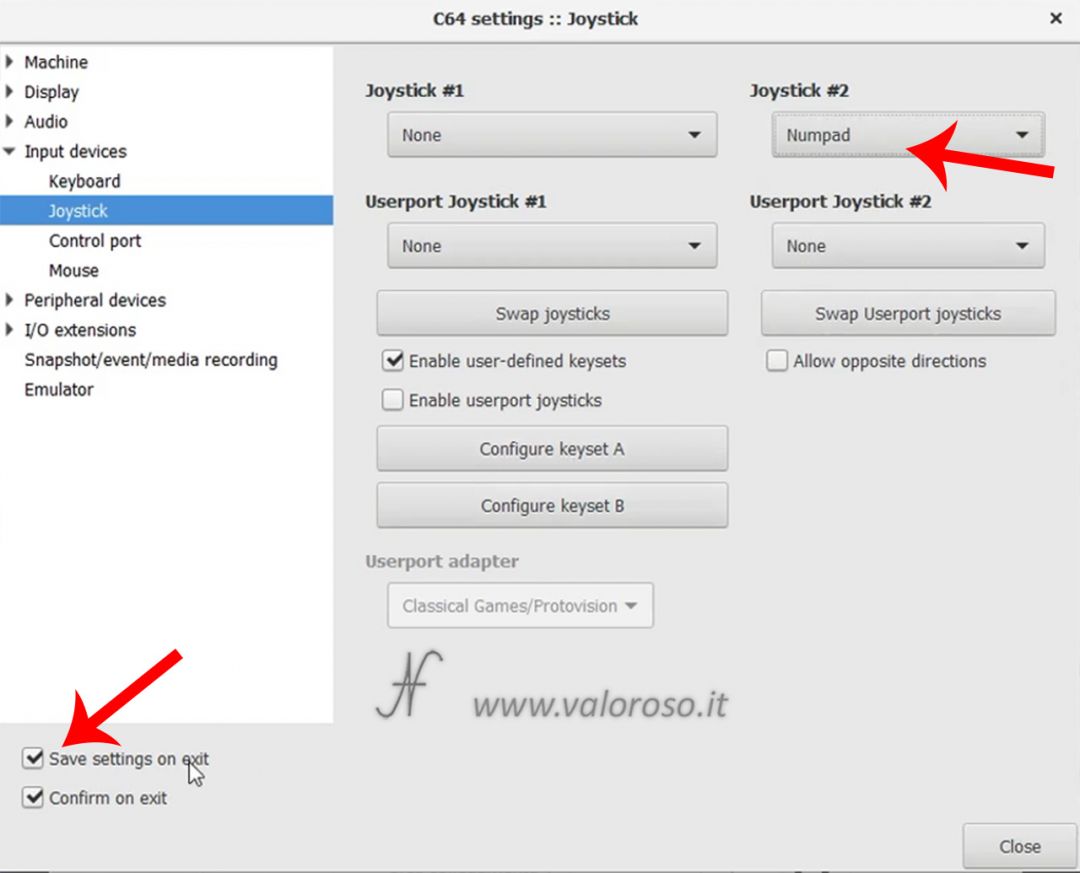
Then, from the numeric keypad, you can press the various buttons to emulate the joystick in port 2:
- 8 forward;
- 2: back;
- 4: left;
- 6: right;
- 0: fire.
The buttons can also be pressed simultaneously: for example 8, 6 and 0 to move forward/right and shoot. It is also possible to use the intermediate keys, for example the 7, to go forward and left at the same time.
Reset the VICE configuration
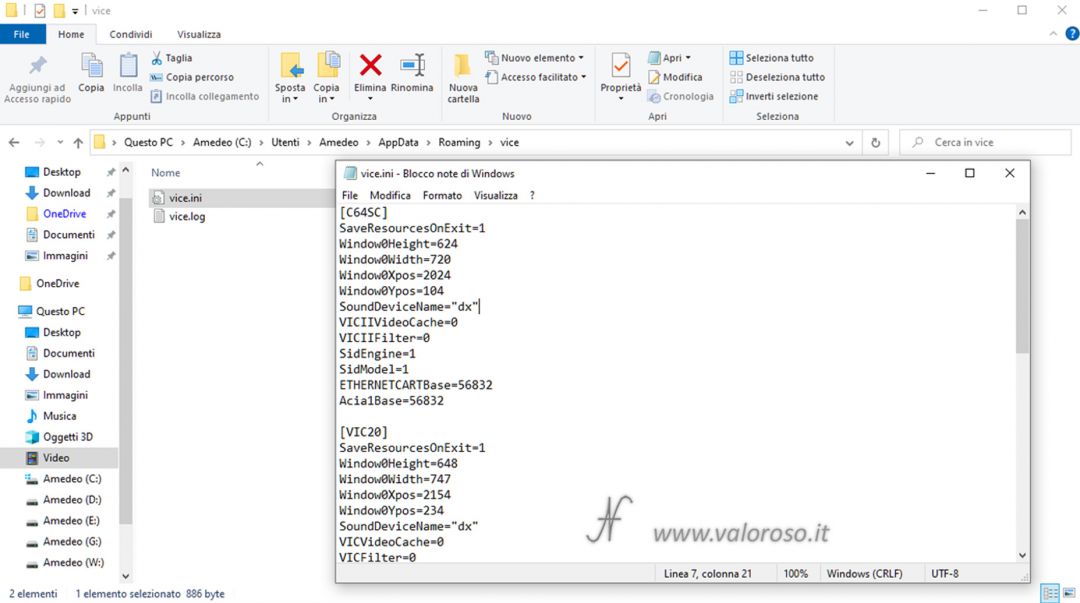
If, by mistake, the configuration of the deputy emulator, don't worry! It is possible to go to a specific Hard Disk folder. The deputy configuration is located in C: Users Your name (or the name of your account, Administrator in my case) AppataData Roaming.
You can delete the file vice.this, which contains the configurations of all deputy emulators, or only the section of the file corresponding to the emulator that has problems.
Open a program, game or utility with the deputy emulator
To open programs, games and utilities for Commodore, with the deputy emulator, you can follow two modes:
- from the outside of the emulator, then Starting from the explosive Window files 10;
- frominterior of the emulator VICE.
The emulator supports different types of files:
- programs, utilities and games in PRG;
- disk images (eg D64);
- and nastri;
- cartridges and CRT interfaces;
- memory freezes.
The first file we try to open in the video is a little program in Basic that I made myself: the one for to drive the remote-controlled machine.
We open it from the explore file. You have to press, with the right mouse button on the file to be loaded. Click with the left mouse button on Open with and then click on Choose another app. Then choose the mulator's program, looking for x64sc.exe (in case the program was for Commodore 64) in the folder where you copied the VICE executables, in my case: C: Portable programs Vice bin (or without bin in version 3.4).

Another experiment that we can try, always with the 8 -bit vice per commodore emulator, is to open a file starting from inside the emulator.
In the video, I upload the EasyScript word processor, having also connected a FastLoad (Epyx) cartridge.
The first step to take is Connect the Epyx Fastload cartridge to the emulator. From the menu File, click on Attach cartridge image. Choose the CRT file that contains the Fastload interface.
The second step is connect the virtual disk D64 that contains the program of video writing Easy Script. To do this, use the menu File, Attach disk image, Drive #8. Choose the D64 file that contains the image of the disk to be loaded.
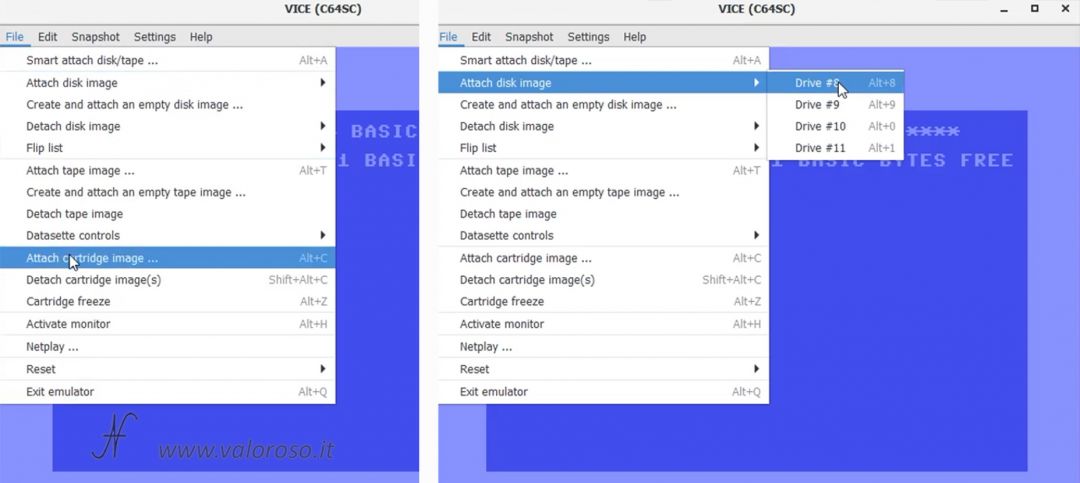
At this point, the emulator is located with the Easy Script floppy disk, inserted inside a Commodore 64, with the Fastload cartridge with connected.
It is therefore possible to see what is inside the disk, with the classic basic commands:
LOAD"$",8
LIST
It is also possible to start the first program on the list with:
LOAD"*",8
RUN
Credits: In the video tutorial, SID music is ACE II by Rob Hubbard.