In this video tutorial, we see how to connect the adapter Prefer 1541 to the PC and how to install the XUM1541 drivers on Windows 10. Let's also see how to install the various software used to transfer files: OpenCBM and CBM Transfer (written CBMXfer). The XUM1541 interface (sometimes pronounced Zoom1541) allows you to connect the original Commodore 1541 drive to the USB port of a normal Windows PC, to transfer files without using the Commodore 64!

In the video, I also explain how to transfer the files to and from the spot. We also create D64 files starting from physical disk and vice versa. We also see the various commands to rename a file, delete it, format the disk, create D64 files, etc ... all the steps on the use of XUM1541 will be available shortly in another article.
If you are interested in assembling the XUM1541 kit, you can consult this article.
XUM1541: connections
The Commodore 1541 floppy disk drive connects to the XUM 1541 interface via an IEC serial cable. The XUM 1541 interface connects to the Windows PC via the USB port.
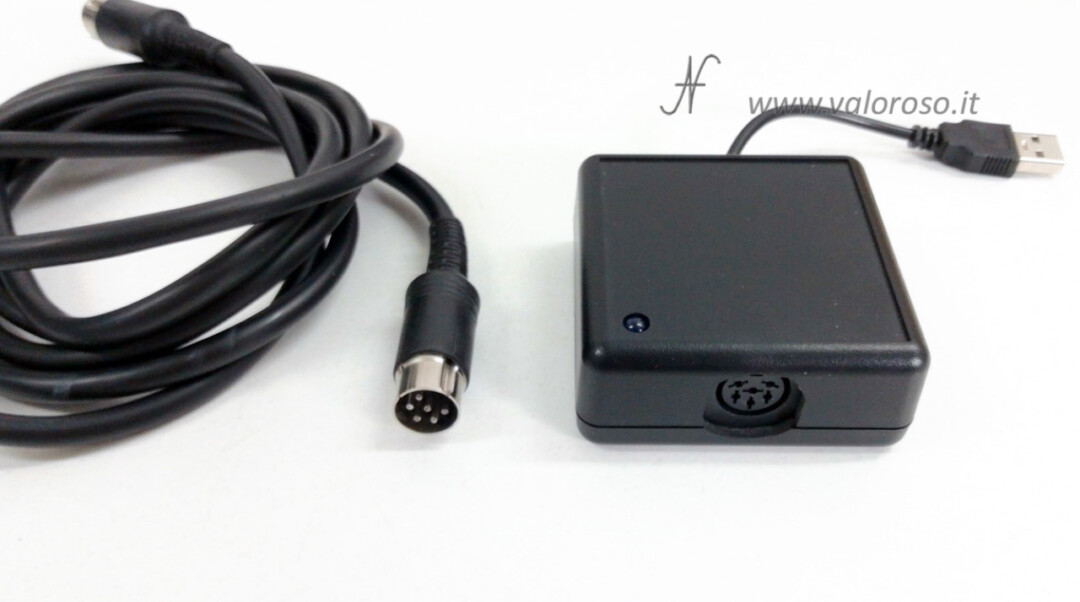
You can turn on the floppy disk drive later, when the drivers and programs are installed and we will do the tests. To install the XUM1541 drivers on Windows 10, it doesn't matter when you turn on the floppy, rather it is important that the XUM1541 interface is connected to the USB port of the computer.

How to install XUM1541 drivers on Windows 10
The installation, on Windows 10, is a bit cumbersome and I relied on the software recommended by the interface manufacturer. To install XUM1541 drivers on Windows 10, Administrator privileges are required.
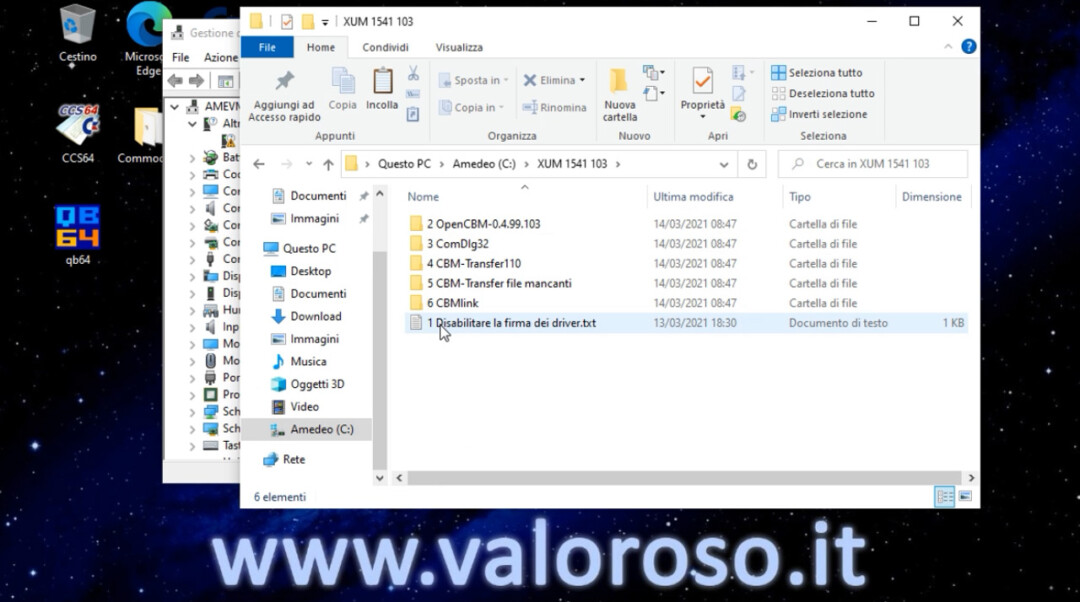
Scompattate il file "XUM-1541-OpenCBM-103-CBMXfer-110.zip" (che trovate nel link in fondo a questa pagina) in “C:\XUM1541 103”, questa è la cartella di installazione, il nome non è strettamente importante.
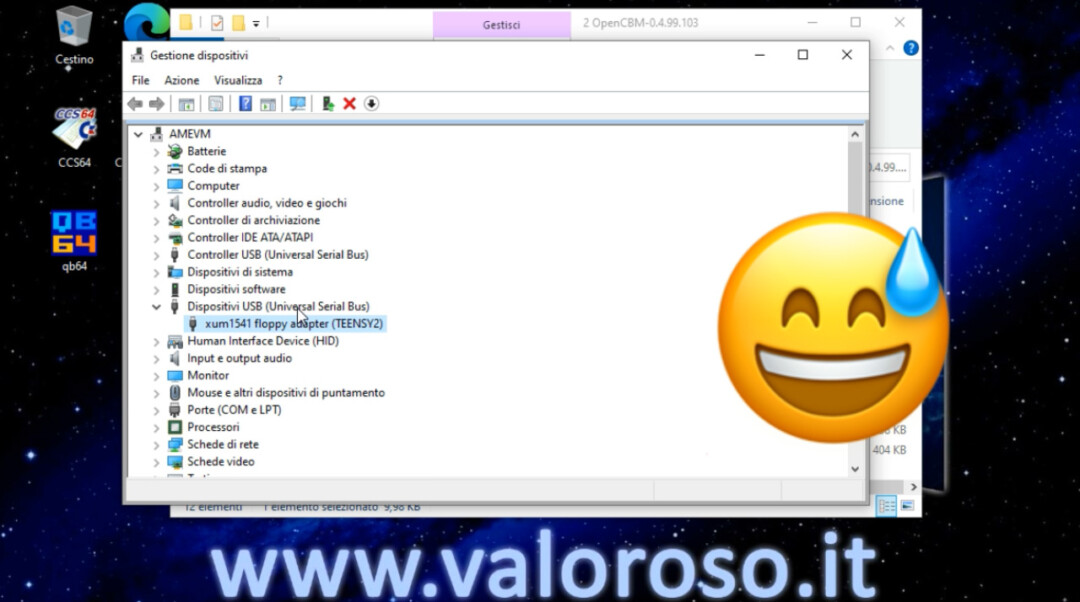
From the Control Panel of Windows 10, in the section Device management, we verify that the computer recognizes the XUM 1541 interface. It is not possible to install the driver directly, as it would give an error on the digital signature, which is missing.
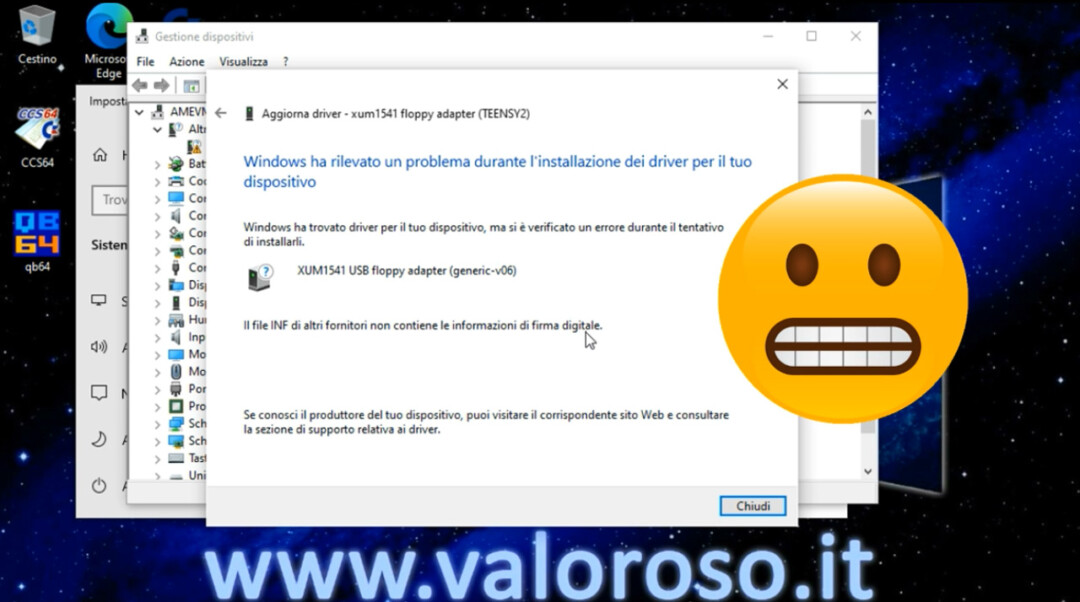
You must first disable driver signature checking. To do this, from the command prompt, type the command shutdown (or copy and paste), with the following options:

shutdown.exe /r /o /f /t 00
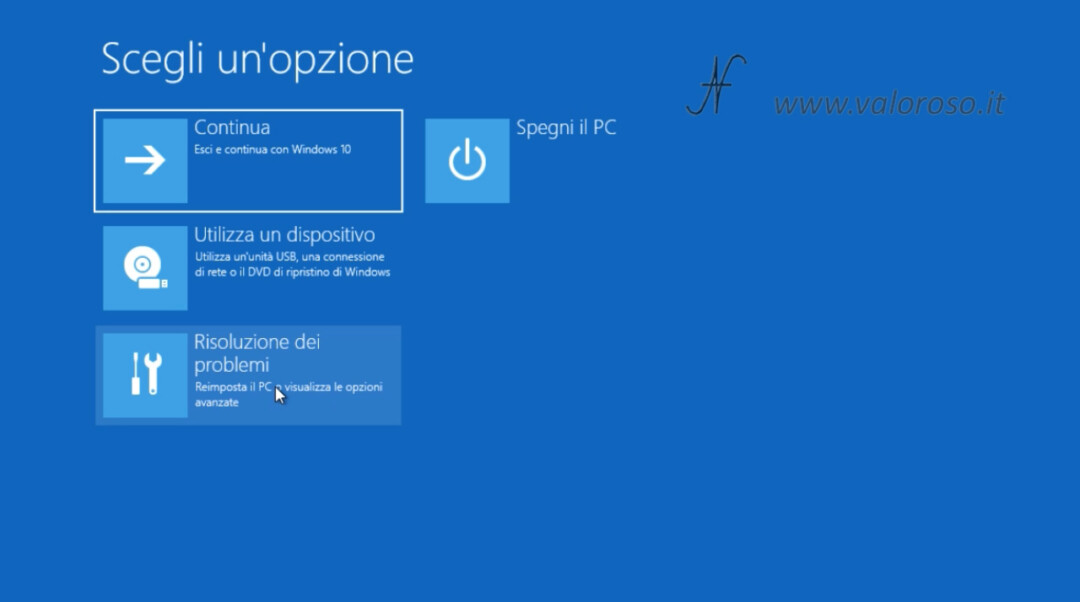
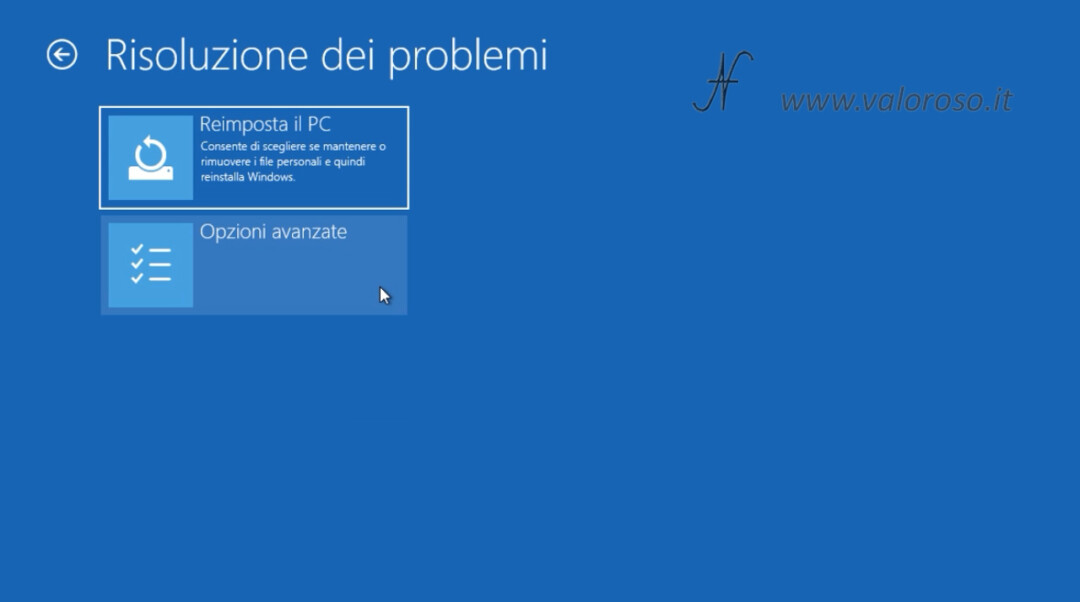
Windows shows the blue options screen. Be careful not to press the wrong buttons!
Click with the mouse on Troubleshooting.
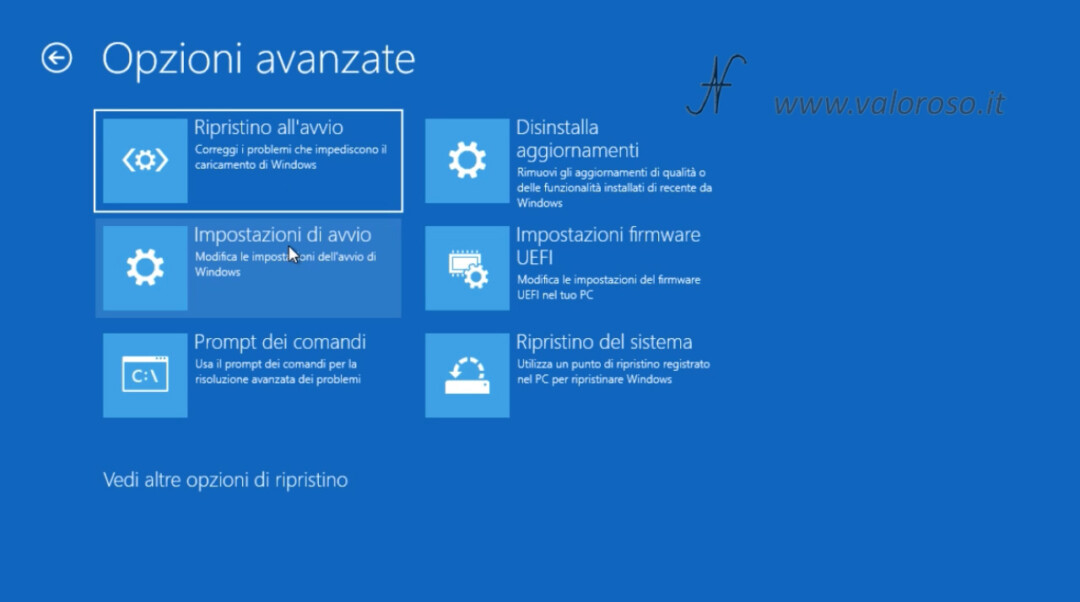
Then click on Advanced options.
Then click on Startup Settings. Click on the button Restart.
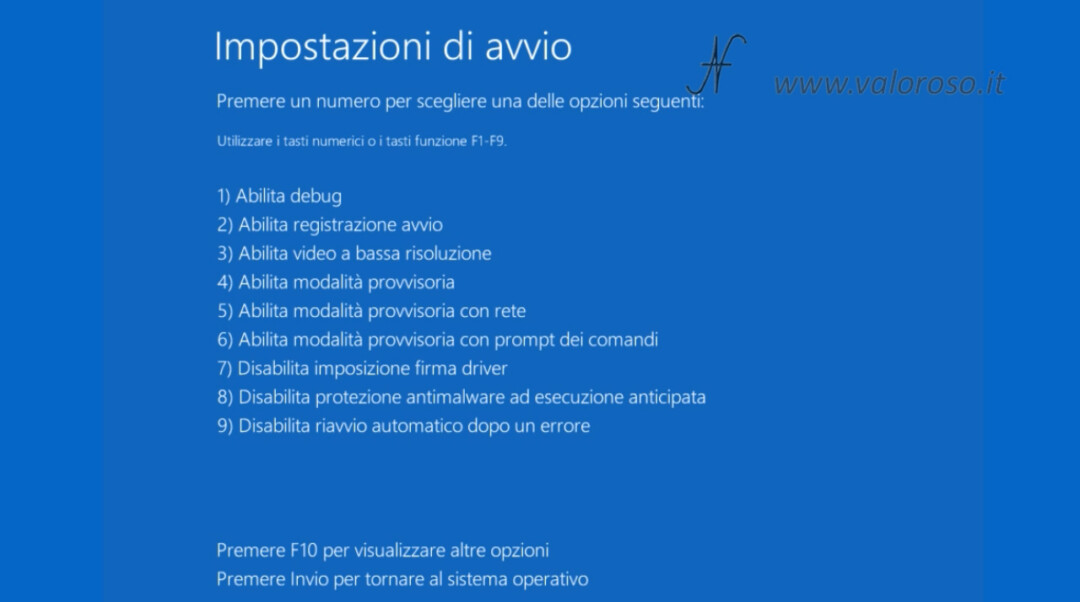
After rebooting, Windows shows the blue startup settings screen. You have to press the key 7 on the keyboard, to disable driver signature enforcement. At this point, Windows starts normally.
We keep the window open Device management of the Control Panel, to check that the OpenCBM drivers for the XUM1541 are installed correctly.
From the folder “2 OpenCBM versione 0.4.99.103”, I modified the “install.cmd” file to install the software in “C:OpenCBM” and not in the programs folder, which is protected in Windows 10. It is now possible to run the "install.cmd" file as an administrator.
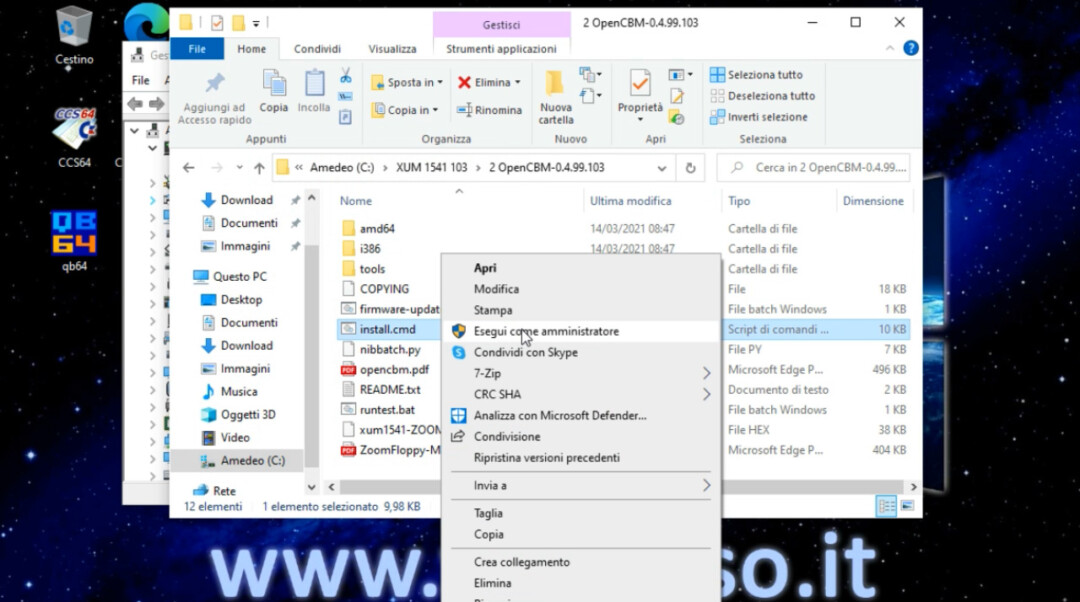
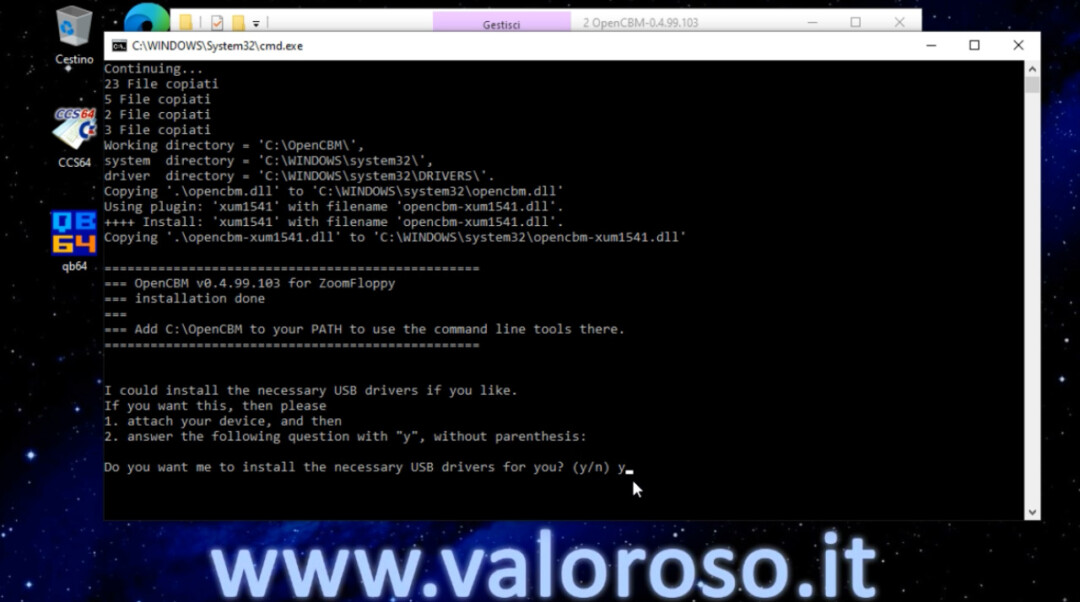
During installation, the computer asks if we also want to install the drivers: type Y to accept, followed by RETURN, on the keyboard.
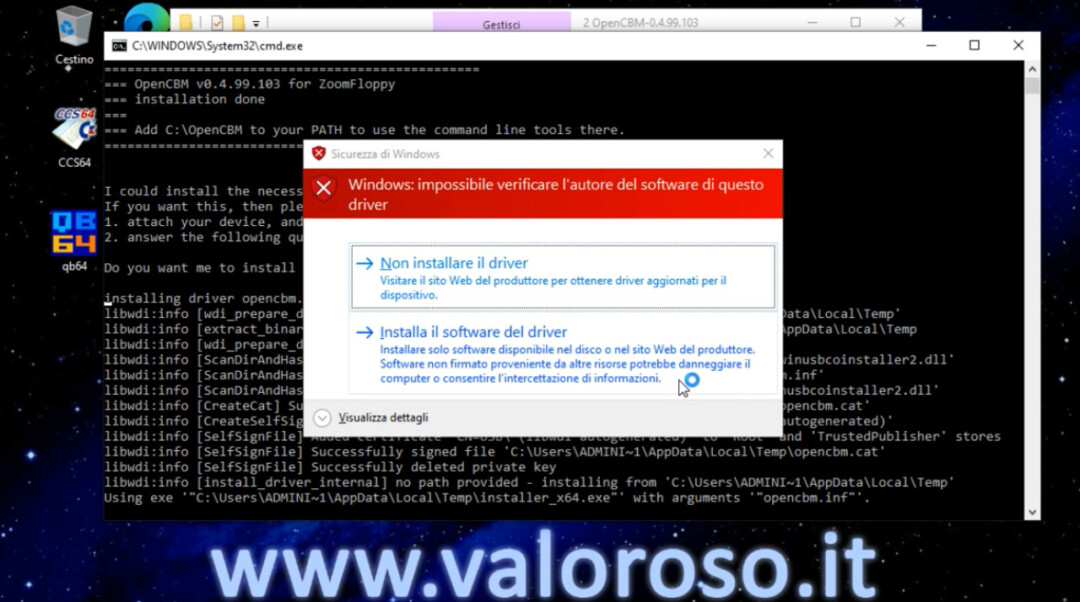
The drivers are unsigned, so you must confirm to Windows to install the driver software anyway.
Once the installation is complete, you must press RETURN a couple of times.
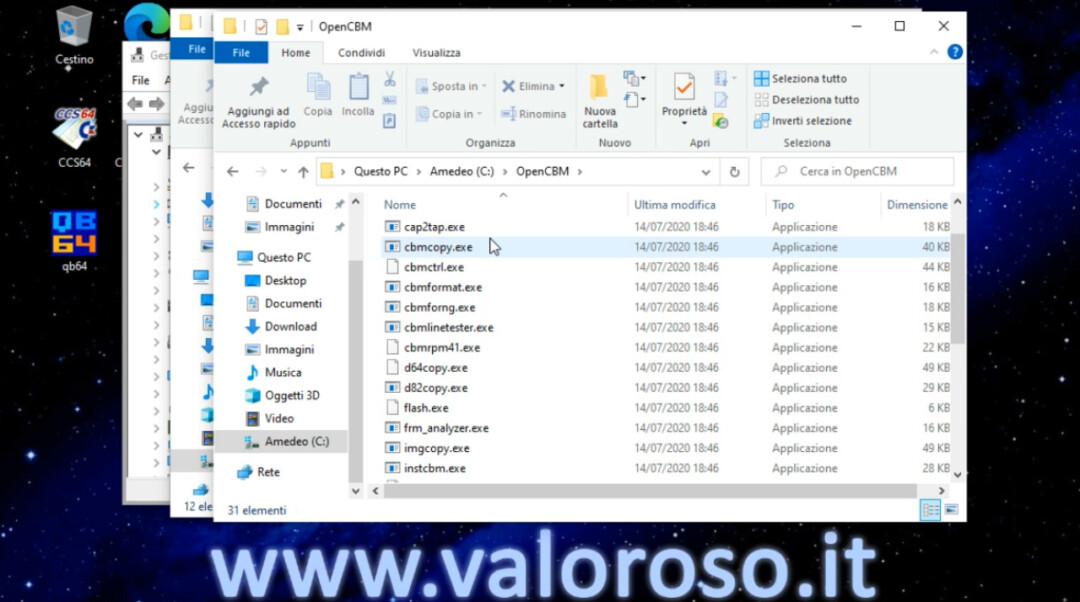
Through thebrowse files, we can see that the "C:OpenCBM" folder has been correctly created and that all the files are inside.
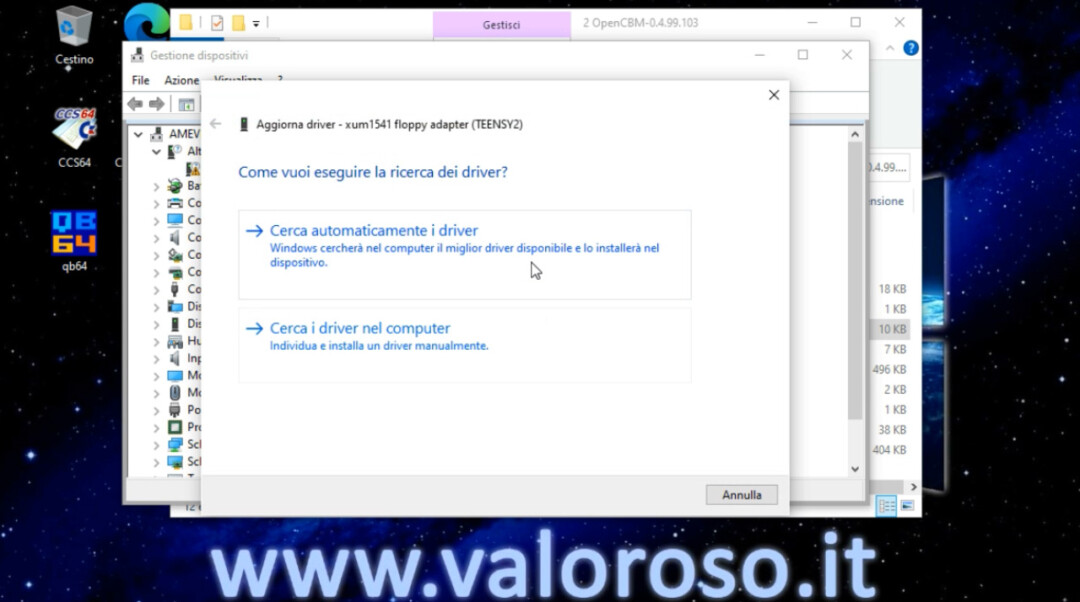
Let's proceed with assigning the driver to the XUM1541 device. From Device management (which we found earlier in the Control Panel), click with the right mouse button on the XUM1541 interface line, then click on Update Driver and Automatically searches for drivers.
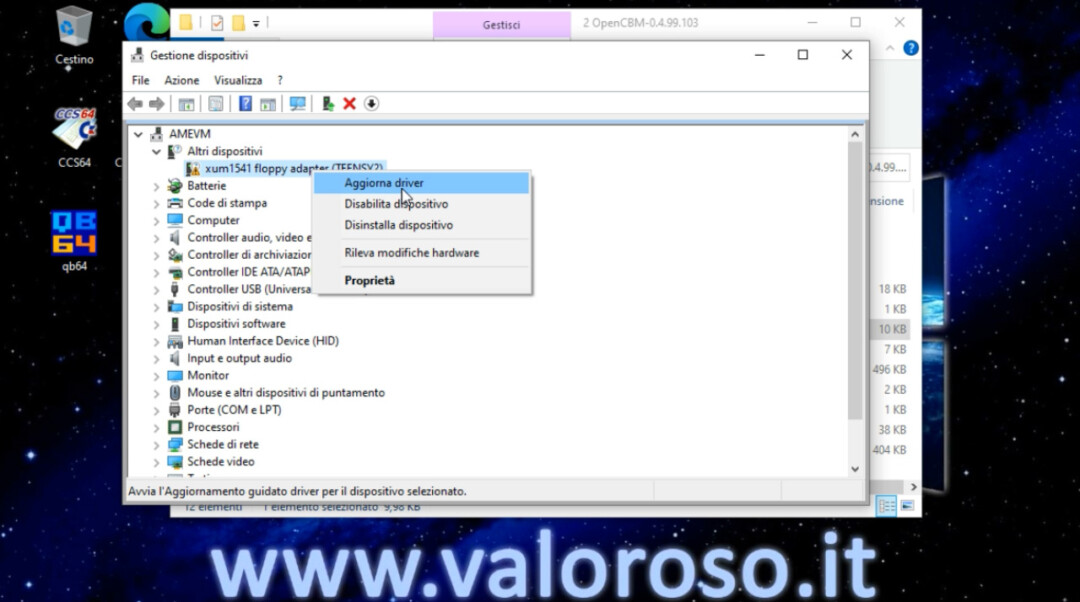
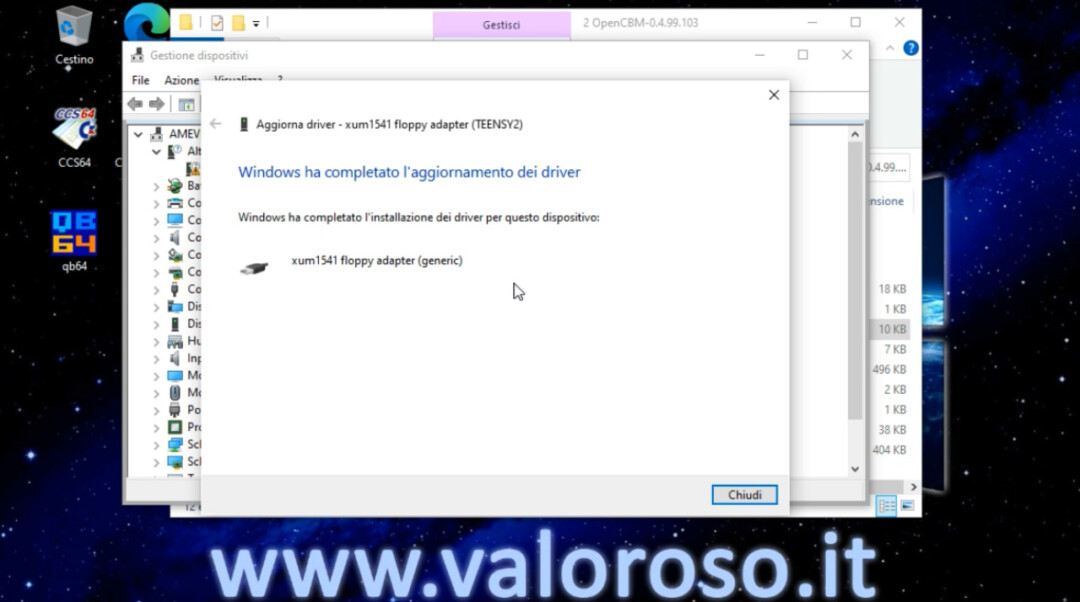
If all goes as it should, the interface is assigned the driver we installed before and the question marks and attention signs disappear from the icon.
The ComDlg32.OCX add-on
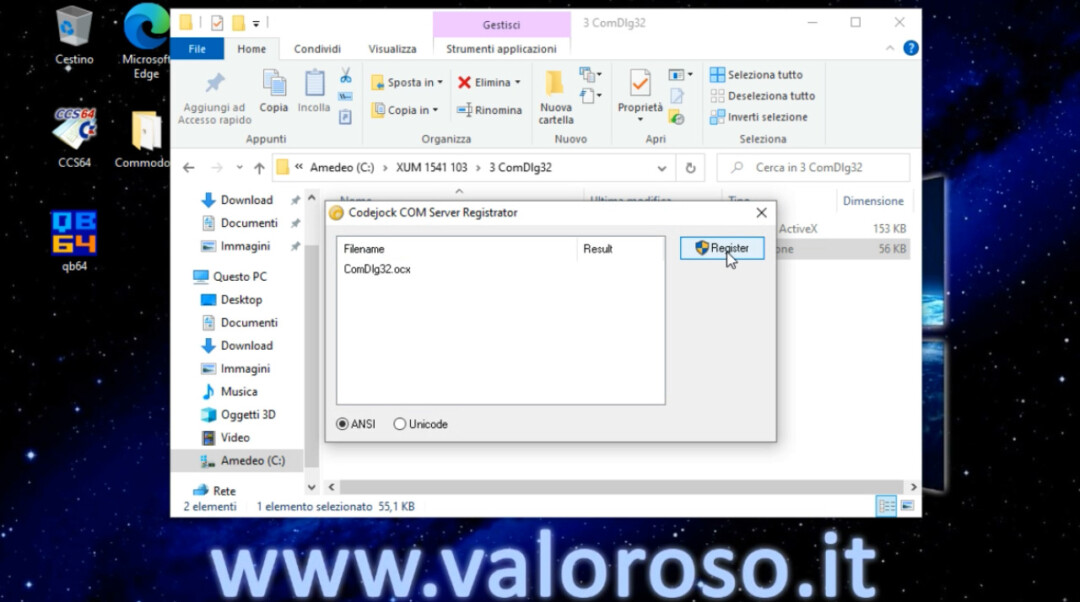
Now that the driver is installed, we can proceed to register the “ComDlg32.ocx” component which is used for CBM Transfer (CBMXfer). The program present in the “3 ComDlg32” folder is used. After starting the “Registrador.exe” program, press the button Register.
Installing CBM Transfer (CBMXfer)
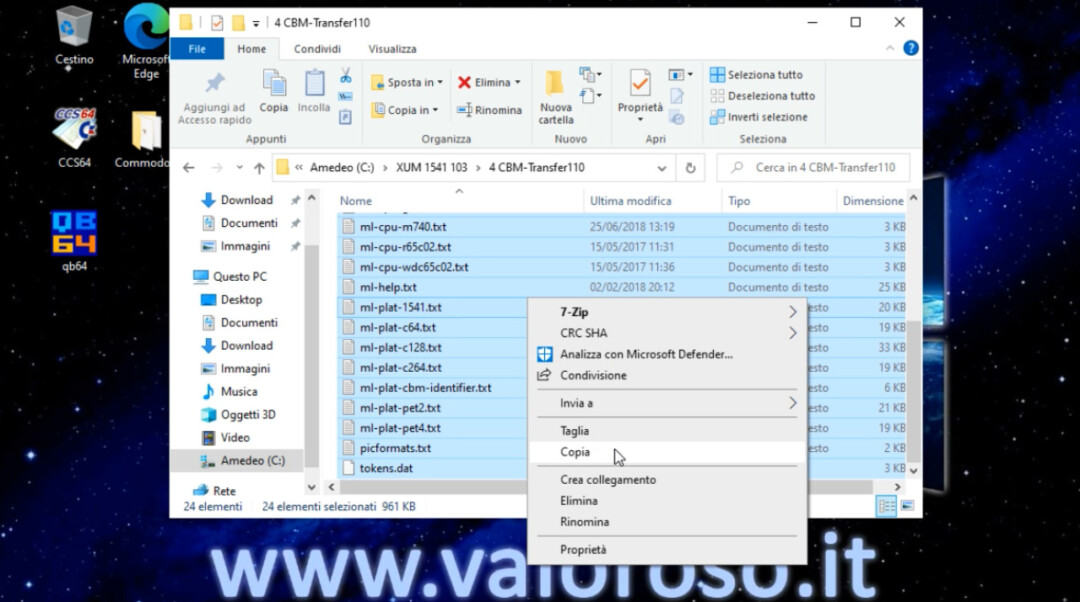
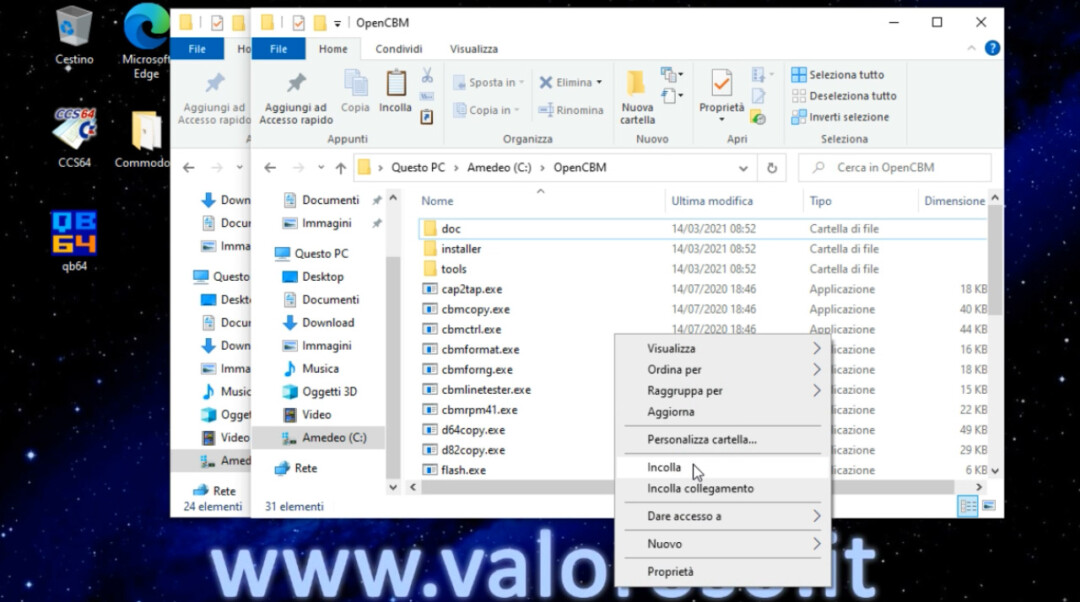
From the folder “4 CBM-Transfer110”, copy all the files to “C:OpenCBM”.
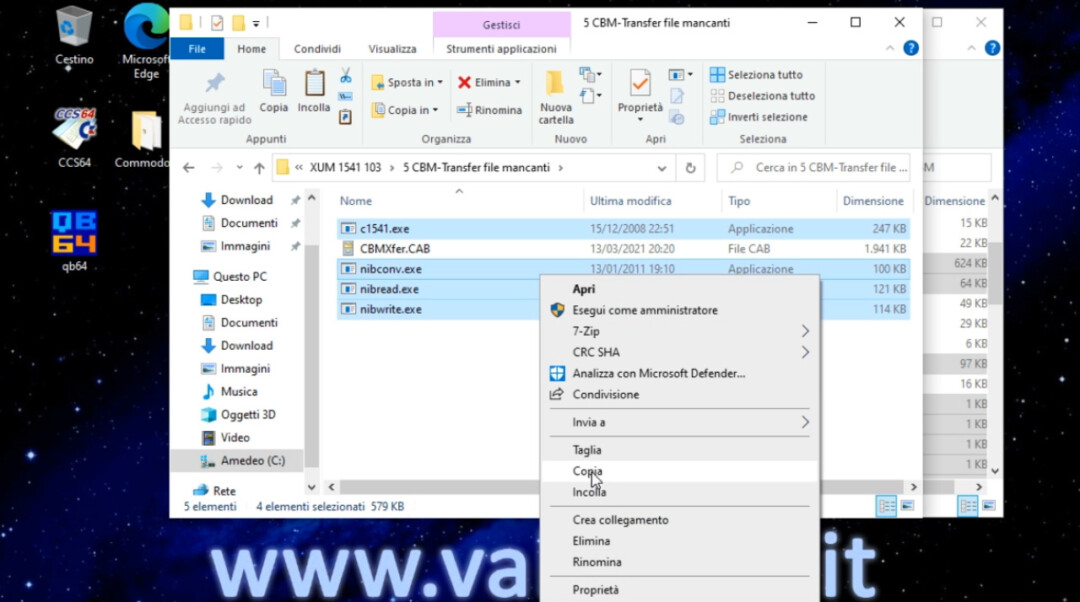
From the “5 CBM-Transfer file mancanti” folder, we copy all the files to “C:OpenCBM”. In fact, CBM Transfer version 1.10 is an update of the previous version. The files were present in the installer of the previous version and I extracted them from this CAB file. In the package, of which I link in the description, you will not find the CAB from which I extracted the missing files, but only the files to copy in "C:OpenCBM".
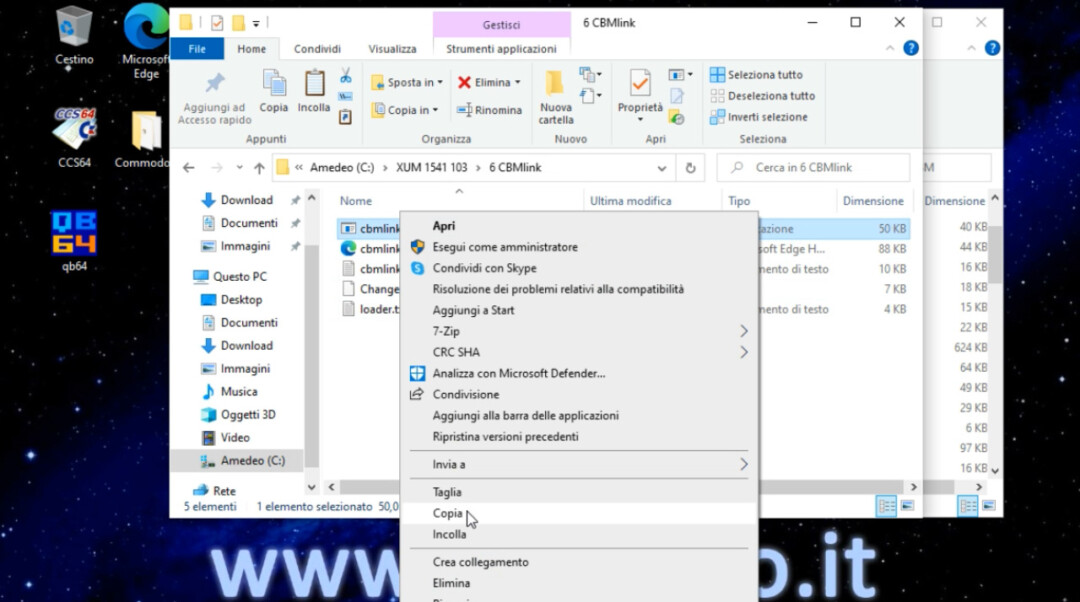
We are almost there, copy the “cbmlink.exe” file, present in the “6 CBMlink” folder, and put it in the usual folder where we are installing the software: “C:OpenCBM”.
Starting CBM Transfer (CBMXfer)
Now we can create a CBM Transfer link on the desktop, and then start it.
Remember to connect the XUM 1541 interface and turn on the Commodore 1541 drive before starting cbmxfer.
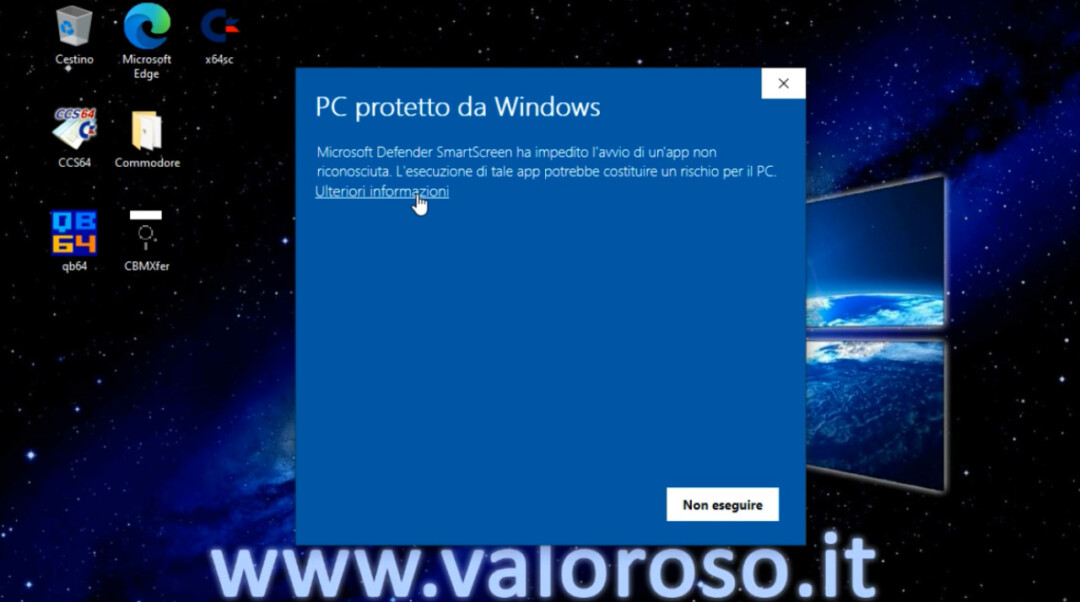
From the screen of Windows Defender SmartScreen, confirm that you still want to run the program. Then click on Further information.
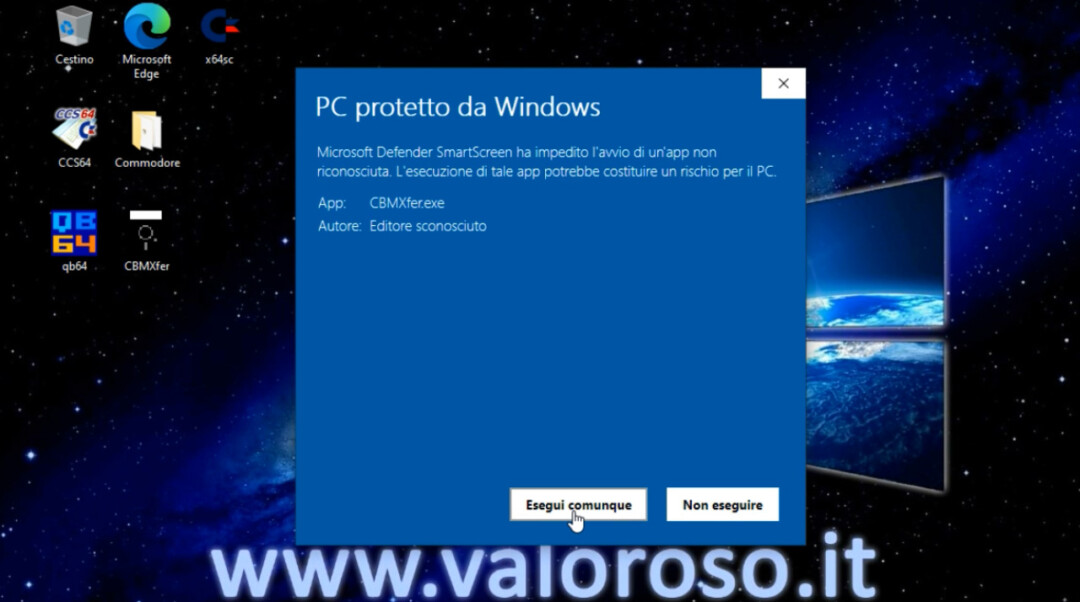
Then, still with the mouse, click on Run anyway. This window will no longer be shown.
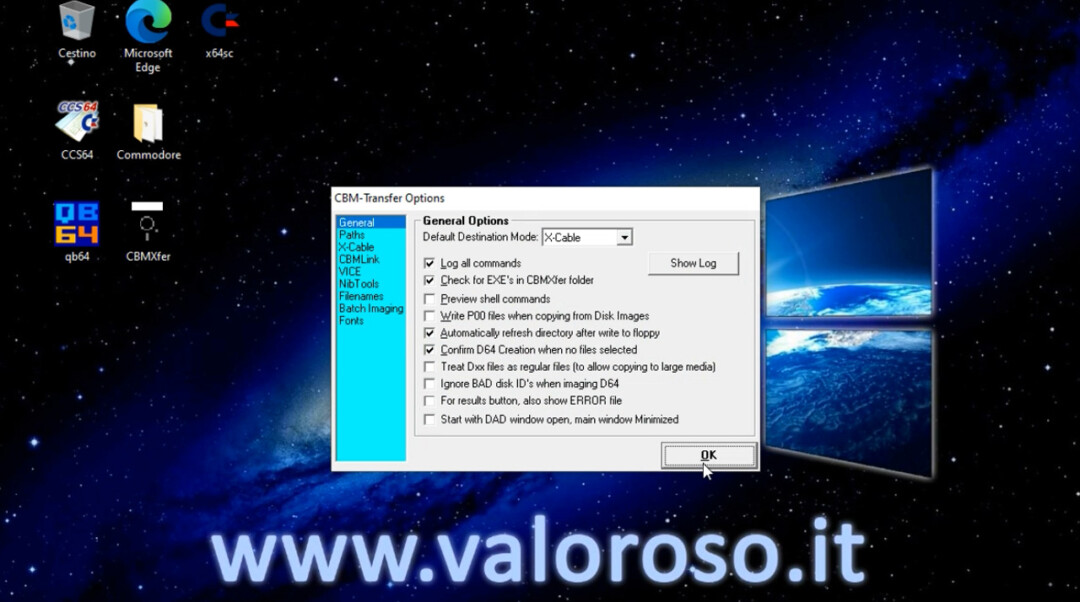
If everything goes as it should, the CBM Transfer settings open. We confirm the settings window as it is (Default Destination Mode: X-Cable) e…
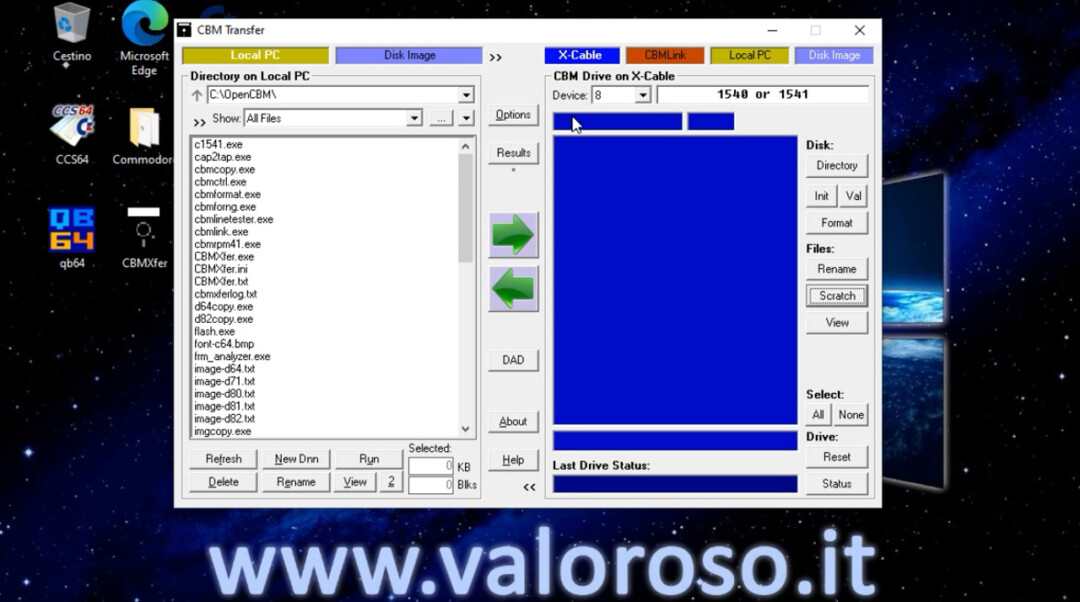
Here we are in the program to transfer files to and from the Commodore 1541 floppy disk drive!
Download XUM1541 driver and OpenCBM, CBMXfer, CBMLink software for Windows 10
As promised, here is the ZIP file containing all the software and drivers to use XUM1541 on Windows 10.
XUM-1541-OpenCBM-103-CBMXfer-110.zip
Detect XUM1541 firmware version on Windows 10
After installing the software and drivers as indicated above, it can be useful to read the firmware version from the XUM1541 Teensy2 module. Obviously the interface must be connected to the computer USB port.
The command you use is xum1541cfg, che è un file presente nella cartella "C:\OpenCBM".
The same command is also used to update the firmware, should updates be released.
In my case, the answer was as follows:
C:\OpenCBM>xum1541cfg devinfo
finding device...
xum1541 device, model 4 (TEENSY2), firmware version 7
Credits: in the video tutorial, SID music is Noisy Pillars by Jeroen Tel.
To be notified when I publish more tutorials, experiments and reviews related to retro computers and vintage electronics, I invite you to subscribe to the YouTube channel and activate the notification bell!
Thank you for sharing!
Hello,
it appears to me that a file in XUM-1541-OpenCBM-103-CBMXfer-110.zip is a Trojan. Specifically the .cbmforng file.exe
To you it turns out?
Hello! The file you say exists in the package, but I don't know it to be a trojan. Why do you think so?
Good work, thanks man!
Thank you!
I just downloaded the zip file and followed your instruction for installation. It works perfectly on the first shot. Congratulations a simple and well done tutorial and then thanks to the prepackaged files the program works immediately. A thousand thanks
Thank you very much, Andrea. I'm happy!
Is these drivers and procedure extremely valid on Windows 7?
Thank you
I have no way to try, because I don't have Win 7. The drivers are right, it should go. The challenge was to make it work on Win10.
Hi a few years ago I installed the OpenCBM program on a PC with Windows 10 and worked perfectly. Now I purchased a laptop used to carry out tests, always with Windows 10, and an interface XU1541. I followed all your instructions as the previous installation but I could not make the program work. Or rather the program was unable to access the interface and consequently to the floppy disk 1571. After several attempts I changed the install.bat file.
In particular the line : set OC_VARIANT_DEFAULT=xum1541
It has been changed to: set OC_VARIANT_DEFAULT=xu1541
Now it works perfectly. I hope I did something nice to communicate this small update as it can happen, like me, to waste hours behind research on the internet without arriving at a solution to the problem. Hello
Hello! Yes, it works well! I also noticed that the procedure can be different, depending on the type of XUM you use. Thank you for sharing your experience!
Thanks for this marvelous posting! Useful.
Thanks!