In this video tutorial, we see how to connect Commodore 1541 floppy disk drive to Windows 10 PC. From minute 7:13, we also see how to use the various software that are used to transfer files: OpenCBM and CBM Transfer (written CBMXfer). The XUM1541 interface (sometimes pronounced Zoom1541) allows you to connect the original Commodore 1541 floppy disk drive to the USB port of a normal Windows PC, to transfer files without using the Commodore 64!

At the beginning of the video, I also explain how to install the XUM1541 interface drivers, as well as how to install software OpenCBM and CBM Transfer (written CBMXfer), correctly, on Windows 10. You can find the details in this article.
If you are interested in assembling the XUM1541 kit, you can consult this article.
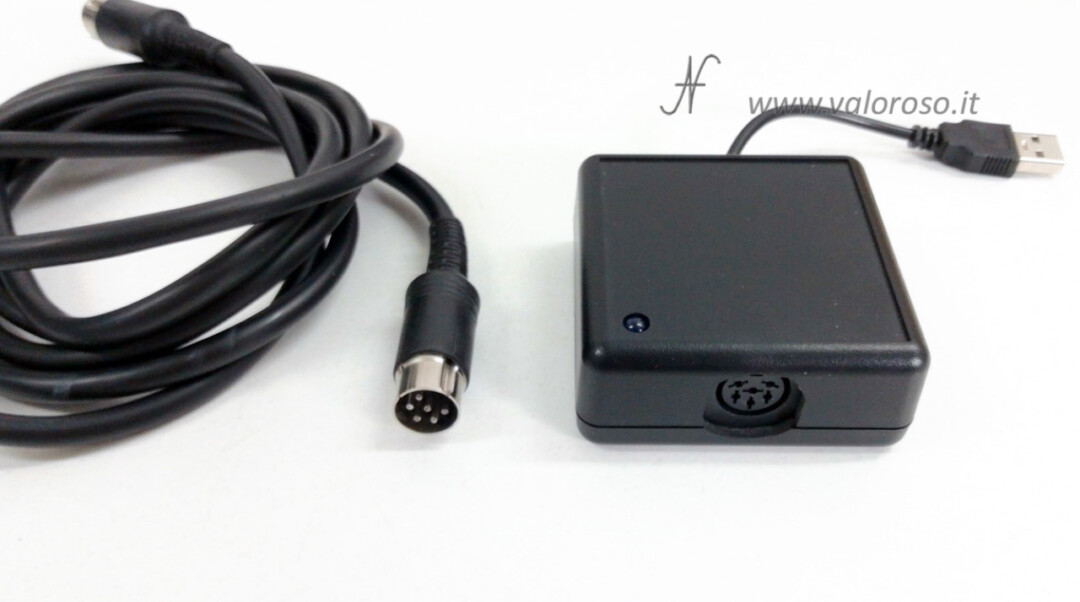
XUM1541: Connect the Commodore 1541 floppy disk drive to the Windows 10 PC
The Commodore 1541 floppy disk drive connects to the XUM 1541 interface via an IEC serial cable. The XUM 1541 interface connects to the Windows PC via the USB port. I recommend connecting all cables with the PC and drive turned off. After connecting everything, you can turn on the PC.
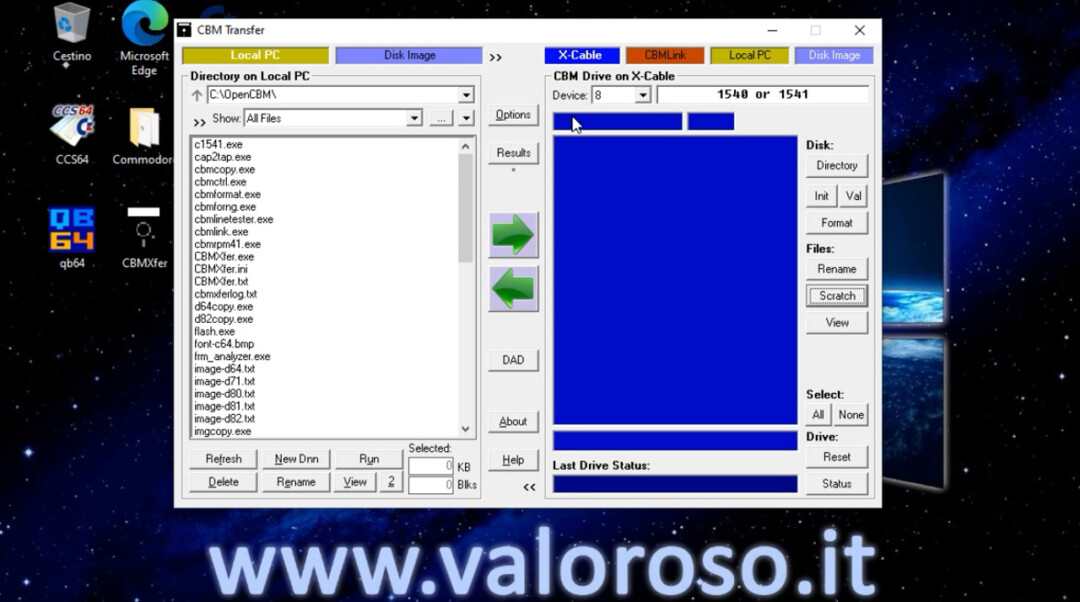
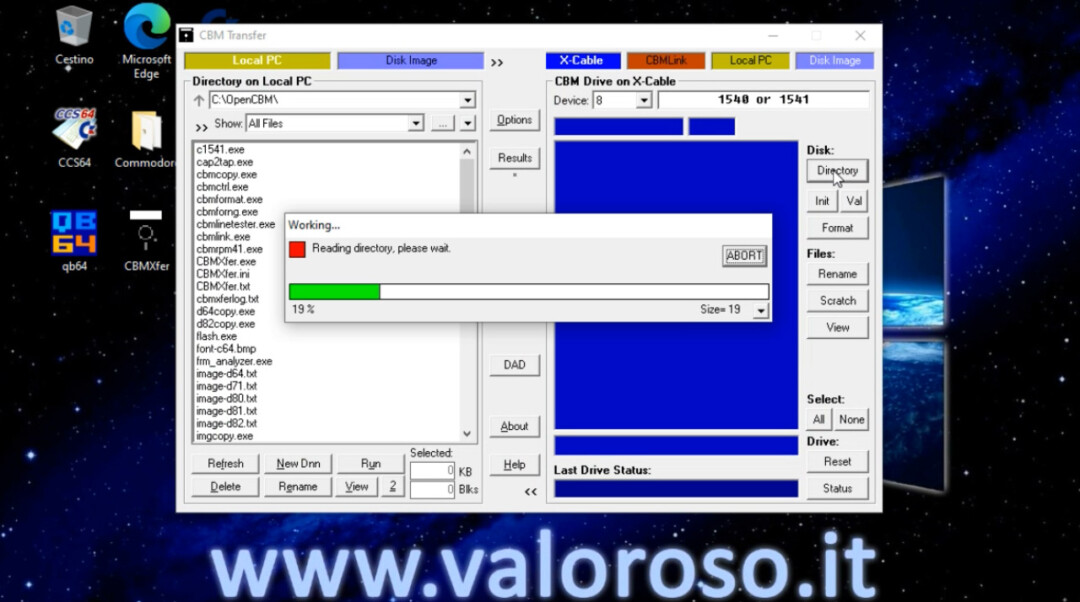
Before starting the CBM Transfer program, the Commodore 1541 drive must be turned on, otherwise the software will not recognize it. So, only after you have everything connected and turned on, you can start CBM Transfer (CBMXfer).

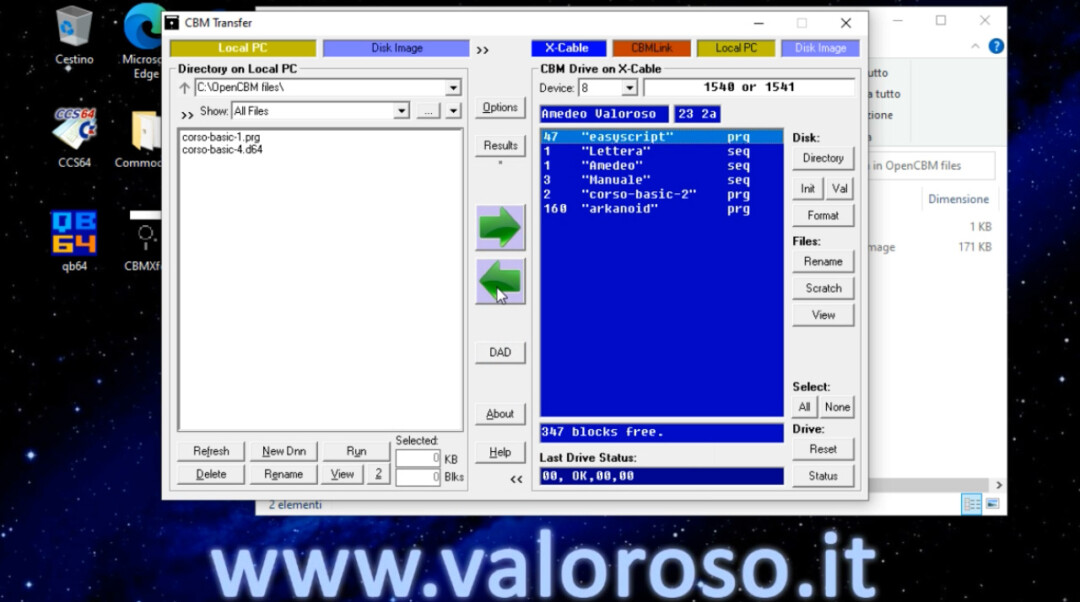
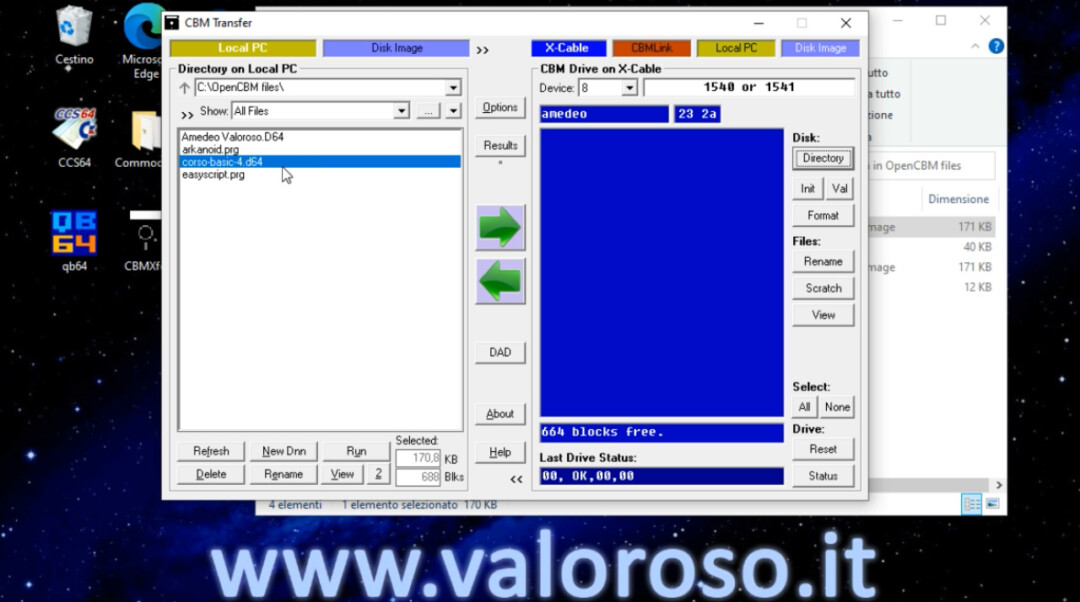
List of files on disk (Directory)
Connecting the Floppy Disk Drive Commodore 1541 to the Windows 10 PC is very useful for consulting the list of files present in old disks, as well as transferring them to PC. After pressing the button Directory on the right, the computer connects to the Commodore 1541 and receives information. Remember to connect the XUM 1541 interface and turn on the drive before starting cbmxfer.
The list of files, on the right of the CBM Transfer window (CBM Drive on X-Cable), populates with all the names on the disk.
Trasferire un file da dischetto 5" 1/4 a PC Windows 10
After consulting the list of files to the right of the CBM Transfer window (CBM Drive on X-Cable), you can select a file, clicking on it with the mouse. To transfer the file, present on a disk, towards a specific folder of the hard disk, you must first select the destination folder, using the button on the left with the three dots, in the section Directory on Local PC.
To start the transfer of the selected file, you must press the button Transfer: the green arrow pointing to the left. The file passes from the floppy to the PC.

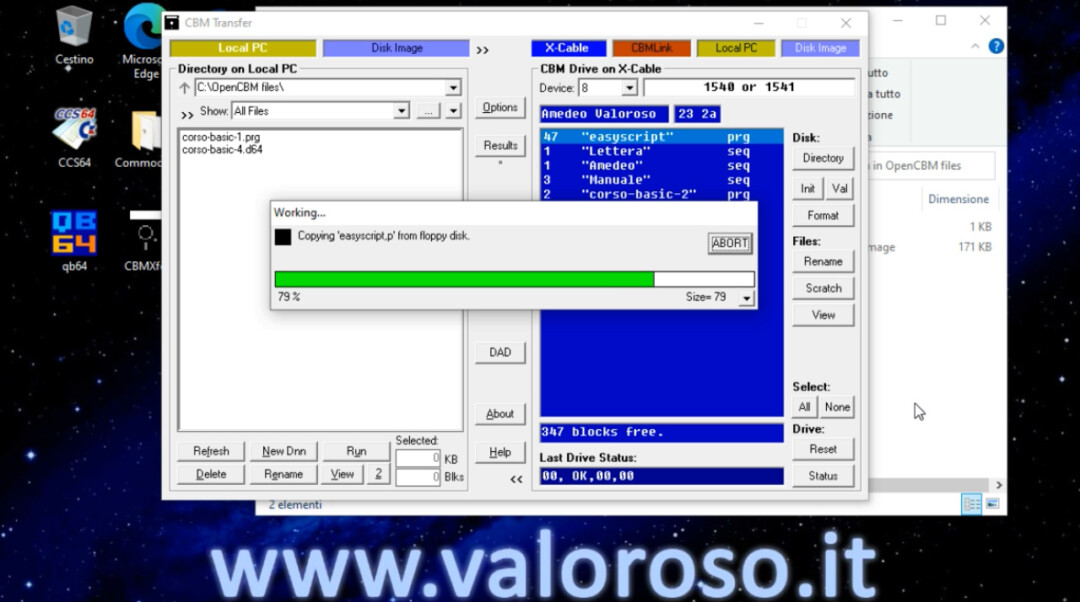
After finishing the transfer, the file is present in the list on the left, as well as in the PC hard disk folder.
Trasferire un file da PC Windows 10 a dischetto 5" 1/4
Connecting the Commodore 1541 floppy disk drive to the Windows 10 PC is also useful for copying files to disk, which we can then use with the various Commodore to which the Commodore 1541 floppy disk drive can be connected.
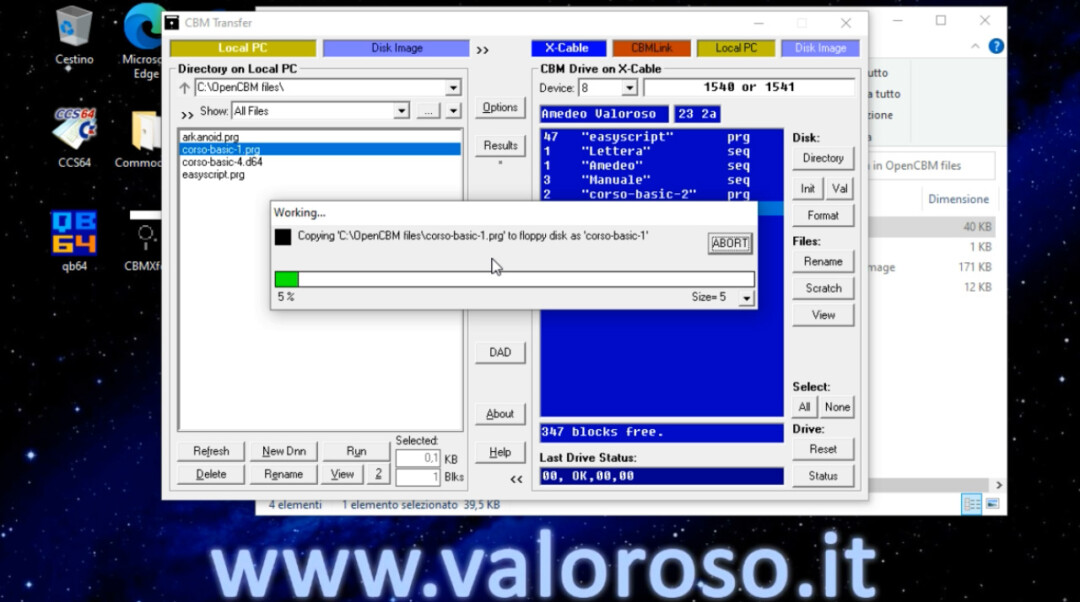
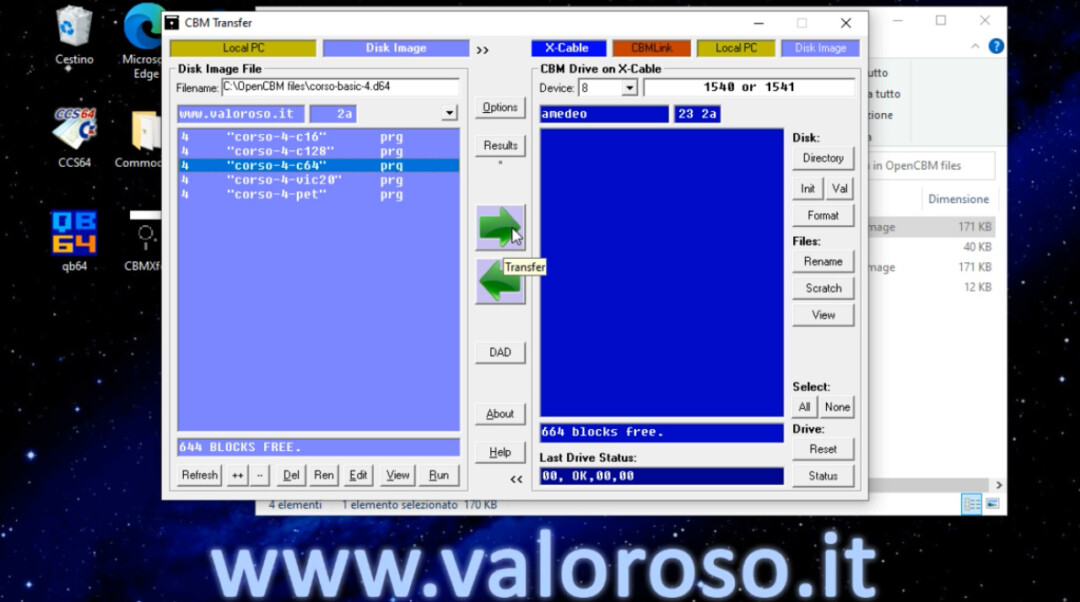
To transfer a file, present on the PC hard drive, towards the disk, you must first select it from the list to the left of CBM Transfer (Directory on Local PC) and then press the button Transfer, the one with the green arrow on the right.
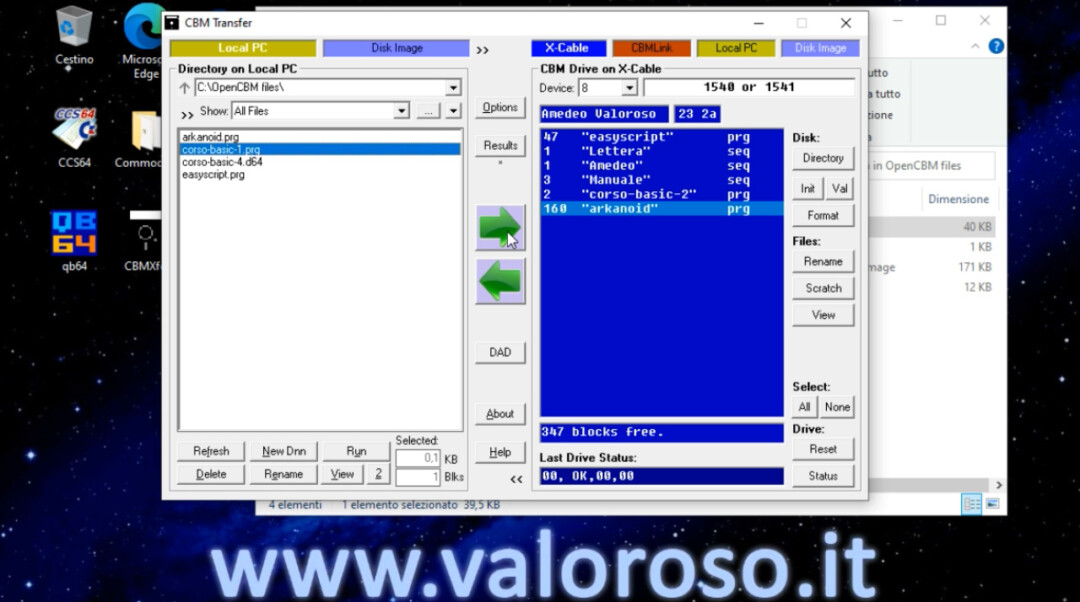
The transfer of the file starts and, after a few seconds, the file will be present on a disk and visible in the list on the right. In the example, I selected the file of the first episode of the Basic language course.
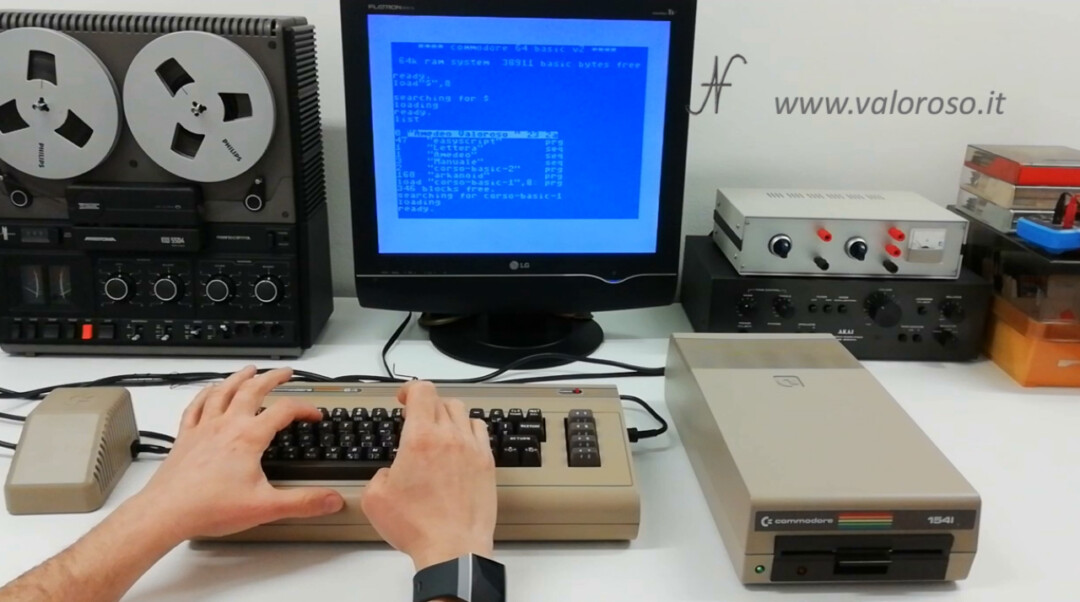
After transferring a file to disk, it can be loaded directly from the Commodore 64 (and from the other Commodores to which the 1541 floppy disk drive can be connected).
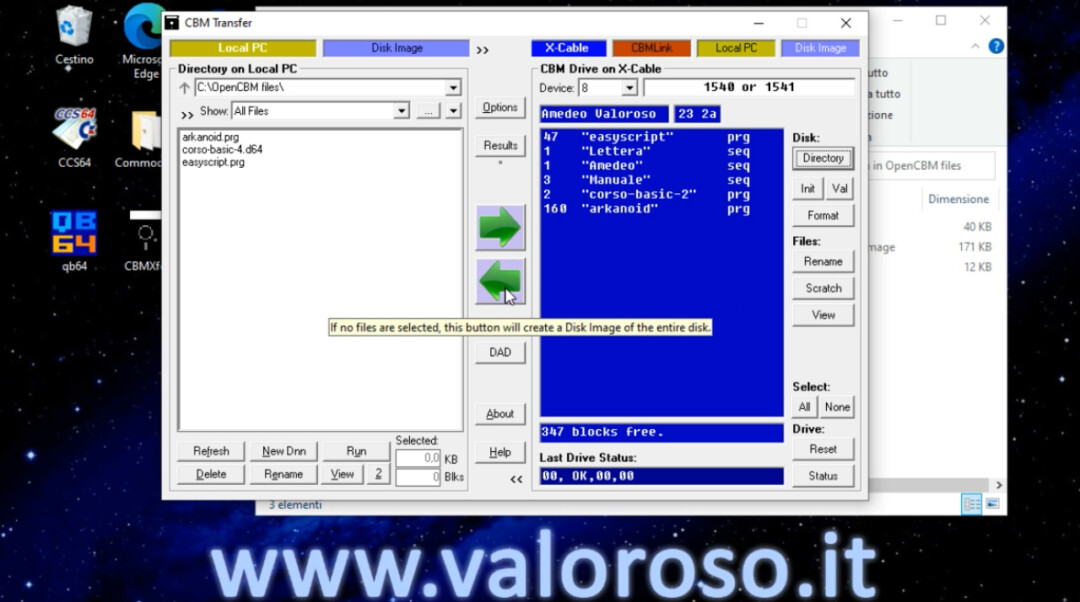
Create the D64 image starting from a physical floppy disk
Now let's try to create a D64 file (an image of a disk), starting from the physical disk present in the Commodore 1541. It is as if we were making a complete backup of the disk, sector by sector, track by track, on a D64 file.
We press the button Directory to view the list of files on the disk, but we do not have to select any.
Without any files selected, we can press the same button Transfer which is used to download a file, the one with the green arrow on the left. A disk image is created with the name of the file we have just indicated.
It may happen, especially if the disk is a little damaged, that this D64 image creation operation crashes or returns errors. In case it crashes, you will have to press the button Abort, then disconnect and reconnect the XUM1541 adapter and also turn off and turn on the floppy disk drive 1541.
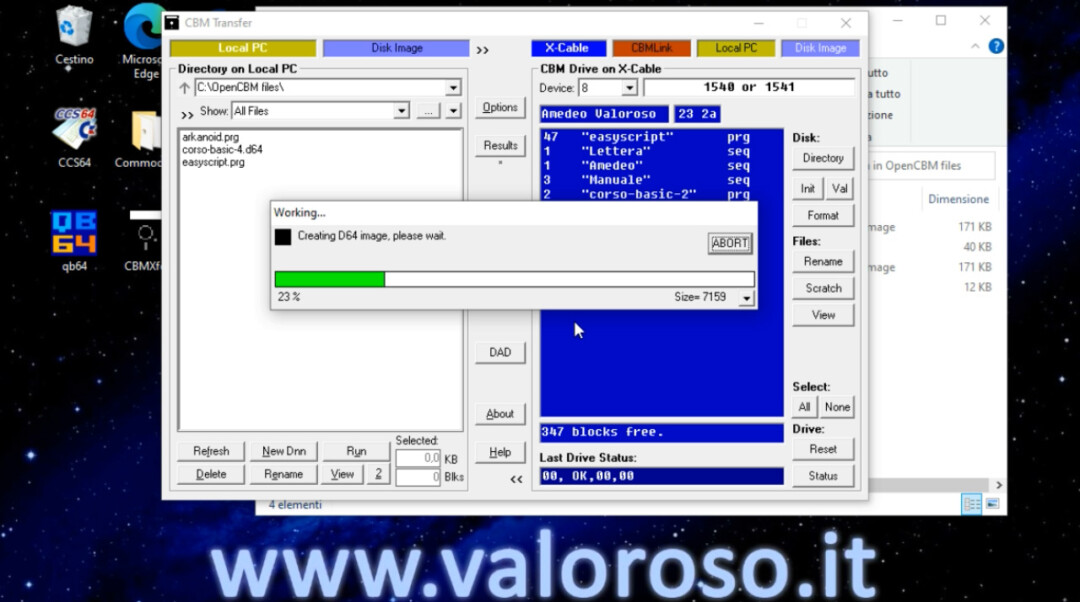
If there are no errors, and if the disc is in good condition, the D64 image is created in less than two minutes.
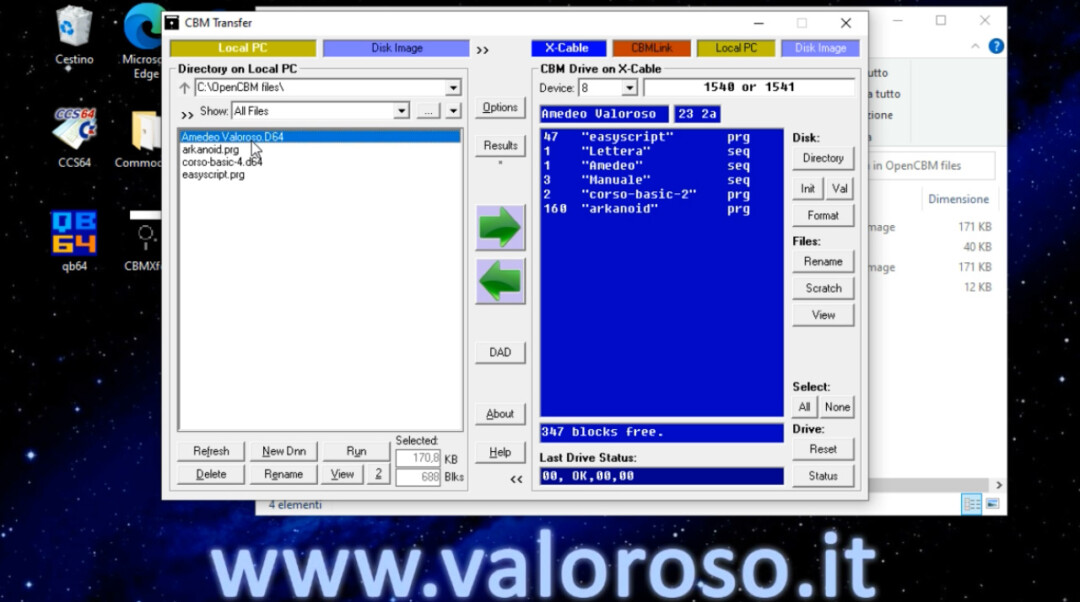
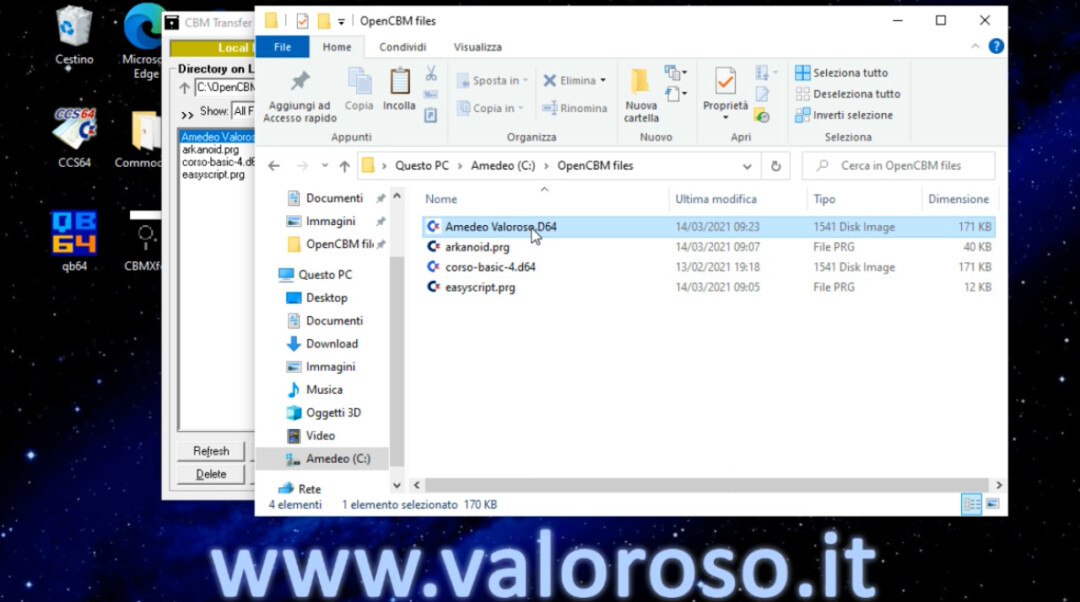
The newly created D64 file is available on the computer hard disk, to be loaded by an emulator, or to be transferred to another spot. All D64 files have a size of 171kbyte.
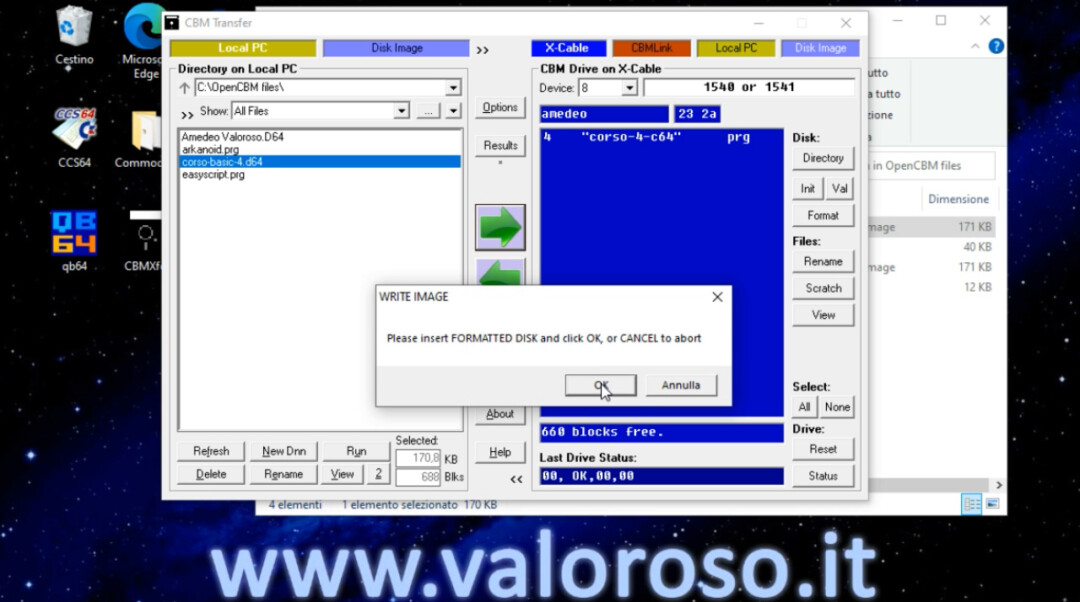
Connect the Commodore 1541 floppy disk drive to the PC to transfer a D64 to a physical disk
E' possibile creare un floppy disk 5" 1/4 a partire da un file D64 senza utilizzare il Commodore 64: semplicemente, si collega il floppy disk drive Commodore 1541 al PC, mediante lo XUM1541!
It starts from a D64 file present in the list to the left of CBM Transfer (Directory on Local PC) and then press the button Transfer, the one with the green arrow on the right. It is as if we were restoring a backup of an entire disk.
The computer asks for confirmation of the operation, also because the disk in the Commodore 1541 floppy disk drive will be overwritten with the new data, trace after track, sector after sector. It is necessary to insert an already formatted disc, even if not empty.
After confirming, the transfer operation begins and the disk will be overwritten with the data in the D64 image file.
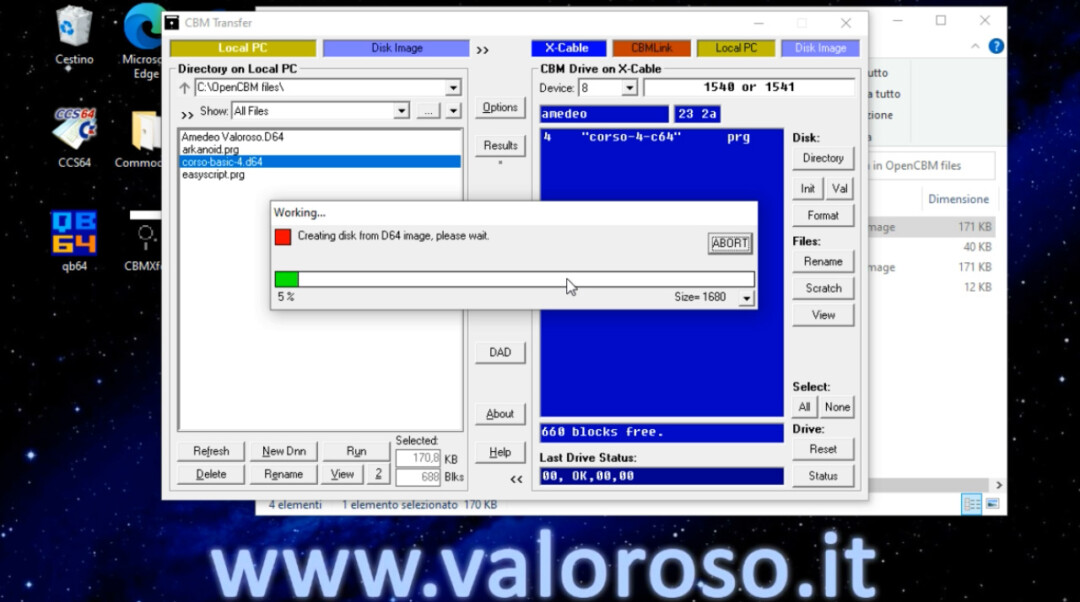
Dopo aver trasferito l'immagine D64 in un floppy disk 5.25", è possibile utilizzare il dischetto con un computer Commodore vero.
File Operations D64
From the list on the left of the CBM Transfer window, we can also open the D64 virtual disks. Double click on the D64 file to open.
The list of files on the left changes background color and passes from Directory on Local PC a Disk Image File.
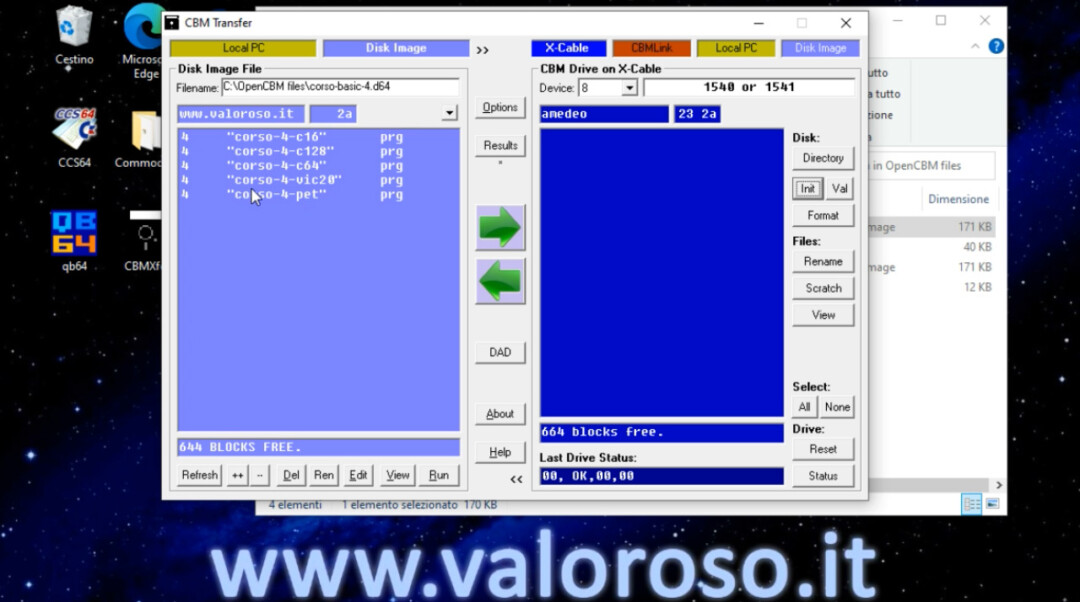
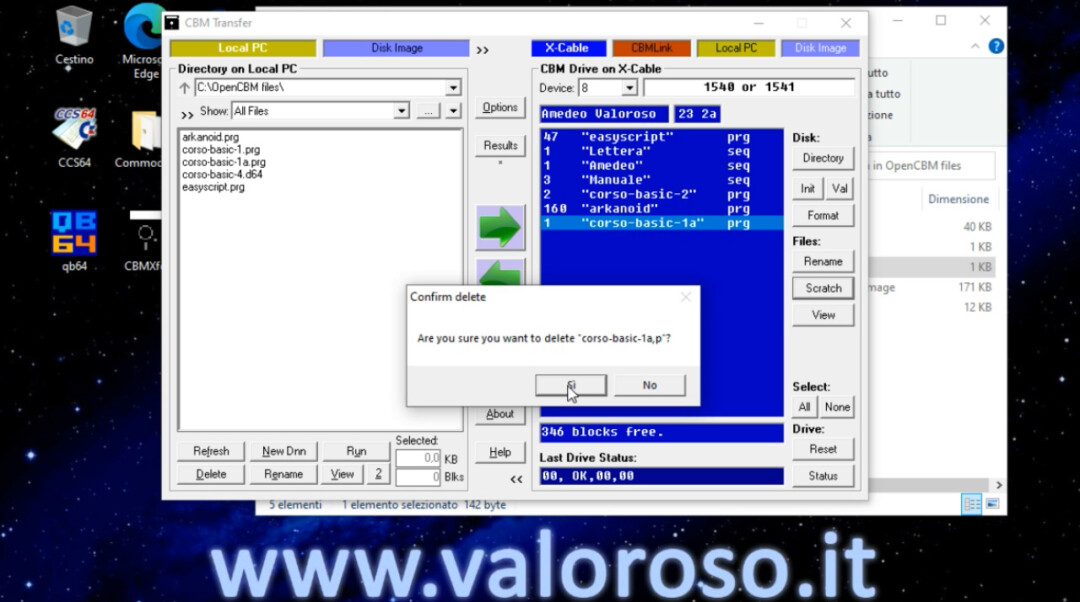
It is possible to carry out several operations with the files contained within the virtual disk D64. It is possible delete a file with the button Of under the file list. You can rename a file, using the button Ren. It is also possible to consult the content of a file with the key View.
Using the buttons Transfer (the two green arrows we saw earlier), we can too Transfer individual files from the D64 image to a physical disk and vice versa. Obviously, there must be sufficient space inside the disc (if you are copying the files from D64 to floppy disk) or inside the D64 image (if you copy the disk files to D64).
You can also transfer files between two D64 images: you need to open the images on the left and right of the CBM Transfer window. In the left part, we have already seen how to open a D64 file. In the right section of the window, you can click on the yellow button Local PC, and then double click on a D64 file. The image of the disc opens on the right side of the window.
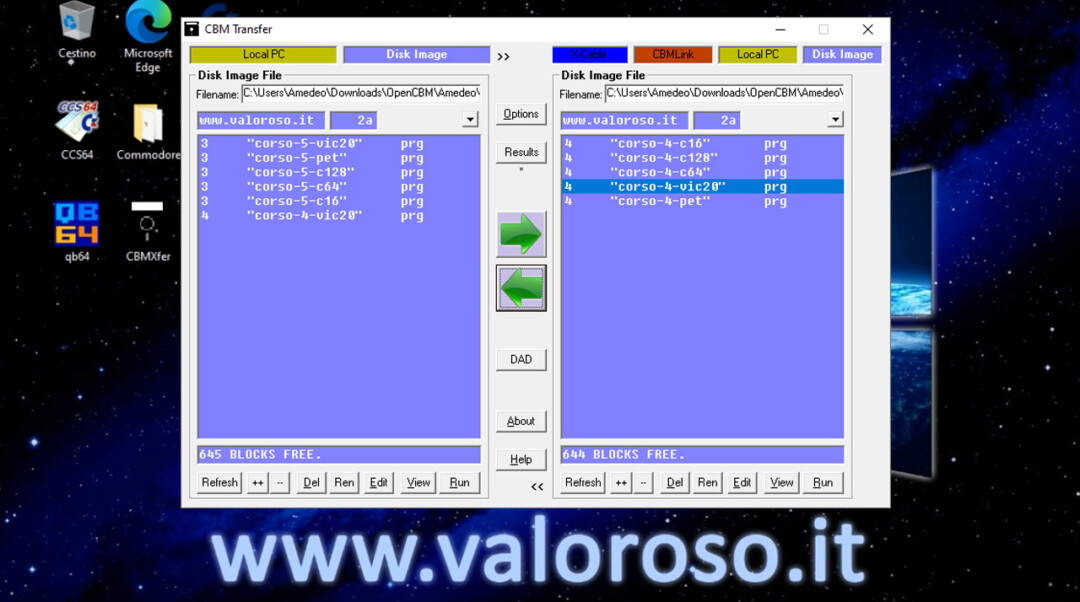
Both lists are named after Disk Image File. Using the buttons Transfer (the two green arrows), we can also transfer individual files between the two D64 images.
OpenCBM, CBMXfer: how to rename a file on diskette
Per rename a file Present on a disk, you must first select it in the list to the right of CBM Transfer (CBM Drive on X-Cable). Then, press the button Rename. Finally, type in the new file name.

The command Rename it is also available in the left part of the window, relating to the files on your computer.
OpenCBM, CBMXfer: delete a file from the disk
Per delete a file presente su floppy disk 5" 1/4, bisogna dapprima selezionarlo nell'elenco a destra di CBM Transfer (CBM Drive on X-Cable). Then, press the button Scratch. Obviously the computer asks for confirmation of the operation. After confirming, the file will be removed from the disk and will no longer be visible in the list.
It is also possible to delete files on the computer hard disk, via the command Delete in the left part of the window.
Connect the Commodore 1541 floppy disk drive to your Windows 10 PC to view the contents of a file
On the right of CBMXfer is the button View. After selecting a file from the list to the right, it is possible to view the content.
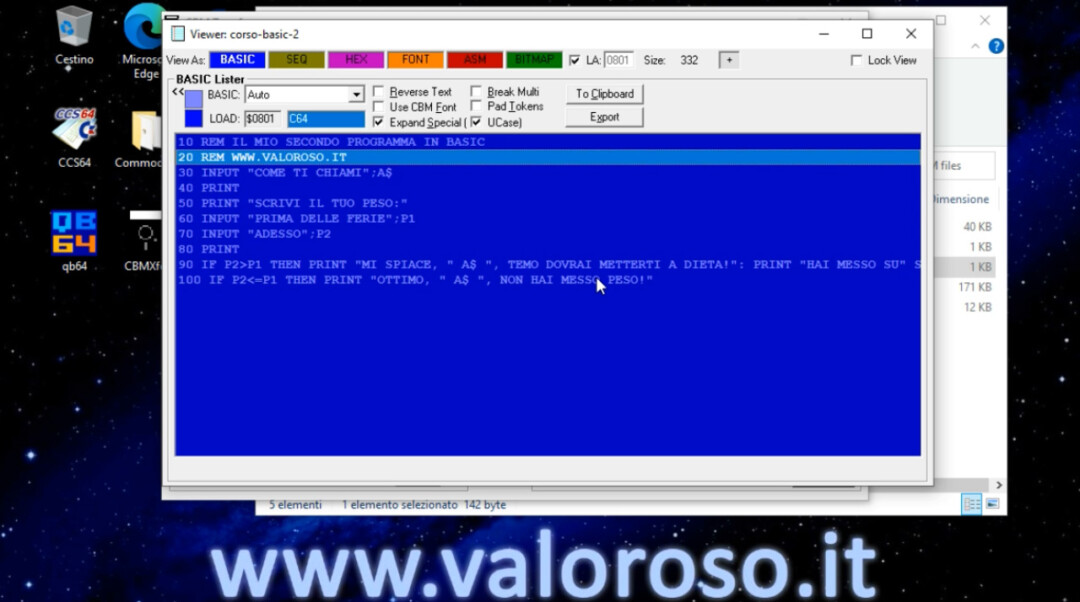
The command View it is also available in the left part of the window, relating to the files on your computer.
Formattare un dischetto Commodore 5" 1/4 da PC Windows 10
To format a disk (in CBM format), you use the button Format on the right of the CBM Transfer window. The computer asks for the disk name and ID, then formatting starts. The formatting process is governed by the Commodore 1541 floppy disk drive, so the computer remains free. However, the disk cannot be accessed, as it is busy formatting. Warning! Formatting deletes all data on the disk!
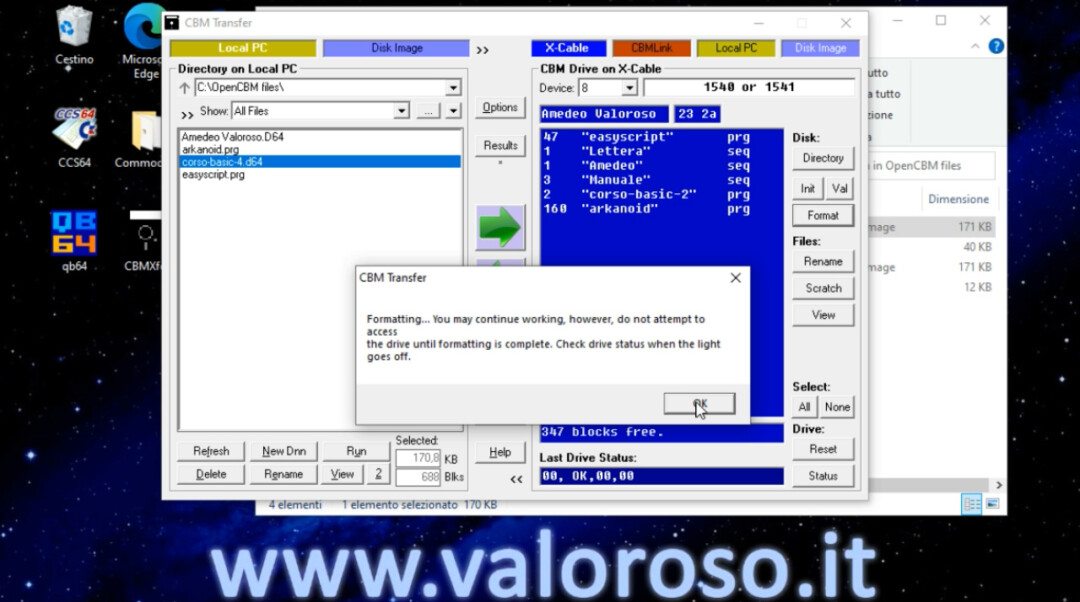
When we hear that the drive has stopped, the formatting is finished. We can consult the list of files by pressing the button Directory. It must be empty.
Download XUM1541 driver and OpenCBM, CBMXfer, CBMLink software for Windows 10
Here is the zip file containing all the software and drivers to use XUM1541 on PC. For installation on Windows 10, you can find the details in this article.
XUM-1541-OpenCBM-103-CBMXfer-110.zip
Credits: in the video tutorial, SID music is Noisy Pillars by Jeroen Tel.
To be notified when I publish more tutorials, experiments and reviews related to retro computers and vintage electronics, I invite you to subscribe to the YouTube channel and activate the notification bell!
Hi,
Thank you for all the great information.
From where can I buy a kit or complete assembled XUM1541 interface for PC?
Thanks.
Hello! You can buy the XUM1541 assembled on eBay. There are many suppliers. If you pay using PayPal, you also have the insurance to receive your parcel.
Hi, I follow you on facebook and youtube, congratulations and thanks for the videos posted, I wanted to ask you a question I have to buy new empty 5.25 floppies but I get confused between the various types and brands, Double sided and more, I ask but it is possible use any 5.25 floppy disk for the 1541 II drive or do I have to buy specific floppies?
Thank you and I wish you a very happy new year, greetings!
Hello and happy new year! Thank you very much for the compliments! For 1541, I use DS DD floppies, which means double sided double density. They are also found on eBay, as well as by private sellers in various Facebook groups.
As floppy disks are generally old, I recommend looking at the surface of the disk before inserting it into the drive. It must not have stains, dirt, dust and streaks. It must be smooth. If the disc is dirty or scratched, do not insert it into the drive.
Great article, just what I was looking for.
Thank you!
Appreciate this post. Let me try it out.
Thank you, I have just been looking for information about this subject for ages and yours is the best I've discovered so far.
Thank you!
Let me know!
Useful article, exactly what I needed.
Thank you!
Very good write-up. I certainly love this website.
Keep it up!
Thank you!
Hey very interesting blog!
Thank you!
Oh my goodness! Amazing article dude! Thank you so much!
Every weekend i use to visit this site!
Thank you!
Many thanks!
Wow! Finally I be able to actually take valuable information.
Thank you!
Hola! I've been reading your site for some time now.
Just wanted to tell you keep up the excellent job!
Thank you!
I must thank you for the efforts you've put in penning this website.
Thank you!