
I recently bought a WiFi modem for Commodore 64 on eBay in kit. The price was interesting. The kit consists of a few components: using the appropriate equipment, the assembly took very few minutes.

Unfortunately, the modem I bought is not well designed: to ensure long-term operation and, even if it is unlikely, in order not to damage the Commodore 64, some precautions are necessary: I talked about it in this article. Of course not all modems are badly designed, some work very well. Plus, tweaking to fix a poorly designed modem is really simple.
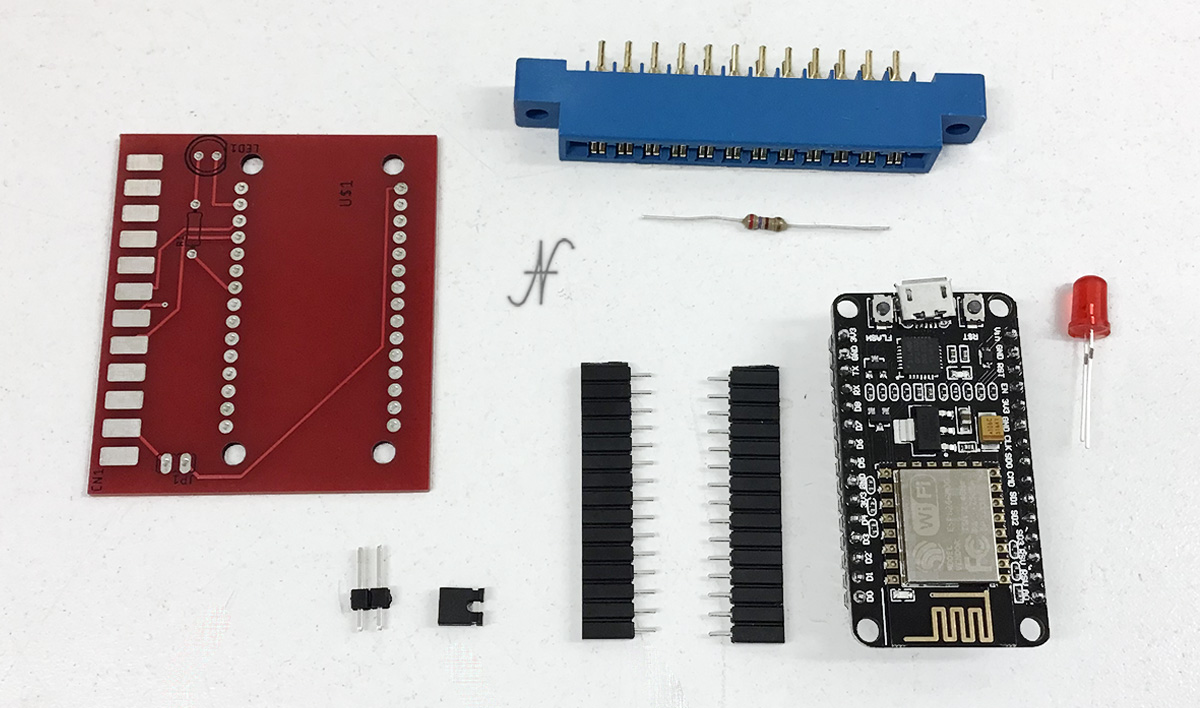
Commodore 64 WiFi Modem Assembly
I decided not to solder the WiFi module directly to the printed circuit board: I instead used two pin strips for assembly. In this way, I will be able to reuse the module for other experiments that I intend to carry out.
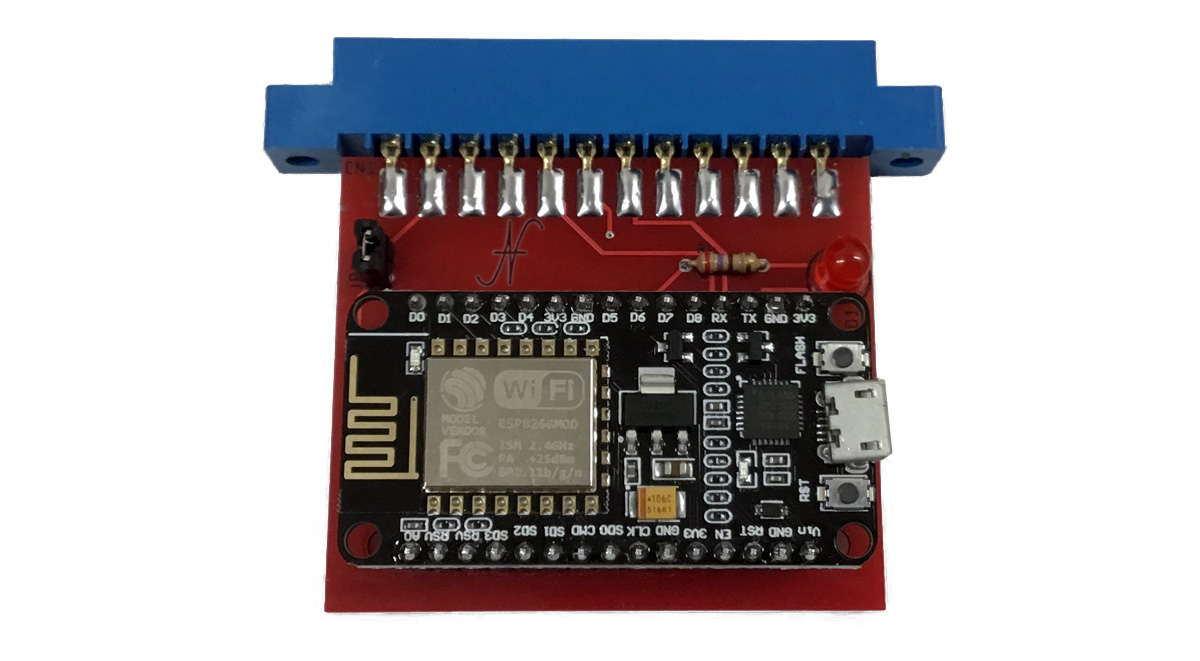
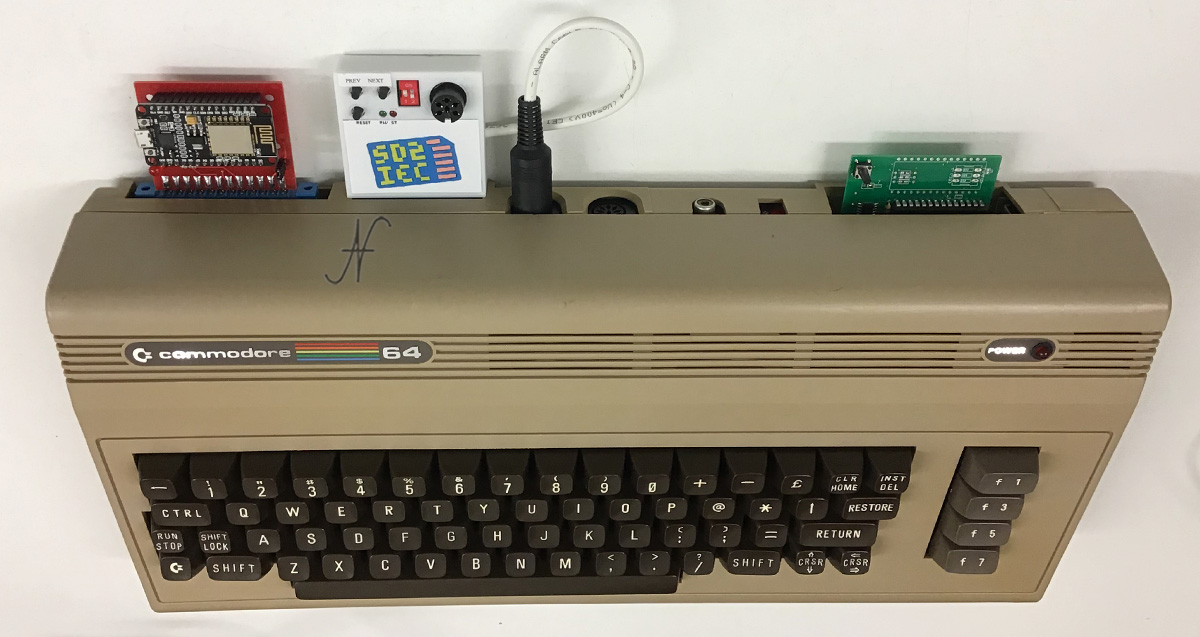
As soon as connected to User Port, the WiFi modem for Commodore 64 immediately turned on. In order to use it, however, you must still follow some step! Together with the modem, I connected to my Commodore 64 some other peripherals: the SD2IEC emulator for the floppy and fastload. In fact, in order to use the WiFi modem, it is necessary to be a software that must be downloaded from the Internet.
Download the CCGMS software
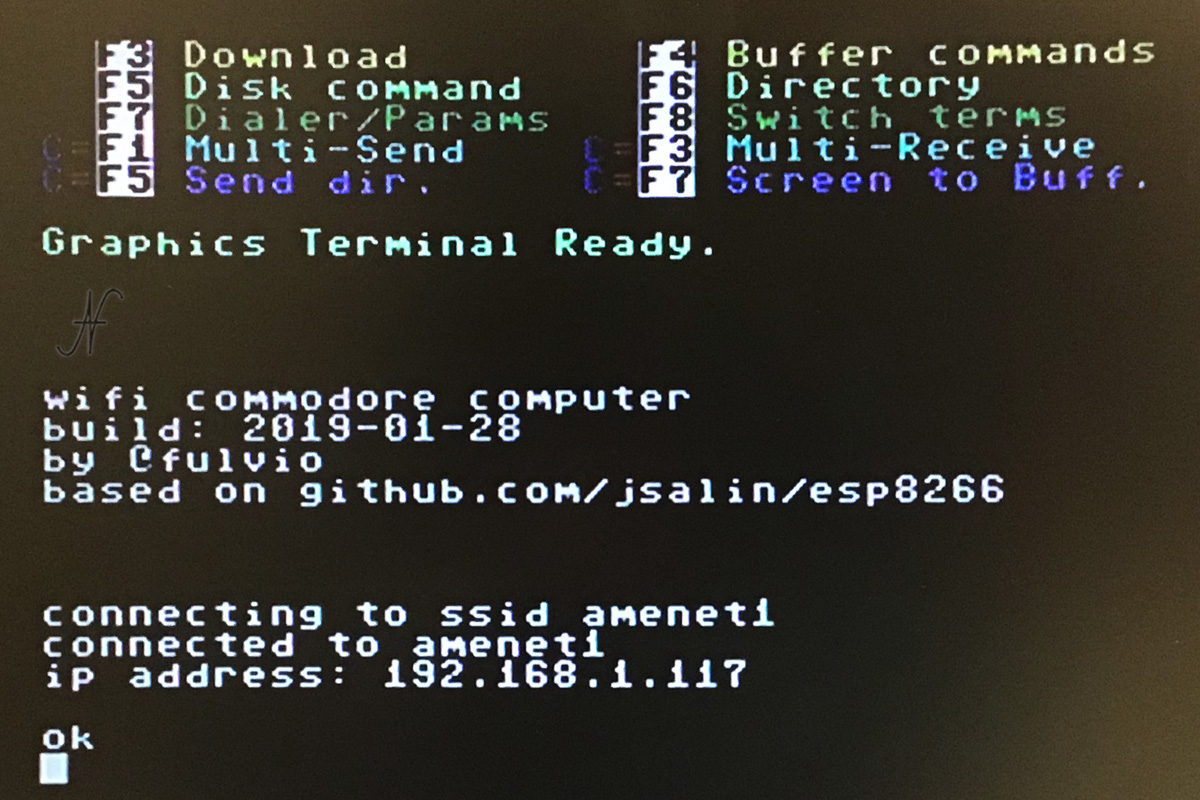
In order to use the WiFi modem for Commodore 64, it is necessary download the CCGMS software. It is a Telnet terminal that is used both to configure the modem and to connect to the BBS. Although the comparison is improper, CCGMS is a bit like the Internet Explorer or the Firefox that is used to navigate between the websites.

To download CCGMS you can carry out a simple Google search. The program is still updated, so much so that I used the 2019 version! Once the CCGMS program has been downloaded (it is in .PRG format), it is possible to copy it on a SD card and upload it to the Commodore 64 using the SD2IEC emulator.
Commodore 64 WiFi Modem Limitations
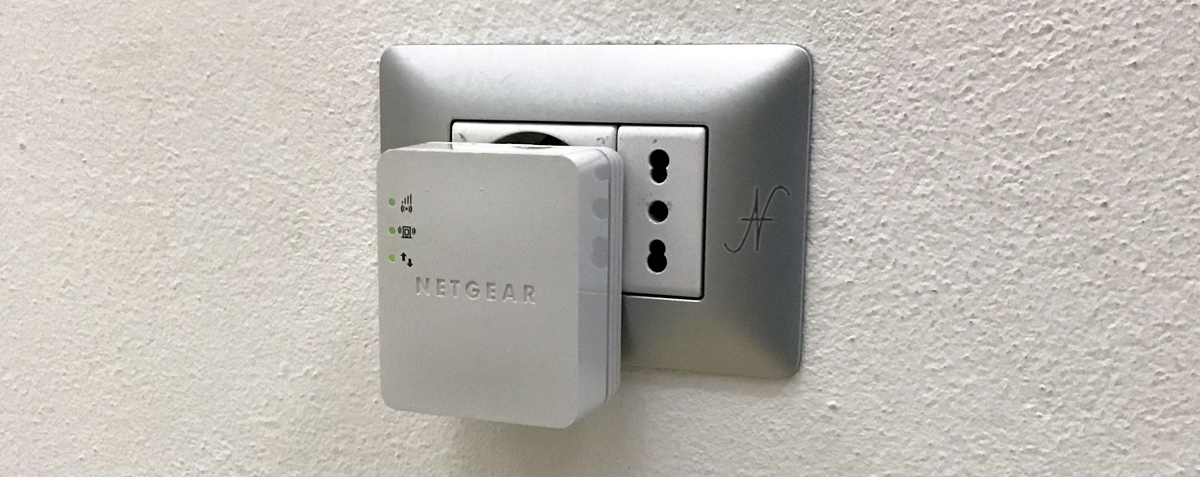
The Commodore 64 WiFi modem I used is based on the NodeMCU platform. The Commodore 64 character table (PETSCII) is different from the standard ASCII character table, adopted by both the NodeMCU and all Computers. Due to this difference, the modem accepts WiFi networks with SSIDs and passwords consisting only of numbers and CAPITAL letters.
My WiFi network obviously uses more complex passwords. Not having the intention of changing the password and the name of the network, I decided to use a WiFi repeater, in which I set up a new network with the required characteristics.
Configure the WiFi modem via CCGMS
At this point it is possible to start CCGMS and perform the first configurations. The WiFi modem, at the start, is set at 300 baud. The speed of the serial port must then be adapted by pressing F7 and appropriately setting the initial speed.

Let's first press RETURN to initiate communication with the modem. Now let's set the SSID of the WiFi network, the password and a higher speed of the modem. I remember to write both the SSID and the password in lowercase, even if on the WiFi repeater they must have been set in UPPER CASE. This is due to the correspondence between PETSCII and ASCII.
at$ssid=ssid_della_rete_wifi_in_minuscolo
at$pass=password_della_rete_wifi_in_minuscolo
at&p0
at&k1
at$sb=2400
at&w
The last command at&w it is used to tell the modem to save the settings.
It is therefore necessary to reset CCGMS to operate at 2400 baud, by pressing again F7 and updating the settings.
To start the WiFi connection, use the command:
atc1
To view the current WiFi connection status, type:
ati
Another useful command is Help, which shows the list of available commands:
at?
Start the first connection
Finally, after all this hard work, we are there! We can connect to a BBS. There are two possibilities: use the default BBS in the modem, or indicate the address and door of a known BBS.
In the first case, that is, if you want to try the ten predefined BBSs, the command is the following:
atds0
...
atds9
Instead, knowing the internet address and the door, you can connect to the BBS with the command etc:
atdthost:port
remembering to replace host with the Internet or IP address e port with the door number, separated from the two points. For example, to connect to the antidote BBS (to the address antidote.hopto.org:64128), to type:
atdtantidote.hopto.org:64128
Alternative al modem WiFi per Commodore 64
Connecting to the BBS took me back in time when, before the spread of the internet, we connected with a modem to a telephone number to exchange messages and files with other users of the same BBS.
The real usefulness of these services today is quite limited. For this I recommend trying to connect to the BBS without buying the WiFi modem for Commodore 64. You can do it easily using a simple program for Windows PC: CGTerm. This is also free software, freely downloadable from the internet.
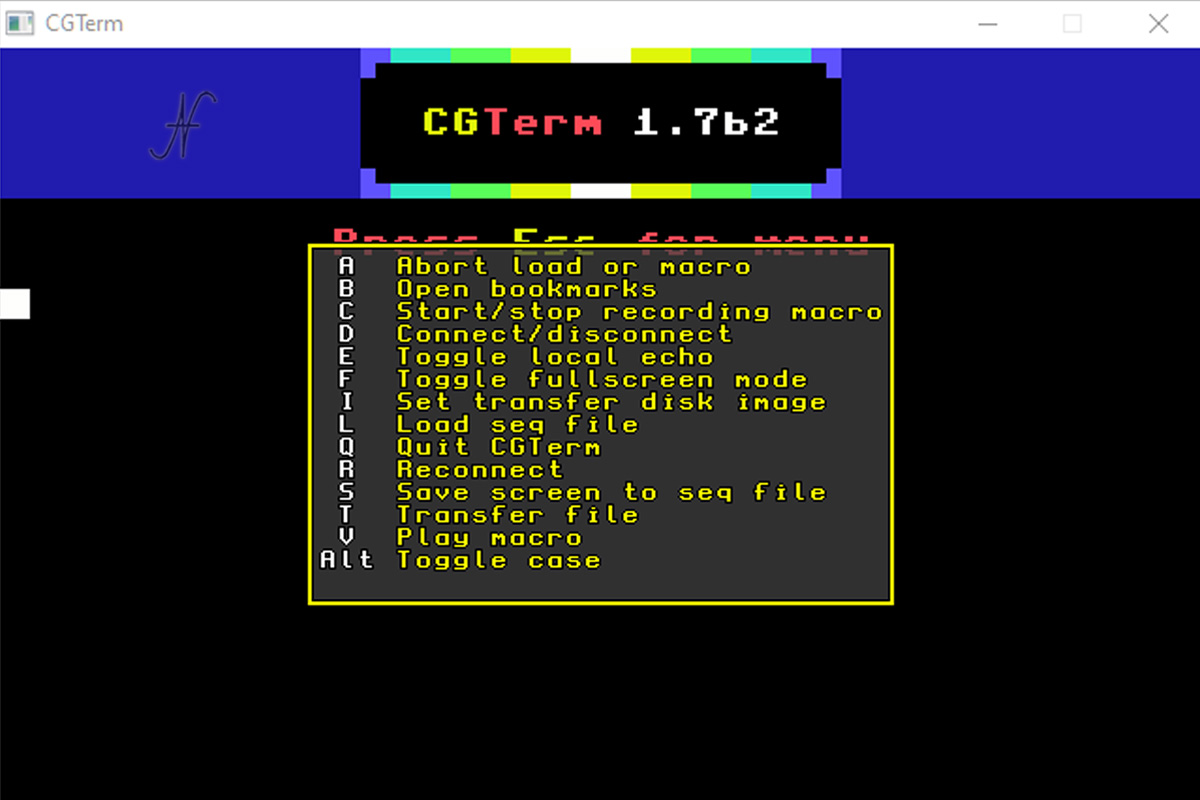
Once you have downloaded and started CGTerm on your PC, you can connect to a BBS simply by pressing ESC and then D.
Then type the internet address and the BBS gate, separated from space and not by the two points, for example: antidote.hopto.org 64128.
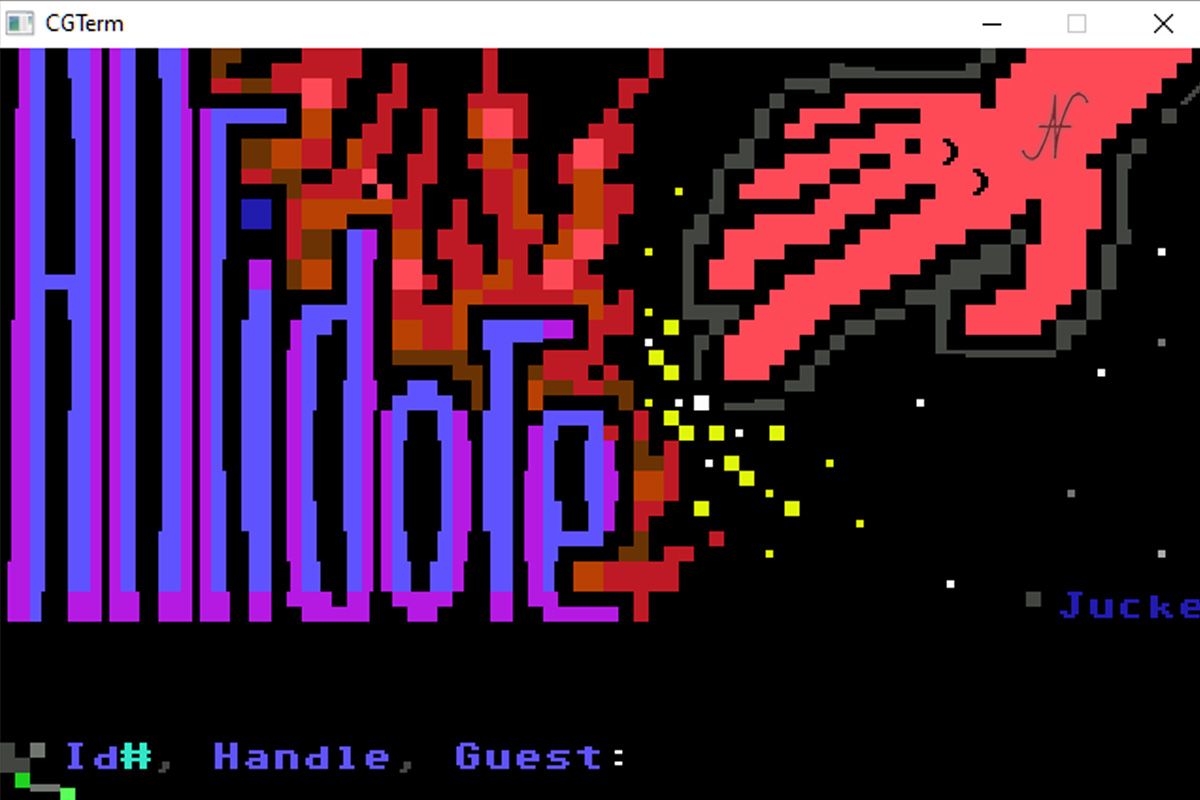
And here we are finally connected to a BBS, without the need to buy a WiFi modem for Commodore 64!
Other developments
In reality I purchased the WiFi modem for Commodore 64 with the aim of connecting to the home automation system ...
The experiment succeeded and I talked about it in this article.