I recently purchased an Atari 800XL, complete with an Atari 1050 floppy disk drive. Here is the unboxing and the first start ... with short circuit!

Before turning on a computer that has not been used for years, remember to follow the steps indicated in this video-article.
Tips for buying a vintage computer
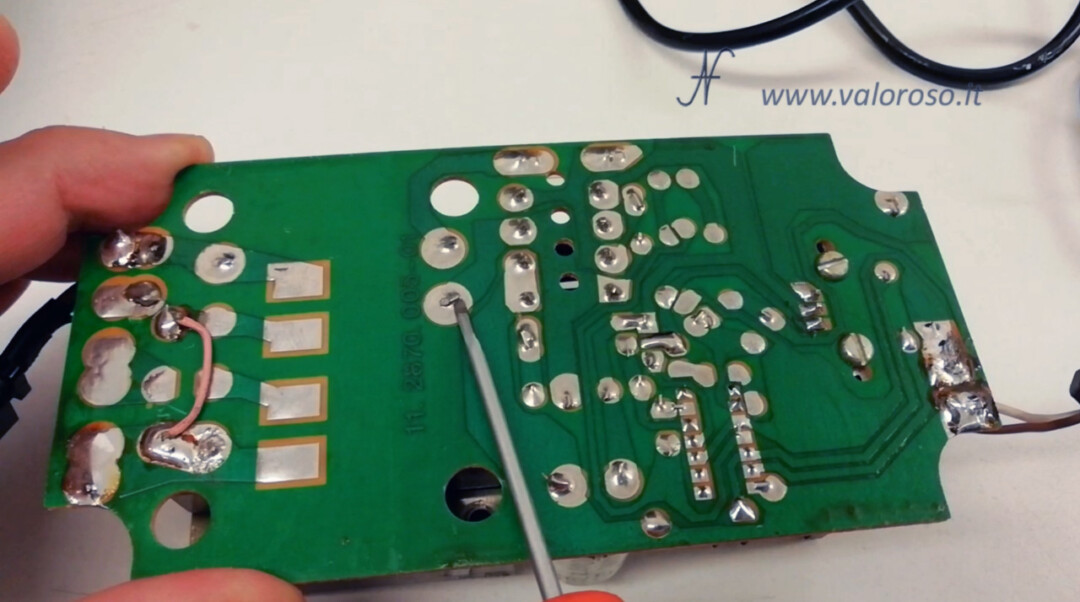
Unfortunately, the power supply of the floppy disk drive, 9V in alternating current, does not work and I will have to repair it.
During the test, the power went out! One piece of advice I can give you, when buying a vintage computer, is to do not trust recently untested computers!
Either you buy a computer from a professional, fully tested dealer-repairer, or you should assume that the computer is broken, or at least not working completely. A computer, even if you turn on, could have various problems: at the communication doors, on the keyboard, to the joystick. It may not feel the audio! The ribbed or floppy disk reader may be damaged.

Before buying a computer, I suggest trying it together with the seller, loading games, programs, using all the keyboard keys, joystick and listening to the audio. The test must last some time: the defects are not always manifested immediately.
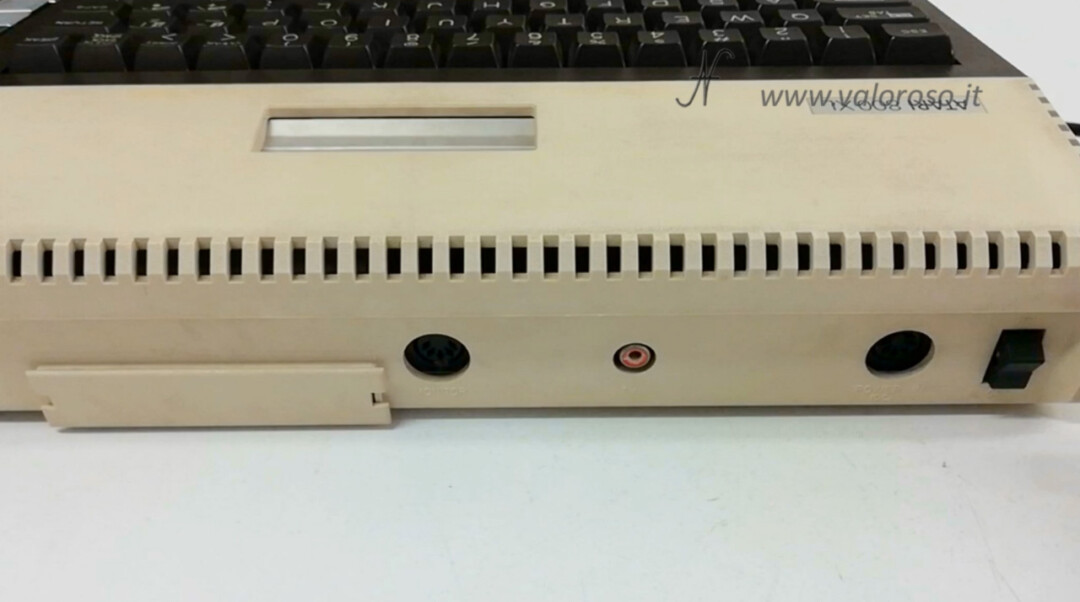
Atari 800XL vintage computer 5V power supply
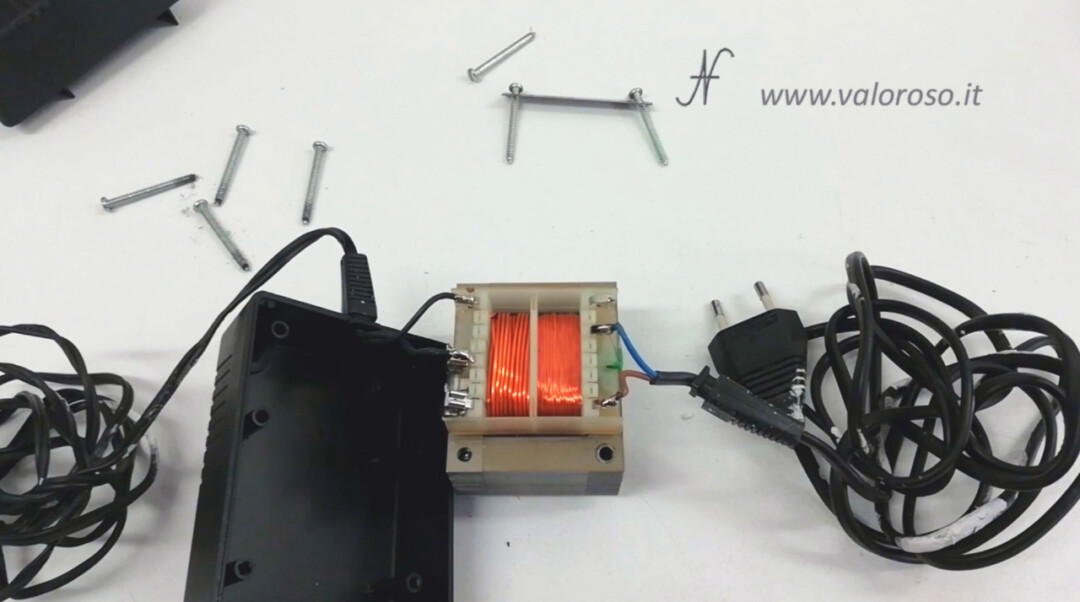
Having found the power supply of the floppy disk drive, I don't even trust the computer power supply. We open it before connecting it to the plug. To open the plastic container, there are 4 cutting screws on the lower lid.
It seems that the power supply has already been opened, in fact there is no screw that fixes the transformer. Unscrew the other three screws. Even one of the pins that fix the transformer is broken.

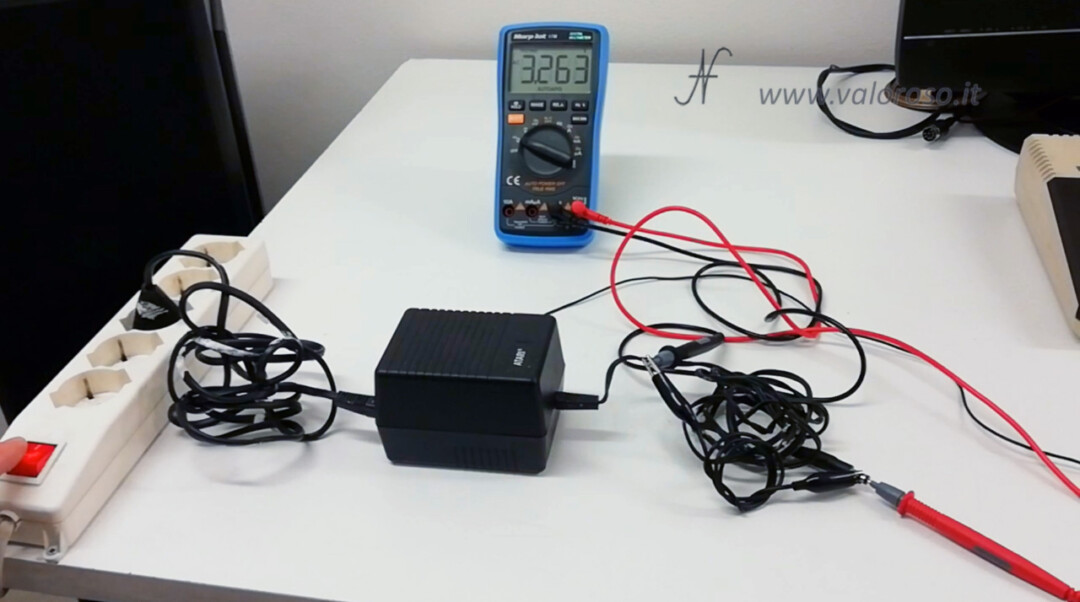
Let's try the output voltage. It must be 5V in continuous current. Let's try the power supply even under load. We put a resistance of 4.7 ohm, 5 watts, in parallel to the 5V exit. With this resistance, the power supply should provide just over 1st. During the test, the resistance warms up. Attention! There is high voltage! If you have no technical experience, avoid doing these tests, which are dangerous.

The tension test with and without load can also be done by the 7 -pole DIN connector, without opening the power supply. For polarity, you can refer to the connector pinout, seen from the contact side.

Unfortunately, during the tension test on the connector, I realized that, by moving the power supply, the output voltage is not always constant. Sometimes there are 5v, other times, the tension lowers! After a verification, I was able to find that the defect is caused by a soldering partially detached on a pins of the transformer.
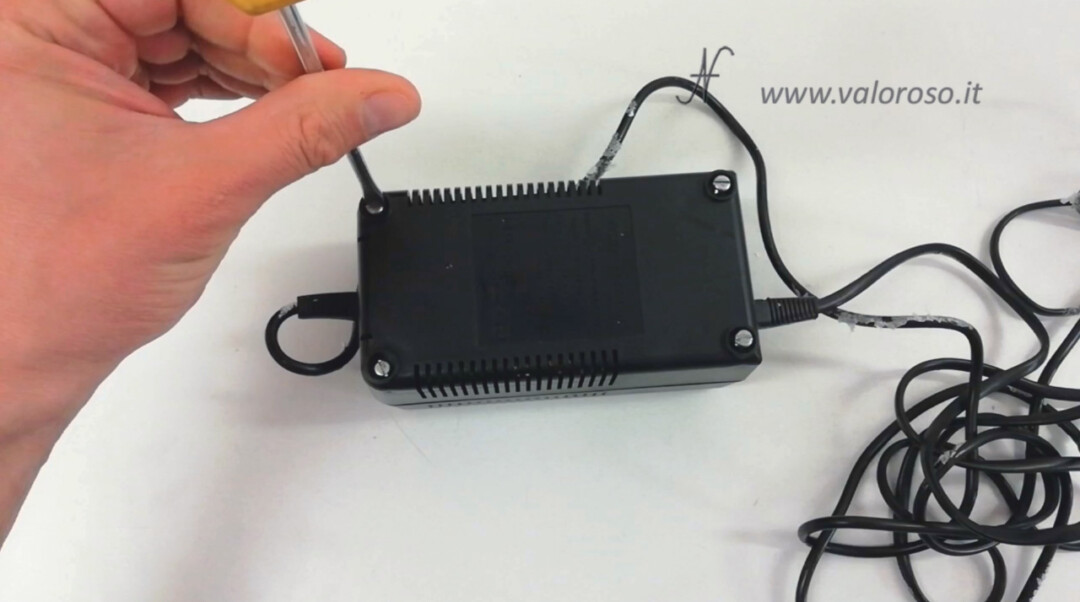
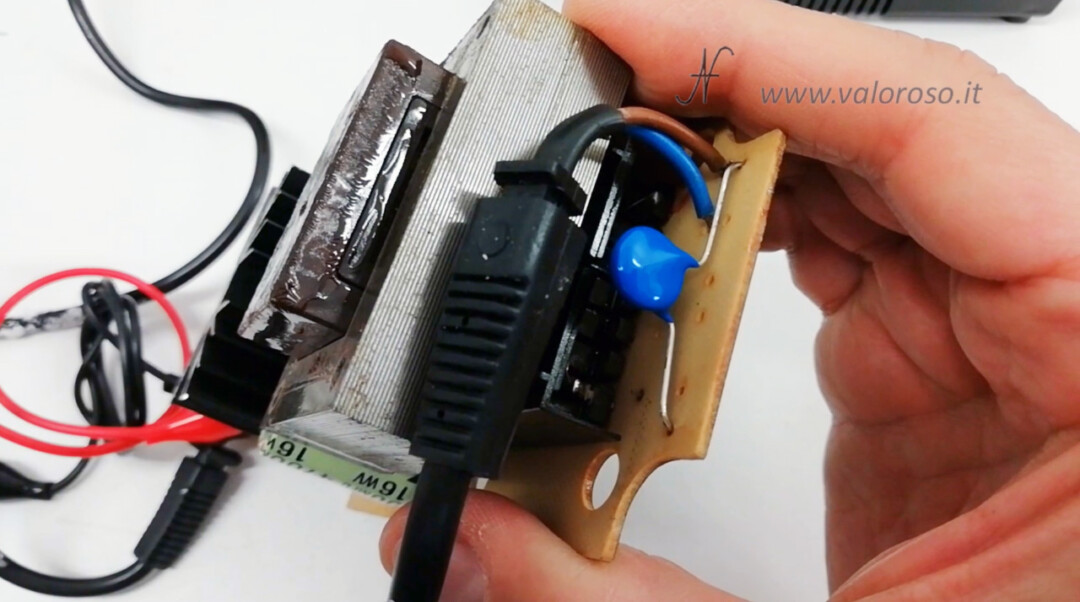
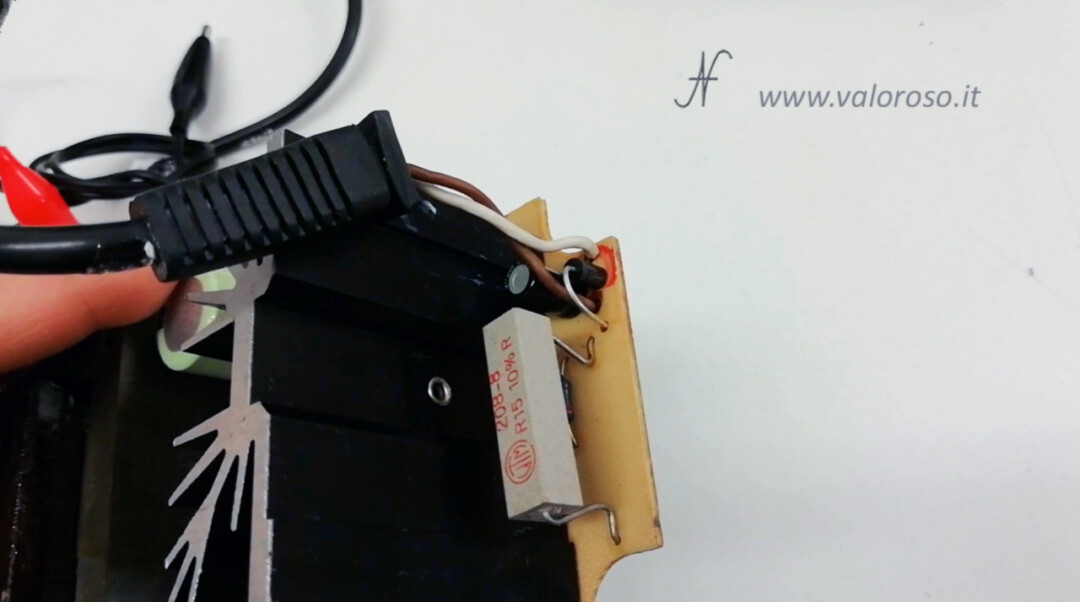
I apply improvements to the power supply. Mount a transil on low voltage exit and a varistor with metal oxide on high voltage. These components offer protection in the event of overvoltage or transient that can be on the power supply.
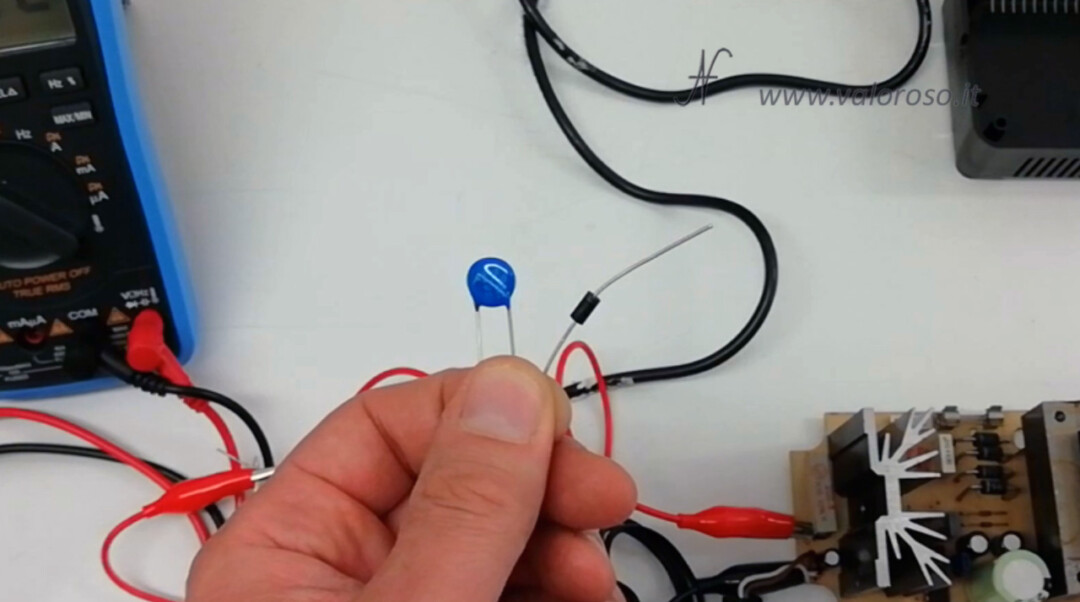
Mount the metal oxide varistor on the high voltage. It must be mounted after the fuse, if present, or after a thin cable that has the function of fuse.
Mount the Transil on low voltage. The exit is already protected by a delayed 2.5th fuse and the Transil must be mounted after the fuse.
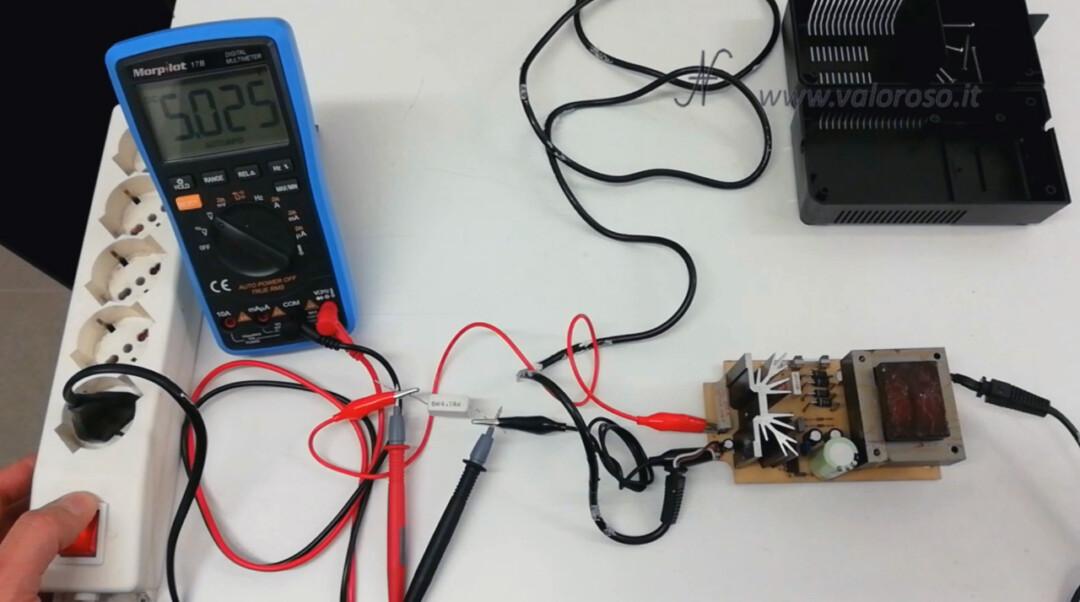
Now the power supply is perfect!
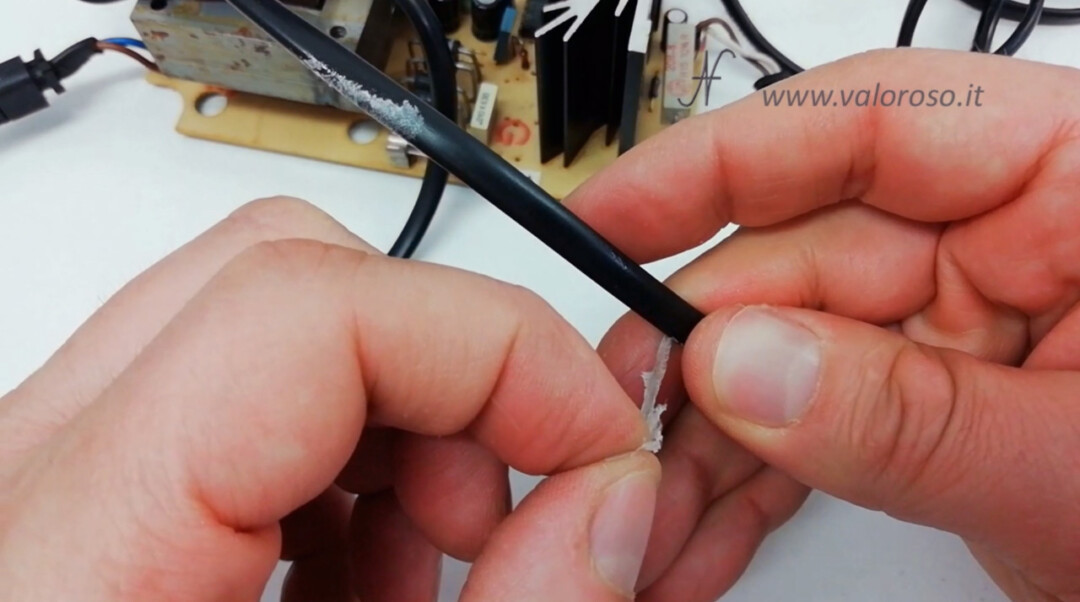
Clean the loose styrofoam on the electrical cables
To improve the aesthetic of the power supply of the 800xl, we can remove the polystyrene that has merged on the cables. Some parts come away simply by pulling them. In some cases the melted polystyrene must be scratched away, gently, with the nail.
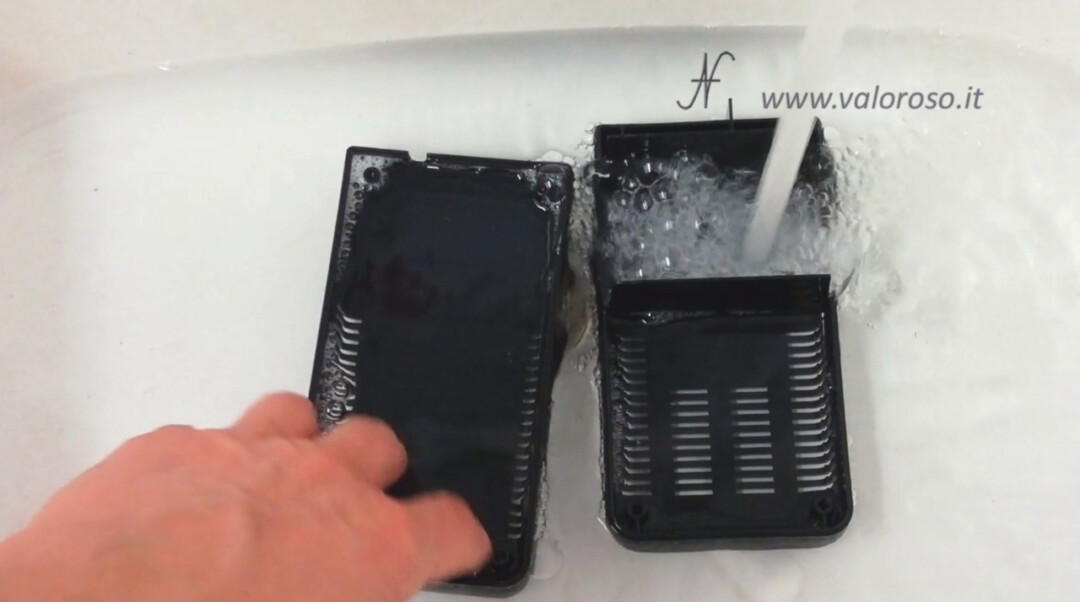
If the power supply is disassembled, it is also possible to clean the plastic shell well, with water and not very degreaser. Obviously you don't have to wet any electrical part!
Test the Atari 800XL computer
After trying and adjusted the power supply, we can try the computer. I am too curious to see if it turns on!
Behind the computer connect the power cord and composite video cable.
The 7-pin DIN power connector, with its view facing the back of the computer, has this contact arrangement.

The composite video cable is the same, with a 5-pin DIN connector, that I use with Commodore computers.
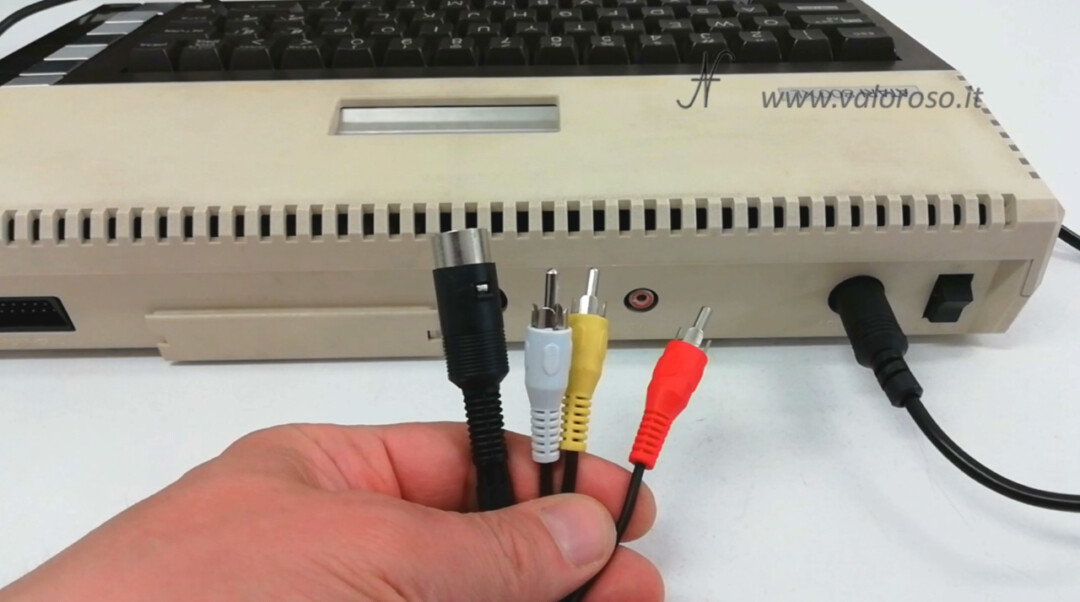
The arrangement of the contacts is the same: the following image depicts the view of the connector facing the back of the computer.

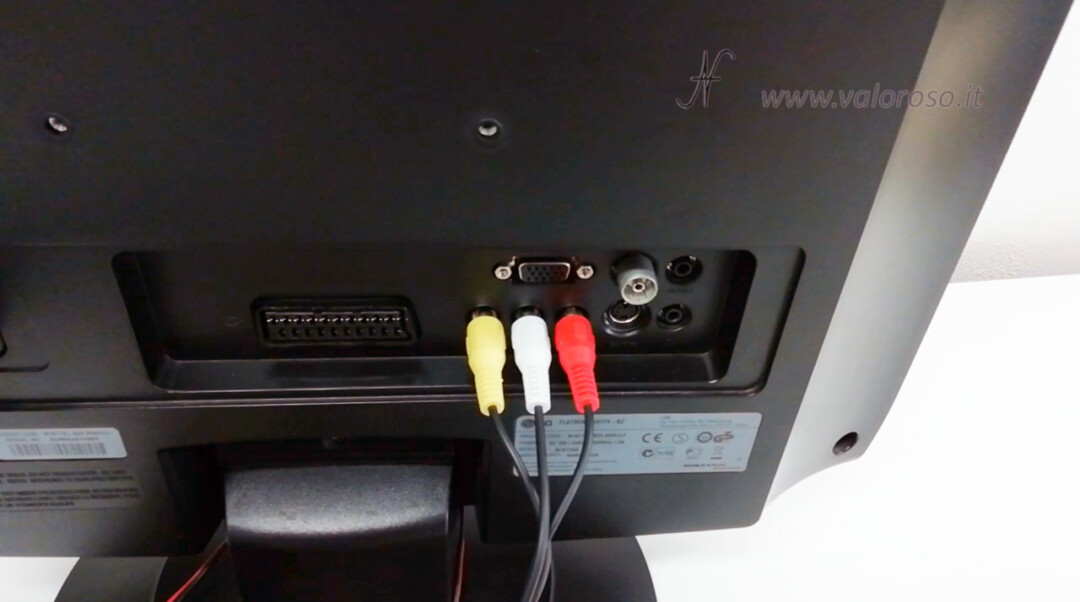
Behind the TV, connect the three RCA plugs: video (yellow) and audio (white and red).
Let's try to switch on? The computer has booted up! We don't have to leave it on for a long time. We can turn it off right away, to make sure it doesn't smell strange.

After verifying that everything is in order, we can turn the computer back on and test the keyboard. The keys work well, and it is also very nice to press them: the sensation, to the touch, is pleasant.
I test a simple Basic program. In the video, you can see the listing.
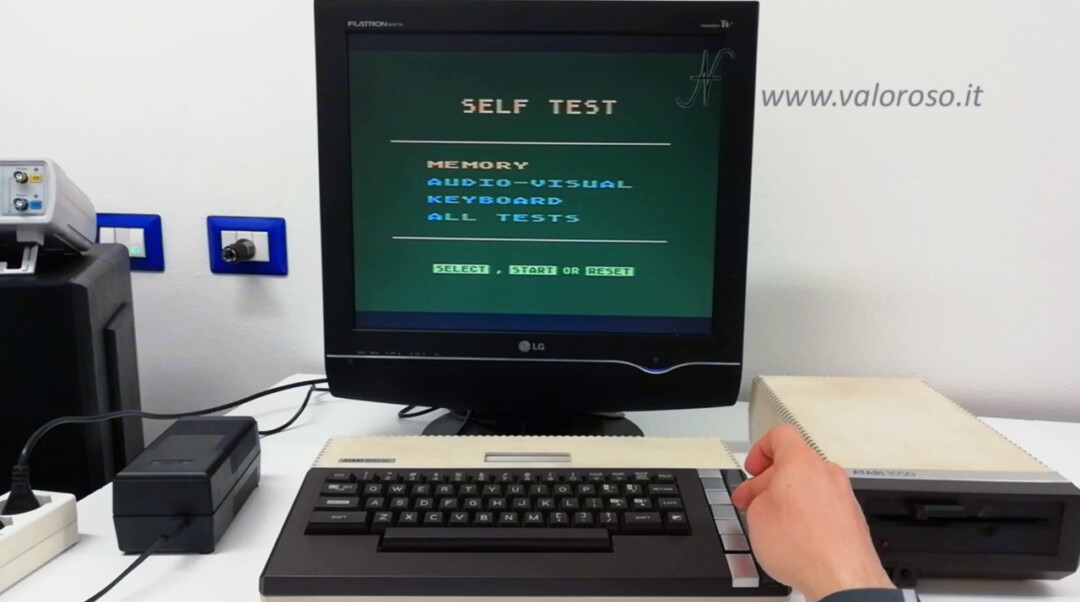
Il self test dell'Atari 800XL
By pressing the key OPTION When the computer is turned on, the self test. Let's try the Atari 800XL!
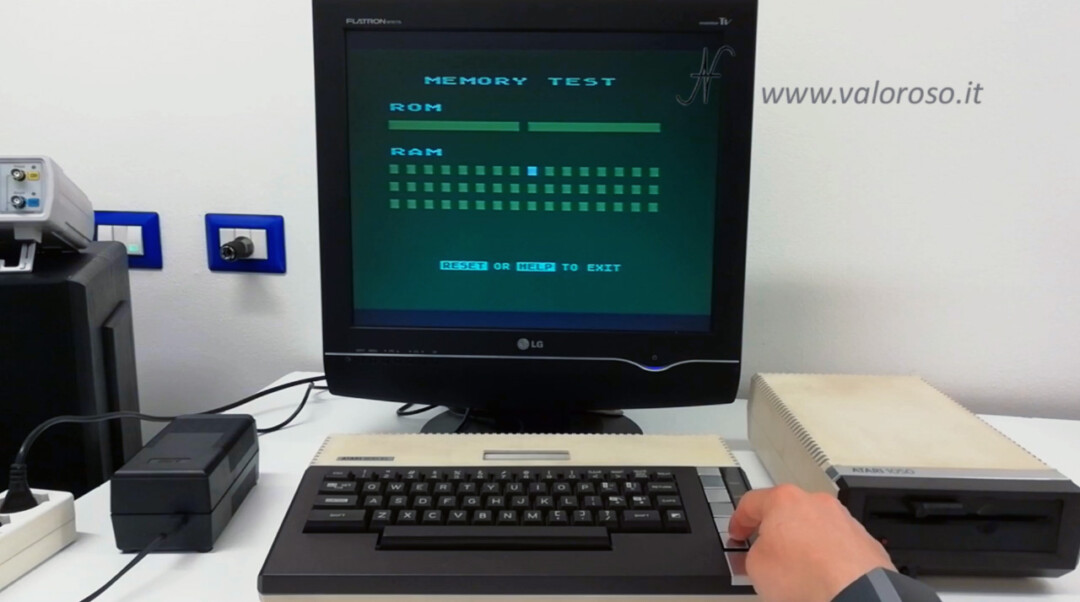
The first test we perform is that of memory (memory test). Both ROM and RAM are tested. The test continues until you press HELP.
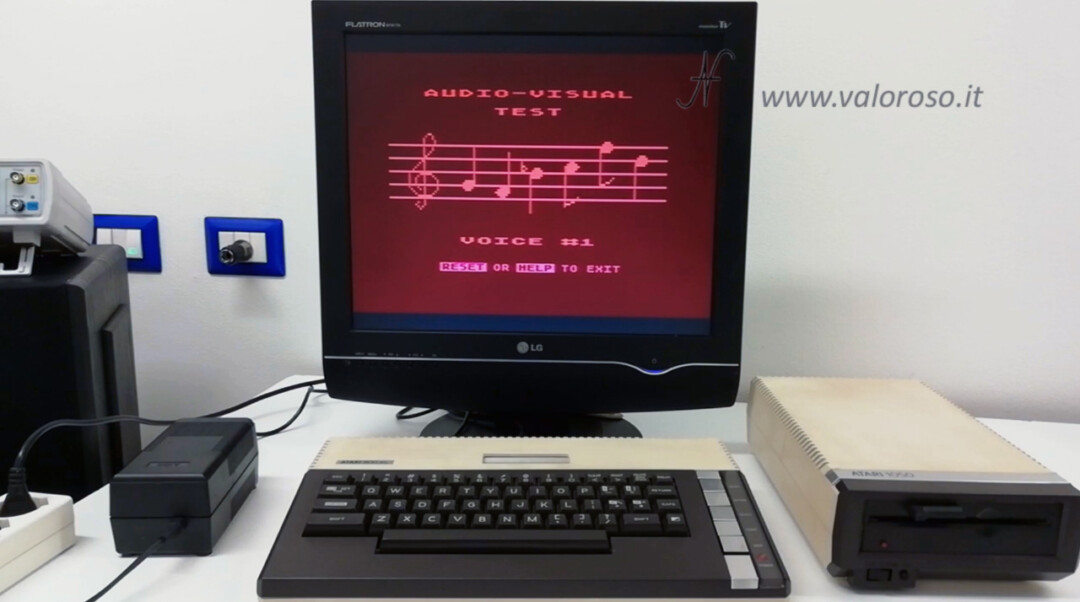
Then, we can test the sound chip (audio-visual test).
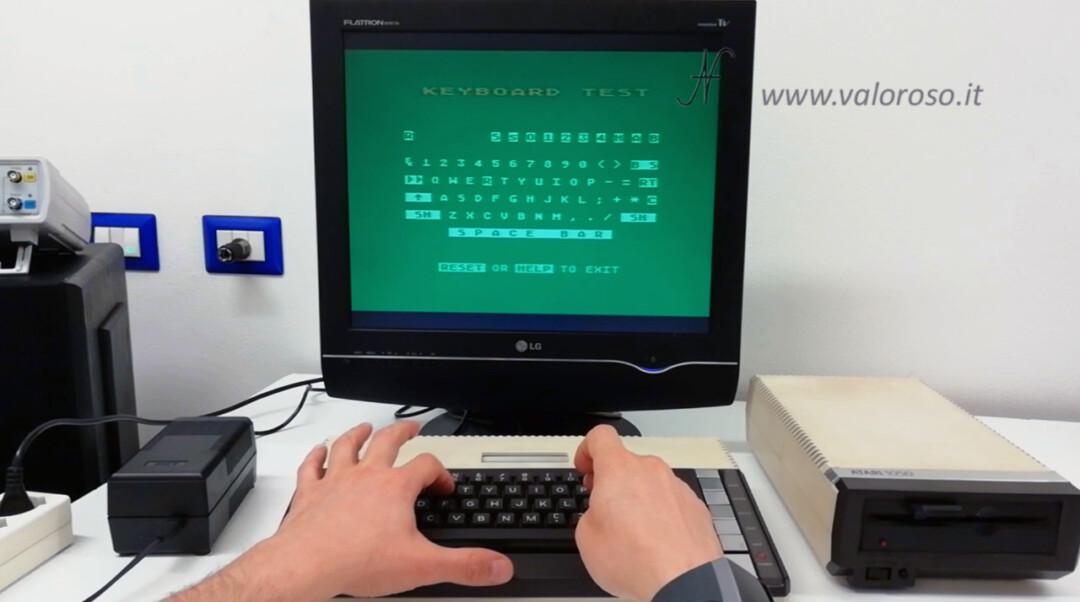
Finally, we also try the keyboard (keyboard test).
Well, the tests are finished and everything seems to work correctly. I plan to disassemble the Atari 800XL computer to watch it inside and to clean it properly. As soon as she sheltered the 9 -volt power supply of the floppy disk drive, we will also be able to load some game.
Credits: the background music of the video is Jet Set Willy by Rob Hubbard.
To be notified when I publish more videos and other articles, I invite you to subscribe to the YouTube channel and activate the notification bell!