Good morning and welcome back to the blog and the ValorosoIT channel. If you like retrocomputers and vintage electronics, you've come to the right place! Today we take the Commodore Amiga 1200 test, which has just arrived from Ebay, through the Amigatestkit utility.

For a while I had wanted a Commodore Amiga 1200. I had happened to me in my hands, which however was not working and the repair would be truly expensive. So I set up, on eBay, a search and saved it. From time to time, notifications appeared to me from eBay, relating to some advertisements of different Amiga 1200. Finally I found this, which had a fairly interesting price.
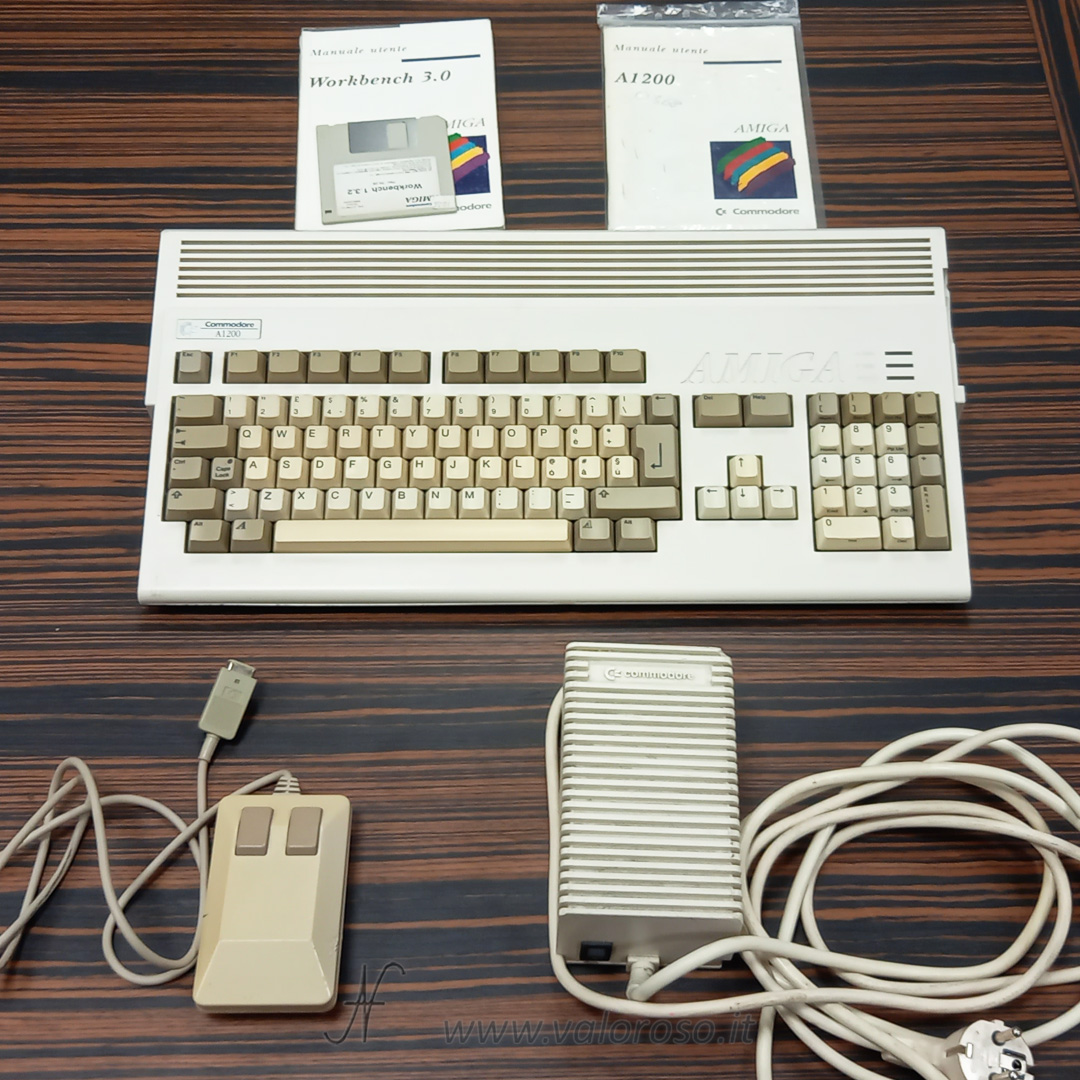
This Commodore Amiga 1200 is not perfect: it has yellowing on the keys, the mouse was eaten by a dog ... or by a cat (since it is a mouse!) And the power supply is not exactly in place: to close it, the seller used a wooden table instead of the lower panel.
Regarding the operation of the vintage computer, this Amiga1200 is in order. In the video and in the next steps of this article, we see the tests I carried out through AmigaTestKit.
Where to find AmigaTestKit
Amigatestkit is a free software, useful for testing Commodore Amiga computers. It works on all the Amiga, even if, in this article, I use it with the Amiga 1200. To download it, we can search for the Github page of Keir Fraser, the developer.

After downloading the latest version of Amigatestkit, in the computer download folder we find a zip file. We open it and extract the ADF file, which is what we have to copy to a USB pen drive.
Obviously, this operation can only be done if we have a Gotek: an emulator for floppy disk drives for Amiga. The Gotek allows you to upload files, not from diskette, but rather from USB pen drive. The black container of the Gotek was kindly offered to me by ByteBreaker.
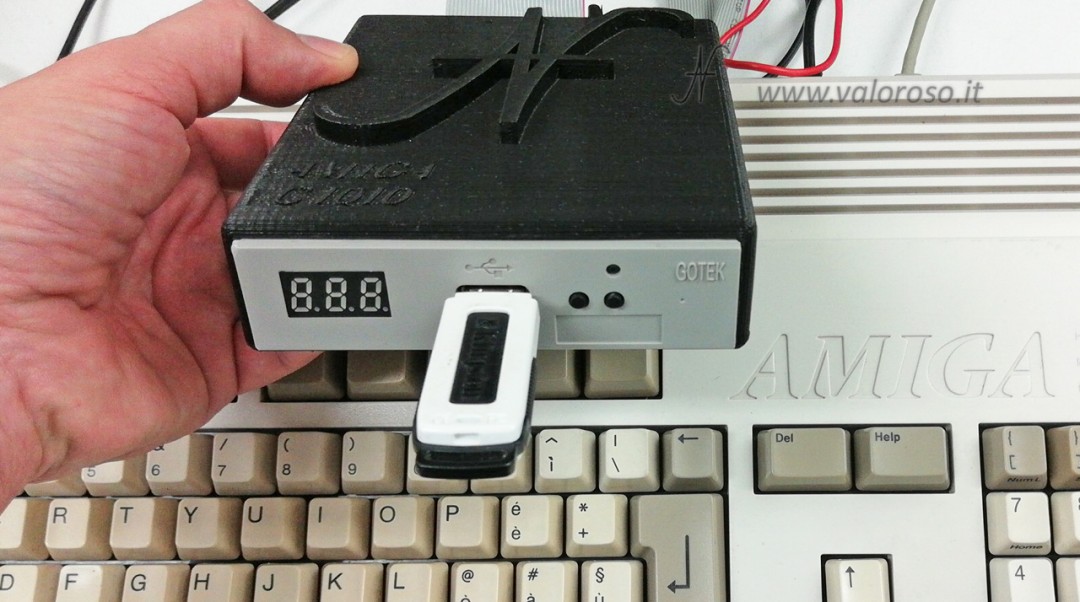
In addition to the ADF file of Amigatestkit, the Flashfloppy Selector files will also be inserted in the Pendrive, the utility that allows you to use the Gotek on Amiga. Flashfloppy depends on the firmware version of the Gotek, and it is not the subject of this article.
Accessories to test Amiga with Amigatestkit
To test the Commodore A1200 we need some tools, to be connected to the various ports of the vintage computer.

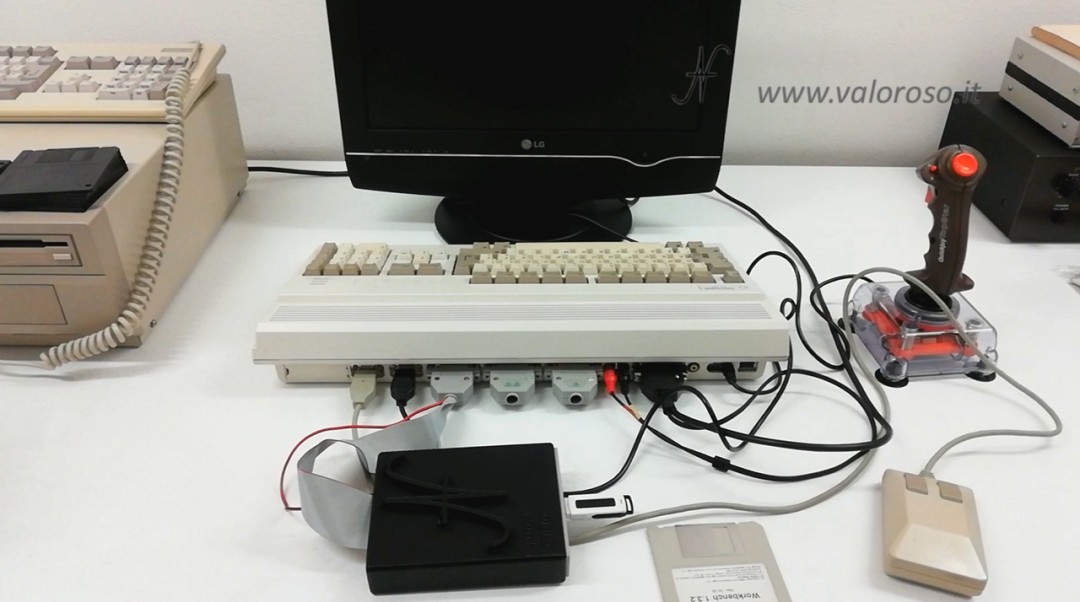
First we need the mouse (obviously compatible with Commodore Amiga). Never use serial mice for PC: they damage the Amiga, as it happened to me in this video.
We also use a joystick, to test the joystick port.
To load AmigaTestKit you need an external (or internal) Gotek for Amiga, properly configured, and the USB pendrive with the AmigaTestKit ADF file and FlashFloppy utilities.
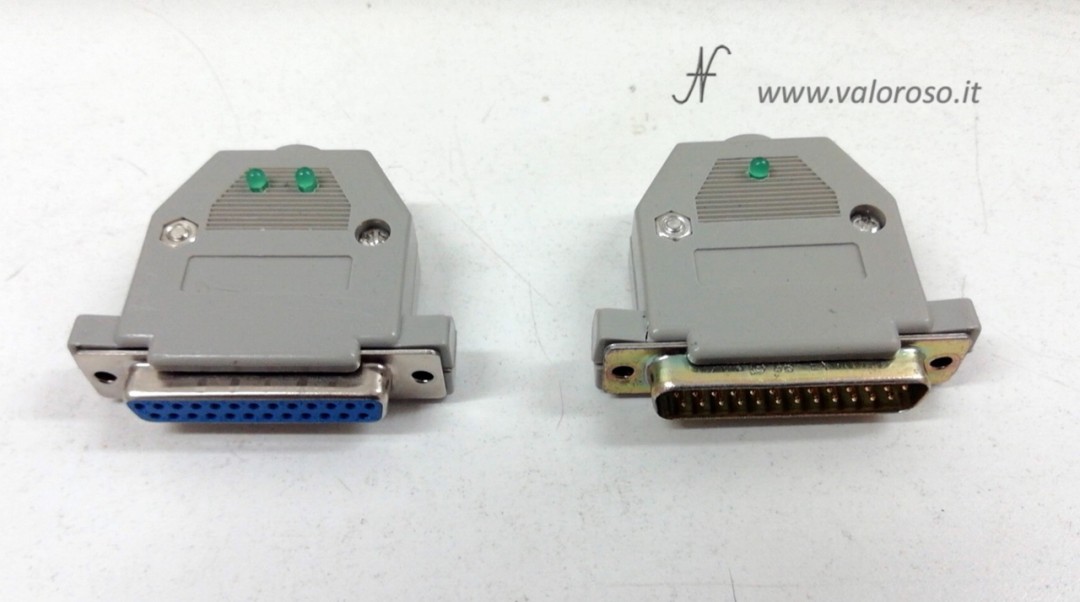
To try the serial and parallel doors (DB25 connectors), we use the appropriate dongle. The instructions to build the dongle are inside Amigatestkit.
We also test the audio output (RCA) and the RGB video output (DB23), through a special RBG Scart cable, as well as the RF exit (antenna TV input, on channel 36).
Before connecting the power supply, I recommend testing tensions and reading this article.
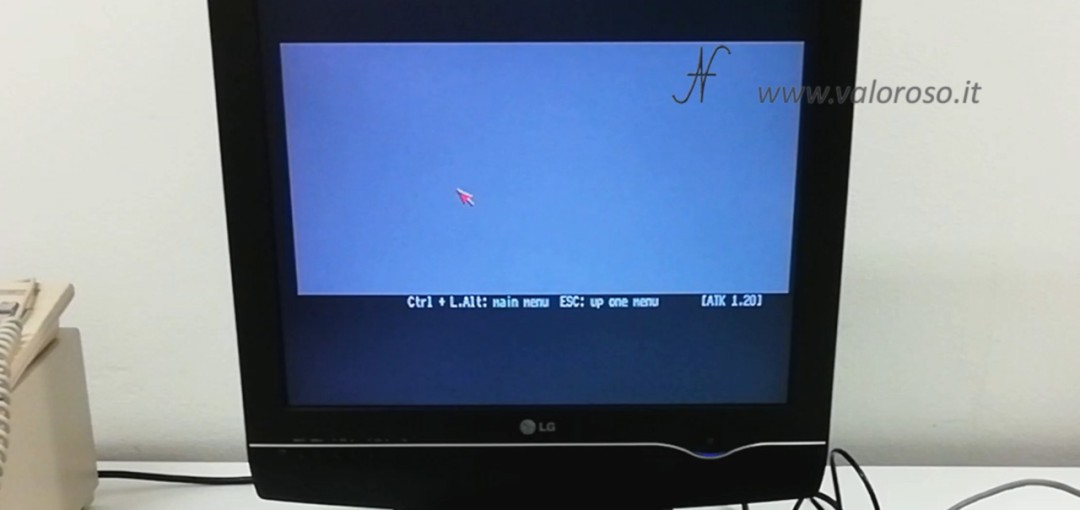
Start the amigatestkit test utility
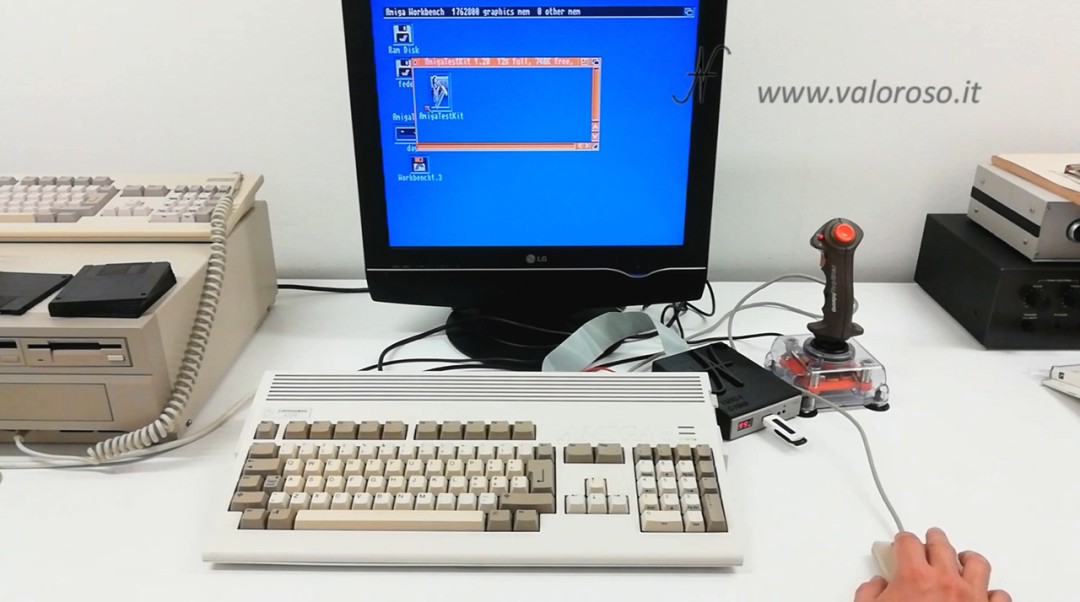
The 1.20 version of Amigatestkit is the first that can also be started by Workbench. The alternative is to start it directly from the disk, after selecting the ADF virtual disk of Amigatestkit on the Gotek.
![Starting screen of Amigatestkit V 1.20, [ATK 1.20] by Keir Fraser, Github, Try the Amiga, Amiga Test Kit](https://www.valoroso.it/wp-content/uploads/Schermata-di-avvio-di-AmigaTestKit-v-1.20-github-provare-lAmiga-1080x510.jpg)
In the video, we start AmigaTestKit from both WorkBench and USB pendrive. We also make a copy on a floppy disk via X-Copy Pro, which can be booted directly to any Amiga, using the internal floppy disk drive.
Commodore Amiga RAM memory test
AmigaTestKit allows you to test the RAM memory of your computer. From the main menu, press F1: Memory. It is also possible to click, with the mouse, on the commands to start the tests. In my Amiga 1200 there are 2mb of RAM memory: let's try to test all the memory, again pressing F1: Test All Memory.
![AmigaTestKit v 1.20, github, test try Amiga memory, kikstart memory scan, [ATK 1.20] by Keir Fraser, Amiga Test Kit](https://www.valoroso.it/wp-content/uploads/AmigaTestKit-v-1.20-github-testare-provare-la-memoria-Amiga-kikstart-memory-scan-1080x510.jpg)
The program carries out various tests on RAM memory. There are several rounds: it fills the memory and verification. This test goes on indefinitely. At a certain point, you have to interrupt it manually. I was satisfied with doing only a few seconds of testing, just to see if the memory works. However, in fact, it can be useful to test the RAM even for several hours, to see if it holds thermally.
To stop the test and return to the main menu, press the keys Ctrl + Left Alt. If the keyboard does not work, you can click the output command with the mouse.
Try the keys of the Amiga keyboard
You know I like the key sounds of vintage keyboards! For this reason, I had published this ASMR video.
To test the keyboard, from the main menu, press F2: Keyboard. You can also use the mouse to start the test functions. After pressing all the keys of the computer, we verify that, on the monitor, they are all colored green.
![Test the keyboard of the Commodore Amiga 1200, CBM A1200, with AmigaTestKit, [ATK 1.20] by Keir Fraser](https://www.valoroso.it/wp-content/uploads/Provare-la-tastiera-del-Commodore-Amiga-1200-CBM-A1200-con-AmigaTestKit-1080x602.jpg)
To stop the test and return to the main menu, press the keys Ctrl + Left Alt (or we use the mouse).
Floppy disk drives testing (external and internal)
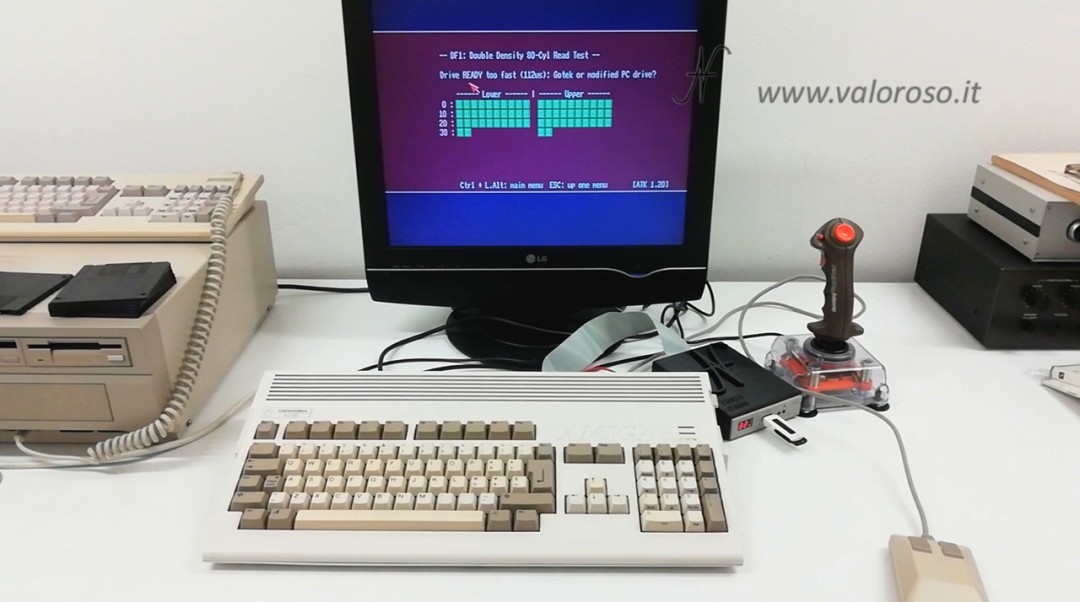
AmigaTestKit allows you to test the internal and external floppy disk drives (connected to the rear DB23 port) of the CBM A1200. To start the function, press (or click the mouse) F3: Floppy Drive.
Select the drive to be tested using F1 (DF0), F2 (DF1), F3 (DF2), F4 (DF3). Then use F6: Read Test for the reading test and F7: Write Test to try writing to diskette.
If the test reports some error, before blaming the drive, it may be sufficient to change the diskette, with another new one.
![Commodore Amiga 1200 test, internal external floppy disk drive test with AmigaTestKit, 3.5-inch floppy disk sector tracks, [ATK 1.20] by Keir Fraser](https://www.valoroso.it/wp-content/uploads/Test-Commodore-Amiga-1200-prova-floppy-disk-drive-esterno-interno-con-AmigaTestKit-tracce-settori-dischetto-3.5-pollici-1080x510.jpg)
From the response speed of the floppy disk drive, AmigaTestKit also detects if the drive is original or if it is a modified IBM or Gotek PC drive.
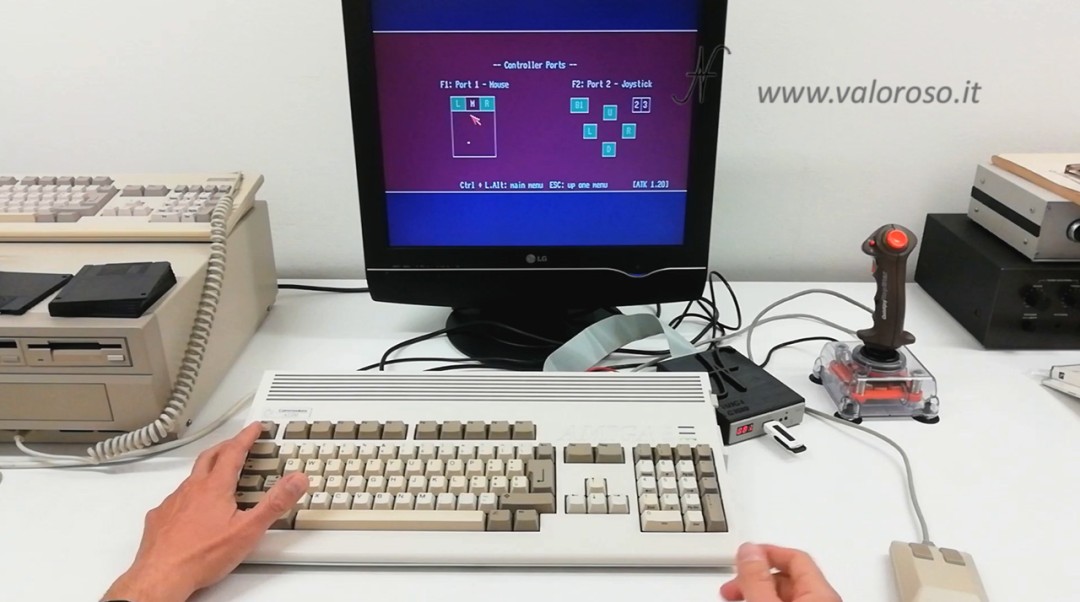
Controller testing: mice and joysticks
Press or click F4: Controller Ports To try the mouse and joystick. It is also possible to exchange mouse and joystick, reversing the connectors, and then perform the test again.
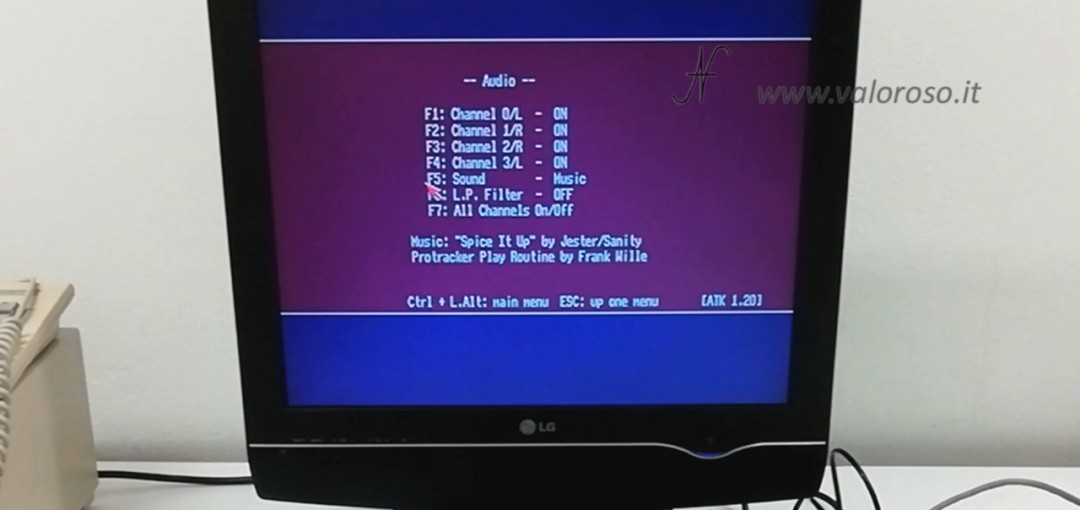
Amiga audio test with Amigatestkit
By pressing or clicking F5: Audio, you access the computer audio test. The audio is generated on the RCA connectors. The test starts immediately with music. We turn off all the outputs (by means of F7: All Channels One/Off) and then activate one channel at a time (via F1-F4). In addition to music, the test can be carried out by means of a sinusoidal wave. It is selected by means of F5: Sound. The sound must be clean, not distorted.
Video test of the Commodore Amiga
The video test is accessed via F6: Video. There are three tests that can be performed: an RGB gradient and two gray tests. Obviously, on the monitor you have to see all the color scales well.
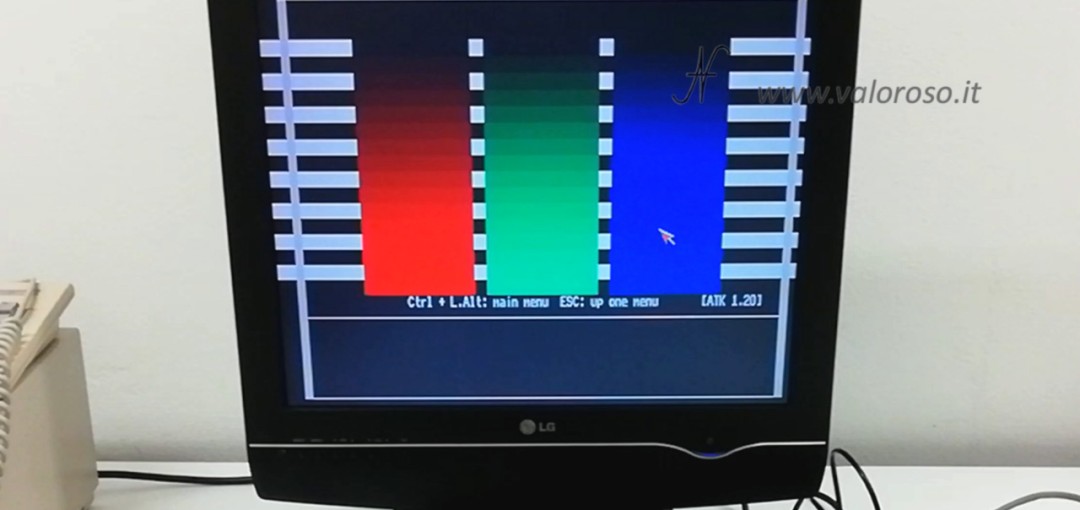
As for the tests on grays, from the following image you do not see well, but to the monitor you can see pixels, stopped or on the move depending on the test carried out.
Since we have connected the Amiga 1200 to the TV also with RF cable, let's try to see if, from the TV, it also works with the antenna entrance. So we set the TV on the antenna entrance, analog 36 channel and let's try if the image is seen. It is normal that the quality of the image is better by setting the audio/video entrance, rather than via RF.
Testing CIA timers of the Commodore Amiga
Through Q7: CIA, Chipset and then F1: CIA Precision Timers We access the function to test the precision of the CIA timers (Complex Interface Adapter). The CIA manage the peripherals of the Amiga (floppy disk drive, serial and parallel door, keyboard, joystick, mouse) and also system timers.
![Test Commodore Amiga 1200, AmigaTestKit 1-20, CIA timers test, VBL, pass, [ATK 1.20] by Keir Fraser, Detected VBlank frequency is 49.93Hz, CIAATA, CIAATB, CIABTA, CIABTB, CIAA TOD, CIAB TOD, IRQ, all tests passed](https://www.valoroso.it/wp-content/uploads/Test-Commodore-Amiga-1200-AmigaTestKit-1-20-CIA-timers-test-VBL-pass-1080x510.jpg)
The result we expect is to see all the tests OK.
Clock test with Amigatestkit
I have no watch inside Amiga 1200, so the Art test is useless. Alternatively, on the Amiga 500 Plus, rather than if the computer was equipped with a watch expansions, it can be useful to start the test with F8: RTC (batt.clock).
Warning! If you have a watch on your computer, make sure to replace the battery! After so many years, in fact, batteries tend to release acid that ruins the electronic boards of computers.
Serial port and parallel port test
To test serial and parallel ports, you need to build your own dongle: external connectors to be inserted into the ports of the computer. Instructions on how to build these connectors are already included in the AmigaTestKit.
After connecting the dongle, start the test via F9: Serial, Parallel. Then use F1: Loopback Serial Test (requires dongle) to start the serial port test.
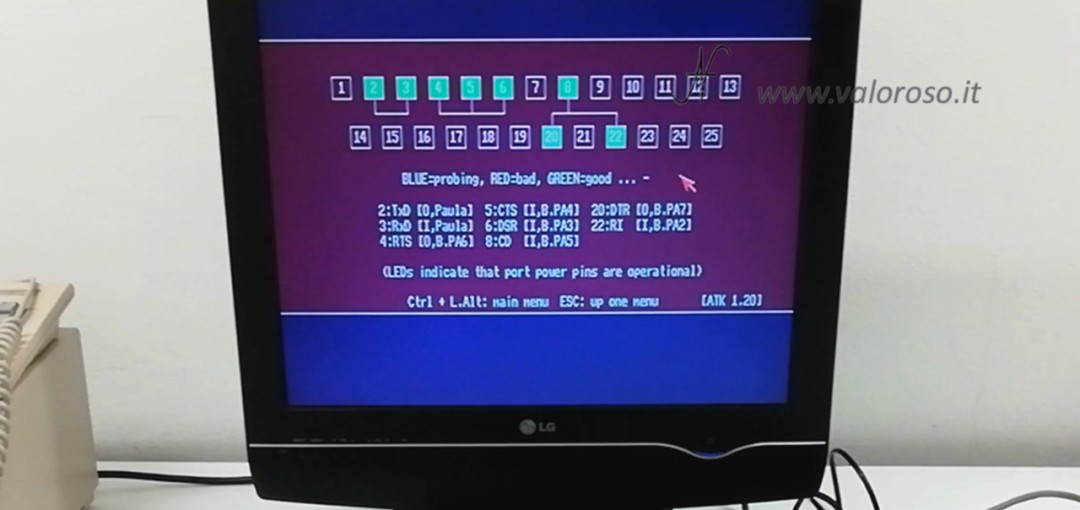
To test the parallel port, click or press F2: Loopback Parallel Test (requires dongle).
![AmigaTestKit v 1.20 parallel port test of the Commodore Amiga 1200, CBM A1200, [ATK 1.20] by Keir Fraser](https://www.valoroso.it/wp-content/uploads/AmigaTestKit-v-1.20-test-porta-parallela-del-Commodore-Amiga-1200-CBM-A1200-1080x510.jpg)
Obviously, we expect the rectangles to turn green, as indicated in the images. In addition, the LEDs on the dongle connectors must also always be lit, as soon as you turn on the computer.
Reca Dell'amiga 1200
Although the computer works very well, I will definitely have to make a recap, that is, replace all the capacitors on the motherboard. In fact, it is well known that the loss of electrolyte from old capacitors can create problems for this type of computer.
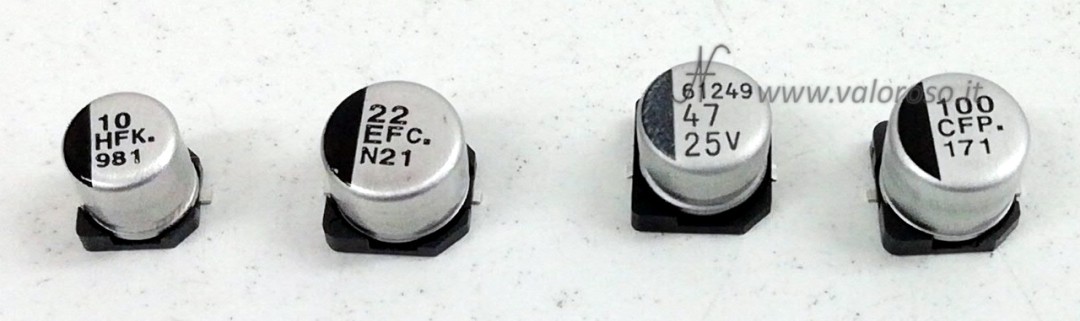
Not so much on 8 -bit computers, such as the Commodore 64 the C16: I never found condensators there that were particularly unfortunate. However, on these Amiga, especially the 600 and 1200, a loss of electrolyte from the capacitors happens very often. The capacitors degrade their characteristics, but, far more serious, the electrolyte escaped can corrode the slopes of the printed circuit.
In addition, as already explained before, if there is a clock in the computer, there will probably be a backup battery, which must be replaced to prevent acid leakage, resulting in damage to the electronic boards.