Welcome to the last article on Windows 10 storage spaces. After writing three articles on mirroring, today I describe the storage spaces simple of Windows 10.

The simple storage spaces of Windows 10 they do not have data protection features In case of breakdown to the hard disk (otherwise called resilience). However, they are useful for obtaining a virtual unit higher than those of a hard disk. In fact, it is possible to add the skills of individual hard disks in a single virtual unit.
In addition It is possible to increase the dimensions of the virtual unit as needs grow, adding other physical hard drives.
Hard disk installation
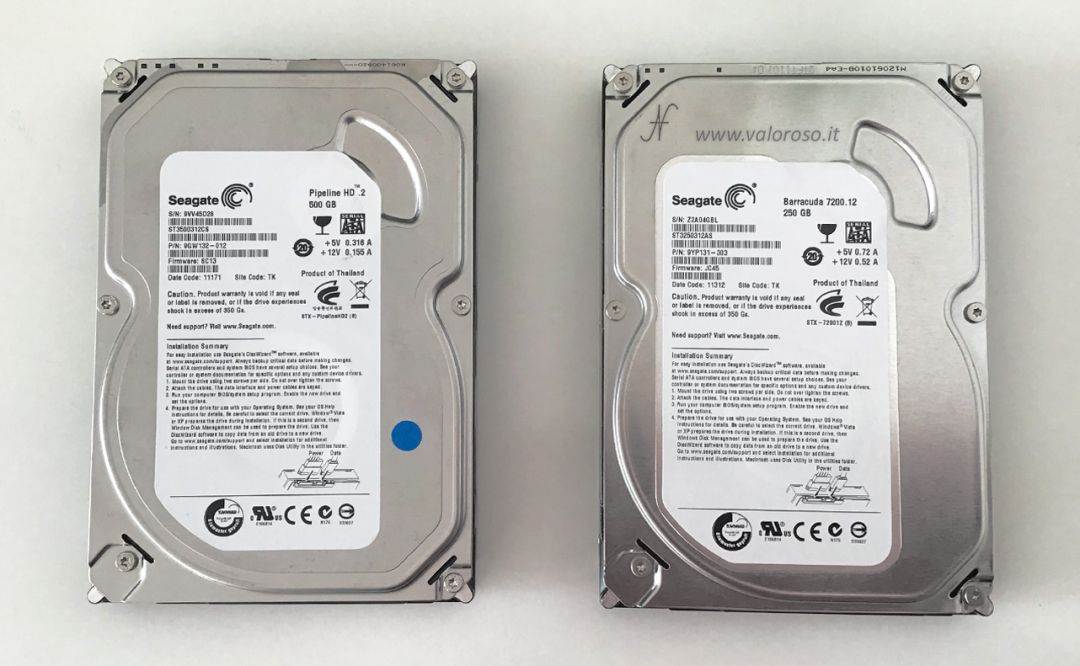
To create a virtual unit in a storage space, it is necessary to install some hard disks on the computer. Obviously, you have to check that you have available doors (in general I am SATA) on the motherboard. To make this test, I used two mechanical hard drives: one 250GB and another 500GB, SATA.
Hard drives can be formatted or not. In any case, creating a storage space will erase all data on the disks you will use.

Create a simple storage space
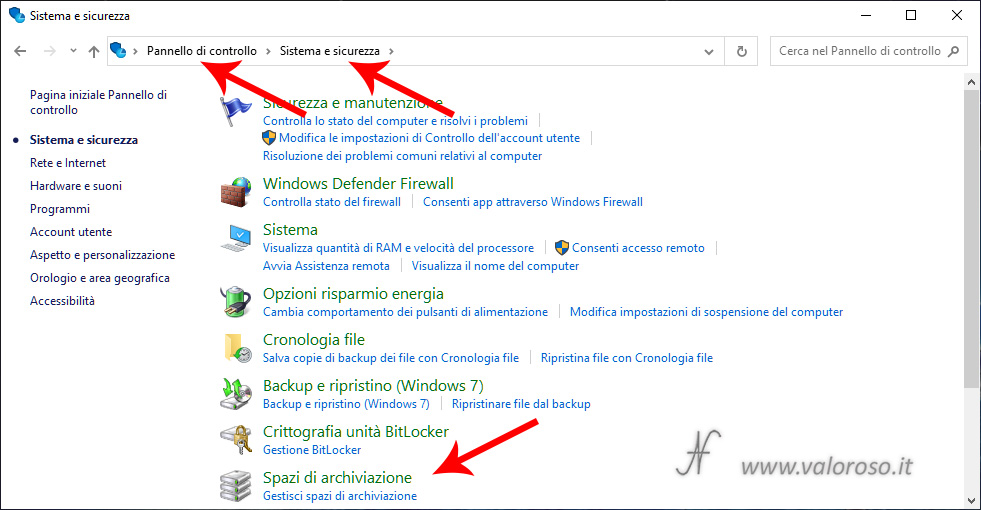
The functionality to create simple storage spaces of Windows 10, is located in Control Panel, System and security, Storage spaces. Administrator privileges are required. Those who have already read the first article, on how to create mirrored storage spaces, can skip the first four slides.
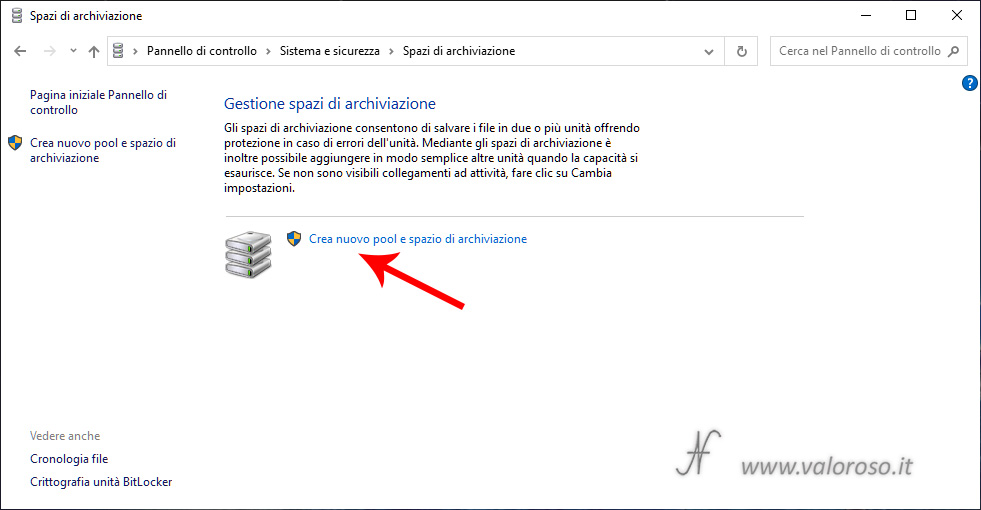
From the window Storage space management, click with the mouse on Create new pool and storage space.
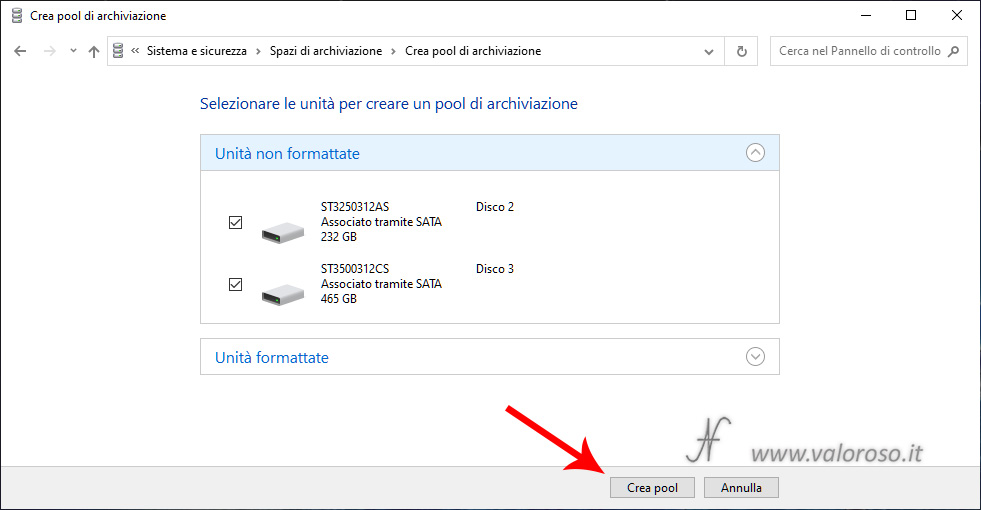
At this point, after confirming that you have administrator privileges, you can select the physical drives (hard disk or SSD) that will form the storage pool. Physical drives can already be formatted or not. In any case, all data present in the selected disks will be erased.
If the drives are not formatted, select the hard disks that need to form the storage pool and press Create pool.

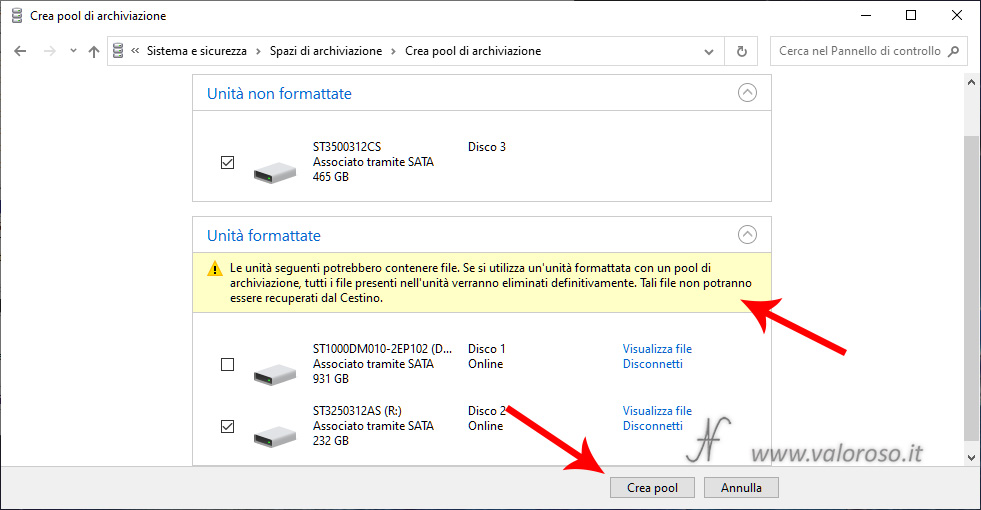
If a hard disk is already formatted, pay attention to choose the correct one, before pressing Create pool.
From now on, the settings are different from those already seen for mirroring.
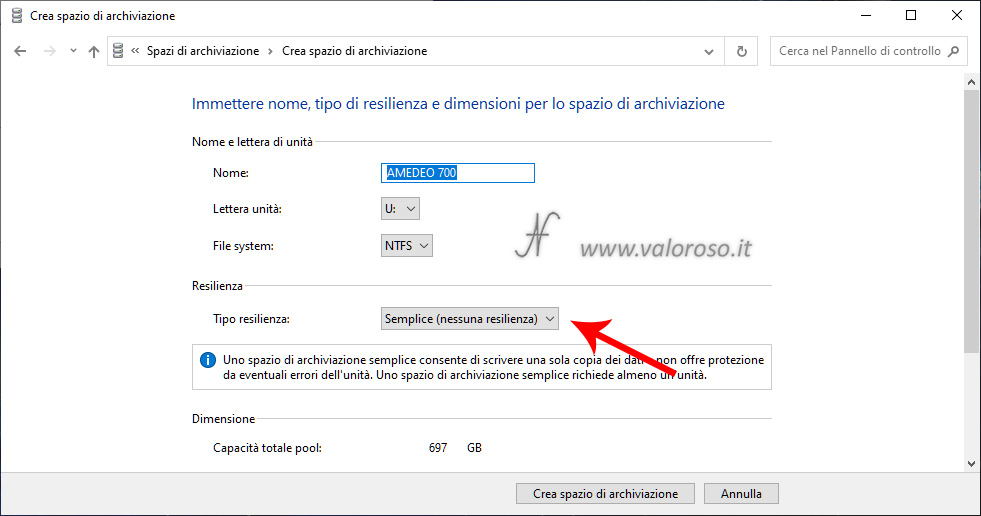
It is therefore possible to enter the name and letter of the virtual unit to be created, as well as specify that you want to create a type of resilience Simple (no resilience). It is also possible to create more than one virtual unit in the storage pool, obviously dividing the space available between virtual units.
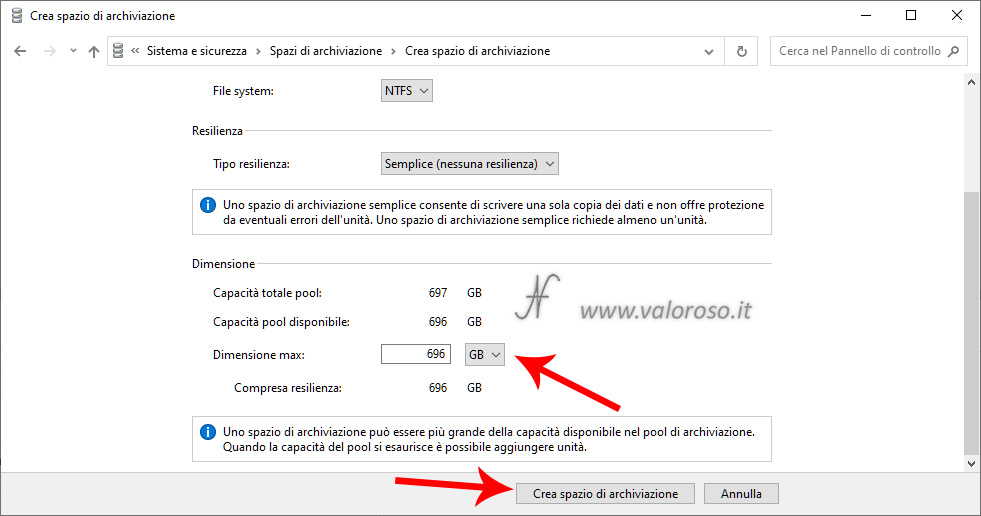
By scrolling down to the same screen, you can set the maximum size of your storage space. The available size is given by the sum of the capacities of the hard disks that make up the storage pool. As a matter of fact Windows 10 also allows you to set higher capabilities for virtual unit. Anyway, The virtual unit cannot be filled more than the sum of the capabilities of physical records. Overcoming this capacity, that is, by setting a greater capacity than the available pool and, subsequently, filling the virtual unit beyond the size of the discs, it will be necessary to add other hard disks to the pool.
After setting the maximum storage size, you can click Create storage space.
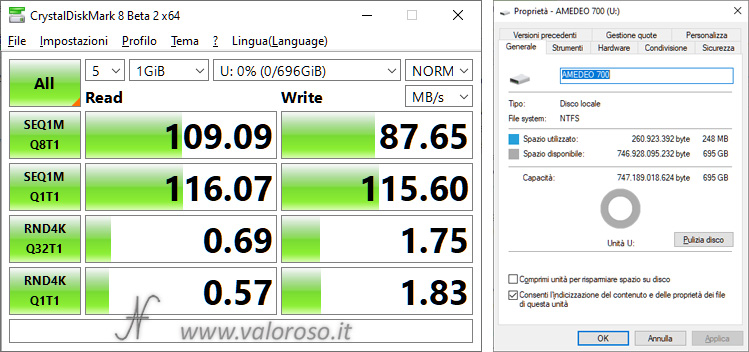
Here is the virtual unit, to which I have assigned the letter U. This unit will behave as a normal hard disk.
Be careful, though. As I have already specified, no data resilience is expected. In case of failure of a hard disk of the pool, the files contained in it will be inaccessible!
Moreover, the files are distributed from the various hard disks automatically by Windows 10, therefore, it is possible that, in the event of a failure of a hard disk, some files scattered throughout various folders are lost.
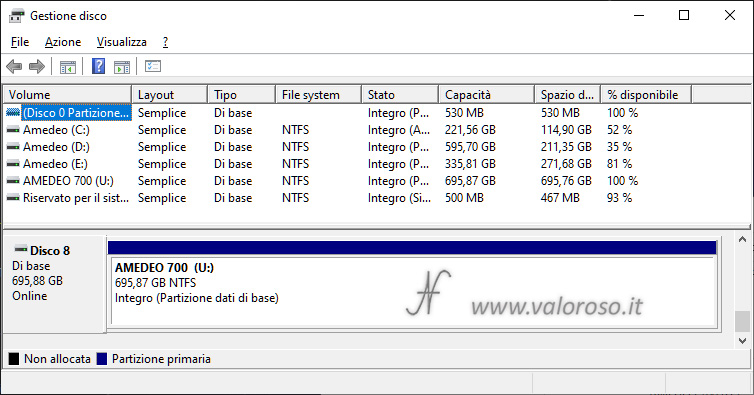
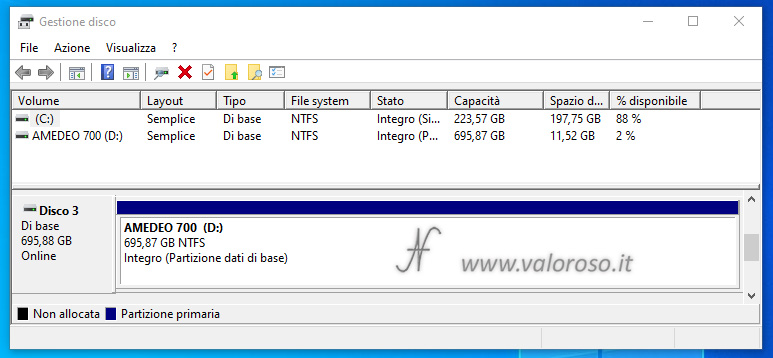
The virtual unit just created is also visible in Disk management, as if it were a normal basic album. The two physical records that make up the virtual unit are no longer visible in the list.
Performance of Windows 10 Simple Storage Spaces
As I had already done for mirrored storage spaces, I measured the performance of the hard drives before and after the creation of the storage space.
I can say that I have not experienced any noteworthy performance losses.
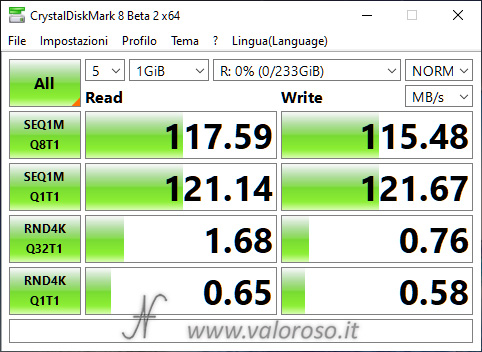
Here are the performance of the two disks (R and S), measured with CrystalDiskMark, before the storage pool is created. The disks are not exactly recent: the performance is quite disappointing already basic, especially when compared to those of solid state drives SSD.
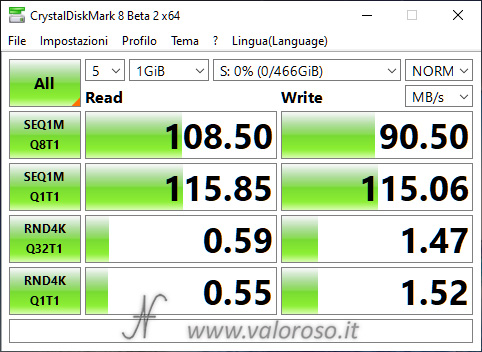
After deleting and mettling the two disks (R and S) in a pool and creating a simple storage space (virtual drive with letter U), here are the results.
I also measured the use of the CPU during the writing of files on physical records and on the virtual unit of the storage space, and I have not found substantial differences.
Moving the storage pool to another computer
Another test I made consists in moving the storage pool to another computer (always with Windows 10 operating system). I connected the two hard disks by means of two docking stations to the USB ports of the second computer.

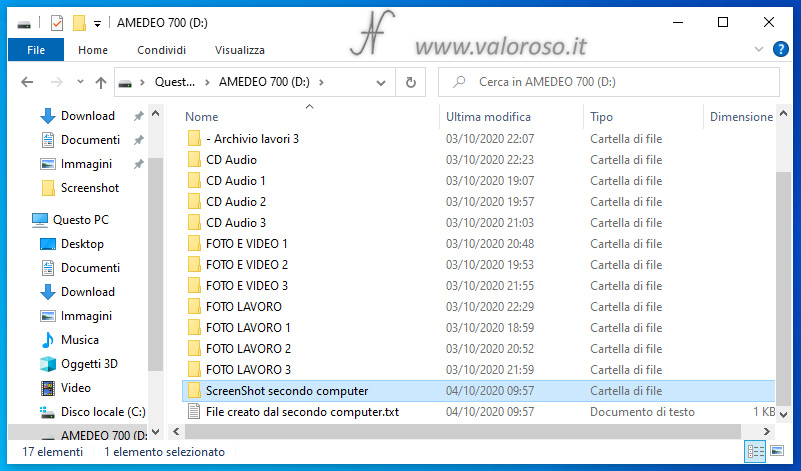
Also from the second computer it was possible to access the files in the virtual unit of the storage pool.
Be careful, though! It is necessary to move all the hard disks on the second computer that make up the storage pool! In fact, the files may find themselves scattered in both hard disks. In addition, by moving only one hard drive of the pool, in some circumstances I found the impossibility of reinstalling the hard drive in the pool, with the consequent loss of a huge amount of data!
Also on the second computer, the storage space maintains the same properties that I had set to the computer of origin, with the exception of the letter of the virtual unit, which can be changed in Disk management.
I tried to put files, from the second computer, in the simple storage space of Windows 10.
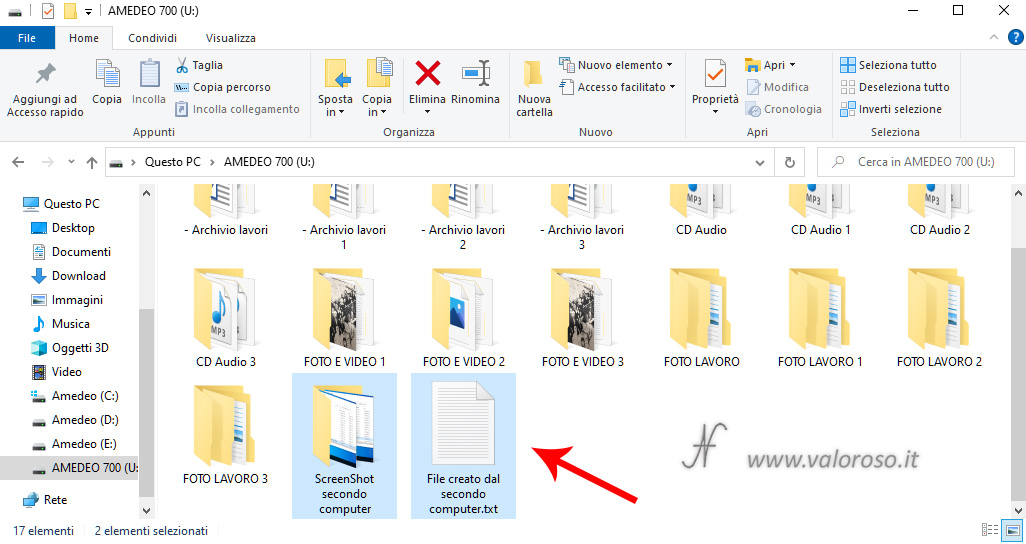
After moving the hard disk pool back to the first computer, the one with which I created the storage space, all the files I had inserted with the second computer were perfectly readable.
Simulation of a hard disk failure of a Storage Pool
I repeated, even for the simple storage space, the same fault simulation that I had carried out with a mirrored hard disk. In this case, however, the results were very different!
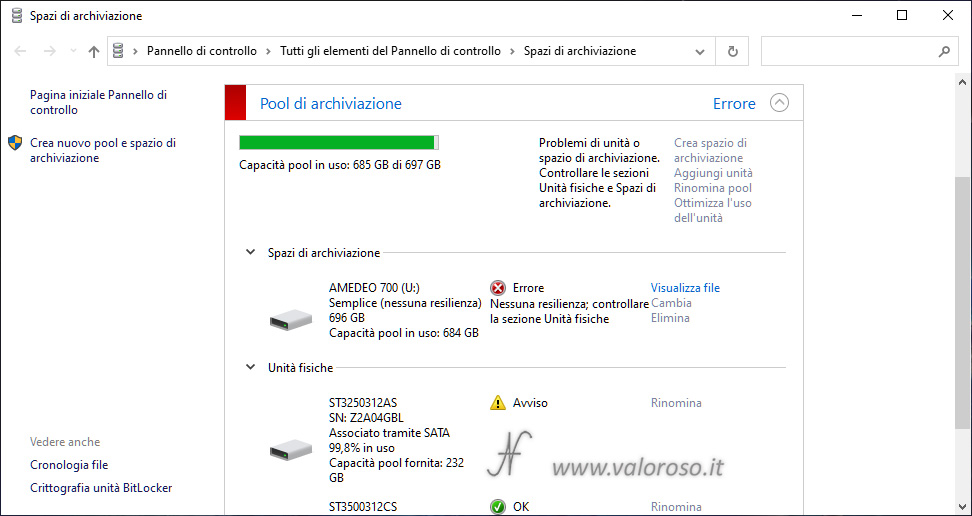
I then removed, without giving any notice to Windows, one of the two hard drives that make up the storage pool. The operating system noticed the error and immediately displayed notifications.
If, with storage spaces in mirroring, I managed to recover all the data, with storage space simple only some files were saved (evidently those present on the hard disk still inserted in the computer).

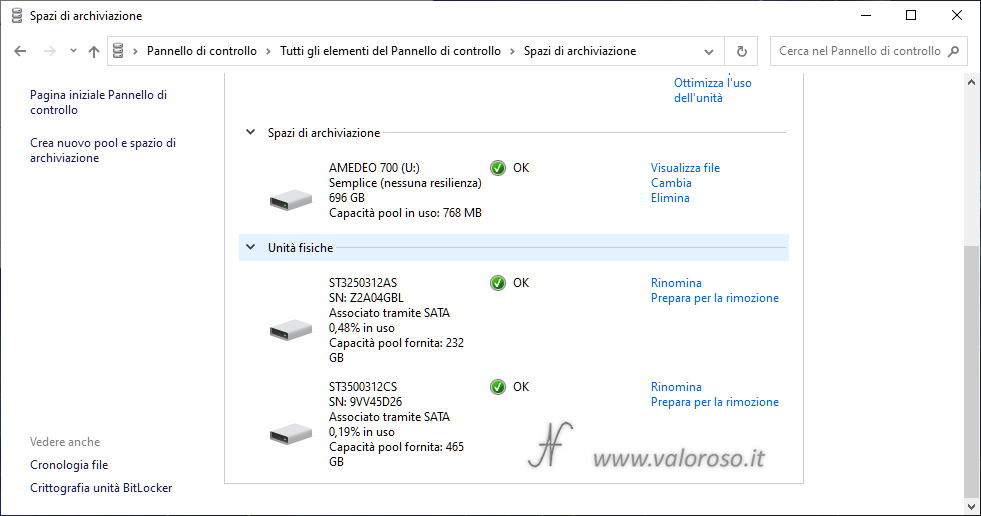
The error is also shown in the section Pannello di controllo, for Storage Spaces.
Elimination of storage space
To delete the storage space, with simultaneous deletion of all data, you can follow the steps described in this article.
After the storage space and hard disk pool are deleted, the physical disks can be used individually.
Conclusion
If I particularly liked the mirrored storage spaces (I consider them an economical alternative to a RAID controller), simple storage spaces of Windows 10 I did not find them particularly interesting.
Of course, it is possible to create a virtual unit of practically infinite size, adding hard disks from time to time, but managing the storage pool is rather laborious, especially in the event of failure of one of the hard disks.
In the case of mirroring, simply replace the damaged hard disk and tell Windows that you want to rebuild the pool: the data is recovered from the still healthy hard disk.
On the contrary, with simple storage, in case of failure, you still have to rebuild the hard disk pool. Subsequently, you need to restore all the data from a backup, as there is no evidence of which files were present on the failed hard disk.
Very good written article. It will be supportive to anybody who employess it, including me. Keep up the good work - looking forward to more posts.
Thank you!